Avipas AV-1562 User Manual
20x/ 30x full hd ptz camera with poe
Hide thumbs
Also See for AV-1562:
- User manual (49 pages) ,
- How to connect (5 pages) ,
- Quick start manual (5 pages)

Related Manuals for Avipas AV-1562


Summary of Contents for Avipas AV-1562
- Page 1 Model: AV-1563 30x Full HD PTZ Camera with PoE Model: AV-1562 20x Full HD PTZ Camera with PoE User Manual V1.0 Please read this user manual thoroughly before using. www.avipas.com...
- Page 2 Preface Thanks for using this HD Video Conferencing Camera. This manual introduces the functions, installation process and operation of the HD camera. Prior to installation and usage, please read the manual thoroughly. Precautions This product should only be used under the specified conditions in order to avoid any damage to the camera: Do not subject the camera to rain or moisture.
-
Page 3: Table Of Contents
Content 1. Camera Installation…………………………………………………………………...……………………….…………4 1.1 Camera Introduction………………………………………………….…..…….………...….5 1.2 Interfaces and Connection……………………………………………..………..…………...5 1.3 Mounting Brackets…………………………………………….…………………….……..5 2. Product Overview.…………………………………………………………...……………………..8 Dimensions..…………………...………………………...…………………...……...…………..8 2.2 RS-232 Interface……………………………………...…………………………...………...……………9 2.3 Rotary DIP Switch…………………………………………………………………..……………...……..10 2.4 Main Features…………………………………………………………………….…………………...11 2.5 Specifications…………………………………………………….…………..………….….11 3. Remote Control……………………………………………………………………………………13 3.1 Fuctions for IR Remote Control……………………………………………….….………...13 3.2 Camera Menu ……..………………………………………...……………………………...14 4. - Page 4 Attentions Electric Safety Installation and operation must accord with electric safety standard. Use caution to transport Avoid stress, vibration or soakage in transport, storage and installation. Polarity of power supply The power supply of this product is +12V, the max electrical current is 2A. Polarity of the power supply plug is shown in the drawing below.
-
Page 5: Camera Installation
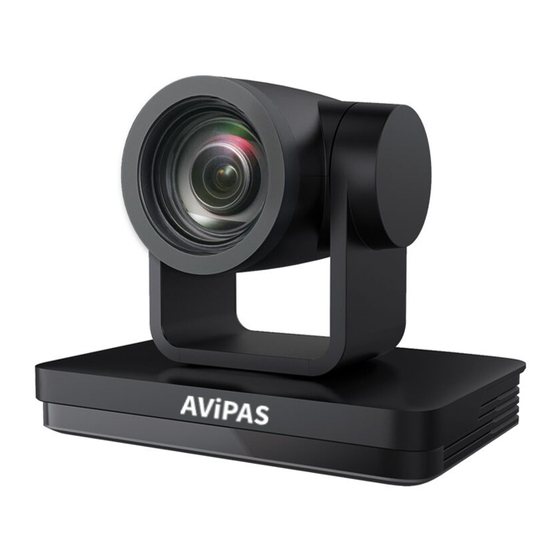
1. Camera Installation 1.1 Camera Interface Illustration Figure 1.1 Interface of SU Model 10. Audio Input Interface (Line-in) 1. Camera Lens 11. Rotary DIP Switch 2. Camera Base 12. RS232 Control Interface (input) 3. Remote Control Receiving Indicator 13. RS232 Control Interface (output) 4. -
Page 6: Interfaces And Connection
1.2 Interface and Connection Figure 1.2 Wiring Diagram 1) After powering on and initialization, camera will automatically go to preset position 0 (Center position as default). 2) The default cam address for the IR remote control is #1. 1.3 Mounting Brackets Note: Ceiling or wall mounting brackets can only be mounted on a template and concrete wall. - Page 8 2) Ceiling Mounting...
-
Page 9: Product Overview
2. Product Overview 2.1 Dimensions Figure 2.2 Product Dimensions... -
Page 10: Rs-232 Interface
2.2 RS-232 Interface 1). RS-232 Interface Definition Connection to PC or Camera Controller Camera WindowsDB-9 1.DTR 1.DCD 2.DSR 2.RXD 3.TXD 3.TXD 4.GND 4.DTR 5.RXD 5.GND 6.GND 6.DSR 7.IR OUT 7.RTS 8.NC 8.CTS 9.RI 2). RS232 Mini-DIN 8-pin: Port Definition Port Definition Data Terminal Ready Data Set Ready... -
Page 11: Rotary Dip Switch
1080I60 1080P29.97 1080I50 720P59.94 1080P30 720P29.97 AV-1563: 720P29.97 1080P25 AV-1562: 1080P59.94 AV-1563: 720P29.97 720P60 AV-1562: 1080P59.94 720P50 video format to be set from OSD menu Note: Please reboot the camera after switching the video format for changes to take effect. -
Page 12: Main Features
2.4 Main Features AV-1563/1562 camera features advanced ISP processing algorithms to provide vivid images with a strong sense of depth, high resolution and fantastic color rendition. It supports H.265/H.264 encoding which makes motion video fluent and clear even under less-than-ideal bandwidth conditions. Full HD resolution: 1/2.8-inch high-quality CMOS sensor. - Page 13 2D & 3D DNR White Balance Auto / Manual/ One Push/ Specify color temperature (range: 2400k-7100k) Focus/Aperture/ Auto/Manual/One Push Focus Electronic Shutter Iris Auto/Manual Shutter Auto/Manual ON/OFF OFF/ Dynamic level adjustment Video Adjustment Brightness, Color, Saturation, Contrast, Sharpness, B/W mode, Gamma curve >50dB Input/output Interface Video Output...
-
Page 14: Remote Control
3. Remote Control 3.1 Functions for IR Remote Control 1). In this manual, “press the key” means a short press rather than a long-press and hold. A note will be given if a long-press for more than one second is required. 2). -
Page 15: Camera Menu
【MENU】: to open/ close the OSD menu; to enter/ exit the OSD menu, or to return to the previous submenu. 11. Key Combination Functions 1) 【#】+【#】+【#】: Clear all presets 2) 【*】+【#】+【6】: Restore factory defaults 3) 【*】+【#】+【9】: Flip switch 4) 【*】+【#】+【AUTO】: Enter the auto mode 5) 【*】+【#】+【3】: Set language to Chinese 6) 【*】+【#】+【4】: Set language to... - Page 16 - 2 -...
-
Page 17: Network Configuration
4. Network Configuration 4.1 Network Connection Direct connection: Connect the camera and computer via an Ethernet cable directly. Internet connection mode: Connect the camera to Internet (via a Router or a Switch). The computer must be assigned to the network segment where the camera IP address belongs to. The device will not be accessible otherwise. -
Page 18: Ie Login
4.2 IE Login 1) Web Page Login Input the default IP address 192.168.5.163 in the browser and click Enter. User can login as administrator or as normal user. If login as administrator (Default User name/Password: admin), users can preview, playback, and set configuration; If login in as normal user (Default User name/Password:user1 or user2), users can only preview, playback, camera configurations cannot be changed. - Page 19 Configure the parameters according to the network settings. Note: stream name live/av0 (live/ XXX) For example: The default IP address of the camera is 192.168.5.163. To obtain video via RTSP stream, please use the URL below: rtsp://192.168.5.163/live/av0(av0 main stream) rtsp://192.168.5.163/live/av1(av1 sub stream) 2).
-
Page 20: Software Upgrade
To push RTMP stream to a server/ platform (public network), make sure the camera’s IP configurations are set to be consistent with the public network, otherwise it will not connect to server successfully. For connection details, please refer to: avipas.com-> SUPPORT -> HOW TO MATERIALS -> How to live stream. -
Page 21: Serial Port Communication And Control
3). Click "Browse…" to select the “.mrg” update file, then click upgrade button to start the upgrading process. 4). A "successful upgrade" message will prompt, and camera will reboot after completion of update. Re-log in to check the firmware version to make sure software upgrade is successful. Click “Reboot”... -
Page 22: Visca Protocol Control Command
auto focus. 5.2 VISCA Protocol Control Command Command Function Command packet Note AddressSet Broadcast 88 30 0p FF p:Address setting IF_Clear Broadcast 88 01 00 01 FF I/F Clear CommandCancel 8x 21 FF 8x 01 04 00 02 FF CAM_Power Power ON/OFF 8x 01 04 00 03 FF Stop... - Page 23 Command Function Command packet Note 8x 01 04 04 02 FF Down 8x 01 04 04 03 FF Direct 8x 01 04 44 00 00 0p 0q FF pq: B Gain Full Auto 8x 01 04 39 00 FF Automatic Exposure mode Manual 8x 01 04 39 03 FF Manual Control mode...
- Page 24 Command Function Command packet Note B&W-Mode 8x 01 04 63 04 FF CAM_Picture effect Picture effect Setting 8x 01 04 63 00 FF Reset 8x 01 04 3F 00 pq FF pq: Memory Number(=0 to 254) CAM_Memory 8x 01 04 3F 01 pq FF Corresponds to 0 to 9 on the Remote Commander Recall...
-
Page 25: Visca Protocol Inquiry Command
5.3 VISCA Protocol Inquiry Command Command Command Packet Return Packet Note y0 50 02 FF CAM_PowerInq 8x 09 04 00 FF y0 50 03 FF Off(Standby) y0 50 0p 0q 0r 0s CAM_ZoomPosInq 8x 09 04 47 FF pqrs: Zoom Position y0 50 02 FF Auto Focus CAM_FocusAFModeIn... - Page 26 y0 50 00 00 00 0p CAM_WDRStrengthInq 8x 09 04 51 FF p: WDR Strength CAM_NRLevel(2D) Inq 8x 09 04 53 FF y0 50 0p FF P: 2DNRLevel CAM_NRLevel(3D) Inq 8x 09 04 54 FF y0 50 0p FF P:3D NRLevel p: Flicker Settings(0: OFF, 1: CAM_FlickerModeInq 8x 09 04 55 FF...
-
Page 27: Pelco-D Protocol Command List
y0 50 01 FF ab cd : vender ID ( 0220 ) y0 50 ab cd mn pq : model ID CAM_VersionInq 8x 09 00 02 FF mn pq rs tu vw FF rs tu : ARM Version vw : reserve P: 0~E Video format 0:1080P60... -
Page 28: Pelco-P Protocol Command List
Query Zoom Position Response 0xFF Address 0x00 0x5D Value High Byte Value Low Byte 5.5 Pelco-P Protocol Command List Byte Function Byte1 Byte2 Byte3 Byte4 Byte5 Byte6 Byte7 0xA0 Address 0x00 0x08 Pan Speed Tilt Speed 0xAF Down 0xA0 Address 0x00 0x10 Pan Speed... -
Page 29: Maintenance
First-time use, please connect the camera directly to your PC. b. Check if the computer is set to the network segment that is consistent with the IP address of the camera. For details, please refer to: avipas.com-> SUPPORT -> HOW TO MATERIALS -> Access camera via IP. - Page 30 This Limited Warranty covers any defect in material and workmanship under normal use within the Warranty Period. AVIPAS Inc. will repair or replace the qualified products at no charge. AVIPAS Inc. provides a one (1)-year warranty (from the date of purchase) for this HD Conference Camera.
Need help?
Do you have a question about the AV-1562 and is the answer not in the manual?
Questions and answers