Avipas AV-1562 User Manual
Full hd ptz camera w/ poe
Hide thumbs
Also See for AV-1562:
- How to connect (5 pages) ,
- User manual (31 pages) ,
- Quick start manual (5 pages)

Subscribe to Our Youtube Channel
Related Manuals for Avipas AV-1562


Summary of Contents for Avipas AV-1562
- Page 1 Model: AV-1562 20x Full HD PTZ Camera w/ PoE Model: AV-1563 30x Full HD PTZ Camera w/ PoE User Manual V1.0 Please read this user manual thoroughly before using. www.avipas.com...
- Page 2 Preface Thanks for using this HD Video Conferencing Camera. This manual introduces the functions, installation process and operation of the HD camera. Prior to installation and usage, please read the manual thoroughly. Precautions This product should only be used under the specified conditions in order to avoid any damage to the camera: ◼...
-
Page 3: Table Of Contents
Contents Attentions ..........................4 Supplied Accessories ......................4 Quick Start ..........................5 Features ..........................8 Product Specifications ......................8 Main Units ..........................11 Dimensions ........................... 11 IR Remote Control Menu ..................... 12 RS-232 Interface ........................13 Serial Communication Control ..................... 16 Menu Settings ........................ -
Page 4: Attentions
Attentions ⚫ Electric Safety Installation and operation must accord with electric safety standard. ⚫ Use caution to transport Avoid stress, vibration or soakage in transport, storage and installation. ⚫ Polarity of power supply The power supply of this product is +12V, the max electrical current is 2A. Polarity of the power supply plug is shown in the drawing below. -
Page 5: Quick Start
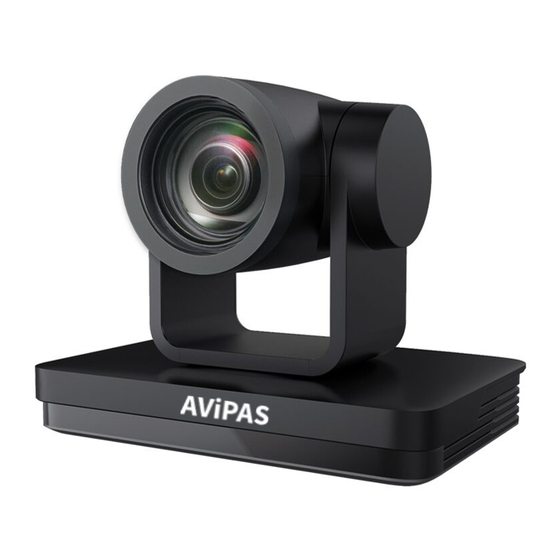
Quick Start 1. Camera Interface Illustration Fig 1.1 Interface of AV-1562 / 1563 1. Camera Lens 2. Camera Base 10. Audio Input Interface (Line-in) 3. Remote Control Receiving Indicator 11. Rotary DIP Switch 4. Infrared Receiver 12. RS232 Control Interface (input) 5. - Page 6 Ceiling mount...
-
Page 8: Features
Features AV-1562 and AV-1563 are multi-interface PTZ models with RS232 out and PoE. They feature advanced ISP processing algorithms to provide vivid images with a strong sense of depth, high resolution and fantastic color rendition. They support H.265/H.264 encoding which makes motion video fluent and clear even under less than ideal bandwidth conditions. -
Page 9: Product Specifications
Product Specifications Camera Parameter Model AV-1562 AV-1563 Optical Zoom f5.2-98mm f4.3-129mm Sensor 1/2.8-inch high quality HD CMOS sensor Effective Pixels 16: 9, 2.07 megapixel Video Format HDMI/SDI/USB3.0: 1920*1080P60/50/30/25, 1920*1080I60/50, 1280*720P60/50 Main Stream (YUY2/MJPEG/NV12/H.264/H.265): 1080P30, 720P30, 1024*576P30, 960*540P30, 800*448P30, 720*480P30, 640*360P30, 640*480P30, 320*176P30 Sub Stream (YUY2/NV12): 640*360P30, 640*480P30, 320*176P30;... - Page 10 Preset Number 255 presets (10 presets via remote control) Input/output Interface HDMI, SDI, LAN(POE), USB3.0(type B compatible with USB2.0) Video Interfaces Video Output HDMI, SDI, LAN, USB3.0 Video Stream Dual stream output Video Compression LAN Interface: H.265, H.264, Dual stream output Format USB3.0 Interface: YUY2, MJPEG, H.264, NV12, H.265 Audio Input Interface...
-
Page 11: Main Units
Main Units External interface of AV-1562 & AV-1563: RS232 (I/O), LAN, SDI, HDMI, USB3.0, Audio Input, DC12V Power Interface. Dimensions... -
Page 12: Ir Remote Control Menu
IR Remote Control Menu 1. Standby Button Press this button and hold it for 3 secs to enter standby mode. The camera will do self-testing and return back to 【HOME】position. (Note: If Preset 0 is set, and with no operation for 12s, the camera will automatically turn to Preset position 0. -
Page 13: Rs-232 Interface
10. Menu Settings 【MENU】: to open/ close the OSD menu; to enter/ exit the OSD menu, or to return to the previous submenu. 11. Key Combination Functions 1) 【#】+【#】+【#】: Clear all presets 2) 【*】+【#】+【6】: Restore factory defaults 3) 【*】+【#】+【9】: Flip switch 4) 【*】+【#】+【AUTO】: Enter the auto mode 5) 【*】+【#】+【3】: Set language to Chinese... - Page 14 RS-232 Mini-DIN 8-pin Port Definition Port Definition Data Terminal Ready Data Set Ready Transmit Data System Ground Receive Data System Ground IR OUT IR Commander Signal No Connection RS232 (DB9) Port Definition Port Definition Data Carrier Detect Receive Data Transmit Data Data Terminal Ready System Ground Data Set Ready...
- Page 15 VISCA networking Rotary DIP Switch Dial-up Video format Dial-up Video format 1080P60 720P30 1080P50 720P25 1080I60 1080P59.94 1080I50 1080I59.94 720P60 720P59.94 720P50 1080P29.97 1080P30 720P29.97 video format 1080P25 to be set on the menu...
-
Page 16: Serial Communication Control
Serial Communication Control Under normal working condition, the camera could be controlled through RS232 interface. RS232C serial parameters are as below: • Baud rate: 2400/4800/9600/115200bps; • Start bit: 1; data bits: 8; Stop bit: 1; Parity: None. Pan-Tilt function rotates the camera to its maximum position of top left upon startup, then it returns to the center, and the process of initialization is finished. -
Page 17: Menu Settings
Menu Settings... - Page 18 1. Maun Menu Compensation Level: -7~7 (only available in Press [MENU] to display the main menu on auto mode & when EV is ON) the screen. Use the arrow buttons to move the BLC: On/ Off (only available in auto mode) cursor.
- Page 19 Blue Gain: 0~255 (only available in Manual Move the cursor to [NOISE REDUCTION] and mode) press [HOME], [NOISE REDUCTION] menu is Saturation: 60%, 70%, 80%, 90%, 100%, 110%, shown below. 120%, 130%, 140%, 150%, 160%, 170%, 180%, 190%, 200% 2D Noise Reduction: Auto/ close/ 1~7 Hue: 0~14 3D Noise Reduction: Close/ 1~8 AWB Sensitivity: high/ middle/ low...
- Page 20 Note: After modifying video format, reboot to save the changes. 6. VERSION Move the cursor to [VERSION] in the main menu and press [HOME], [VERSION] menu is shown below. MCU Version: Display MCU version Camera Version: Display camera version AF Version: Display the focus version Lens: Display the lens zoom 7.
-
Page 21: Network Connection
Please make sure that your computer is in the same network segment as the camera IP address. The device will not be accessible if the segment is not consistent. For example, AV-1562/1563’s default IP address is 192.168.5.163, then segment 5 must be added to your computer. Specific steps are as below: •... - Page 22 Note: The IP address to be added cannot be same as that of other computers or devices. The existence of this IP address needs to be verified before adding. Confirm Access Click “Start” and select “Operation”. Input “cmd” as shown in the picture below to verify whether the network segment has been successfully added.
- Page 23 User can also verify network connection as steps above mentioned after the finish of camera self-check. If IP is default, open DOS command window and input 192.168.5.163, then press Enter key. It will show message as below: which means network connection is normal.
- Page 24 Download/Install Plug in When using IE browser to access the AV-1562/1563 for the first time, a message will show at the login page: “Playback plug-in is not installed, please download and install!”. Click on this message, download and install MRWebXinstall.exe according to instruction prompts.
- Page 25 Playback • Playback video files Before Playback, please make sure that you have recorded, snapshot and saved the file. Click “Playback” tag to enter the page, then select “Video File” and click “Search”. Choose the video file you want to play. •...
- Page 26 Recording packing time (minute): To set recording video packing time (default is 10, range from 1~120 minutes). Recording/Snapshot file type: To set the recording file type (default MP4, other option: TS). Recording/Snapshot file storage route: To set local recording video/snapshot file storage route (default D:\MyIPCam\).
- Page 27 Bit Rate (Kb/S): To set the video bit rate (Main stream default 4096, ranges from: 64~12288; sub stream default 512, ranges from 64-10240). Frame Rate (F/S): To set the video frame rate (Default: 25, other options: main stream ranges from 5~60; sub stream ranges from 5~30). I Frame Interval: To set the key frame interval (Default: 75, other options: main stream ranges from 1~300;...
- Page 28 Multicast Port: To set the multicast port (Main stream port default: 4000; sub stream port default 4002). Note: Access Method: rtp://224.1.2.3:4000; udp://@224.1.2.3:4000; 4) Video Parameters a. Focus: Focus Mode: To set the focus mode (Default: Auto, other options: Manual, OnePush). AF-Zone: To set the focus range (Default: Center, other options: Top, Bottom, All).
- Page 29 d. Image: Brightness: To set the brightness (Default 7, ranges from 0~14). Contrast: To set the contrast (Default 7, ranges from 0~14). Sharpness: To set the sharpness (Default 7, ranges from 0~15). Gamma: To set the Gamma value (Default, 0.45, 0.50, 0.55, 0.63). DCI: To set the DCI value (Default: OFF, other options: 1~8).
- Page 30 Master Stream OSD Font Size: To set the character size of main stream (Default: 48, ranges from 28-200). Slave Stream OSD Font Size: To set the character size of the sub stream (Default: 48, ranges from 28-200). 7) Video Out Output Out Format: To set the video output format.
- Page 31 3) DNS parameters Preferred DNS server: To set the preferred DNS server (Default 0.0.0.0). Alternate DNS server: To set the alternate DNS server. (Default 0.0.0.0). 4) GB28181 Enable: Check to enable GB28181. ClockSync: Check to set time synchronization. Video Type: To choose the stream (Default: main stream). Registration Valid Time(s): To set the sign-in effective time (in seconds): Default: 3600, ranges from 5-65535.
- Page 32 Date Format: To set the date format (Default YYYY-MM-DD, other options: MM-DD-YYYY, DD-MM-YYYY). Date separator: To set the date separator (default '/', other options: '.', '-'). Zone: To set the time zone (Default East eight districts, other time zones available). Hour Type: To set the time types (Default 24 hours, other option: 12 hours).
- Page 33 Update File: Click "Browse", and choose the upgrade file in the pop-up window. Click "Upgrade" button, and an upgrade dialog will show. The device will reboot automatically after update successfully. (Note: make sure to keep the power and network connected during the process.
-
Page 34: Maintenance And Troubleshooting
Maintenance and Troubleshooting Camera Maintenance ⚫ If camera will be idle for a long time, please turn off the power switch and disconnect AC power cord from the outlet. ⚫ Use soft cloth or tissue to clean the camera (lens cleaning not recommended). ⚫... - Page 35 2. Disconnect IP Camera from network. Connect IP Camera to PC, and re-set the IP address following the proper operations. 3. Check the server's IP address, subnet mask and gateway address. 4. Check if MAC addresses conflict. 5. Check if web port is occupied by other devices. ⚫...
-
Page 36: Appendix
Appendix The camera could be controlled through RS232/RS485 interface; RS232C serial parameter are as follows: Baud rate: 2400/4800/9600/115200 bits / sec; Start bit: 1; data bits: 8; Stop bit: 1; Parity: None. VISCA Protocol Return Command Ack/Completion Message Command packet Note z0 41 FF Returned when the command is accepted. - Page 37 Command Function Command packet Note AddressSet Broadcast 88 30 0p FF p:Address setting IF_Clear Broadcast 88 01 00 01 FF I/F Clear CommandCancel 8x 21 FF 8x 01 04 00 02 FF CAM_Power Power ON/OFF 8x 01 04 00 03 FF Stop 8x 01 04 07 00 FF Tele (Standard)
- Page 38 Command Function Command packet Note One Push mode 8x 01 04 35 03 FF One Push WB Trigger One Push 8x 01 04 10 05 FF (Enabled during OnePush CAM_WB Trigger WB mode) CAM_WB 8x 01 04 35 pq FF pq = 00--33 WBMode Mode 8x 01 04 A9 00 FF...
- Page 39 Command Function Command packet Note 8x 01 04 0B 02 FF Down 8x 01 04 0B 03 FF Direct 8x 01 04 4B 00 00 0p 0q FF pq: Iris Position Reset 8x 01 04 0C 00 FF 8x 01 04 0C 02 FF Gain Limit Setting CAM_Gain Limit Down...
- Page 40 Command Function Command packet Note 8x 01 04 2D 00 FF 8x 01 04 23 00 FF CAM_Flicker 50HZ 8x 01 04 23 01 FF 50HZ 60HZ 8x 01 04 23 02 FF 60HZ Reset 8x 01 04 02 00 FF 8x 01 04 02 02 FF Aperture Control CAM_Aperture...
- Page 41 Command Function Command packet Note 8x 01 06 08 02 FF IR(remote IR_Receive 8x 01 06 08 03 FF commander)receive On/Off 8x 01 7D 01 03 00 00 FF IR(remote commander)receive IR_ReceiveReturn message via the VISCA 8x 01 7D 01 13 00 00 FF communication ON/OFF CAM_SettingReset Reset...
- Page 42 Command Function Command packet Note DownLeft 8x 01 06 01 VV WW 01 02 FF DownRight 8x 01 06 01 VV WW 02 02 FF Stop 8x 01 06 01 VV WW 03 03 FF 8x 01 06 02 VV WW AbsolutePosition 0Y 0Y 0Y 0Y 0Z 0Z 0Z 0Z FF 8x 01 06 03 VV WW...
- Page 43 Command Command Packet Return Packet Note y0 50 02 FF CAM_PowerInq 8x 09 04 00 FF y0 50 03 FF Off (Standby) CAM_ZoomPosInq 8x 09 04 47 FF y0 50 0p 0q 0r 0s FF pqrs: Zoom Position y0 50 02 FF Auto Focus CAM_FocusAFModeInq 8x 09 04 38 FF...
- Page 44 CAM_Gain LimitInq 8x 09 04 2C FF y0 50 0p FF p: Gain Position CAM_ BrightPosiInq 8x 09 04 4D FF y0 50 00 00 0p 0q FF pq: Bright Position y0 50 02 FF CAM_ExpCompModeInq 8x 09 04 3E FF y0 50 03 FF CAM_ExpCompPosInq 8x 09 04 4E FF...
- Page 45 y0 07 7D 01 04 38 FF AF ON/OFF y0 07 7D 01 04 33 FF Camera _Backlight y0 07 7D 01 04 3F FF Camera _Memery y0 07 7D 01 06 01 FF Pan_titleDriver CAM_BrightnessInq 8x 09 04 A1 FF y0 50 00 00 0p 0q FF pq: Brightness Position CAM_ContrastInq...
- Page 46 y0 50 0w 0w 0w 0w wwww: Pan Position Pan-tiltPosInq 8x 09 06 12 FF 0z 0z 0z 0z FF zzzz: Tilt Position Note: [X] in the above table indicates the camera address to be operated, 【y】=【x + 8】.
- Page 47 Pelco-D protocol command list Function Byte1 Byte2 Byte3 Byte4 Byte5 Byte6 Byte7 0xFF Address 0x00 0x08 Pan Speed Tilt Speed Down 0xFF Address 0x00 0x10 Pan Speed Tilt Speed Left 0xFF Address 0x00 0x04 Pan Speed Tilt Speed Right 0xFF Address 0x00 0x02...
- Page 48 Pelco-P protocol command list Function Byte1 Byte2 Byte3 Byte4 Byte5 Byte6 Byte7 Byte8 0xA0 Address 0x00 0x08 Pan Speed Tilt Speed 0xAF Down 0xA0 Address 0x00 0x10 Pan Speed Tilt Speed 0xAF Left 0xA0 Address 0x00 0x04 Pan Speed Tilt Speed 0xAF Right 0xA0...
- Page 49 This Limited Warranty covers any defect in material and workmanship under normal use within the Warranty Period. AVIPAS Inc. will repair or replace the qualified products at no charge. AVIPAS Inc. provides a two (2)-year warranty (from the date of purchase) for this HD Conference Camera.
Need help?
Do you have a question about the AV-1562 and is the answer not in the manual?
Questions and answers