Table of Contents

Related Manuals for Munters RF-VX36-H Series


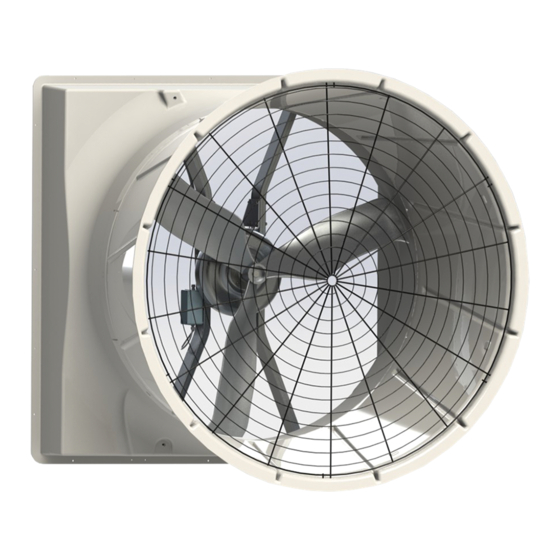
Summary of Contents for Munters RF-VX36-H Series
- Page 1 Munters Drive* AT36/ VX36 AT48/VX48 Retrofit Ki Instruction Manual *Patents Pending Munters Drive Retrofit Kit AT36/VX36 or AT48/VX48 Retrofit Kit Models: RF- VX36xx-Hx •RF-VX48xx-Hx © Munters Corporation, March 2017 QM1226r3...
- Page 2 With the proper installation and maintenance it will provide many years of service. Please Note: To achieve maximum performance and insure long life from your Munters product it is essential that it be installed and maintained properly. Please read all instructions carefully before beginning installation. Warranty: For Warranty claims information see the “Warranty Claims and Return Policy”...
- Page 3 Chapters Page 1. Unpacking the Equipment Parts List 2. Installation Instructions Install Fan With X-Strut Installation with Munters Drive H-Strut 3. Electrical Wiring Recomended Wire Routing Electrical Wiring 4. Operation and Maintenance 5. Troubleshooting 6. Exploded View © Munters Corporation, March 2017...
-
Page 4: Unpacking The Equipment
Fan is shipped complete with all accessories. Remove shutter, guard and cone sections before proceeding with installation. 1.1 Parts List Each Munters Drive Retrofit Kit includes: 1 – Left Tube Strut 1 – Right Tube Strut 4 –... -
Page 5: Installation Instructions
Loosen the set screws holding the propeller to the shaft. Carefully remove the propeller from the fan and set safely aside to be reused. A gear puller or prop puller may need to be used. See Figure 2. Figure 2 © Munters Corporation, March 2017 QM1226r3... - Page 6 48” Fan with X-Strut built before July 11, 2003 36” Fan with H-Strut built after March 15, 2004 36” Fan with X-Strut built before March 15, 2004 Bolt and Washer Bolt and Washer Figure 3B Figure 3A © Munters Corporation, March 2017 QM1226r3...
- Page 7 Struts into the fan housing and align the outermost holes in each strut leg with the outermost holes in the housing and fasten in place using (4) bolts [D] and wing nut [J]. See Figure 4B. This Face Goes Against Housing Figure 4A Bolts [D] Strut Strut Wingnut [J] Figure 4B © Munters Corporation, March 2017 QM1226r3...
- Page 8 Locate box and make sure it is facing up and open the box. Remove the top section of the foam packaging to reveal the Munters Drive motor and Controller and leave them in the foam packaging. Carefully remove the lower section of foam packaging with the motor and controller still in it and set on a flat surface for assembly.
- Page 9 Installation Instructions Step 7 Remove the top section of the foam packaging to reveal the Munters Drive motor and Controller and leave them in the foam packaging. With the Motor sitting in the foam packaging, position the Strut on the motor with the short leg towards the controlletr and the long leg away from the controller and line up the offset hole pattern in the struts with the offset hole pattern in the motor.
- Page 10 Step 9 Carefully pull the Munters Drive controller out of the foam packaging and slide it between the struts so that the 4 holes in each strut line up with the holes in each side of the controller bracket and fasten with (8) bolts [A], washers [B] and nuts [C].
- Page 11 Step 11 A 2x4 wood block may be used to rest retrofit kit on as you position it. Position the completed Munters Drive Retrofit Assembly into the fan housing and fasten in place using (8) bolts [G], washers [H] and splitlock washers [F].
-
Page 12: Electrical Wiring
3.1 Recommended Wire Routing Step 13 The Munters Drive Retrofit Kit comes with a coil of electrical cable that is pre-wired to motor. Determine where the existing power for the fan entered the housing and route the cable up the left or right strut toward the existing power. - Page 13 Chapter 3 Electrical Wiring Continued from previous page Single Phase and Three Phase Munters Drives: Power Supply for fans to have circuit breaker or Fuse Protection. The installer must refer to NEC and local codes to ensure saftey and See Figures 13B and 13C.
- Page 14 Motor Overload Protection with Disconnect Safety Cut-Off Switch Three Phase Three Phase Power Supply for Fan Power Out to Fan Moto Recommended Lightning Protection FC2006, 230V, 3 Phase FC2009, 460V, 3 Phase Figure 13C © Munters Corporation, March 2017 QM1226r3...
- Page 15 See Figure 14A . To operate the Munters Drive On/Off with a control, Slide the ‘ON’ switch, located on the circuit board in the junction box, away from the ON position. Now wire an ‘ON’ command from the ‘COMMON’ terminal to the input relay in the control and from the output of the control relay to the ‘RUN’...
- Page 16 Chapter 3 Electrical Wiring ‘ON’ Switch Junction Box Junction Box Figure 14B On/Off Remotely Control Relay © Munters Corporation, March 2017 QM1226r3...
- Page 17 Chapter 3 Electrical Wiring To operate the Munters Drive Off/Low/High with a control, slide the ‘ON’ switch, located on the circuit board in the junction box, away from the ON position. Now wire an ‘ON’ command from the “COMMOM” terminal to the input relay in the control and from the output of the relay to the ‘RUN’...
- Page 18 Chapter 3 Electrical Wiring ‘ON’ Switch Junction Box 10-0V Output In Control Junction Box Figure 13D Variable Speed Operation © Munters Corporation, March 2017 QM1226r3...
- Page 19 Chapter 2 Electrical Wiring To operate the Munters Drive Off/Variable with a 10-0V Signel, slide the ‘ON’ switch, located on the circuit board in the junction box, away from the ON position. Now wire an ‘ON’ command from the ‘COMMON’ terminal to the input relay in the control and from the output of the control relay to the ‘RUN’...
- Page 20 Chapter 3 Electrical Wiring Step 14 Reinstall the shutter in the back of the fan and the guard in the cone. See Figure 15 Figure 15 Installation is now complete. © Munters Corporation, March 2017 QM1226r3...
-
Page 21: Operation And Maintenance
TEMERATURE ADJUSTMENTS: Set the fan control to the temperature Moving parts, disconnect power before servicing. shown on your Munters ventilation system drawing, or to a value which will provide the desired environmental conditions. WARNING 4.2 Maintenance The following inspection and cleaning procedures should be performed... -
Page 22: Troubleshooting
3. Verify Prop turns freely an 'On' command is present. a. If not contact Munters Product Support b. If it turns freely go to next step 4. Turn AC power back on to fan a. -
Page 23: Exploded View And Parts List
Hub, Prop Adaptor, 1” Dia. Steel Various* Various* Motor for Munters Drive, Less Controller KE2535 KE2535 Cable, Power, 1hp Munters Drive Controller, 16/3, 144”L KE2536 KE2536 Cable, Power, 3hp Munters Drive Controller, 16/4, 144”L AC1212-MD AC1212-MD Control Signal Junction Box, Munters Drive w/Cable... - Page 24 Munters Drive Retrofit is developed and produced by Munters Corporation, Lansing, Michigan U.S.A. 1-800-227-2376 Munters Europe AB, Isafjordsgatan 1, P.O. Box 1150, SE-164 26 Kista, Sweden. Phone +46 08 626 63 00, Fax +46 8 754 56 66. Munters Corporation 2691 Ena Drive, Lansing, MI 48917 U.S.A. Phone +1 800-227-2376, Fax +1 517-676-7078 www.munters.us...
Need help?
Do you have a question about the RF-VX36-H Series and is the answer not in the manual?
Questions and answers