Table of Contents
Advertisement
Quick Links
Advertisement
Table of Contents

Related Manuals for Munters WF50 Series


Summary of Contents for Munters WF50 Series
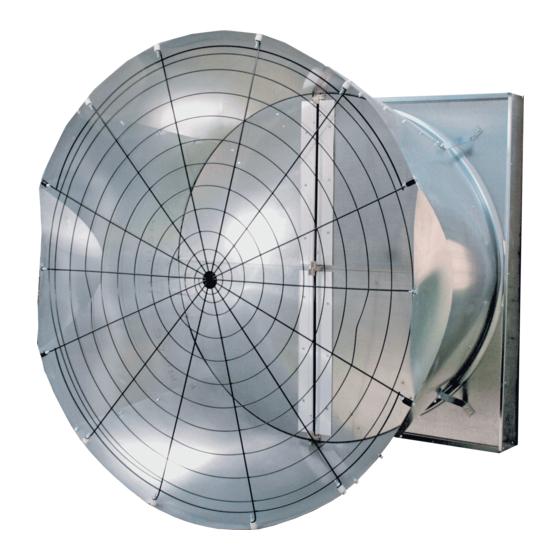
- Page 1 WF50-99 Galvanized 50” Tilt Fan with Cone Instruction Manual Partially Assembled, No Crate WF50 Galvanized Tilt Fan with Cone Partially Assembled, No Crate Models: WF501TxCP • WF501TxCY • WF5015TxCP • WF5015TxCY © Munters Corporation, December 2019 QM1075r3...
-
Page 2: Warranty
With the proper installation and maintenance it will provide many years of service. Please Note: To achieve maximum performance and insure long life from your Munters product it is essential that it be installed and maintained properly. Please read all instructions carefully before beginning installation. Warranty: For Warranty claims information see the “Warranty Claims and Return Policy”... - Page 3 Parts List Fan Dimensions 2. Installation Instructions Installation 3. Electrical Wiring Wiring Recommended Wire Routing 4. Operation 5. Maintenance 12-13 6. Winterizing Winterizing Winter Weather Protection 7. Troubleshooting 8. Exploded View and Parts List 16-17 © Munters Corporation, December 2019 QM1075r3...
-
Page 4: Unpacking The Equipment
”-20 x ¹⁄₂” SRTDHXWSHR Type-F Screw, ZP KS1928 M8-1.25 x 25mm Hex Bolt, ZP KW4906 M8 Star Lock Washer, BLK KN1849 M8-1.25 x 8mm Hex Nut, ZP - - - Yellow Vertical Warning Labels © Munters Corporation, December 2019 QM1075r3... -
Page 5: Side View
” ⁄ ” ⁄ ” ⁄ ” ⁄ ” ⁄ ” 55”W. x 56 ⁄ ”H.* Opening based on 2 x 4 framing. Opening size may change with framing. See Chart A, page 6. © Munters Corporation, December 2019 QM1075r3... -
Page 6: Installation Instructions
Figure 2C 2 x 4 Framing Concrete Framing Framing cut at 12° to match Catalog fan housing. 2 x 4 Framing Concrete Framing WF50 55”W. x ”H. 55”W. x ”H. ⁄ ⁄ Chart A © Munters Corporation, December 2019 QM1075r3... - Page 7 Then secure housing to wall using (12) Lag Screws [F], through holes in each mounting flange. See Figure 4B. Figure 3 ¹⁄₄" x 1.5" Lag Screw [A] NOTE: This is NOT the Wall Opening Size 54¹⁄₂" 54¹⁄₈" Figure 4A Figure 4B © Munters Corporation, December 2019 QM1075r3...
- Page 8 Tighten bolts to 180 in-lbs. [20 N-m] of torque. See Figure 5A and 5B. Star Washer [J] M8 Bolt [H] Nut [K] Figure 5B Figure 5A Step 7 Proceed to Installation Instructions for Discharge Cone, Form QM1033 for 50" Fans. © Munters Corporation, December 2019 QM1075r3...
-
Page 9: Electrical Wiring
For electrical connection requirements, refer to diagram on motor nameplate and to information enclosed with the Munters environmental control to be used. After wiring check for proper motor rotation. -
Page 10: Shutter Installation
Insert shutter into fan by sliding the bottom flange of shutter into bottom shutter clips and pressing shutter inward. Fasten shutter in place by rotating top and side shutter clips over See Figure 9A. shutter flanges. See Figure 9B. Shutter Clip Shutter Clip Figure 9A Figure 9B © Munters Corporation, December 2019 QM1075r3... -
Page 11: Operation
Minimum operating frequency of 30 Hz. Will require three pole contractors with overload protection (by others). Moving Parts: Disconnect Power Before Servicing. WARNING Do Not Power Wash Electrical Devices. © Munters Corporation, December 2019 QM1075r3... -
Page 12: Maintenance
Wiring should be secure and in good condition. Remove any dust build-up from control case and sensor using a soft brush or cloth. NEVER CLEAN Do Not Power Wash Electrical Devices. ELECTRICAL EQUIPMENT WITH A PRESSURE WASHER! © Munters Corporation, December 2019 QM1075r3... -
Page 13: Belt Tightening
Mark 2 on the tensioner arm. Hold tensioner at this setting and tighten 10mm bolt to 40 ft.-lbs [54 N-m] torque. 10mm Bolt Mark 2 on Alignment Tensioner Mark on Base © Munters Corporation, December 2019 QM1075r3... -
Page 14: Winter Weather Protection
Munters Product and System manufacturers recommendations. The supplier listing above is given Warranties do not cover cone or fan as a reference only. Munters does not endorse any specific snow guard product and no performance warranty is implied. damage from external sources. -
Page 15: Troubleshooting
2. Frequency drive improperly adjusted 2. See operation, Step 2 for adjustments guidelines Excessive 1. Tighten fasteners 1. Motor loose on mount Vibration 2. Replace propeller 2. Propeller damaged 3. Repair or replace motor or propeller shaft © Munters Corporation, December 2019 QM1075r3... -
Page 16: Exploded View
Exploded View © Munters Corporation, December 2019 QM1075r3... - Page 17 Shutter, 53⁷⁄₈" Sq., PL or GZ or AL * Parts listed are for standard configuration with 1HP motor and other drive components operating on 60Hz power. Contact office for replacement part numbers for your fan configuration. © Munters Corporation, December 2019 QM1075r3...
- Page 18 WF50 Tilt Fan with ”GC” Cone is developed and produced by Munters Corporation, Lansing, Michigan U.S.A. 1-800-227-2376 Munters Europe AB, Isafjordsgatan 1, P.O. Box 1150, SE-164 26 Kista, Sweden. Phone +46 08 626 63 00, Fax +46 8 754 56 66.
Need help?
Do you have a question about the WF50 Series and is the answer not in the manual?
Questions and answers