Advertisement
Quick Links
Advertisement

Related Manuals for AVYCON AVC-NPTZ51X23L-F


Summary of Contents for AVYCON AVC-NPTZ51X23L-F
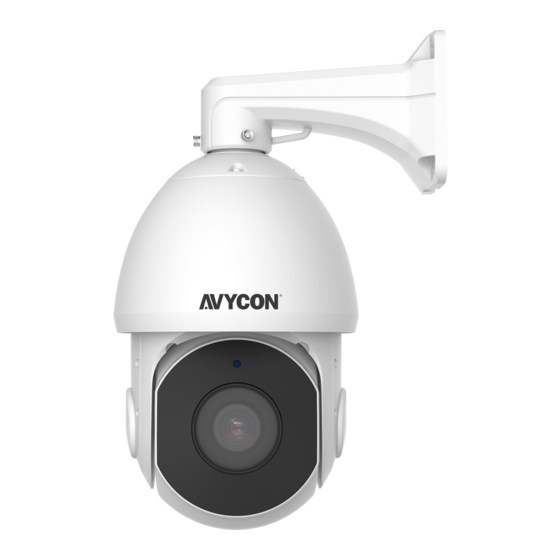
- Page 1 NPTZ51X23L-F QUICK START GUIDE 5MP MINI PTZ DOME NETWORK CAMERA...
-
Page 2: Table Of Contents
TABLE OF CONTENTS Package Contents........................Caution............................System Requirements....................... Hardware Overview........................Camera Installation........................- Mount Accessories......................... Outdoor Installation........................Accessing the Network Camera.................... -
Page 3: Package Contents
Thank you for purchasing this AVYCON IP Network Camera. This guide provides basic instructions on installing and accessing this IP Network Camera. For more details, please refer to the User Manual. Package Contents Before installation, please verify that all the necessary items are supplied in the box as the package contents listed below. -
Page 4: Hardware Overview
PoE Speed Dome Network Camera power supply; 2) Built-in SD card slot can be seen after removing the 4 screws and open the front panel; 3) Speed Dome on AI Camera Series only support 30X/36X Optical Zoom Lens. 5MP MINI PTZ DOME NETWORK CAMERA | AVC-NPTZ51X23L-F... -
Page 5: Camera Installation
Step4: Make sure that the camera body has been correctly installed to the holder, and match the holder to the holes on the wall or ceiling, then tighten up the screws; 5MP MINI PTZ DOME NETWORK CAMERA | AVC-NPTZ51X23L-F... - Page 6 5MP MINI PTZ DOME NETWORK CAMERA | AVC-NPTZ51X23L-F...
-
Page 7: Mount Accessories
Step 1: Rotate to open the front cover over about 75°to conveniently take off it from the box; Step 2: Install the rear cover first; Step 3: Take out the weather-proof connector, separate it to four parts as screw nut, rubber ring, screw bolt and O-ring; 5MP MINI PTZ DOME NETWORK CAMERA | AVC-NPTZ51X23L-F... - Page 8 For tension disc, please remove it then cut an opening on the rubber plug, get cables through the opening. Please remember to plug the rubber plug whenever the holes on it are not in use; 5MP MINI PTZ DOME NETWORK CAMERA | AVC-NPTZ51X23L-F...
- Page 9 The set screw will lock the body securely; Step 10: Connect camera cables with previous cables. Manage the cables well then close the front cover and lock the screws. 5MP MINI PTZ DOME NETWORK CAMERA | AVC-NPTZ51X23L-F...
- Page 10 Step 2: Loosen the screws of the fix rings, put rings through the back of the box body; Step 3: Fix the rings with rear cover on the pole, fasten the screws; Step 4: The following steps are the same as it installed on the wall mount. 5MP MINI PTZ DOME NETWORK CAMERA | AVC-NPTZ51X23L-F...
-
Page 11: Outdoor Installation
5) Make sure that your camera is not at the top of the pole and must be installed within the lightning rod below 45 degrees. 6) Make sure that system adopts equal potential grounding. 5MP MINI PTZ DOME NETWORK CAMERA | AVC-NPTZ51X23L-F... -
Page 12: Accessing The Network Camera
1. Install the Tools utility (This can be downloaded from our website) 2. Start Tools, then click the IPC Tools icon, and then all AVYCON IP cameras on the local network you are connected to will be shown with information such as IP address, MAC address, Status, Port number, Netmask, and Gateway. - Page 13 4. If the selected camera shows "Active" in the status bar, you can directly type the User Name and Password you have previously assigned and then make any modifications to the IP address and click on Modify. 5MP MINI PTZ DOME NETWORK CAMERA | AVC-NPTZ51X23L-F...
- Page 14 (2) You need to be using Tools version V2.4.0.1 or above to activate the camera. 5. After activation, you can change the IP address or other network values, and then click “Modify” button to change the IP address successfully; 5MP MINI PTZ DOME NETWORK CAMERA | AVC-NPTZ51X23L-F...
- Page 15 1. Change the IP address of computer to 192.168.10.0 segment, here are two ways as below: A. Start > Control Panel > Network and Internet Connection > Network Connection > Local Area Connection, and double click it. 5MP MINI PTZ DOME NETWORK CAMERA | AVC-NPTZ51X23L-F...
- Page 16 B. Click “Advanced”, and then click “IP settings” > “IP address” > “Add”. In the pop-up window, enter an IP address that is in the same segment with your Avycon IP camera (e.g. 192.168.10.200, but please confirm that the IP address you pick does not conflict with another address on the network);...
- Page 17 4. After login, please select “Configuration” > “Basic Settings” > “Network” > “TCP/IP”. The Network Settings page appears (Shown as below Figure); 5MP MINI PTZ DOME NETWORK CAMERA | AVC-NPTZ51X23L-F...
- Page 18 3. If this is the first time logging into your IP camera, the browser will prompt you to install the plugin. Please click on link that the window displays to start the download. 5MP MINI PTZ DOME NETWORK CAMERA | AVC-NPTZ51X23L-F...
- Page 19 After the plugin has successfully installed, you can refresh the browser and you should be able to see video. If IE9 or higher version browser is used, it is suggested that the Avycon camera web link should be added as a trusted site. See the instructions as follows: 1.
- Page 20 3. Enter the IP address of the camera in the blank and click “Add”; 4. Enter the IP address into your browser's address bar. After logging into your AVYCON IP camera successfully, you should see live video. 5MP MINI PTZ DOME NETWORK CAMERA | AVC-NPTZ51X23L-F...
- Page 21 Copyright © AVYCON. All rights reserved. Specifications and pricing are subject to change without notice. phone: 949-752-7606 email: info@avycon.com social: @avycon_aivo website: avycon.com...
Need help?
Do you have a question about the AVC-NPTZ51X23L-F and is the answer not in the manual?
Questions and answers