Table of Contents
Advertisement
Quick Links
Advertisement
Table of Contents

Related Manuals for Johnson Controls Tyco KT-1


Summary of Contents for Johnson Controls Tyco KT-1
- Page 1 KT-1 One-Door Controller Installation Guide DN2186-2103 2021-03-08 D29008966R009...
-
Page 3: Table Of Contents
TYCO INTERNATIONAL LTD END-USER LICENSE AGREEMENT..............7 C o n t e n t s Technical support............................8 United States and Canada......................8 Latin America and Caribbean......................9 Europe, Middle East, and Africa..................... 9 Asia Pacific............................10 Copyright............................... 10 Safety information............................10 Introduction.............................. - Page 4 ioSmart card readers........................15 Reader outputs..........................16 Reader interfaces........................... 16 Integration interface........................16 Detecting ports automatically...................... 16 Downloadable firmware....................... 16 Downloading firmware in EntraPass mode..................16 Downloading firmware in stand-alone mode..................16 Trouble and reporting........................16 Technical specifications..........................16 Front cover LEDs............................18 Kantech shield LED........................
- Page 5 Security configuration........................32 Connecting to the internet......................32 Managing users..........................32 Protecting the network......................... 32 Deployment............................ 32 Restricting physical access to the controller..................33 Logging on during the initial startup....................33 Resetting to factory default........................33 Knowledge level............................33 Installation..............................34 Preparing to install the controller....................
- Page 6 Powering the KT-1-PCB in a KT-1-CAB..................44 Powering the KT-1-PCB using an external power supply............45 Reset options..............................45 Soft reset............................45 Hard reset............................45 Forced default static........................45 Factory default DHCP........................46 Resetting the controller........................ 46 Using the One Button on the Kantech shield................47 Turning on the Kantech shield LED......................
- Page 7 UL 294 Compliance Notice......................52 UL 1076 Compliance Notice......................52 FCC & IC............................53 CE & RCM............................53 KT-1 One-Door Controller Installation Guide...
-
Page 9: Tyco International Ltd End-User License Agreement
TYCO INTERNATIONAL LTD END-USER LICENSE AGREEMENT FOR KANTECH Software provided with or without products or components IMPORTANT - READ CAREFULLY KANTECH Software purchased with or without Products and Components is copyrighted and is purchased under the following license terms: • This End-User License Agreement (“EULA”) is a legal agreement between You (the company, individual or entity who acquired the Software and any related Hardware) and KANTECH, the manufacturer of the integrated security systems and the developer of the software and any... -
Page 10: Technical Support
All title and intellectual property rights in and to the SOFTWARE PRODUCT (including but not limited to any images, photographs, and text incorporated into the SOFTWARE PRODUCT), the accompanying printed materials, and any copies of the SOFTWARE PRODUCT, are owned by KANTECH or its suppliers. -
Page 11: Latin America And Caribbean
Latin America and Caribbean For technical support, contact us at one of the following email addresses or use the phone number for your area. • For access technical support, email access-support@jci.com. • For video technical support, email video-support@jci.com. • For technical training inquiries, email latam.certificaciones@jci.com. Table 2: Latin America and Caribbean telephone numbers Area Call type... -
Page 12: Asia Pacific
Oceania and New Zealand Direct +64 9942 4004 Copyright © 2021 Johnson Controls. All rights reserved. JOHNSON CONTROLS, TYCO and KANTECH are trademarks of Johnson Controls. Safety information WARNING: Risk of Electrick Shock. Never install the equipment during an electrical storm. - Page 13 equipment is installed in a metallic cabinet that meets the applicable requirements for a FIRE ENCLOSURE. Note: When installed on the North American Market, powered via the UL, cUL Listed 40VA Transformer, the KT-1 shall be connected to the mains by a LICENSED ELECTRICIAN in accordance with the applicable rules of the National Electrical Code or Canadian Electrical Code regarding this type of connection.
-
Page 14: Introduction
Introduction The KT-1 One-Door Controller offers a simple access control solution. It is available in two configurations: • KT-1: one-door controller, single gang mount. • KT-1-PCB: one-door controller, cabinet mount. For information about expansion kits and related components, see KT-1 models, expansion kits, and components. -
Page 15: Features
Figure 3: Example of a KT-1 setup with a T.REX Features The KT-1 controller includes the following features. Operating modes Use the controller in one of the following three modes: • Stand-alone mode: use as a stand-alone access controller with an Ethernet connection for direct configuration. -
Page 16: Compatibility Using Linux
Compatibility using Linux The controller is compatible with the following EntraPass editions 8.20 and later: • EntraPass Special Edition • EntraPass Corporate Edition • EntraPass Global Edition with a Multi-site Gateway, a Global Gateway, or a KT-NCC Network Communications Controller Note: To upgrade the KT-1 controller to Linux firmware, you must have EntraPass 8.30 or later. -
Page 17: Inputs
Inputs You can use the four onboard inputs for different functions depending on the mode of your controller. Stand-alone, EntraPass, or cloud mode If your controller is in stand-alone, EntraPass, or cloud mode, you can use the inputs for the following functions: •... -
Page 18: Reader Outputs
Reader outputs The controller has four open-collector, switch-to-ground outputs. Use the reader outputs to give the user visual or audible feedback about ongoing access events. The outputs include three LEDs (LED, OUT1, and OUT2) and a buzzer (BUZ). Reader interfaces The controller has two onboard 12 VDC reader interfaces. - Page 19 Table 6: Technical specifications Item Description Operating For UL listed installations: 0°C to 49°C (32°F to 120°F) indoor use only. For European compliant installations: -10°C to 55°C (14°F to 131°F) temperatures Environmental Class II. Humidity level 93% maximum (relative humidity non-condensing) KT-1 cabinet From wall surface: 5.1 in.
-
Page 20: Front Cover Leds
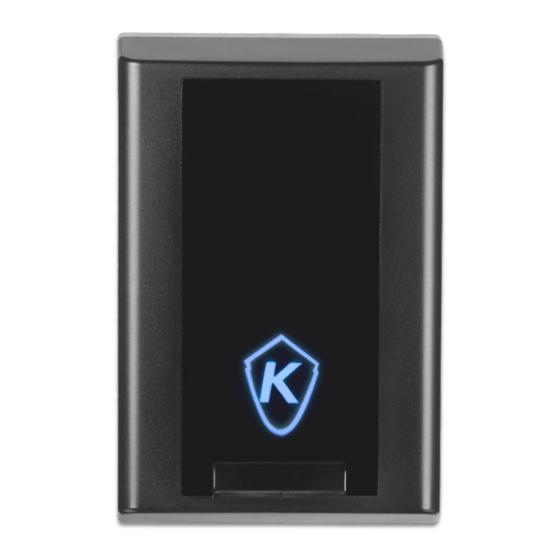
Table 6: Technical specifications Item Description Network autonomy Distributed data and processing. Certifications/listing USA: UL 294, UL 1076, FCC Part 15 Class B Canada: ICES-003 (B)/NMB-003 (B) Europe: EN 60950-1, EN 62368-1, EN 50130-4, EN 61000-6-3. CE Compliance in accordance with applicable LVD and EMC Directives. Australia/New Zealand: RCM Compliance. - Page 21 Table 8: Kantech shield LED patterns Condition Flashing pattern color Starting up Blue Steady Corporate/ Blue Three short flashes Multi-site Gateway Global Gateway Blue One short flash Restarting Blue Ten flashes every second at 50% duty cycle Card read or Blue One 0.5 sec flash, then swipe...
-
Page 22: Wiring Diagrams
Wiring diagrams See the following wiring diagrams for each controller model. Figure 4: KT-1 inputs and outputs KT-1 One-Door Controller Installation Guide... - Page 23 Callout Description Entry card reader RJ45 Ethernet network. Optional PoE or PoE+ powered. Door locking device: 12 VDC, 750 mA maximum. Connect a 1000 Ohm resistor between LK- and +12 V if you are not using a locking device. Optional end of line resistor. Door contact Request to exit device Individually programmable zone termination: NC, NO, NEOL, single or double EOL...
- Page 24 Figure 5: KT-1 PCB inputs and outputs KT-1 One-Door Controller Installation Guide...
- Page 25 Callout Description Entry reader Extra outputs used as a general annunciator. KT-PS4085 power supply (optional North American model). 12 VDC, 1.5 A. RS485 main network to other KT-1 controllers or the Gateway using a USB-485 interface. Transformer: 16 VAC, 40 VA. 120 Volts, 80 Hertz.
- Page 26 Figure 6: KT-1 controller with KT-PS4085 power supply KT-1 One-Door Controller Installation Guide...
- Page 27 Figure 7: KT-1 EU inputs and outputs Callout Description Entry reader KT-1 controller RJ45 Ethernet network. Optional PoE or PoE+ powered Relay outputs: open collector, switch to ground, 12 VDC 100 mA maximum KT-1 One-Door Controller Installation Guide...
- Page 28 Callout Description Door locking device: 12 VDC 750 mA maximum Connect a 1000 Ohm resistor between LK- and +12V if you are not using a locking device. Door contact Optional end of line resistor Request to exit device Individually programmable zone termination: NC, NO, NEOL, single or double EOL termination.
- Page 29 Figure 8: KT-1-PCB EU inputs and outputs KT-1 One-Door Controller Installation Guide...
-
Page 30: System Setup With Entrapass
Callout Description Entry reader Extra outputs used as a general annunciator KT-1-PCB controller RS485 main network to other KT-1 controllers or the Gateway using a USB-485 interface. Relay 1: 30 VDC/VAC, 3 Amps, Form C Relay 2: 30 VDC/VAC, 3 Amps, Form C Door contact Optional end of line resistor Request to exit device... - Page 31 Figure 9: Over the internet with EntraPass Special or Corporate Edition with a Multi-Site Gateway KT-1 One-Door Controller Installation Guide...
- Page 32 Figure 10: USB-485 with EntraPass Special, Corporate, and Global Editions Figure 11: Over the internet with EntraPass Global Edition and a KT-NCC KT-1 One-Door Controller Installation Guide...
-
Page 33: Security Hardening Guide
Security hardening guide The security hardening guide provides information about the following areas: • Assuring compliance with the cybersecurity criteria that govern the target environment • Designing safe and secure deployment architecture • Providing a reference for settings that you configure during deployment To ensure the safe and secure deployment of the KT-1 controller, complete the following steps: Ensure that you understand and plan your controller architecture. -
Page 34: Connecting Readers And Modules Using Wiegand And An Spi
Connecting readers and modules using Wiegand and an SPI The Wiegand connections and SPI connection are not encrypted or authenticated. If you connect readers and modules, complete the following steps: • Ensure that you isolate and secure the connection wires inside the walls of the installation in a safe area. -
Page 35: Restricting Physical Access To The Controller
• Logging on during the initial startup • Resetting to factory default • Knowledge level Restricting physical access to the controller If you install the controller in an area that is easily accessible, this enables actions that cannot be authenticated or logged electronically, and therefore, impact the controller's cybersecurity capabilities. -
Page 36: Installation
Installation Use this section to prepare for the installation, to install the controller, and to connect all of the components. Preparing to install the controller Before you install the controller, follow these guidelines: • Install the controller indoors in a secure location with regular temperature and humidity levels. -
Page 37: Installing The Kt-1
Installing the KT-1 WARNING: Route and secure all internal wiring using tie wraps or equivalent means to ensure that the cables do not come into contact with the front cover of the metal enclosure. Failure to do so may result in risk of physical injury to persons, or damage to or destruction of property. -
Page 38: Installing The Kt-1-Pcb
Installing the KT-1-PCB WARNING: Route and secure all internal wiring using tie wraps or equivalent means to ensure that the cables do not come into contact with the front cover of the metal enclosure. Failure to do so may result in risk of physical injury to persons, or damage to or destruction of property. -
Page 39: Connecting Door Locking Devices
Make an earth ground connection to the cabinet of the controller. Note: Follow the requirements of your local electrical code. Wire the E-GND terminal on the controller printed circuit board directly to the earth ground connection point. Connecting door locking devices WARNING: Controlled door locks may be governed by regulatory bodies and must always be installed according to local regulations. -
Page 40: Connecting Inputs
Figure 15: KT-1-PCB lock setup Callout Description Door locking device: 12 VDC, 750 mA maximum. Connect a 1000 ohm resistor between LK- and +12 V if you do not use a locking device. Connecting inputs The controller can monitor four input points. Each onboard input is supervised with or without end- of-line (EOL) resistors. - Page 41 Figure 16: KT-1 inputs Callout Description Alarm Tamper End of line resistor Door contact Request to exit device Individually programmable zone termination: NC, NO, NEOL, single or double EOL termination. KT-1 One-Door Controller Installation Guide...
-
Page 42: Connecting Card Readers
Figure 17: KT-1-PCB inputs Callout Description Alarm Tamper End of line resistor Door contact Request to exit device Individually programmable zone termination: NC, NO, NEOL, single or double EOL termination. Connecting card readers The controller provides 12 VDC power for card readers. You can connect two card readers to a KT-1 controller. -
Page 43: Connecting Relay Controlled Outputs
Figure 18: Connecting card readers Connecting relay controlled outputs The following table lists the KT-1 controller's relay controlled output ratings. Table 9: Relay controlled outputs Controller Outputs Rating KT-1 RELAY1 and RELAY2 Open-collector, up to 100 mA each KT-1-PCB Form C RELAY1 and RELAY2 3 Amps, 30 VAC/VDC, 0.6 power factor Figure 19: KT-1 relay controlled outputs Callout... -
Page 44: Connecting Auxiliary Outputs
Figure 20: KT-1-PCB relay controlled outputs Callout Description Relay 1: 30 VDC/VAC, 3 Amps, Form C, 0.6 power factor. Relay 2: 30 VDC/VAC, 3 Amps, Form C, 0.6 power factor. Connecting auxiliary outputs • To provide visual and audio signals of access operations, connect auxiliary outputs to card readers and to local warning devices. - Page 45 Figure 21: Connecting the controller Callout Description DB9F: Gateway to serial port. The maximum length is 100 ft (33 m). External power supply: 5 to 14 VDC, 100 mA VC-845: RS232 to RS485 serial communication interface KT-1 controller Connect the RS-485 main network to other KT-1 controllers or to the gateway using a USB-485 interface.
-
Page 46: Making An Rs-232 Cable With An Rj-12 Connector
Making an RS-232 cable with an RJ-12 connector To make your own RS-232 cable with a RJ-12 connector, the following figure shows an example of the configuration. Figure 22: RJ-12 pin-out Callout Description VC-485 RJ-12 male connector (clip down) PIN 1 Power supply CAUTION: Do not apply power to the controller until after you complete and test all connections, and after you fix the unit to the wall. -
Page 47: Powering The Kt-1-Pcb Using An External Power Supply
Powering the KT-1-PCB using an external power supply • Connect the external power supply to the 12 VDC input terminals. Reset options The controller has four reset options: • Soft reset • Hard reset • Forced default static • Factory default DHCP To reset the controller, see Resetting the controller. -
Page 48: Factory Default Dhcp
Factory default DHCP The KT-1 default DHCP is completed by Kantech. Reset the controller to factory default DHCP only for the following reasons: • To configure the KT-1 with the KT-Finder. For more information, see Configuring the controller using the KT-Finder. -
Page 49: Using The One Button On The Kantech Shield
Figure 23: KT-1 main board Callout Description KT-1 controller main board Reset button Using the One Button on the Kantech shield The One Button is located on the Kantech shield on the lower part of the controller's front cover. Press the One Button to configure some of the controller's functions. Note: After you replace the controller's front cover, there is a 20-second delay before the One Button responds. -
Page 50: Configuration
Configuration Use one of the following options to configure the controller: • Configuring the controller using a browser • Configuring the controller using the KT-Finder Configuring the controller using a browser Before you begin: To configure cloud mode, factory default the controller. Determine your connection to the controller and choose the appropriate network cable. -
Page 51: Configuring The Controller Using The Kt-Finder
In the Cloudvue Registration pane, in the Cloudvue Partner and Cloudvue Account Name fields, enter the partner and account name, and from the Cloudvue Data Center list, select the data center. Note: To find out this information, contact your Cloudvue administrator. Click Save. -
Page 52: Replacing Or Discarding Components
Note: The location defines the controller's time zone. If you enter an incorrect location, it affects all controllers associated with it. Click Save. Click the Devices tab. If the controller saves successfully, it appears in the list of devices. Replacing or discarding components Important: Only qualified service technicians should perform maintenance recommendations. - Page 53 Creating a trigger and alarm sound in EntraPass On the EntraPass main menu, click the Devices tab and click Controller. From the Controller list, select the controller. Click the Trigger and Alarm tab. Right-click and select New trigger. In the Trigger and Alarm window, in the English field, enter a name for the trigger. On the General tab, from the Component Type list, select Controller.
-
Page 54: Ul 294 Compliance Notice
UL 294 Compliance Notice • Use only UL 294 or UL 1076 listed power supply. • Connect Kantech part number KT-ACPW-LED status indicator to the AC terminals of the KT- PS4085. • Use Kantech part number KT-BATT-12 battery. Note: Using a 12V/7Ah battery, backup battery provides a minimum of 4 hours standby time. •... -
Page 55: Fcc & Ic
• The Central Supervisory Equipment shall be installed in a temperature controlled environment. A temperature controlled environment is defined as one that can be maintained between 14° - 10°C (55° - 95°F) by HVAC system. Twenty-four hours on standby power shall be provided for the HVAC system. The standby power system for the HVAC system may be supplied by an engine driven generator alone. - Page 56 KT-1 One-Door Controller Installation Guide...
Need help?
Do you have a question about the Tyco KT-1 and is the answer not in the manual?
Questions and answers