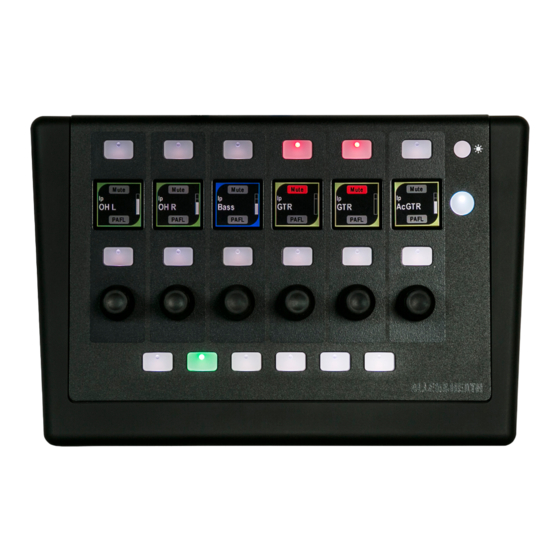
Summary of Contents for ALLEN & HEATH IP6
- Page 1 Getting Started Guide Before starting please check www.allen-heath.com for the latest software and documentation. AP10352 Issue 4...
- Page 2 Check with your Allen & Heath distributor or agent for any additional warranty information which may apply. If further assistance is required please contact Allen & Heath Ltd. IP6 Getting Started Guide AP10352 Issue 4...
-
Page 3: Important - Read Before Starting
AHM processor guides available for download at www.allen- heath.com. Check for the latest version of this Getting Started Guide. You can also join our Allen & Heath Digital Community to share knowledge and information with other users. IP6 Getting Started Guide AP10352 Issue 4... - Page 4 Register your product Register your product online at www.allen-heath.com/register. IP6 Getting Started Guide Copyright © 2021 Allen & Heath. All rights reserved. ALLEN&HEATH Allen & Heath Limited, Kernick Industrial Estate, Penryn, Cornwall, TR10 9LU, UK http://www.allen-heath.com...
-
Page 5: Table Of Contents
Connect and power up..................11 Set up the unit Name and IP Address ............ 11 System connection ................. 12 Ethernet Switch ..................12 Programming the Remote Controller ............13 Dimensions ..................... 14 Technical specs ....................15 IP6 Getting Started Guide AP10352 Issue 4... -
Page 6: Introduction
12V Power Supply 1. Introduction The IP6 is part of the Allen & Heath IP Series of remote controllers. It interfaces with the AHM, dLive or Avantis mixing system via standard TCP/IP Network connections and can therefore be networked with other controllers, computers and third party devices using standard Ethernet infrastructure. -
Page 7: Mounting The Remote Controller
2. Mounting the Remote Controller The IP6 can be used free standing or mounted on a standard microphone stand thanks to the integrated 3/8” threaded hole. Non-slip feet fitted for shelf use Top of mic stand Optional headphone with 3/8” thread... -
Page 8: Front Panel
– 6x colour displays providing information on the channels and on the function of the SoftKeys. Upper SoftKey function Channel type, name and Level bar and meter colour Lower SoftKey function or second rotary function IP6 Getting Started Guide AP10352 Issue 4... - Page 9 36 individual Inputs to a monitor mix, or set up the Layers to control the sound to 6 different zones in a venue. Other available functions include Send On/Off, PAFL, Mute, Scene Recall, Tap Tempo, Talkback Assign, Custom MIDI. IP6 Getting Started Guide AP10352 Issue 4...
-
Page 10: Rear Panel
Network – Fast Ethernet, PoE compliant Network port for connection to the mixing system. The IP6 provides a locking Neutrik EtherCon socket to protect the connection. Use cables fitted with locking EtherCon for touring or rental applications. The maximum cable length is 100m. Use STP (shielded twisted pair) CAT5 or higher cables. -
Page 11: Connect And Power Up
255.255.255.0 Gateway 192.168.1.254 There are two ways of editing these settings: Browser access – Connect a PC or Mac computer to the Network port of the IP6. Set your computer to a compatible, static Address, example 192.168.1.100 with Subnet 255.255.255.0. Open a web browser and type the IP6 default IP Address 192.168.1.72 in the URL bar. -
Page 12: System Connection
5.2 System connection Connect the IP6 to a dLive / Avantis / AHM Network port using a CAT5 cable up to 100m long. Power up the IP6 by plugging the external PSU into the DC In socket. The port Lnk/Err indicator flashes at a steady rate when the link is established. -
Page 13: Programming The Remote Controller
/ Director software to configure the controller as appropriate. With dLive, the IP6 can be set to link to either the MixRack or the Surface. This is regardless of the physical Network connection, for example the unit might be physically connected to the MixRack but set to link to the Surface. -
Page 14: Dimensions
6. Dimensions 194.40 54.9 12.20 28.4 IP6 Getting Started Guide AP10352 Issue 4... -
Page 15: Technical Specs
0 deg C to 35 deg C (32 deg F to 95 deg F) Dimensions and Weights Width x Depth x Height x Weight 227 x 150 x 55 mm x 1.5kg (3.3lbs) IP6 (boxed) 300 x 330 x 170 mm x 1.6kg (3.5lbs) IP6 Getting Started Guide AP10352 Issue 4...


Need help?
Do you have a question about the IP6 and is the answer not in the manual?
Questions and answers