Advertisement
SR-WM-SK-19
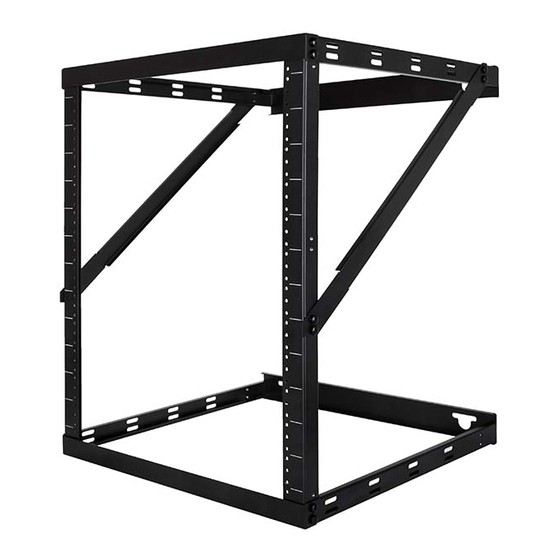
Wall-Mount Expandable Open-Frame Rack, 8–22U
Package Contents
A. 2 × Rack Frames
B. 2 × 8U Rack Rails
C. 2 × 12U Rack Rails
D. 4 × Side Brace
E. 2 × Tie Plate
F. 38 × #10-32 Assembly Screws
G. Mounting Template
H. 5 × 8×63mm Lag Bolts
I.
5 × 8.4×16×2mm Lag Bolt Washers
J.
38 × #10-32 Rack Screws
K. 4 × Zip Ties for part storage
L. 4 × Hook and Loop Strips
Key Features
• Stores and organizes EIA-standard 19"
rack equipment
• Maximum weight capacity 150lbs
• Expandable for 8U, 12U, or 22U
configuration
• Integrated wire management
Tools Required for Installation
• Power Drill
• 3/32" drill bit
• 1/2" (13mm) wrench
• level
• stud finder
• Phillips screwdriver
Advisory: The rack rails in this product can be used individually for an 8U installation or a 12U
installation, or they can be combined for a 22U installation. Ensure you use the proper
rack rails for your installation needs.
Warning: This product is designed to mount on a wood or sheet-rock wall.
A
B
D
E
C
1
Advertisement
Table of Contents

Related Manuals for Strong SR-WM-SK-19


Summary of Contents for Strong SR-WM-SK-19
- Page 1 SR-WM-SK-19 Wall-Mount Expandable Open-Frame Rack, 8–22U Package Contents A. 2 × Rack Frames B. 2 × 8U Rack Rails C. 2 × 12U Rack Rails D. 4 × Side Brace E. 2 × Tie Plate F. 38 × #10-32 Assembly Screws G.
- Page 2 Assembly: 8U Preparation Use a stud finder to find the nearest wall studs and mark their location. Align the template with the stud markings on the wall, level the template, and tape the template flat to the wall surface. Use the mounting template to mark the locations the of the four lag bolts (H) for the 8U configuration.
- Page 3 Step 5 Attach a side brace (D) to the two holes in the top rack frame (A) ‘ that are closest to the rear of the rack, securing it with two 10-32 assembly screws (F). Next, attach the side brace (D) to the holes near the bottom of the 8U rack rails (B)
- Page 4 Assembly: 12U Preparation Use a stud finder to find the nearest wall studs and mark their location. Align the template with the stud markings on the wall, level the template, and tape the template flat to the wall surface. Use the mounting template to mark the locations the of the four lag bolts (H) for the 12U configuration.
- Page 5 Step 5 Attach a side brace (D) to the ‘ two holes in the top rack frame (A) that are closest to the rear of the rack, securing it with two 10-32 assembly screws (F). Next, attach the side brace (D) to the lower ‘...
- Page 6 Assembly: 22U Preparation Use a stud finder to find the nearest wall studs and mark their location. Align the template with the stud markings on the wall, level the template, and tape the template flat to the wall surface. Use the mounting template to mark the locations the of the four lag bolts (H) for the 22U configuration.
- Page 7 Step 5 ‘ Secure each 22U rack rail (B+C+E) with two 10-32 assembly screws (F) as shown. See ’ Step 6 Attach a side brace (D) to the ’ ‘ two holes in the top rack frame (A) that are closest to the rear of the rack, securing it with two 10-32 assembly screws (F).
- Page 8 Snap One, LLC (formerly known as Wirepath Home Systems, LLC), in the United States and/or other countries. Control4, Strong, and Wirepath are also registered trademarks or trademarks of Snap One, LLC. Other names and brands may be claimed as the property of their respective owners. Snap One makes no claim that the information contained herein covers all installation scenarios and contingencies, or product use risks.
Need help?
Do you have a question about the SR-WM-SK-19 and is the answer not in the manual?
Questions and answers