Table of Contents
Advertisement
Quick Links
INSTALLATION INSTRUCTIONS FOR PART RFASWC
Wireless SWC universal add-on
US. PAT. NOS. 8014920 and 8214105
FEATURES
• Designed to be compatible with most major radio brands
• Auto detects radio being connected, and presets controls
• Ability to dual assign steering wheel control buttons
• Retains settings even after the battery has been disconnected
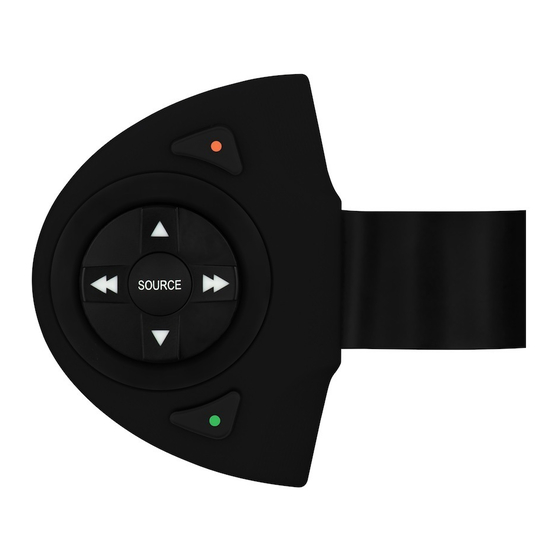
INTERFACE COMPONENTS
• A) RFASWC Transmitter • B) RFASWC interface • C) Keypad • D) Trim ring • E) RFASWC harness
• F) Female 3.5mm connector with Brown and Brown/White wires • G) 12k-ohm Resistor (not shown)
A
METRA. The World's best kits.™
RFASWC
B
C
E
F
1-800-221-0932
TOOLS REQUIRED
• Cutting tool • Crimping tool • Tape • Connectors
(example: butt-connectors, bell caps, etc.)
D
CAUTION: Metra recommends disconnecting the
negative battery terminal before beginning any
installation. All accessories, switches, and especially
air bag indicator lights must be plugged in before
reconnecting the battery or cycling the ignition.
NOTE: Refer to the instructions included with the
aftermarket radio.
metraonline.com
© COPYRIGHT 2004-2014 METRA ELECTRONICS CORPORATION
Advertisement
Table of Contents

Subscribe to Our Youtube Channel
Related Manuals for Axxess RFASWC


Summary of Contents for Axxess RFASWC
- Page 1 INSTALLATION INSTRUCTIONS FOR PART RFASWC RFASWC TOOLS REQUIRED • Cutting tool • Crimping tool • Tape • Connectors Wireless SWC universal add-on (example: butt-connectors, bell caps, etc.) US. PAT. NOS. 8014920 and 8214105 FEATURES • Designed to be compatible with most major radio brands • Auto detects radio being connected, and presets controls • Ability to dual assign steering wheel control buttons • Retains settings even after the battery has been disconnected INTERFACE COMPONENTS • A) RFASWC Transmitter • B) RFASWC interface • C) Keypad • D) Trim ring • E) RFASWC harness • F) Female 3.5mm connector with Brown and Brown/White wires • G) 12k-ohm Resistor (not shown) CAUTION: Metra recommends disconnecting the negative battery terminal before beginning any installation. All accessories, switches, and especially air bag indicator lights must be plugged in before reconnecting the battery or cycling the ignition.
-
Page 2: Table Of Contents
What you need to know before you begin 1) Be sure that the radio you are installing is steering wheel control compatible. Overview Additionally, refer to the Radio Legend and your radio’s installation manual. – Introduction to the RFASWC Interface and Wiring Harness ........2 2) Update the RFASWC to the latest software. – Mounting the RFASWC Transmitter ..............3 Note: To update the RFASWC, go to axxessinterfaces.com and download the RFASWC Installation WebXXpress Updater. – Connections to be Made ..................4 Overview Setting up the RFASWC ...................5 – Programming ......................5 Introduction to the RFASWC Interface and Wiring Harness – Remapping the SWC... -
Page 3: Mounting The Rfaswc Transmitter
RFASWC Overview Note: The reset button is recessed. An item, such as a partially unfolded paper clip, is needed to press the button. Mounting the RFASWC Transmitter (Figure A) (Figure C) 1) Place the button pad in the RFASWC with the Volume Up arrow (▲) in the location where you want it to be. (Figure A) 2) Snap the trim ring onto the RFASWC to secure the keypad in place. (Figure B) 3) Unscrew the strap cover from the RFASWC. 4) Install the RFASWC in the desired place on the steering wheel, wrapping the rubber strap around the steering wheel, and then through the slot. Hook it to the back side of the RFASWC to secure... -
Page 4: Rfaswc Installation
(normally Brown and Brown/Black) to the Brown and Brown/White wires Note: AX-SWC-PARROT is required (sold separately) and the radio must be of the RFASWC. The Brown of the RFASWC goes to the Brown/Black of the updated to rev. 2.1.4 or higher. Additionally, the RFASWC must be updated to the Eclipse and Brown/White of the RFASWC goes to the Brown of the Eclipse. most recent software available. b. For Metra OE radios: Connect the steering wheel control Key 1 wire (Gray) 3) For all other radios: Plug in the male 3.5mm connector of the RFASWC into the... -
Page 5: Setting Up The Rfaswc
4) Refer to the Button Assignment Legend to reference the order in which the 2) After a few of seconds, the LED should stop flashing rapidly, and go out for buttons need to be programmed. approximately 2 seconds. Note: If the next function on the list is not on the RFASWC press Volume Up 3) The LED will then flash up to 15 times, depending on what radio is for 1 second, until the LED comes on, and then release Volume Up. This will connected to it. -
Page 6: Button Assignment Legend
RFASWC Installation Remapping the SWC Buttons Changing Radio Type Button Assignment Legend 1) Refer to the Radio Legend to know which radio number you would like to have programmed. 1. Volume Up 10. Band 2. Volume Down 11. Play/Enter 2) After 3 seconds of turning the key on, press and hold Volume Down on the RFASWC until the LED on the RFASWC interface goes solid. 3. Seek Up/Next 12. PTT (Push to Talk)* 4. Seek Down/Previous 13. On-Hook 3) Release Volume Down and the LED will go off, indicating that you are in the Changing Radio Type mode. 5. Mode/Source 14. Off-Hook 6. Mute 15. Fan Up 4) Press and hold Volume Up until the LED goes solid, then release. Repeat this step for the desired radio number you have selected. 7. Preset Up 16. Fan Down 8. Preset Down 17. Temp Up 5) Once the desired radio number has been selected, press and release Volume 9. Power... -
Page 7: Radio Legend
Tip: These steps must be repeated for each button you would like to assign dual purpose action to. Note: If you have a Clarion radio and the RFASWC did not work try the other Clarion radio type, same for the Eclipse To reset a button back to its original use, repeat Step 1 and then press Volume Down. The LED will go off and the long press mapping for the button will be erased. -
Page 8: Dual Assignment Legend
Not allowed Attention: Due to the nature of how microprocessors function, sometimes Not allowed having the ground on the RFASWC shared with the radio, and/or using the Seek Up/Next factory ground in the vehicles wiring harness is not sufficient; and will cause Seek Down/Prev problems. -
Page 9: Led Feedback
If you have one of these radios, ensure the sensor is on the rear 5. JVC 12. Eclipse (Type 2) setting. If the setting is on the rear, turn it to the front, then back to the rear. 6. Pioneer and Jensen 13. LG 7) For Pioneer and Sony radios, if the RFASWC works, but the buttons are out of order, or become out of order; this could be caused by the 3.5mm jack on the 7. Alpine 14. Parrot RFASWC not seating properly, slipping out, or dirt on the contacts. Additionally, 15. XITE sometimes this can be intermittent. Remove any dirt on the contacts, reinsert... - Page 10 RFASWC Notes...
- Page 11 RFASWC Notes...
- Page 12 INSTALLATION INSTRUCTIONS FOR PART RFASWC IMPORTANT WARNING This product includes instructions for installation which must be carefully followed. The instructions are worded in such a manner to assume that the installer is capable of completing these type of electronic installations. If you are unclear as to what you are instructed to do or believe that you do not understand the instructions so as to properly and safely complete the installation you should consult a technician who does have this knowledge and understanding. Failure to follow these instructions carefully and to install the interface as described could cause harm to the vehicle or to safety systems on the vehicle.
Need help?
Do you have a question about the RFASWC and is the answer not in the manual?
Questions and answers