Table of Contents
Advertisement
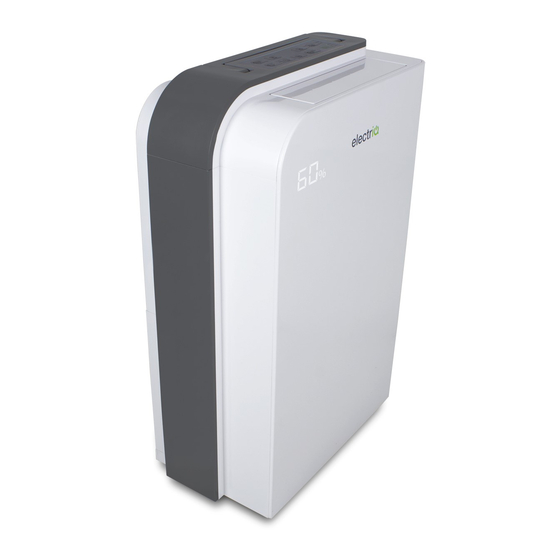
Premium Low Energy Dehumidifier &
Air Purifier with UV and Plasma Ioniser
Smart WIFI App and Remote Controlled
CD25PRO-LE - 25 litres per day
USER MANUAL
Thank you for choosing ElectriQ
Please read this user manual before using this innovative Dehumidifier
and keep it safe for future reference
Visit our page www.electriQ.co.uk for our entire range of Intelligent Electricals
Advertisement
Table of Contents

Related Manuals for ElectrIQ CD25PRO-LE


Summary of Contents for ElectrIQ CD25PRO-LE
- Page 1 CD25PRO-LE - 25 litres per day USER MANUAL Thank you for choosing ElectriQ Please read this user manual before using this innovative Dehumidifier and keep it safe for future reference Visit our page www.electriQ.co.uk for our entire range of Intelligent Electricals...
-
Page 2: Table Of Contents
CONTENTS Safety Instructions Installation Parts Control Panel Quick reference guide Remote Control Features How to Connect to WiFi Positioning Water Drainage Care and Maintenance Frequently Asked Questions Troubleshooting Technical Data... -
Page 3: Safety Instructions
SAFETY INSTRUCTIONS Important Carefully read the instructions before operating the unit. This appliance is only intended for use in an indoor domestic environment. Any other use is not recommended by the manufacturer and may cause fire, electrical shocks or other injury to user or property. Rating: This unit must be connected to a 220-240 V / 50 Hz earthed outlet. - Page 4 Do not place the unit next to heat sources (e.g. electrical fires, fireplaces, etc.) Avoid mishandling the dehumidifier. Dropping or throwing the unit can cause damage to its internals and increases the risks of operating it. Do not store or use gasoline, petrol, paint, solvents or other flammable vapours or liquids in the vicinity of this dehumidifier or any other appliance.
-
Page 5: Installation
They are easy to move around on castors. With their intelligent logic they are designed to remove unwanted humidity while minimising operating costs. The CD25PRO-LE feature an intelligent humidistat which is adjustable in increments of 5% from 35-80% RH giving you the ability to ensure your room is not dried too much and power is not wasted. -
Page 6: Parts
PARTS Handle Air outlet Louvres Castors Power cord Control Panel Pre-filter/activated Carbon filter (Optional) Continuous Drain Port Water tank... - Page 7 ACCESSORIES Activated carbon filter (Optional) HEPA FILTER 6 stage dual action dehumidifier and purifier great in improving indoor air quality Clean dry air Polluted Humid Ioniser Antibacterial HEPA Activated Dehumidifier filter filter Carbon filter UV light...
-
Page 8: Control Panel
CONTROL PANEL Child Lock Down Mode Timer Oscillation Ionizer Power POWER Button Turns the appliance on and off. MODE Button Select the mode of the unit between: SMART / HIGH / LOW / and FAN. The unit will default to SMART mode the first time it is switched on and remains in this mode until another option is chosen. - Page 9 OSC. Button (oscillating function) There are three different options, 45, 90 degree and swing, the louvers will move in swing mode or be fixed in selected position. Use 45 degree or swing when using the Laundry mode. UV Light Button ( For air purification) To select "UV", press the "UV"...
- Page 10 Humidity Level & Timer 2 digit display The led indicator performs the following functions: When the unit is plugged in - It will indicate the room humidity level When one of the humidity setting button is pressed - it will indicate the set humidity, before reverting to showing the current humidity after a few seconds When the timer button is pressed it will indicate in how many hours the timer function will operate, before reverting to showing the current humidity after a...
-
Page 11: Quick Reference Guide
QUICK REFERENCE GUIDE Power Button Press the power button to turn the dehumidifier on and off. Swing control Button Press once to make the louvres swing and press again to lock at 45 degrees, press again to lock at 90 degrees. Do not operate the unit if the self- opening louvers do not open when the unit is powered on. - Page 12 Please Note: If a permanent drainage pipe is fitted, the unit will not stop operation. Setting the desired humidity to around 35% is good for a drying boost, on the units initial run, or in emergencies. It is not recommended to use it with these settings for normal operation in domestic/ office environment over a long period of time, as the air may become uncomfortably dry.
- Page 13 Other features and Indicators Tank Full Light The red light will illuminate and the unit will beep when the tank is ready to be emptied, or if the water tank is incorrectly inserted. The water level control will shut off the dehumidifier until the empty tank is replaced in its proper position Auto Defrost The appliance will defrost automatically as programmed once the coil sensor detects...
-
Page 14: Remote Control Features
REMOTE CONTROL FEATURES Display Auto Laundry (HIGH) Strong Dehumidification Display (LOW) Weak Dehumidification Timer (FAN) Ventilation UV light louver swing Ioniser angle DISPLAY Mode ON/OFF As well as containing an independent humidistat, allowing the humidity of the room to be measured away from the dehumidifier, the remote control contains many of the same buttons as found on the main unit, as well as a few other features. - Page 15 Buttons on the Remote: ON/OFF Button – Turns the dehumidifier on and off. Mode Button - Select the functions of the unit between: SMART / LAUNDRY / HIGH / LOW / and FAN. The mode selected will be displayed on the left hand side of the screen on the remote.
-
Page 16: How To Connect To Wifi
Other Features on the remote: Room temperature / humidity display – Your smart remote includes an inbuilt humidistat, allowing the humidity of the area to be measured from the remote. The humidity reading shown on the remote is the one measured by the remote, rather than transmitted from the dehumidifier. -
Page 17: Positioning
When positioning your electriQ dehumidifier, ensure that it is placed clear of any obstacle that may limit the air movement, and it should be placed on a dry flat surface. - Page 18 NOTES: Do not remove the water tank immediately after the unit stops. Please wait a while to avoid the water dripping into the unit and causing damage. Only empty the water tank when it is full or before moving or storing the unit. Do not rest the tank on the floor because the bottom of the tank could be uneven and tank may fall and cause the water to spill.
-
Page 19: Care And Maintenance
This unit uses gravity fall to dispose water hence the drain should be lower than the dehumidifier water outlet. Be sure to run the water pipe downward and let the water flow out smoothly. Do not kink or bend the pipe. NOTE: When the continuous drain feature is not being used, reverse the pipe installation, to start the water collecting in the water tank. -
Page 20: Frequently Asked Questions
Clean the water tank Every few weeks, clean the tank to prevent growth of mould, mildew and bacteria. Partially fill the tank with clean water and add a little mild detergent. Swish it around and than empty the tank and rinse. NOTE: Do not use a dishwasher to clean the tank. After cleaning and drying the tank must be reinserted securely into dehumidifier in order to restart operation. -
Page 21: Troubleshooting
Tank is full or is not in the right position-- Empty the tank and Red light notification replace in the right position. Any other malfunctions will need to be reported to ElectrIQ service centre. Do not attempt unauthorised repairs as these may invalidate the warranty. -
Page 22: Technical Data
TECHNICAL DATA CD25PRO-LE Model Voltage 1Ph, 220-240V~ 50Hz Dehumidifying capacity 25L/Day (30 C RH80%) 13L/Day (26.7 C RH60%) Fan Speeds Power Consumption 340W Running Amps 1.51 Amps Tank Capacity 5 litres Humidity settings range 35%~80% IP RATING IPX1 Refrigeran R134a, 230 grams... - Page 23 ElectrIQ UK SUPPORT www.ElectrIQ.co.uk/support Please, for your own convenience, make these simple checks before calling the service line. 1. Has the unit been standing upright for at least 2 hours? 2. Is the unit plugged into the mains? 3. Is the fuse OK? 4.
Need help?
Do you have a question about the CD25PRO-LE and is the answer not in the manual?
Questions and answers