Table of Contents
Advertisement
Quick Links
INSTALLATION & USER INSTRUCTIONS
FLOOR MOUNTED ELECTRIC FIRE
Focal Point Fires Ltd
Fo
Christchurch, Dorset BH23 2BT
Tel: 01202 49933499330
Fax: 01202 499326
www.focalpointfires.co.uk
e : sales@focalpointfires.co.uk
Focal Point Fires Ltd
RBK House, Irishtown, Athlone,
Co. Westmeath, N37 XP52,
Ireland Tel: 01202 499330
Fax: 01202 499326
www.focalpointfires.co.uk
e: sales@focalpointfires.co.uk
This product is only suitable for well insulated spaces or
occasional use.
Please note: Except where otherwise stated, all rights,
including copyright in the text, images and layout of this
booklet is owned by Focal Point Fires Ltd. You are not
permitted to copy or adapt any of the content without
the prior written permission of Focal Point Fires Ltd.
MODELS COVERED BY THESE INSTRUCTIONS
AMERSHAM LED ELECTRIC SUITE
CALBOURNE LED ELECTRIC SUITE
EASTON LED ELECTRIC SUITE
HORSHAM LED ELECTRIC SUITE
TED2401E
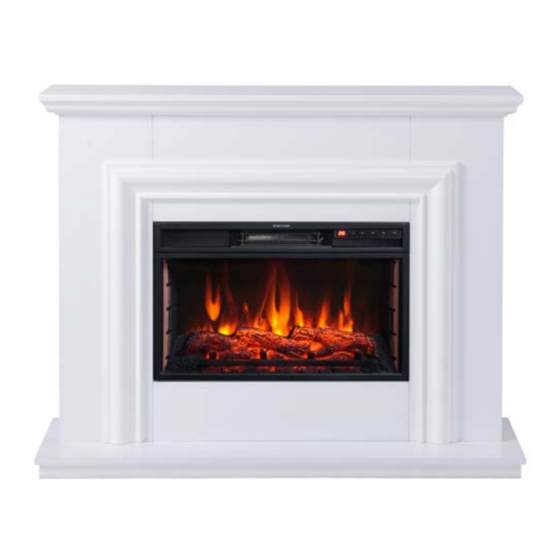
MODEL SHOWN: AMERSHAM LED ELECTRIC SUITE
All instructions must be handed to the user for
Revision I - 04/21
1
GB IE
safekeeping.
©
2021 Focal Point Fires Ltd.
Advertisement
Table of Contents


Need help?
Do you have a question about the AMERSHAM LED ELECTRIC SUITE and is the answer not in the manual?
Questions and answers