Table of Contents
Advertisement
Quick Links
AIG-501-T-AZU-LX
Quick Installation Guide
Advanced IIoT gateway with Intel Atom® quad-core 1.91 GHz processor, 1
VGA port, 4 DIs, 4 DOs, ThingsPro Edge and Azure IoT Edge software, -40
to 70°C operating temperature
Version 1.0, January 2022
Technical Support Contact Information
www.moxa.com/support
2022 Moxa Inc. All rights reserved.
P/N: 1802005010020
*1802005010020*
Advertisement
Table of Contents

Related Manuals for Moxa Technologies AIG-501-T-AZU-LX


Summary of Contents for Moxa Technologies AIG-501-T-AZU-LX
- Page 1 AIG-501-T-AZU-LX Quick Installation Guide Advanced IIoT gateway with Intel Atom® quad-core 1.91 GHz processor, 1 VGA port, 4 DIs, 4 DOs, ThingsPro Edge and Azure IoT Edge software, -40 to 70°C operating temperature Version 1.0, January 2022 Technical Support Contact Information www.moxa.com/support...
-
Page 2: Package Checklist
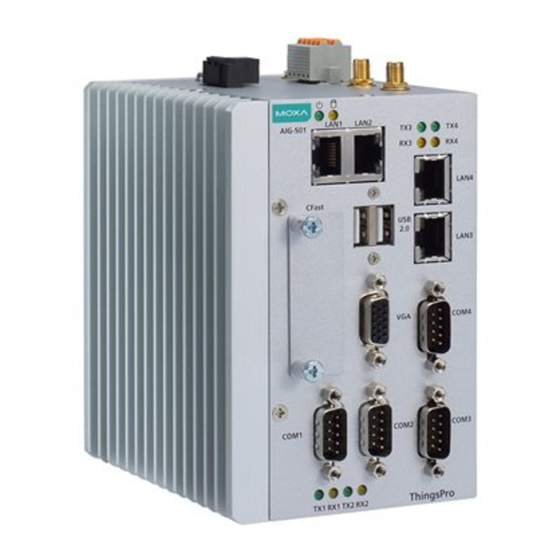
They must be purchased separately as needed. Notify your sales representative if any of the above items are missing or damaged. Panel Views The following figures show the panel layouts of the AIG-501-T-AZU-LX. Top Panel Bottom Panel Front Panel... -
Page 3: Led Indicators
501-T-AZU-LX’s rear panel and tighten the screws to secure the bracket. STEP 2: Insert the upper lip of the DIN rail into the DIN-rail mounting kit. STEP 3: Press the AIG-501-T-AZU-LX towards the DIN rail until it snaps into place. - 3 -... -
Page 4: Wiring Requirements
Follow these steps to mount the device on to a wall. STEP 1: Attach the wall-mounting brackets to the rear side of the AIG-501-T-AZU-LX by using two screws per bracket. STEP 2: Use four screws per side on the wall-mounting bracket to attach the AIG-501-T-AZU-LX to a wall or cabinet. -
Page 5: Grounding Requirements
NOTE Do not run signal or communication wiring and power wiring in the same wire conduit. To avoid interference, wires with different signal characteristics should be routed separately. Grounding Requirements There is a grounding connector on the top panel of the device. Use this connector to connect a well-grounded mounting surface, such as a metal panel. -
Page 6: Communication Connections
DI Dry Contact DO Channel (Sink Type) Connecting to a USB Device The AIG-501-T-AZU-LX has one USB port with the type-A connector, allowing users to connect to a device with an USB interface. Communication Connections Connecting to the Network The Ethernet ports are located on the front panel of the device. The pin assignments are shown in the following figure. -
Page 7: Connecting The Device To A Pc
Wi-Fi module for the device. Connecting the Device to a PC You can use a PC to access the AIG-501-T-AZU-LX by one of the following methods: A. Access the web console of ThingsPro Edge via LAN 2 using https://192.168.4.127:8443/... -
Page 8: Troubleshooting
Troubleshooting Reboot To reboot the device, refer to the ThingsPro Edge user’s manual on how to run the Reboot function. No hardware button is available for rebooting the device. Reset to Default Refer to the ThingsPro Edge user manual on how to run Reset-to- default function.
Need help?
Do you have a question about the AIG-501-T-AZU-LX and is the answer not in the manual?
Questions and answers