
Subscribe to Our Youtube Channel
Related Manuals for MSA HUB


Summary of Contents for MSA HUB
- Page 1 Operating Manual MSA HUB SCBA Telemetry Version Order No.: 10204590/02 MSAsafety.com...
- Page 2 The Declaration of Conformity can be found under the following link: https://MSAsafety.com/DoC. MSA is a registered trademark of MSA Technology, LLC in the US, Europe and other Countries. For all other trademarks visit https://us.msasafety.com/Trademarks. This product incorporates Bluetooth® wireless technology. The Bluetooth word mark and logos are registered trademarks owned by Bluetooth SIG, Inc., and any use of such marks by MSA is under license.
-
Page 3: Table Of Contents
2.2.2 MSA HUB Fireservice Standard Assembly and Installation Assembly 3.1.1 MSA HUB Fireservice for Truck Installation with Wall Brackets 3.1.2 MSA HUB Fireservice for Truck Installation without Wall Brackets 3.1.3 MSA HUB Fireservice Standard Antenna Installation (for Truck Installation only) 3.2.1 Multi Antenna... -
Page 4: Safety Regulations
Correct Use The MSA HUB – hereafter referred to as device – is an industrial router that wirelessly connects MSA devices to the Internet or intranet. It is a stand-alone device with Long Range Radio (LRR) connectivity and a gateway connection that connects local MSA networks with MSA Cloud Services. -
Page 5: Description
Main power cable (5 m / 16.4 ft) • Additional power cable (25 m / 82 ft) • LRR antenna • Quick Start Guide: Standard Version The A2 Software can be downloaded via the MSA Software Product website at www.MSAsafety.com. MSA HUB... -
Page 6: Overview
A SIM card holder is included inside the housing lid. When the device is installed and configured, it can connect MSA devices to the Internet or intranet and transfer data. The status LEDs show the respective connection status. -
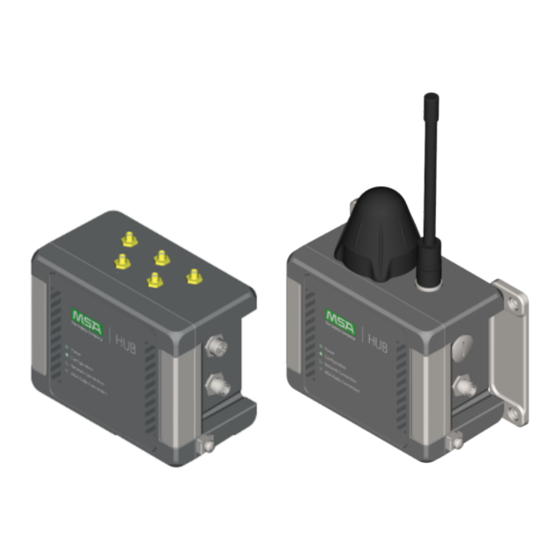
Page 7: Msa Hub Fireservice Standard
(Part Number 10195741). A SIM card holder is included inside the housing lid. When the device is installed and configured, it can connect MSA devices to the Internet or intranet and transfer data. The status LEDs show the respective connection status. -
Page 8: Assembly And Installation
• all empty panel connectors must be sealed with sealing plugs Assembly 3.1.1 MSA HUB Fireservice for Truck Installation with Wall Brackets (1) Open housing by opening the right joints and unscrew the lid screws using a Torx T20. MSA HUB... - Page 9 When installing the device on a solid plain surface, use four appropriate screws and apply a torque of 5 Nm (3 ft-lbf). (5) Close housing lid by tightening the lid screws with a torque of 1.5 Nm (1 ft-lbf). (6) Close right joints. MSA HUB...
-
Page 10: Msa Hub Fireservice For Truck Installation Without Wall Brackets
(9) Plug in power plug and screw union nut with a torque of 1.2 - 1.5 Nm (0.9 - 1 ft- lbf) using a wrench SW14. The device is assembled. 3.1.2 MSA HUB Fireservice for Truck Installation without Wall Brackets (1) Open housing by opening the right joints and unscrew the lid screws using a Torx T20. - Page 11 (7) If needed, plug in and screw Ethernet plug with a torque of 0.4 Nm (0.3 ft-lbf). (8) Plug in power plug and screw union nut with a torque of 1.2 - 1.5 Nm (0.9 - 1 ft- lbf) using a wrench SW14. The device is assembled. MSA HUB...
-
Page 12: Msa Hub Fireservice Standard
3 Assembly and Installation 3.1.3 MSA HUB Fireservice Standard (1) Hand-screw LRR antenna. (2) Open housing by opening the right joints and removing the lid screws. (3) Optional: Insert SIM card. Place the SIM card into the SIM card holder. - Page 13 (6) Close housing lid by tightening the lid screws with a torque of 1.5 Nm (1 ft-lbf). (7) Close right joins. (8) Optional: Loosen grounding clamp. a) Insert grounding cable and re-tighten grounding clamp with a torque of 2 Nm (1.5 ft-lbf). MSA HUB...
-
Page 14: Antenna Installation (For Truck Installation Only)
NOTE: Keep at least 20 cm (8 in) distance between the antennas and from other metal parts. (2) Clean the relevant surface on the roof from any dirt and dust. 3.2.1 Multi Antenna (1) Remove lock nut, spring lock washer and flat washer. MSA HUB... -
Page 15: Lrr Antenna
(5) Re-attach flat washer, spring lock washer and lock nut. (6) Screw lock nut with a torque of 50 Nm (36 ft-lbf). (7) Attach antenna cables to the relevant MSA HUB antenna connections. NOTE: GPS connection is for future use. Label... - Page 16 (5) Re-attach flat washer, tooth lock washer and lock nut. (6) Screw lock nut with a torque of 10 Nm (7 ft-lbf). (7) Attach the antenna cable to the LRR connection on the MSA HUB. The LRR antenna is installed. MSA HUB...
-
Page 17: Ethernet Kit Installation (Msa Hub Fireservice Standard Only)
3 Assembly and Installation Ethernet Kit Installation (MSA HUB Fireservice Standard only) (1) Remove the sealing plug. (2) Open housing by opening the right joints and removing the lid screws. (3) Unscrew the four cover panel screws. (4) Remove cover panel. - Page 18 (8) Tighten lower nut with a torque of 0.4 Nm (0.3 ft-lbf). The cable is fixed within the cable gland. (9) Close housing lid by tightening the lid screws with a torque of 1.5 Nm (1 ft- lbf). (10) Close right joins. The Ethernet connector is installed. MSA HUB...
-
Page 19: Connectivity
Connectivity functionality (including monitoring, configuration, and registration) is provided through A2 Software. Refer to the A2 Software Manual on the Software Product website at www.MSAsafety.com. Upon the initial setup, connect the HUB provided network that is active by default. The default connection settings are found on the HUB type label. - Page 20 4 Connectivity For additional information regarding connectivity functionality (including monitoring, configuration, and registration), refer to the A2 Software Manual on the Software Product website at www.MSAsafety.com. MSA HUB...
-
Page 21: Operation
Update process Flashing in repeat The device is loading and installing a software update. Firmware Update Regularly check for new updates by using the A2 Software. Refer to the A2 Software Operating Manual on the MSA Software Product website at www.MSAsafety.com. MSA HUB... -
Page 22: Error Cases
LEDs blinking Error, Unpower the device for 30 seconds and power it again. (1 + 2 + 3 + 4) Device stops working If the error persists, please contact MSA Customer Support. Network Connection Connection interrupted Check internet connection. LED off (Important for users with Safety io FireGrid If the error persists, restart the device. - Page 23 Table 2 : Factory Reset Parameters Parameters Value Default Ethernet dhcp true disabled false Hostname ccimx6sbc WLAN configuration Client Hotspot Hotspot disabled WiFi client configuration previous connections to WLAN networks are deleted WiFi hotspot configuration ssid MSA HUB <serial number> <random on name plate> MSA HUB...
-
Page 24: Decommission And Disposal
NOTICE Do not carry the device by holding the antennas or cables. Otherwise, device parts can be damaged. 6.1.1 MSA HUB Fireservice for Truck Installation with Wall Brackets (1) Unplug the power plug and remove Ethernet cable, if present. (2) Remove antenna cables. -
Page 25: Msa Hub Fireservice For Truck Installation Without Wall Brackets
(8) Remove the four screws and the wall brackets at the back of the housing. (9) Close housing lid. (10) Close right joints. 6.1.2 MSA HUB Fireservice for Truck Installation without Wall Brackets (1) Unplug the power plug and remove Ethernet cable, if present. MSA HUB... - Page 26 (3) If a grounding terminal is used, loosen grounding clamp and remove grounding cable. (4) Reattach grounding clamp. (5) Open housing by opening the right joints and unscrew the lid screws using a Torx T20. (6) Remove the screws from the surface. (7) Take the device off the installed place. MSA HUB...
-
Page 27: Msa Hub Fireservice Standard With Wall Brackets
(9) Close right joints. The device is decommissioned. 6.1.3 MSA HUB Fireservice Standard with Wall Brackets (1) Unplug the power plug and remove Ethernet cable, if present. (2) If a grounding terminal is used, loosen grounding clamp and remove grounding cable. -
Page 28: Msa Hub Fireservice Standard Without Wall Brackets
(7) Remove the four screws and the wall brackets at the back of the housing. (8) Close housing lid. (9) Close right joints. 6.1.4 MSA HUB Fireservice Standard without Wall Brackets (1) Unplug the power plug and remove Ethernet cable, if present. MSA HUB... -
Page 29: Disposal
(5) Remove the screws from the surface. (6) Take the device off the installed place. (7) Close housing lid. (8) Close right joints. The device is decommissioned. Disposal For disposal of the device and batteries, local regulations are to be observed. MSA HUB... -
Page 30: Maintenance
Repair or alteration of the device beyond the procedures described in this manual or by anyone other than a person authorized by MSA could cause the unit to fail to perform properly. Use only genuine MSA replacement parts when performing any maintenance procedures described in this manual. Substitution of components can seriously impair performance of the unit or void agency approvals. -
Page 31: Certification
8 Certification Certification The Declaration of Conformity can be found under the following link: https://MSAsafety.com/DoC. MSA HUB... -
Page 32: Technical Data
Truck Installation: (without radio antenna and wall mount kit) MSA HUB Fireservice Standard: 174 mm x 92 mm x 190 mm (without radio antenna and wall mount kit) Weight MSA HUB Fireservice for Truck 1,27 kg Installation: MSA HUB Fireservice Standard: 1,46 kg Ambient temperature range -20 °C to +60 °C... -
Page 33: Ordering Information
10.2 Accessories Description Part Number Ethernet Kit (MSA HUB Fireservice Standard) 10195741 Ethernet Cable 20 m / 66 ft (MSA HUB Fireservice for Truck Installation) 10195743 Ethernet Cable 5 m / 16.4 ft (MSA HUB Fireservice for Truck Installation) 10195747 Wall brackets (all) - Page 34 For local MSA contacts, please visit us at MSAsafety.com...
Need help?
Do you have a question about the HUB and is the answer not in the manual?
Questions and answers