Table of Contents
Advertisement
Quick Links
1 About this user manual ................................................................................................................................................... 4
Symbols and Information ...................................................................................................................................................... 5
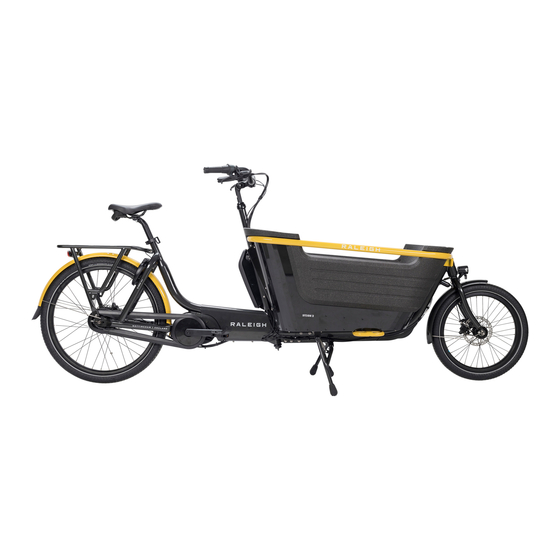
Technical specification Raleigh Stride 2 .......................................................................................................................... 7
Technical specifications Raleigh Stride 3 ..................................................... Fout! Bladwijzer niet gedefinieerd.
Highlights ................................................................................................................. Fout! Bladwijzer niet gedefinieerd.
1.1 Proper use ............................................................................................................................................................................ 7
1.2 Maximum permissible total weight ........................................................................................................................... 8
1.3 Seating position ................................................................................................................................................................. 8
1.4 Wear and tear ..................................................................................................................................................................... 8
especially when transporting children. ........................................................................................................................ 10
2.1 Instructions for safe use .............................................................................................................................................. 10
2.2 General safety instructions ......................................................................................................................................... 12
2.3 Safety instructions on the charging device.......................................................................................................... 12
2.4 Safety instructions on the battery ........................................................................................................................... 12
2.5 Safety in road traffic ...................................................................................................................................................... 13
2.6 Transporting children in the cargo box ................................................................................................................. 14
2.7 Transporting new-borns and toddlers in the cargo box ................................................................................ 14
2.8 Replacing bike components ...................................................................................................................................... 15
2.9 Misuse of cargo bikes ................................................................................................................................................... 15
2.10 Fastening and opening the three-point belt .................................................................................................... 16
3 Basic settings .................................................................................................................................................................... 17
3.1 Before making your first journey ............................................................................................................................. 17
3.2 To be checked before every journey ...................................................................................................................... 17
3.3 Adjusting the seating position .................................................................................................................................. 18
3.4 Adjusting the seat height ............................................................................................................................................ 18
3.5 Minimum insertion seat tube .................................................................................................................................... 19
3.6 Adjusting the seat position ........................................................................................................................................ 20
3.7 Replacing components ................................................................................................................................................ 21
4 The Raleigh Stride Cargo Box: Cleaning and Maintenance ................................................................................ 22
5 Basic characteristics and components ...................................................................................................................... 22
5.1 Tuning or manipulations ............................................................................................................................................. 23
5.2 Electrical drive system .................................................................................................................................................. 23
Advertisement
Table of Contents

Subscribe to Our Youtube Channel
Related Manuals for Raleigh Stride 2


Summary of Contents for Raleigh Stride 2
-
Page 1: Table Of Contents
1.3 Seating position ................................. 8 1.4 Wear and tear ..................................8 2 Safety Warning: In general, always be aware and careful while using your Raleigh Stride cargo bike, especially when transporting children......................... 10 2.1 Instructions for safe use .............................. 10 2.2 General safety instructions ............................ - Page 2 5.2.1 Cycling with electrical pedal assistance ......................23 5.3 Bosch Purion ..................................24 5.3.1 Switching the drive system on and off ....................24 5.3.2 Setting the assistance level ..........................26 5.3.3 Switching bike lights on/off ..........................26 5.3.4 Switching the push walking assistance on/off ..................27 5.3.5 Battery charge indicator .............................
- Page 3 12 Using the Prop stand or Parking Brake ........................44 12.1 Using the prop stand with the Raleigh Stride 2 two-wheel cargo bike ..........44 12.2 Using the parking brake with the Raleigh Stride 3 three-wheel cargo bike ........44 13 Storage, cleaning and disposal ..........................
-
Page 4: About This User Manual
Notice: Your cargo bike can deviate from some of the images shown in this manual. 1 About this user manual This user manual provides information about both the Raleigh Stride 2- and 3-wheel cargo bikes. This user manual provides important information about the settings and usage of the cargo bikes. -
Page 5: Symbols And Information
Symbols and Information Clarification of the symbols and information found on the cargo bikes: Electric pedal support to a maximum speed of 25 Max. speed km/hr Power 0,25 kW output EPAC acc. to This e-cargo bike meets the DIN 15194 standard DIN 15194 for Electric Pedal Assisted Cycles DIN 97010:... - Page 6 Max. speed Electric pedal support to a maximum speed of 25 km/hr Power 0,25 kW output EPAC acc. to This e-cargo bike meets the DIN 15194 standard DIN 15194 for Electric Pedal Assisted Cycles DIN 97010: This e-cargo bike meets DIN 97010 version 2020 2020 standard for cargo bikes This e-cargo bike is classified as 2Ce...
-
Page 7: Technical Specification Raleigh Stride 2
1.1 Proper use Raleigh, as a company, or Raleigh Stride dealers accept no responsibility for damage which has arisen through improper use. Only use the cargo bike as described in this user manual. Any other use is deemed to be improper and can lead to accidents, serious injury and damage to the cargo bike. -
Page 8: Maximum Permissible Total Weight
● Maximum permissible total weight: Raleigh Stride 2: 550 lbs (Including the rider and the weight of the cargo bike itself.) Raleigh Stride 3: 660 lbs (Including the rider and the weight of the cargo bike itself.) ●... - Page 9 material fatigue or heavy rust) show that the service life of the components has expired. Worn components must be replaced.
-
Page 10: Safety Warning: In General, Always Be Aware And Careful While Using Your Raleigh Stride Cargo Bike, Especially When Transporting Children
It is also recommended to make a trial emergency stop. Riding a Stride 2 two-wheel cargo bike has similarities to riding on a regular bike. The steering motion is practically the same, although the front wheel is further in front. - Page 11 ● When riding always ensure that the cargo bike is stable. ● Do not allow children to play with the cargo bike. ● If you do not possess the necessary knowledge and the required tools to make adjustment and repairs, have them carried out by a Raleigh Stride dealer.
-
Page 12: General Safety Instructions
● Always keep the battery away from the vicinity of fire and heat. ● After a fall or impact, have the battery checked by a Raleigh Stride dealer. Do no open, dismantle, drill through, or deform the battery or the battery housing. Lithium... -
Page 13: Safety In Road Traffic
which is emitted from a damaged battery may damage the skin or eyes. ● Only touch damaged batteries with protective gloves. Incorrect use may cause the battery to become damaged. ● Do not charge the battery if it might be damaged. ●... -
Page 14: Transporting Children In The Cargo Box
● Only lift children into the transport box or only allow children to enter the transport box if the cargo bike is secured against rolling away. ● Park the Raleigh Stride 2 cargo bike on the prop stand and the Raleigh Stride 3 using the parking brake. -
Page 15: Replacing Bike Components
● Before each journey, check the function of the safety-related components such as the brakes. ● Have the cargo bike checked for damage by a Raleigh Stride dealer after a fall or an accident. 2.9 Misuse of cargo bikes Do not misuse your Raleigh Stride in the following ways: ●... -
Page 16: Fastening And Opening The Three-Point Belt
Warning: The guarantee will be cancelled due to improper use of your Raleigh Stride. Follow the safety instructions. 2.10 Fastening and opening the three-point belt We strongly recommend using the three-point safety belts for transporting children. By default, two three-point belts are installed inside the box of your Raleigh Stride. -
Page 17: Basic Settings
3.1 Before making your first journey Your Raleigh Stride dealer will have fully assembled and set up your cargo bike. Your cargo bike is therefore ready to ride. Learn the important functions of the cargo bike prior to your first journey. -
Page 18: Adjusting The Seating Position
An incorrect seating position may mean that you can only reach the control elements on the handlebar to a limited extent. The seating position can be adjusted correctly by a Raleigh Stride dealer. Significant features of a suitable seating position are: ●... -
Page 19: Minimum Insertion Seat Tube
Opening and locking the quick release Swing the quick-release lever outward. Adjust the seat tube to the desired height. Note the instructions for the minimum insertion depth on page 23. Rotate the quick release lever inward until it is against the seat tube in order to close the seat tube clamp. -
Page 20: Adjusting The Seat Position
Take note of the minimum insertion depth of the seat tube. When adjusting the seat height, note that the marking (1) on the seat tube is not visible. 3.6 Adjusting the seat position In order to achieve a suitable seating position you can adjust the seat inclination on your cargo bike and the distance to the handlebar. -
Page 21: Replacing Components
● The stem and the handlebar ● The pedal cranks If it is not possible to adjust the seating position, you can have components with different measurements, or you might look for alternative components with different specifications, installed by a Raleigh Stride dealer. -
Page 22: The Raleigh Stride Cargo Box: Cleaning And Maintenance
4 The Raleigh Stride Cargo Box: Cleaning and Maintenance The Raleigh Stride cargo box constitutes the main difference between a cargo bike and an ordinary bike. In order to protect the children and luggage, Raleigh recommends using a rain tent, a rain cover and/or a box cover. On the floor of the box two aluminium rails are fixed onto which the bench is mounted. -
Page 23: Tuning Or Manipulations
5.2.1 Cycling with electrical pedal assistance We recommend that you first try out the Raleigh Stride cargo bike in a quiet environment and without children. This way you can get used to your Raleigh Stride. ● Only switch on the pedal assistance when you feel safe and secure. -
Page 24: Bosch Purion
This is due to the weight of the electric components. ● Never walk with the pedal assistance switched on, as the Raleigh Stride cargo bike can suddenly accelerate if you accidentally bump into the pedals. ● If you still want to switch on the pedal assistance while walking, use the walk-assist function. - Page 25 25 km/h or 15.5 mph, the Raleigh Stride drive switches off the assistance. The drive is automatically reactivated as soon you start pedalling again and the speed is below 25...
-
Page 26: Setting The Assistance Level
Switching the bike light on and off has no effect on the back lighting of the display. The front of the box of your Raleigh Stride is equipped with LED-light. This is an extra LED-light, which is switched on automatically when the front light is... -
Page 27: Switching The Push Walking Assistance On/Off
(at full power). The push walking assistance function must only be used when pushing the Raleigh Stride. There is a risk of injury if the wheels of the Raleigh Stride are not in contact with the ground while using the push walking assistance. To activate the push walking assistance, briefly press the walk button (2) on your onboard computer. -
Page 28: Instructions For Using The Battery
If your Raleigh Stride is powered by two batteries, the battery charge indicator displays the state of charge of both batteries. Note: The indicator and LEDs give an indication, not an exact percentage. 5.4 Instructions for using the battery By default, your Raleigh Stride is equipped with one Bosch battery. -
Page 29: Charging Procedure Dual Battery
To insert the standard battery, place it onto the contacts on the lower holder on the Raleigh Stride (the battery can be titled towards the frame by up to 7°). Tilt it into the upper holder as far as possible until you hear it click into place. -
Page 30: Range
25 km/h or 15.5 mph, do not use the cargo bike until the electrical drive system has cooled down. If the malfunction is not rectified through the electrical drive system cooling down, have the cargo bike checked by a Raleigh Stride dealer. -
Page 31: Transporting Or Shipping The Battery
Seek information about transporting the battery and suitable transport packaging, e.g., directly from the transport company, from Raleigh Stride customer service or from your Raleigh Stride dealer. If you are transporting the cargo bike, remove the battery and transport it separately and secure it against knocks and impact. -
Page 32: Residual Risks
Charge the on-board computer (in the holder or via Internal battery of the the USB port) or by changing the battery in case of onboard computer is flat the Purion display. Restart the system. If the problem persists, contact Speed sensor error your Raleigh Stride dealer. -
Page 33: Brakes
● Only replace brake components with original spare parts. ● Raleigh Stride is equipped with two disk brakes which take independent effect on the front wheel and the rear wheel. Over a short braking distance, brake evenly with both brakes. -
Page 34: Brake Lever Assignment
4. Check the extent of the wear to the brake pads. Ask a Raleigh Stride dealer to explain how you can check for wear. 5. Check by gently moving the brake disc back and forth whether or not the brake disc sits on the front or rear wheel and is backlash-free. -
Page 35: Using The Disc Brakes
If brakes are not installed professionally, the brake performance may reduce, or the brakes may fail. Let the brakes only be set up by a Raleigh Stride dealer and have the brake adjustment explained to you by a Raleigh Stride dealer. -
Page 36: Using The Continuously Variable Transmission (Enviolo Hub)
If the gears are incorrectly adjusted, they can be damaged during use. Contact your Raleigh Stride dealer / bicycle mechanic to adjust the setting of the continuously variable transmission if these do not work properly. If the transmission no longer functions properly, change the position of the adjusting nut. -
Page 37: Use And Maintenance Of The Gear Hub
Visually inspect the shifting cable and inspect the cable sheathing and wires for damage and / or cracks. Have the sprocket and / or the chain wheel replaced by a Raleigh dealer / bicycle repairer if you notice that individual teeth are extremely sharp (so-called shark teeth) (1) or (2). -
Page 38: Operating The Chain Drive
Note: Contact a Raleigh Stride dealer / bicycle repairer if adjustments to the chain drive are necessary. 8.2 Operating the chain drive If you are unsure of how to operate the chain drive or if you are bothered by it, this can be distracting in road traffic. -
Page 39: Operating The Lighting
Have any defective lighting replaced by a Raleigh Stride dealer. 9.1 Operating the lighting You can switch on the lighting of your Raleigh Stride by using the Bosch remote control on your handlebar. If you do not have lighting or if it is inadequate, other road users may not be able to see you well and you may not notice unevenness in the road or obstacles. -
Page 40: Wheels, Tyres And Suspension
If the front and rear wheels are not aligned or if they wobble, this compromises rider safety. Have the front and rear wheel aligned by a Raleigh Stride dealer if they are not aligned or if they wobble. If the spokes are not correctly or evenly tensioned, this may compromise how well the front or rear wheels turn. -
Page 41: Tyres
The tyres and rims are not airtight; rather the air is retained in the inner tyres with the help of an inner tube which is filled with air via the valve. Contact a Raleigh Stride dealer if the tyres show signs of cracks or damage or if the profile is very worn. -
Page 42: Valves
Valvetypes 10.3 Cycles may be equipped with one of the following valve types (see “Illustr.: Valve types”): ● Presta valve (PV): secured with a tappet in the valve, rim hole 6.5 mm/0.26". ● Dunlop valve (DV): secured with a union nut, rim hole 8.5 mm/0.33". -
Page 43: Basic Settings
corresponding to the indicated upper threshold. Use the air pump with a pressure display in order to check the tyre pressure when pumping up the tyres. 10.4.1 Basic settings The tyre pressure has an influence on the roll resistance and the suspension of the cargo bike. -
Page 44: Using The Prop Stand Or Parking Brake
● Store the cargo bike in frost-free and dry place, protected from significant temperature differences. ● If you are not able to store the cargo bike in a closed room, use the Raleigh Stride Bike Cover in order to protect the cargo bike when it is being stored outdoors. -
Page 45: Storing The Battery
● Wipe all surfaces and components after cleaning. ● Maintain all painted and metallic surfaces on the frame at least every 6 months. Ask Raleigh Stride customer services or a Raleigh Stride dealer for a paint stick in the colour of your cargo bike. -
Page 46: First Inspection And Maintenance
(see section “Inspection record” on page 14.2 Annual maintenance Have your cargo bike maintained at least once a year by a Raleigh Stride dealer, a second maintenance is strongly advised by Raleigh Stride (after each 1000km). -
Page 47: Cargo Bike Passport
15 Cargo Bike passport Brand, model: Frame number: Other information: Condition the cargo bike is in: You notes: Article number: Key number: Used, mileage:... -
Page 48: Transfer Report
15.1 Transfer Report The cargo bike is handed over fully assembled with: (tick if applicable and enter quantities) Battery lock Bicycle passport with technical data of the cargo bike Manuals for (electric) cargo bike parts of the cargo bike: Bosch Quick-start manual for the drive system All functions of the cargo bike have been explained The cargo bike is delivered ready for use The cargo bike is delivered fully assembled, instructions on how to handle the cargo... -
Page 50: Maintenance Intervals
15.2 Maintenance intervals 1. First check At approx. 100 km / 62 miles or 2 months, whichever comes first. Work performed: Replaced parts:... - Page 51 2. Maintenance service At approx. 1000 km / 620 miles or 1 year, whichever comes first. Work performed: Replaced parts:...
- Page 52 3. Maintenance service At approx. 2000 km / 1240 miles or 2 years, whichever comes first. Work performed: Replaced parts:...
- Page 53 4. Maintenance service At approx. 3000 km / 1860 miles or 3 years, whichever is reached first. Work performed: Replaced parts:...
- Page 54 Raleigh reserves the right to change the warranty conditions at any time. Raleigh as a company or Raleigh dealers accept no responsibility for damage caused by improper use. Only use the cargo bike as described in this user manual.
Need help?
Do you have a question about the Stride 2 and is the answer not in the manual?
Questions and answers