
Related Manuals for Raleigh EN 14764


Summary of Contents for Raleigh EN 14764
- Page 1 BICYCLE OWNER’S GUIDE & ASSEMBLY INSTRUCTIONS PLEASE READ CAREFULLY BEFORE RIDING WWW.RALEIGH.CO.UK...
-
Page 2: Table Of Contents
Check chainwheel and crank bolt torque is 42-45Nm. Date: ............... the flat and high gears for downhill. for further information consult our website www.raleigh.co.uk • for video support & download... - Page 3 WELComE to thE FAmiLY When Sir Frank W. Bowden started Raleigh Bicycles in Nottingham UK, in 1887 we are certain that he would have pictured you stood here today with your new bicycle, which comes steeped with the innovation and expertise that you get from designing bikes for over 125 years.
-
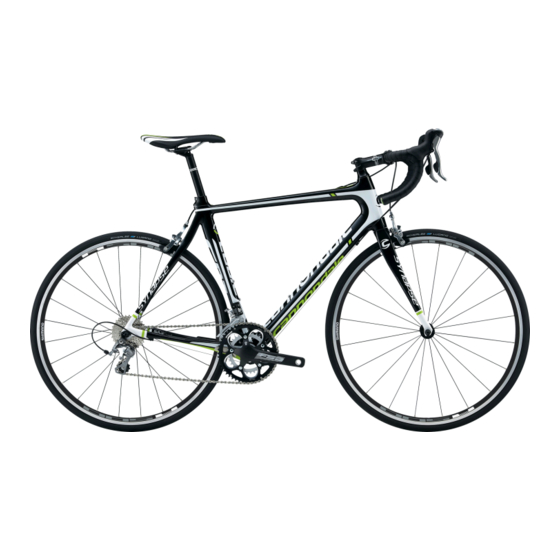
Page 4: Know Your Bike
120 Kg (19 stone) BMX Bikes use in sanctioned competition events Important: FaIlure to use your bIke In accordance wIth the above recommendatIons could result In serIous Injury for further information consult our website www.raleigh.co.uk • for video support & download... -
Page 5: Quick Assembly Guide
• Allen key (s) • Multi-spanner • Pedals • Reflectors *Where applicable FOR DETAILED ADJUSTMENT AND OTHER INFORMATION PLEASE REFER TO THE SPECIFIC SECTIONS IN THIS GUIDE for further information consult our website www.raleigh.co.uk • for video support & download... - Page 6 13. Rear suspension unit care. Some of these items are specified in the British Top tube 14. Chain wheel set Standard covering bicycles but many others are axle bolt recommendations. for further information consult our website www.raleigh.co.uk • for video support & download...
- Page 7 Set at the required height and re-tighten. See page 15. limit mark. re-tighten the bolt. Important: Do not position the stem outside the limit mark. for further information consult our website www.raleigh.co.uk • for video support & download...
-
Page 8: Disc Brakes
RH LEVER > FRONT BRAKE released accidentally. LH LEVER > REAR BRAKE Important: Ensure the nuts and quick release are fully tightened. for further information consult our website www.raleigh.co.uk • for video support & download... - Page 9 THE REFLEcTORs FITTED TO yOuR NEW BIKE ARE A LEGAL REQuIREMENT, Ensure pedal is tight up against suppLIED FOR yOuR sAFETy. DON’T BE TEMpTED TO REMOVE THEM. the crank when fully tightened for further information consult our website www.raleigh.co.uk • for video support & download...
-
Page 10: Personal Safety
Light and the rear Red. Check and clean them regularly to ensure they are fully functional. For full information on lighting regulations refer to the following website www.ctc.org.uk/cyclists- library/regulations/lighting-regulations Fitting for suspension forks. for further information consult our website www.raleigh.co.uk • for video support & download... - Page 11 They’re very effective at letting the reflective areas in with the shape of moving the rubber seal. the glass at all. motorists know you’re on the road. the bike. for further information consult our website www.raleigh.co.uk • for video support & download...
-
Page 12: Before Riding
DistAnCE stoPPing DistAnCE stoP be prepared to walk your bike around obtained from schools, council offices or 4.5m 11.5m roundabouts and difficult right turns. Police stations. for further information consult our website www.raleigh.co.uk • for video support & download... -
Page 13: Riding With Juniors
Be ready to jump seat post. encouraged. off your bike and intervene if it ever becomes necessary. for further information consult our website www.raleigh.co.uk • for video support & download... -
Page 14: Steering, Headsets And Handlebars
As part of the 21 point safety check, make sure the stem clamp bolts and the handlebar clamp bolts are all tight enough to prevent the handlebars moving. for further information consult our website www.raleigh.co.uk • for video support & download... - Page 15 Check also that the handlebar clamp is tight. Repeat both these final checks during the 21 point Safety Check for further information consult our website www.raleigh.co.uk • for video support & download...
-
Page 16: Pedals
It’ll take practice before crank. Don’t try to fit them the wrong tighten both pedals with an open-ended you can slip into them automatically. way round. spanner. for further information consult our website www.raleigh.co.uk • for video support & download... -
Page 17: Quick Release Wheels
This will ensure that all nuts and bolts are tightened using the Note: The rear derailleur automatically correct amount of force, so preventing damage to components. tensions the chain. See page 41 for a list of torque settings. for further information consult our website www.raleigh.co.uk • for video support & download... -
Page 18: Saddle Adjustment
Next, start to move the Q/R lever. too loose. for further information consult our website www.raleigh.co.uk • for video support & download... - Page 19 This applies to most normal cycle use. Riders using Jump, Trials & other specialist bikes will have their own preferences. for further information consult our website www.raleigh.co.uk • for video support & download...
- Page 20 Above all, don’t snatch at the brakes - apply them well before you have to stop and give the pads a chance to wipe the rims dry. for further information consult our website www.raleigh.co.uk • for video support & download...
- Page 21 If there isn’t, Degreaser, if the brakes don’t adjust the gap using the tiny adjuster seem to have their usual bite. screws at the pivots. for further information consult our website www.raleigh.co.uk • for video support & download...
- Page 22 • for video support & download...
- Page 23 1mm. undo the straddle wire clamp and adjust Check again when the pads have worn the length of the straddle wire. down. for further information consult our website www.raleigh.co.uk • for video support & download...
- Page 24 • for video support & download...
- Page 25 Finally, adjust the brake pads. be careful. for further information consult our website www.raleigh.co.uk • for video support & download...
-
Page 26: Brakes
The arrow indicates the lubrication jaws of an adjustable spanner. point. for further information consult our website www.raleigh.co.uk • for video support & download... -
Page 27: Cranks
Then apply so they won’t come out while you’re the test to the other crank. riding. for further information consult our website www.raleigh.co.uk • for video support & download... - Page 28 If there’s still a problem, check the As for rotational changers, leave basic adjustment, as shown on page 30. both lubrication and fault finding entirely to your retailer. for further information consult our website www.raleigh.co.uk • for video support & download...
- Page 29 Top and the other high gears are for descents. chainring At the rear wheel, the small sprocket is top gear, the large sprocket is bottom. for further information consult our website www.raleigh.co.uk • for video support & download...
-
Page 30: Gears
L screw until the chain runs almost silently, then let it jump back down whole range of sprockets several times, as fast as you can, just to check. onto the smallest sprocket. for further information consult our website www.raleigh.co.uk • for video support & download... - Page 31 3 and 4 on anti-clockwise if the chain doesn’t climb extreme cases it will cause your gears to slip. page 30. easily onto the chainring. for further information consult our website www.raleigh.co.uk • for video support & download...
-
Page 32: Suspension Forks
If there’s not enough adjustment to get the right amount of sag, talk to your retailer about fitting alternative springs. In addition, get your retailer to grease the forks every six months, or sooner if the corrugated gaiters get damaged. for further information consult our website www.raleigh.co.uk • for video support & download... -
Page 33: Rear Suspension
As a result, the gears may need tweaking, some nuts and bolts may need tightening and you may well need to check the adjustment of the saddle and handlebars. for further information consult our website www.raleigh.co.uk • for video support & download... -
Page 34: Specialist Bikes
(arrowed, where the blue meets the red) lines up with the end of the axle. Finally, lock the connector with the knurled nut. for further information consult our website www.raleigh.co.uk • for video support & download... - Page 35 Note: The chain is automatically tensioned odd noises and for regreasing, refer to on models fitted with derailleur gears. your retailer without delay. for further information consult our website www.raleigh.co.uk • for video support & download...
- Page 36 Then test the back brake, the brake arm, tension the straddle tightening the cable using the adjuster wire with pliers and then tighten the on the frame if necessary. clamp bolt. for further information consult our website www.raleigh.co.uk • for video support & download...
- Page 37 This is not the easiest task but if you similar way and continue half a turn at a get somebody else to steady the time. Tighten up using the same method. handlebars, that’ll help. for further information consult our website www.raleigh.co.uk • for video support & download...
- Page 38 Keep the cable well lubricated with multi- the device that binds the shoe to the purpose lube but don’t lube the shifter. pedal works reliably every time. for further information consult our website www.raleigh.co.uk • for video support & download...
-
Page 39: Important Information
• for video support & download... -
Page 40: Maintenance
Always use genuine replacement parts for safety • Hubs are running smoothly. critical items such as brakes. for further information consult our website www.raleigh.co.uk • for video support & download... - Page 41 As for luggage straps and bungees, don’t let them hang down within 1 working day. lightly with grease. Keep grease off plastic parts. where they could jam in the wheel. for further information consult our website www.raleigh.co.uk • for video support & download...
- Page 42 However, you must clean the chain first or you’ll simply form an abrasive paste. NEVER use a pressure washer on your bike or put it through a car wash. for further information consult our website www.raleigh.co.uk • for video support & download...
- Page 43 WARNING: WHEN USING AN AEROSOL LUBRICANT, KEEP IT TO THE EXACT POINT INDICATED HERE. WIPE UP ANY DRIPS AND KEEP THEM OFF THE WHEEL RIMS, BRAKE PADS AND TYRES IN PARTICULAR. for further information consult our website www.raleigh.co.uk • for video support & download...
- Page 44 Pump the tube up lightly and push the valve back through the hole, checking that it’s straight. RALEigh RECommEnDs sLimE sEALAnt AnD REPAiR PRoDUCts FoR ALL oUR biCYCLEs for further information consult our website www.raleigh.co.uk • for video support & download...
-
Page 45: Shock Pump
2 A tyre designed specifically for MTB off road riding size 26 x 1.95. 3 Semi slick combination for on and off road. 4 Commuter/trekking puncture resistant. for further information consult our website www.raleigh.co.uk • for video support & download... -
Page 46: For Further Information Consult Our Website Www.raleigh.co.uk • For Video Support & Download
In the top racing shoes, you can do neither ! for further information consult our website www.raleigh.co.uk • for video support & download... -
Page 47: Clothing
• for video support & download... -
Page 48: Getting Started
Quality tools don’t come cheap, but if used correctly you could still be using them in 10 years time. for further information consult our website www.raleigh.co.uk • for video support & download... - Page 49 SERVICE ONE SERVICE TWO SERVICE THREE SERVICE FOUR DATE: DATE: DATE: DATE: MECHANIC: MECHANIC: MECHANIC: MECHANIC: DEALER STAMP DEALER STAMP DEALER STAMP DEALER STAMP WORK CARRIED OUT: WORK CARRIED OUT: WORK CARRIED OUT: WORK CARRIED OUT: FURTHER WORK RECOMMENDED: FURTHER WORK RECOMMENDED: FURTHER WORK RECOMMENDED: FURTHER WORK RECCOMENDED: for further information consult our website www.raleigh.co.uk • for video support & download...
- Page 50 2. DATE & MILEAGE: 3. DATE & MILEAGE: 4. DATE & MILEAGE: 5. DATE & MILEAGE: 6. DATE & MILEAGE: 7. DATE & MILEAGE: 8. DATE & MILEAGE for further information consult our website www.raleigh.co.uk • for video support & download...
-
Page 51: Guarantee Conditions
*Please write your unique frame number here. See page 6 for location. a Guarantee oF conFIdence Issued by raleIGh uk ltd. If the frame number is unclear, please ask your Raleigh dealer or the police to stamp church street, eastwood, nottInGham, nG16 3ht. - Page 52 Buy on-LinE or WWW.RALEigh.Co.Uk CLiCk AnD CoLLECt in store RALEigh Uk LtD Photos in part from RaleighBikesUK the Haynes Bike Book. Church Street, Eastwood, Nottingham, NG16 3HT J.H. Haynes & Co. Ltd and Raleigh UK Ltd, 1999 telephone: 01773 532600 @RaleighBikes_UK www.raleigh.co.uk...
Need help?
Do you have a question about the EN 14764 and is the answer not in the manual?
Questions and answers