Table of Contents
Advertisement
Advertisement
Table of Contents

Subscribe to Our Youtube Channel
Related Manuals for Atlas Copco G 160 VSD


Summary of Contents for Atlas Copco G 160 VSD
- Page 1 APF221384 G 160 VSD Instruction book...
- Page 3 Atlas Copco G 160 VSD APF221384 Instruction book Original instructions COPYRIGHT NOTICE Any unauthorized use or copying of the contents or any part thereof is prohibited. This applies in particular to trademarks, model denominations, part numbers and drawings. This instruction book is valid for CE as well as non-CE labelled machines. It meets the requirements for instructions specified by the applicable European directives as identified in the Declaration of Conformity.
-
Page 4: Table Of Contents
Instruction book Table of contents Safety precautions......................5 ........................... 5 AFETY ICONS ......................5 ENERAL SAFETY PRECAUTIONS ................... 6 AFETY PRECAUTIONS DURING INSTALLATION ....................7 AFETY PRECAUTIONS DURING OPERATION ................8 AFETY PRECAUTIONS DURING MAINTENANCE OR REPAIR .......................10 ISMANTLING AND DISPOSAL General description...................... 11 ..........................11 NTRODUCTION .........................12... - Page 5 Instruction book .......................51 UALITY OF SAFETY COMPONENTS ..................51 NSTALLATION INSTRUCTIONS FOR CUBICLE FAN ..........................52 ICTOGRAPHS Operating instructions....................54 ..........................54 NITIAL START ..........................56 EFORE STARTING ............................57 TARTING .......................... 58 URING OPERATION ........................59 HECKING THE DISPLAY ............................60 TOPPING ........................61 AKING OUT OF OPERATION ........................
- Page 6 Instruction book Technical data.......................76 ........................76 EADINGS ON DISPLAY ........................76 EFERENCE CONDITIONS ............................77 IMITS .......................77 ETTINGS OF SAFETY VALVE .............. 77 ETTINGS OF OVERLOAD RELAYS FUSES AND CIRCUIT BREAKERS ..........................77 OMPRESSOR DATA Pressure equipment directives................... 79 Documentation......................81 APF221384...
-
Page 7: Safety Precautions
Instruction book Safety precautions Safety icons Explanation Danger to life Warning Important note General safety precautions 1. The operator must employ safe working practices and observe all related work safety requirements and regulations. 2. If any of the following statements does not comply with the applicable legislation, the stricter of the two shall apply. -
Page 8: Safety Precautions During Installation
Instruction book 9. The Variable Speed Drive is equipped with a Safe Torque Off function, triggered by the emergency stop button. The Safe Torque Off function has the immediate effect that the drive can not supply any torque-generating energy. The drive is reliably torque-free. This state is monitored internally in the drive. -
Page 9: Safety Precautions During Operation
Instruction book controlled machines shall take adequate precautions to ensure that there is no one checking or working on the machine. To this end, a suitable notice shall be affixed to the start equipment. 11. Air-cooled machines must be installed in such a way that an adequate flow of cooling air is available and that the exhausted air does not recirculate to the compressor air inlet or cooling air inlet. -
Page 10: Safety Precautions During Maintenance Or Repair
Instruction book 3. Persons switching on remotely controlled machines shall take adequate precautions to ensure that there is no one checking or working on the machine. To this end, a suitable notice shall be affixed to the remote start equipment. 4. - Page 11 Instruction book Precautions during maintenance or repair 1. Always use the correct safety equipment (such as safety glasses, gloves, safety shoes, etc.). 2. Use only the correct tools for maintenance and repair work. 3. Use only genuine spare parts for maintenance or repair. The manufacturer will disclaim all damage or injuries caused by the use of non-genuine spare parts.
-
Page 12: Dismantling And Disposal
Instruction book • Always wear special gloves. In case of refrigerant contact with the skin, rinse the skin with water. If liquid refrigerant contacts the skin through clothing, never tear off or remove the latter; flush abundantly with fresh water over the clothing until all refrigerant is flushed away;... -
Page 13: General Description
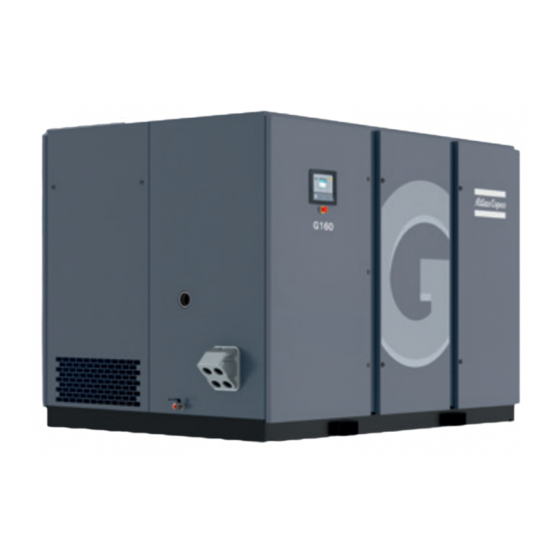
Instruction book General description Introduction General General view Description of G VSD compressors G VSD (Variable Speed Drive) compressors are single-stage, oil-injected, air-cooled screw compressors directly driven by an electric motor. The compressors deliver pulsation-free air. By continuously matching the speed of the drive motor to the air net pressure, the compressor optimizes energy consumption and reduces the operating pressure band. -
Page 14: Air And Oil System
Instruction book Air and oil system Flow diagrams Flow diagram of air-cooled VSD compressor Drawing Reference Description Customer installation Atlas Copco installation APF221384... - Page 15 Condensate drain of the compressor Energy recovery circuit (optional) Air inlet Air outlet * Refer to your Atlas Copco Customer Centre for detailed info Position of components Air flow Air drawn through filter (AF) is compressed in compressor element (E). Compressed air and oil are discharged through check valve (CV) to air receiver/oil separator (AR) where oil is separated from the compressed air.
-
Page 16: Cooling And Condensate System
Instruction book Oil system Air pressure forces the oil from receiver (AR) through oil cooler (Co), filters (OF) and oil stop valve (Vs) to compressor element (E) and the lubrication points. Oil stop valve (Vs) prevents the compressor elements from flooding with oil when the compressor is stopped. -
Page 17: Smartbox And Smartlink
SMARTLINK Service rules out all uncertainties. Scheduling maintenance visits becomes as simple and easy as it should be; the service log book is always just one click away and the online link with Atlas Copco allows to request and quickly receive quotes for spare parts or additional services. - Page 18 Instruction book This product level is free of charge and available for 3 years following the machine purchase. • SMARTLINK Uptime SMARTLINK Uptime keeps your compressors up and running. By e-mail and/or text, you receive all relevant machine indications (warnings and shutdowns) in advance. Based on this information, you can then take all necessary actions and measures to avoid the risk of a breakdown.
- Page 19 Instruction book • You will receive an e-mail with login credentials. • Go to the SMARTLINK web site http://www.atlascopco.com/smartlink, log in with the user credentials. • Enjoy SMARTLINK! • In case more SMARTLINK-ready machines are available, you can add these via My Profile. APF221384...
-
Page 20: Elektronikon® Graphic Controller
Instruction book Elektronikon® Graphic controller Elektronikon control system Electronic controller Controller panel Parts and functions Reference Name Function Alarm Flashes if a shut-down warning condition exists. Service Lights up if service is needed Automatic operation Indicates that the regulator is automatically controlling the compressor. - Page 21 Instruction book Main functions In general, the regulator has the following functions: • Controlling the motor speed (Variable Speed Drive), reducing the power consumption and pressure band. • Controlling the speed of the fans of the coolers, reducing the power consumption and noise level.
-
Page 22: Digital Output Contacts
Instruction book Ref. Designation (10) Indirect stop offset If the motor is running at minimum speed and the net pressure rises to a value equal to the sum of the programmed pressure set-point and the programmed indirect stop offset, the compressor will stop. - Page 23 Instruction book Expansion Module IO2 for Elektronikon (Mk5) The digital output contacts have following specifications: Relay Connector Maximum load 3 X 31 15 A / 250 V AC 15 A / 30 V DC RC* protected 3 X 31 15 A / 250 V AC 15 A / 30 V DC RC* protected 3 X 31...
-
Page 24: Icons Used
Instruction book Relay Connector Maximum load 3 X 30 10 A / 250 V AC 10 A / 30 V DC resistive load 3 X 32 10 A / 250 V AC 10 A / 30 V DC resistive load 3 X 32 10 A / 250 V AC 10 A / 30 V DC... - Page 25 Instruction book Local start / stop Machine control mode Remote start / stop Network control Automatic restart after voltage Automatic restart after voltage failure is enabled failure Week timer Week timer is active Emergency stop Active protection functions Shutdown Warning Service required Service Error...
- Page 26 Instruction book Menu icons Icon Description Converter(s) Service Alarms (warnings, shutdowns) Week timer Info Test Counters Regulation setpoints Inputs Outputs Event history (saved data) Settings APF221384...
- Page 27 Instruction book Input icons Icon Description Pressure Temperature Digital input Special protection System icons Icon Description Fan (overload) Automatic restart (ARAVF) Main chart Compressor element (LP, HP, ...) Filter(s) Frequency converter Motor Expansion module Network settings/problem General alarm APF221384...
-
Page 28: Main Screen
Instruction book Oil circuit Regulation General settings Access key Remote start/stop (Password protected) Navigation arrows Icon Description Down Main screen Control panel Control panel APF221384... - Page 29 Instruction book Function The main screen shows the status of the compressor and is the gateway to all functionality implemented in the controller. The main screen is shown automatically when the power is switched on. The display switches to sleep mode when no keys are pushed for a programmable time. Five different main screens can be chosen: 1.
- Page 30 Instruction book stopped or Running Loaded is selected, the screen will jump directly to the regulation menu after pressing the Enter key). • Control mode icons These icons are always shown in the main screen. If the icon is selected and the Enter key is pushed, the screen jumps to the control mode menu.
- Page 31 Instruction book Chart views When the Chart (High Resolution) display is selected, a chart with an X-axis covering 4 minutes is displayed. The value displayed on the Y-axis depends on the selection made in the input screen. Each chart dot represents 1 second. When the Chart (Medium Resolution) display is selected, a chart with an X-axis covering 4 hours is displayed.
-
Page 32: Controller Menu Structure
Please find the tree structure on the 2 top levels below. The items are mentioned as they appear on the screen from top to bottom and left to right. If questions regarding lower levels appear, please consult your local Atlas Copco Customer Centre. SERVICE PLAN... - Page 33 Instruction book Topic Description Displays 4 programmable week action schemes Week Action Schemes Each week action scheme contains 7 programmable days and these days can contain a number of successive events on selected time slots. Contains 10 weeks and each week can be selected as 1 of the 4 week action Week Cycle schemes Status...
- Page 34 Instruction book Topic Description Emergency stops Displays the number of compressor stops by use of the emergency stop REGULATION Topic Description The pressure setpoint that is higher than setpoint 1, where the loaded Unloading pressure 1 compressor switches to unload The pressure setpoint that is lower than setpoint 1, where the unloaded Loading pressure 1 compressor switches to load...
- Page 35 Instruction book OUTPUTS Topic Description General Displays a number of analogue and digital outputs Displays the activation of the fan Element(s) Displays the activation of the element(s) Converter(s) Displays the activation of the converter(s) Oil circuit(s) Displays the activation of the oil circuit(s) Main Motor Displays a number of digital outputs concerning the main motor status SPM (Shock Pulse Method)
-
Page 36: Web Server
Instruction book Web server All controllers have a built-in web server that allows direct connection to the company network or to a dedicated PC via a local area network (LAN). This allows to consult certain data and settings via a PC instead of the display of the controller. Getting started If the unit is equipped with a SMARTBOX, the network connection of the controller is already in use. - Page 37 Instruction book • Select the Local Area Connection, which is connected to the controller. • Click with the right button and select Properties (1). • Use the check box Internet Protocol version +4 (TCP/IPv4) (1) (see picture). To avoid conflicts, uncheck other properties if they are checked. After selecting TCP/IPv4, click on the Properties button (2) to change the settings.
- Page 38 Instruction book Configure a company network (LAN) connection • Ask your IT department to generate a fixed IP address in your company’s network. • That IP address will be excluded from the DNS server, so it will be reserved for the controller.
- Page 39 Instruction book • Go to Settings (1) • Go to Network (1) • Go to Ethernet (1) • Switch Off (1) the Ethernet communication to allow editing the settings APF221384...
- Page 40 Instruction book • Adapt IP Address (1) • Adapt Gateway IP (2) • Adapt Subnet Mask (3) • Switch On (4) the Ethernet communication • Wait a few minutes so the LAN network can connect to the controller Configuration of the web server ®...
- Page 41 Instruction book Screen shot (example!) Navigation and options • The banner shows the unit type and the language selector. In this example, three languages are available on the controller. • On the left side of the interface, you can find the navigation menu. If a license for ESi is foreseen, the menu contains 3 buttons.
- Page 42 Instruction book Unit settings All unit settings can be displayed or hidden. Put a check mark in front of each point of interest and it will be displayed. Only the machine status is fixed and can not be removed from the main screen.
-
Page 43: Programmable Settings
Instruction book Special protections Lists all special protections of the unit. Service plan Displays all levels of the service plan and their status. This screen shot underneath only shows the running hours. It is also possible to show the current status of the service interval. Programmable settings A number of controller parameters are programmable. - Page 44 Instruction book • (2) = the maximum value • (3) = the selected value • (4) = the factory setting icon (it only appears when the selected value equals the factory setting value) APF221384...
-
Page 45: Installation
• Working with machinery controlled by a frequency converter requires special safety precautions, which depend on the type of network (TN, TT or IT). Consult Atlas Copco. • When good EMC practices for installation are followed, the compressor qualifies for installation in EMC category C3, according to EN61800-3, for use in a 2... -
Page 46: Dimension Drawing
Instruction book Dimension drawing Compressor dimensions Dimension drawing of air-cooled G 160 VSD Pack, metric units APF221384... - Page 47 Instruction book Dimension drawing of air-cooled G 160 VSD Pack, imperial units Text on figures Reference Description View from right side Ventilation air inlet of the canopy Front view Compressor air inlet Ventilation air outlet of the canopy Ventilation for cubicle...
- Page 48 Instruction book Reference Description (10) View A (11) Compressor air outlet (12) Data plate (13) Cooling air outlet (14) Top view (15) Detail B (16) Water outlet of the energy recovery (not present) (17) Cooling water inlet (not present) (18) Water inlet of the energy recovery (not present) (19) Cooling water outlet (not present)
-
Page 49: Installation Proposal
Instruction book Installation proposal Compressor room example Compressor room example of air-cooled G 160 VSD Pack APF221384... - Page 50 Drain pipes to condensate collector. The drain pipes may not enter in the collector. Individual drain pipes may not be interconnected to avoid interference Compressor condensate contains oil. Depending on local legislation, it is recommended to install an oil/water separator (consult Atlas Copco) Control cubicle with monitoring panel Main cable entry...
-
Page 51: Main Fuses And Supply Cables (Section & Maximum Length)
Instruction book Main fuses and supply cables (section & maximum length) Electrical connections APF221384... - Page 52 Cables, fuses and maximum cable length for Pack compressors (CSA-UL) FLA* FLA* Maximum (nominal (under- Model Cables Fuses (A) cable voltage) voltage) length (m) G 160 VSD 2 x (3x MCM 600 + AWG 000) 1X (3X 500) FLA*: Full-Load Ampacity APF221384...
-
Page 53: Quality Of Safety Components
Instruction book Quality of safety components When installing a remote emergency button, the following B10d values are advised: • Emergency stop button: 500 000 Installation instructions for cubicle fan Description The fan must be installed on the cubicle roof with 8 bolts 0147 1963 08 as follows: •... -
Page 54: Pictographs
Instruction book Figure B Completed assembly of the cubicle fan Pictographs Control panel of Elektronikon controller Refer to the chapter Controller panel for pictographs of the Elektronikon controller. APF221384... - Page 55 Instruction book Other locations Reference Description Automatic condensate drain Automatic condensate drain for optional oil/water separator (type OSD) Manual condensate drain Stop the compressor before maintenance or repair Warning: under tension Read Instruction book before starting the compressor Switch off the voltage and depressurize the compressor before maintenance or repair Before connecting the compressor electrically, consult the Instruction book for the motor rotation direction Torques for steel (Fe) or brass (CuZn) bolts...
-
Page 56: Operating Instructions
Instruction book Operating instructions Initial start-up Warning The operator must apply all relevant Safety precautions. Switch off the voltage before making any adjustment. Outdoor/altitude operation If the compressor is installed outdoors or if the air inlet temperature can be below freezing point, precautions must be taken. - Page 57 Instruction book Protection during transport Transport fixtures Step Action The coupling housing supports, motor support and air receiver supports are secured to the frame, immobilizing the vibration dampers during transport. Remove the bushes (1) from the gear casing supports and the motor support. Remove the brackets fitted next to the air receiver supports.
-
Page 58: Before Starting
If the rotation direction is wrong, press the emergency stop button, switch off the voltage and reverse two incoming electric lines. If the rotation direction of the fan motor is wrong, consult your Atlas Copco customer centre. Run the compressor for a few minutes and check that it is operating normally. -
Page 59: Starting
Instruction book Reference Name Service Automatic operation Voltage on Enter Escape Scroll keys Stop Start Procedure Step Action Switch on the voltage. Voltage on LED lights up. Close the condensate drain valves (see the section Cooling and condensate system). Open the air outlet valve. Check the oil level indicator (see the section change). -
Page 60: During Operation
Instruction book Reference Name Alarm Service Automatic operation Voltage on Enter Escape Scroll keys Stop Start Procedure Step Action Press the start button. The compressor starts running in unloaded condition. The automatic operation LED lights up. Approx. 10 seconds later (programmable), the compressor starts running loaded. During operation Warning The operator must apply all relevant... -
Page 61: Checking The Display
Instruction book Compressors with Elektronikon Graphic controller Elektronikon Graphic controller 1. Check the readings on the display. 2. When reaching the preset unloading pressure, shown on the display, the compressor will start running unloaded. From now on, the electronic control module will calculate the optimum moment to stop and restart the compressor motor automatically, depending on the maximum permissible number of motor starts and on the air consumption. -
Page 62: Stopping
Instruction book Elektronikon Graphic controller Control panel of Elektronikon Graphic controller 1. Regularly check the display for readings and messages. Normally, the main display is shown. 2. Always check the display and remedy the trouble if alarm LED (4) is alight or blinks. The display will show a service message if a service plan interval has been exceeded or if a service level for a monitored component has been exceeded. -
Page 63: Taking Out Of Operation
Instruction book On compressors equipped with an Elektronikon Graphic controller Control panel Procedure Frequently stopping the compressor using the emergency stop button may damage the compressor. Only use the emergency stop button in case of emergency. Step Action Press stop button (13). The compressor will run unloaded for 30 seconds and then stop. To stop the compressor in case of emergency, press the emergency stop button. -
Page 64: Use Of Air Receiver
Instruction book Step Action Shut off and depressurize the part of the air net which is connected to the outlet valve. Disconnect the compressor air outlet pipe from the air net. Drain the oil and condensate circuits. Disconnect the compressor condensate piping from the condensate drain net. Use of air receiver Instructions Step... -
Page 65: Maintenance
Instruction book Maintenance Preventive maintenance schedule Warning Before carrying out any maintenance, repair work or adjustment, proceed as follows: • Stop the compressor. • Press the emergency stop button. • Close the air outlet valve and open the manual condensate drain valves. •... -
Page 66: Motors
Damaged flexibles must be replaced immediately. Service agreements Atlas Copco Customer Centres have a range of service agreements to suit your needs: • An Inspection Plan • A Preventive Maintenance Plan •... -
Page 67: Oil Specifications
Oil specifications Atlas Copco Roto-Xtend Duty Fluid Atlas Copco Roto-Xtend Duty Fluid is a high-quality synthetic lubricant for oil-injected scroll and screw compressors which keeps the compressor in excellent condition. Roto-Xtend Duty Fluid can be used for compressors operating at ambient temperatures between 0 ˚C (32 ˚F) and 46 ˚C (115 ˚F) (see section... - Page 68 Instruction book Vent, filler and drain plugs Oil drain plugs on compressor elements Vent, filler and drain plugs on air-cooled compressors APF221384...
- Page 69 Instruction book Procedure Step Action Run the compressor until warm. Stop the compressor. Close the air outlet valve. Switch off the voltage. Wait a few minutes. Depressurize by unscrewing plug only one turn to permit any pressure in the system to escape.
-
Page 70: Oil Filter Change
Instruction book Step Action After carrying out all service actions in the relevant “Service Plan”, reset the service warning. Refer to the Service menu section. Oil filter change Warning Stop the compressor and switch off the voltage. The operator must apply all relevant Safety precautions. -
Page 71: Storage After Installation
General Service kits comprise all parts needed for servicing components and offer the benefits of genuine Atlas Copco parts while keeping the maintenance budget low. All service kits are indicated in the relevant Parts Lists. Atlas Copco Roto-Xtend Duty Fluid Roto-Xtend Duty Fluid can be ordered in the following quantities: •... -
Page 72: Adjustments And Servicing Procedures
Instruction book Adjustments and servicing procedures Air filters Warning Stop the compressor, close the air outlet valve, press the emergency stop button and switch off the voltage. The operator must apply all relevant Safety precautions. Position of air filters Air filters (1) Procedure Step Action... -
Page 73: Coolers
Stop the compressor, press the emergency stop button and switch off the voltage. The operator must apply all relevant Safety precautions. Procedure Cooler block (1) of air-cooled G 160 VSD Keep the cooler block clean to maintain the cooling efficiency. On air-cooled compressors proceed as follows: APF221384... -
Page 74: Safety Valve
Clean the coolers with an air jet in the reverse direction to normal flow. Use low pressure air; if necessary, the pressure may be increased up to 6 bar (e) (87 psig). If it is necessary to clean the coolers with a cleaning agent, consult Atlas Copco. Mount the service panel. - Page 75 Location of safety valve on air-cooled compressor The valve can be tested on a separate compressed air line. Consult the Atlas Copco Customer Centre if the valve does not open at the correct pressure (see the section Settings of safety valve).
-
Page 76: Problem Solving
Instruction book Problem solving Problem solving Warning Before carrying out any maintenance, repair work or adjustment, stop the compressor, press the emergency stop button and switch off the voltage. Close the air outlet valve and open the manual condensate drain valves. Open and lock the isolating switch. - Page 77 Multiple shut-down If there are multiple sequential failures with short time intervals on a specific shut-down functionality, consult your Atlas Copco Customer Centre. Excessive oil consumption Have the compressor inspected by your Atlas Copco Customer Centre. Condition Fault Remedy Condensate is not discharged from Discharge pipe of condensate Check and correct as necessary.
-
Page 78: Technical Data
Instruction book Technical data Readings on display Important The readings are valid when operating under reference conditions. See the section Reference conditions. Normally the main display is shown (see the section Function keys), indicating the actual air outlet pressure and the actual compressor status. The arrow down key allows the operator to call up other information such as actually measured pressures and temperatures. -
Page 79: Limits
Setting of fan protection for air-cooled compressors Supply voltage (V) Q25/Q26 (A) Compressor data Data for 125 psi (8.6 bar) 60 Hz compressors Units G 160 VSD Maximum working pressure, Pack bar(e) Nominal working pressure bar(e) Motor shaft speed for:... - Page 80 Instruction book Units G 160 VSD Sound pressure level dB(A) APF221384...
-
Page 81: Pressure Equipment Directives
Instruction book Pressure equipment directives General This machine is a pressure assembly of category IV according to 2014/68/EU. Parts of article 4.3 of 2014/68/EU are subject to Sound Engineering Practice (SEP). Parts of category I according to 2014/68/EU are integrated into the machine and fall under the exclusion of article 1.2, (f)(i). - Page 82 Instruction book Reference Description Cast identification Data plate Height of the vessel (without support and cover) Diameter of the vessel Part MWAC CF (cover) number (vess 1635 1489 210 l 14 bar Vessel shell: 1076 mm 1284 mm 550 mm 0.85 5.9 mm Vessel...
-
Page 83: Documentation
Instruction book Documentation APF221384... - Page 86 This is what we call - Sustainable Productivity. Atlas Copco Airpower Oil-free Air Division, Boomsesteenweg 957, 2610 Wilrijk, Belgium Phone: +32 (0)3 870 21 11 Atlas Copco Airpower NV. All rights reserved. Designs and specifications are subject to change without notice or obligation.
Need help?
Do you have a question about the G 160 VSD and is the answer not in the manual?
Questions and answers
provide information about the heat exchangers installed in this installation?