
Related Manuals for Atlas Copco GA 30+


Summary of Contents for Atlas Copco GA 30+
- Page 1 INSTRUCTION BOOK OIL-INJECTED ROTARY SCREW COMPRESSORS GA 30+, GA 37+, GA 37, GA 45+, GA 45...
- Page 3 Atlas Copco Oil-injected rotary screw compressors GA 30+, GA 37+, GA 37, GA 45+, GA 45 Instruction book Original instructions COPYRIGHT NOTICE Any unauthorized use or copying of the contents or any part thereof is prohibited. This applies in particular to trademarks, model denominations, part numbers and drawings.
-
Page 4: Table Of Contents
Instruction book Table of contents Safety precautions......................6 ........................... 6 AFETY ICONS ......................6 ENERAL SAFETY PRECAUTIONS ................... 7 AFETY PRECAUTIONS DURING INSTALLATION ....................8 AFETY PRECAUTIONS DURING OPERATION ................9 AFETY PRECAUTIONS DURING MAINTENANCE OR REPAIR General description...................... 12 ..........................12 NTRODUCTION ............................ - Page 5 Instruction book 3.11 ......................44 ONTROLLER SETTINGS MENU 3.12 .......................... 46 NFORMATION MENU 3.13 ..........................47 EB SERVER 3.14 .........................52 ROGRAMMABLE SETTINGS Elektronikon™ Touch controller................. 56 ...........................56 ONTROLLER ..........................58 ONTROL PANEL ............................ 59 CONS USED ..........................63 AIN SCREEN ........................64 UICK ACCESS SCREEN ........................65 HUTDOWN WARNING .............................
- Page 6 Instruction book ..................98 ATA DISPLAYED DURING NORMAL OPERATION ............................99 ARNINGS ..........................101 AINTENANCE ..........................103 ERVICE KITS 5.10 ......................... 104 ROBLEM SOLVING Energy recovery (optional)..................106 ......................... 106 NERGY RECOVERY UNIT ......................107 NERGY RECOVERY SYSTEMS ...........................108 PERATION ..........................111 AINTENANCE ........................
- Page 7 Instruction book Maintenance........................ 142 ....................142 REVENTIVE MAINTENANCE SCHEDULE ........................145 IL SPECIFICATIONS ..........................148 RIVE MOTOR ............................149 IR FILTER ......................149 IL AND OIL FILTER CHANGE ............................. 151 OOLERS ..........................152 AFETY VALVES ....................152 RYER MAINTENANCE INSTRUCTIONS ..........................153 ERVICE KITS 9.10 ......................153 TORAGE AFTER INSTALLATION 9.11 ......................
-
Page 8: Safety Precautions
Instruction book Safety precautions Safety icons Explanation Danger to life Warning Important note General safety precautions 1. The operator must employ safe working practices and observe all related work safety requirements and regulations. 2. If any of the following statements does not comply with the applicable legislation, the stricter of the two shall apply. -
Page 9: Safety Precautions During Installation
Instruction book 9. If compressed air is used in the food industry and more specifically for direct food contact, it is recommended, for optimal safety, to use certified Class 0 compressors in combination with appropriate filtration depending on the application. Please contact your customer center for advice on specific filtration. -
Page 10: Safety Precautions During Operation
Instruction book 12. The electrical connections must correspond to the applicable codes. The machines must be earthed and protected against short circuits by fuses in all phases. A lockable power isolating switch must be installed near the compressor. 13. On machines with automatic start/stop system or if the automatic restart function after voltage failure is activated, a sign stating "This machine may start without warning"... -
Page 11: Safety Precautions During Maintenance Or Repair
Instruction book 6. Keep all bodywork doors shut during operation. The doors may be opened for short periods only, e.g. to carry out routine checks. Wear ear protectors when opening a door. On machines without bodywork, wear ear protection in the vicinity of the machine. 7. - Page 12 Instruction book 3. Use only genuine spare parts for maintenance or repair. The manufacturer will disclaim all damage or injuries caused by the use of non-genuine spare parts. 4. All maintenance work shall only be undertaken when the machine has cooled down. 5.
- Page 13 Instruction book Also consult following safety precautions: Safety precautions during installation Safety precautions during operation. These precautions apply to machinery processing or consuming air or inert gas. Processing of any other gas requires additional safety precautions typical to the application which are not included herein. Some precautions are general and cover several machine types and equipment;...
-
Page 14: General Description
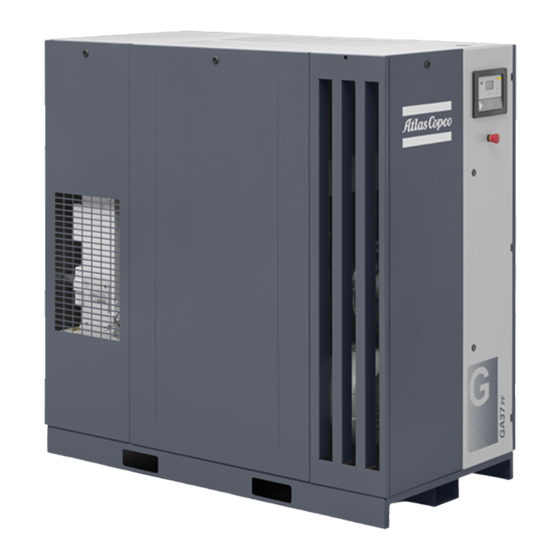
Instruction book General description Introduction GA 30 up to GA 45 are single-stage, oil-injected screw compressors driven by an electric motor. The compressors are available in air-cooled and water-cooled version. ™ The compressors are controlled by an Elektronikon controller. GA Workplace GA Workplace compressors are enclosed in a sound-insulated bodywork. - Page 15 Instruction book Rear view, GA 30 up to GA 45 Reference Name Air outlet valve Air cooler Oil cooler CV/Vs Check valve/oil stop valve Compressor element Elektronikon™ controller Cooling fan Drive motor Emergency stop button Unloader Da (Dm) Condensate outlets GA Workplace Full-Feature GA Workplace Full-Feature compressors are enclosed in a sound-insulated bodywork.
- Page 16 Instruction book The dryer is integrated in the sound-insulated bodywork. The dryer removes water from the compressed air by cooling the air to near freezing point. The condensate is automatically drained. Front view, GA 30 up to GA 45 Full-Feature 2920 7109 51...
- Page 17 Instruction book Rear view, GA 30 up to GA 45 Full-Feature Reference Name Electric cubicle Air filter Air receiver (oil separator vessel) Air outlet valve Air cooler Oil cooler CV/Vs Check valve/oil stop valve Automatic condensate outlets Manual condensate outlets Dryer Compressor element Elektronikon™...
-
Page 18: Air Flow
Instruction book Reference Name Unloader Air flow Flow diagrams Flow diagram, GA Workplace 2920 7109 51... - Page 19 Instruction book Flow diagram, GA Workplace Full-Feature Reference Description Intake air Air/oil mixture Wet compressed air Condensate Dried compressed air Note: The cooling fan is not provided on water-cooled compressors. Description Air drawn through filter (AF) and open inlet valve (IV) of unloader is compressed in compressor element (E).
-
Page 20: Oil System
Instruction book On Full-Feature compressors, the air flows through air dryer (DR) before it is discharged through outlet valve (AV). Also see section dryer. In all circumstances, minimum pressure valve (Vp) keeps the pressure in the separator tank (AR) above a minimum value, required for lubrication. An integrated check valve prevents the compressed air downstream the valve from being vented to atmosphere during unloaded operation. -
Page 21: Cooling System
Instruction book Description In air receiver/oil separator (AR), most of the oil is removed from the air/oil mixture by centrifugal action. The remaining oil is removed by oil separator (OS). The oil collects in the lower part of air receiver/oil separator (AR), which serves as an oil tank. The oil system is provided with a thermostatic bypass valve (BV). - Page 22 Instruction book Description The cooling system on air-cooled compressors comprises air cooler (Ca) and oil cooler (Co). The cooling air flow is generated by fan (FN). Water-cooled compressors References Description Intake air Air/oil mixture Wet compressed air Water flow Description The cooling system on water-cooled compressors comprises air cooler (Cwa) and oil cooler (Cwo).
-
Page 23: Condensate System
Instruction book Water-cooled air cooler and oil cooler Condensate system Drain connections The compressors have an centrifugal water separator WSD25 (1). The condensate formed in the air cooler accumulates in the collector. When the condensate reaches a certain level, it is discharged through the automatic drain outlet (Da). -
Page 24: Regulating System
Instruction book Condensate drains, typical example Reference Designation Automatic drain connection Manual drain connection Automatic drain connection of the dryer (only on Full-Feature units) Manual drain connection of the dryer (only on Full-Feature units) Regulating system Load/unload regulating system Regulating system (loaded condition) 2920 7109 51... -
Page 25: Electrical System
Instruction book Loading When the net pressure is below the loading pressure, solenoid valve (Y1) is energised. Results: • The space above unloading valve/blow-off valve (UV) is connected with the oil separator tank pressure (1) via the solenoid valve. • Unloading valve/blow-off valve (UV) moves downwards, closing off the connection to channels (2) and (3). -
Page 26: Air Dryer
Instruction book Typical Example of electric cubicle on GA 30 up to GA 45 Reference Designation F1/2/3 Fuses F7/F8/F9 Fuses (only on Full-Feature) Overload relay, compressor motor Circuit breaker, fan motor (on air-cooled compressors) Auxiliary relay Auxiliary contactor Auxiliary contactor Auxiliary contactor, fan motor (on air-cooled compressors) Line contactor Star contactor... - Page 27 Instruction book Flow diagram Air dryer Reference Name Air inlet Air outlet Air/air heat exchanger Air/refrigerant heat exchanger/evaporator Condensate separator Automatic drain / condensate outlet Refrigerant compressor Refrigerant condenser Liquid refrigerant dryer/filter Capillary Bypass valve Condenser cooling fan Pressure switch, fan control Liquid separator Compressed air circuit Compressed air enters heat exchanger (1) and is cooled by the outgoing, cold, dried air.
- Page 28 Instruction book Refrigerant circuit Compressor (5) delivers hot, high-pressure refrigerant gas which flows through condenser (6) where most of the refrigerant condenses. The liquid refrigerant flows through liquid refrigerant dryer/filter (7) to capillary tube (8). The refrigerant leaves the capillary tube at about evaporating pressure. The refrigerant enters evaporator (2) where it withdraws heat from the compressed air by further evaporation at about constant pressure.
-
Page 29: Elektronikon™ Swipe Controller
Instruction book Elektronikon™ Swipe controller Controller The Elektronikon™ Swipe controller Introduction The controller has following functions: • Controlling the unit • Protecting the unit • Monitoring components subject to service • Automatic restart after voltage failure (ARAVF) Automatic control of the unit The controller maintains the net pressure between programmable limits by automatically loading and unloading the unit. - Page 30 Instruction book Protecting the unit Shutdown If the element outlet temperature exceeds the programmed shutdown level, the unit will be stopped. The unit will also be stopped in case of overload of the drive motor or fan motor. Before remedying, consult the Safety precautions.
-
Page 31: Control Panel
Instruction book Control panel Control panel Parts and functions Reference Designation Function Warning sign Flashes in case of a shut-down, is lit in case of a warning condition. Service sign Is lit when service is needed. Operation sign Is lit when the unit is running. Voltage sign Indicates that the voltage is switched on. -
Page 32: Icons Used
Instruction book Icons used Menu icons Menu Icon Main screen Machine Settings Aux. Equipment Parameters Data Service Controller Settings Information Status icons Icon Description Motor Stopped Motor Stopped Wait Running Unloaded Manual Unload Running Unloaded Wait Running Loaded Running Loaded Wait Machine Control Mode, Local 2920 7109 51... -
Page 33: Menu
Instruction book Machine Control Mode, Remote Machine Control Mode, LAN Auto Restart After Voltage Failure (ARAVF) System icons Icon Description Basic User Advanced User Service User Change between screens (indication) Reset This chapter gives a general survey of available icons. Not all icons mentioned in this chapter are applicable to every machine. - Page 34 Instruction book Menu structure Reference Designation Function Main screen Next to the main screen, a maximum of 3 extra values can be shown. Machine settings Setpoints, Regulation settings and Control parameters can be viewed and modified through this menu. Aux. Equipment Settings for auxiliary equipment can be viewed and modified through parameters this menu.
-
Page 35: Main Screen
Instruction book This is the main menu structure. The structure can be different depending on the configuration of the unit. Select or modify a setting Several settings can be modified. The process of selecting or modifying a setting anywhere in the menu is basically the same. - Page 36 Instruction book Description Reference Designation Function Screen information On the main screen, the screen information bar shows the current status of the machine. When scrolling through menus, the name of the current menu item is shown. Access level icon The access level icon shows the current access level setting.
- Page 37 Instruction book Example Setpoint used Starting from the main screen, swipe left until the Setpoint used screen is shown. To switch to a different setpoint, swipe up or down on the left vertical swipebar or tap next to the corresponding square. Manual unload Starting from the main screen, swipe left until the Manual unload screen is shown.
-
Page 38: Shutdown
Instruction book To reset the alarm, press the confirm button under the reset icon. To cancel without resetting, press the cancel button under the red ‘X’ icon. Before remedying, consult the Safety precautions. Before resetting a warning or shutdown message, always solve the problem. Frequently resetting these messages without remedying may damage the unit. - Page 39 Instruction book Shutdown screen, element outlet temperature The above screen shows that the temperature at the outlet of the element is 117 ˚C. Actions: • Switch off the voltage and remedy the problem cause. • After remedying and when the shutdown condition has disappeared, switch on the voltage and restart the unit.
-
Page 40: Machine Settings Menu
Instruction book • After remedying and when the shutdown condition has disappeared, switch on the voltage and restart the unit. The shutdown message will disappear automatically when the shutdown condition has disappeared. Machine settings menu Function The Machine Settings menu provides the ability to view and modify several machine settings. Swipe left to navigate to the following screens: •... - Page 41 Instruction book Setpoint 2 Starting from the Machine Settings menu, swipe left until the Setpoint 2 screen is shown. To select a load and unload setpoint, or to modify the values, see section Select or modify a setting. Regulation Starting from the Machine Settings menu, swipe left until the Regulation screen is shown. To select a menu item, or to change the setting, see section Select or modify a setting.
-
Page 42: Auxiliary Equipment Parameters Menu
Instruction book can only be modified after entering a password, please consult your supplier to activate this function. To select a menu item, or to change the setting, see section Select or modify a setting. Auxiliary equipment parameters menu Function The Aux. -
Page 43: Data Menu
Instruction book SmartBox Starting from the Aux. Equipment parameters menu, swipe left until the Internal SmartBox screen is shown. The reception quality of the internal antenna can be monitored. To select a menu item, or to change the setting, see section Select or modify a setting. -
Page 44: Service Menu
Instruction book Select To select a different item, swipe up or down on the left vertical swipebar. Inputs Starting from the Data menu, swipe left until the Inputs screen is shown. Select To select a different item, swipe up or down on the left vertical swipebar. Outputs Starting from the Data menu, swipe left until the Outputs screen is shown. - Page 45 Instruction book • Safety valve test Procedure To view the Service menu: 1. Use the controller as a Service user Controller settings menu to change the user profile. 2. Tap the Home button on top of the screen to go to the main screen. 3.
-
Page 46: Controller Settings Menu
Instruction book On the horizontal swipebar, tap ‘V’ to confirm or ‘X’ to decline. 3.11 Controller settings menu Function The Controller Settings menu provides the ability to view and modify several settings of the controller. Swipe left to navigate to the following screens: •... - Page 47 Instruction book The Service user profile is protected by a password. After selecting the Service user profile, the following screen pops up: The user can enter the password by swiping up or down on the right vertical swipebar to select the first digit.
-
Page 48: Information Menu
Instruction book To modify the setting, see section Select or modify a setting. 3.12 Information menu Function The Information menu provides the ability to view important information. Swipe left to navigate to the following screens: • Help • Information Procedure To view the Information menu: 1. -
Page 49: Web Server
Instruction book 3.13 Web server All controllers have a built-in web server that allows direct connection to the company network or to a dedicated PC via a local area network (LAN). This allows to consult certain data and settings via a PC instead of the display of the controller. Getting started Make sure you are logged in as administrator. - Page 50 Instruction book • Click with the right button and select Properties (1). • Use the check box Internet Protocol version +4 (TCP/IPv4) (1) (see picture). To avoid conflicts, uncheck other properties if they are checked. After selecting TCP/IPv4, click on the Properties button (2) to change the settings.
- Page 51 Instruction book • That IP address will be excluded from the DNS server, so it will be reserved for the controller. • Also get the correct Gateway and Subnet mask settings. For example: • IP = 10.25.43.200 • Gateway = 10.25.42.250 •...
- Page 52 Instruction book • Open your browser and type the IP address of the controller you want to view in your browser (in this example http://192.168.100.100). The interface opens: Screen shot (example!) Navigation and options • The banner shows the unit type and the language selector. In this example, three languages are available on the controller.
- Page 53 Instruction book Unit settings All unit settings can be displayed or hidden. Put a check mark in front of each point of interest and it will be displayed. Only the machine status is fixed and can not be removed from the main screen.
-
Page 54: Programmable Settings
Instruction book Special protections Lists all special protections of the unit. Service plan Displays all levels of the service plan and their status. This screen shot underneath only shows the running hours. It is also possible to show the current status of the service interval. 3.14 Programmable settings Parameters: unloading/loading pressures for compressors without built-in refrigeration dryer Minimum... - Page 55 Instruction book Minimum Factory Maximum setting setting setting Unloading pressure (100 psi compressors) psig 88.5 Unloading pressure (125 psi compressors) bar(e) Unloading pressure (125 psi compressors) psig 88.5 Unloading pressure (150 psi compressors) bar(e) 10.3 10.8 Unloading pressure (150 psi compressors) psig 88.5 Unloading pressure (175 psi compressors)
- Page 56 Instruction book Minimum Factory Maximum setting setting setting Unloading pressure (125 psi compressors) psig 88.5 Unloading pressure (150 psi compressors) bar(e) 10.3 10.6 Unloading pressure (150 psi compressors) psig 88.5 Unloading pressure (175 psi compressors) bar(e) 12.2 Unloading pressure (175 psi compressors) psig 88.5 Loading pressures...
- Page 57 Minimum stop Once the compressor has automatically stopped, it will remain stopped for the minimum time stop time, whatever happens with the net air pressure. Consult Atlas Copco if a setting lower than 20 seconds is required. Unloading/ The regulator does not accept illogical settings, e.g. if the unloading pressure is Loading pressure programmed at 7.0 bar(e) (101 psi(g)), the maximum limit for the loading pressure...
-
Page 58: Elektronikon™ Touch Controller
Instruction book Elektronikon™ Touch controller Controller The Elektronikon™ Touch controller Introduction The controller has following functions: • Controlling the unit • Protecting the unit • Monitoring components subject to service • Automatic restart after voltage failure (ARAVF) Automatic control of the unit The controller maintains the net pressure between programmable limits by automatically loading and unloading the unit (fixed speed units) or by adapting the motor speed (units with frequency converter). - Page 59 Instruction book Protecting the unit Shutdown Several sensors are provided on the unit. If one of the measured signals exceeds the programmed shutdown level, the unit will be stopped. Example: If the element outlet temperature exceeds the programmed shutdown level, the unit will be stopped.
-
Page 60: Control Panel
Instruction book Control panel Control panel Parts and functions Reference Designation Function Touchscreen Shows the unit operating condition and a number of icons to navigate through the menu. The screen can be operated by touch. Warning sign Flashes in case of a shut-down, is lit in case of a warning condition. -
Page 61: Icons Used
Instruction book Icons used Menu icons Menu Icon Menu Icon Menu Icon Data Status Inputs Outputs Counters Aux. Equipment Converters Parameters Service Service Overview Service Plan Service History Service functions Clean Screen Week Timer Week Remaining Running Time Event History Saved Data 2920 7109 51... - Page 62 Instruction book Menu Icon Menu Icon Menu Icon Machine Alarms Settings Regulation Control Parameters Aux. Equipment Converter(s) Parameters Internal SmartBox Auto Restart Controller Network Ethernet Settings Settings Settings CAN Settings Localisation Language Date/Time Units User Password Help Information Status icons Icon Description Motor Stopped...
- Page 63 Instruction book Motor Stopped Wait Running Unloaded Manual Unload Running Unloaded Wait Running Loaded Failed to Load Running Loaded Wait Manual Stop Machine Control Mode, Local Machine Control Mode, Remote Machine Control Mode, LAN Automatic Restart After Voltage Failure Week Timer Active System icons Icon Description...
- Page 64 Instruction book Antenna 50% Antenna 75% Antenna 100% Change between screens (indication) Energy recovery Dryer Element Drain(s) Analogue Output Menu Reset Auto Restart Filter(s) Cooler Valve(s) Power Meter Input icons Icon Description Pressure 2920 7109 51...
-
Page 65: Main Screen
Instruction book Temperature Special Protection Open Closed This chapter gives a general survey of available icons. Not all icons mentioned in this chapter are applicable to every machine. Main screen Function The Main screen is the screen that is shown automatically when the voltage is switched on. It is switched off automatically after a few minutes when there is no touch input. -
Page 66: Quick Access Screen
Instruction book Reference Designation Function Alarm button The alarm button can be tapped to show the current alarms. If an alarm occurs, the icon on the button will be red. Service button The service button can be tapped to show the service information. -
Page 67: Shutdown Warning
Instruction book Function Description Setpoints Several setpoints can be modified by tapping this icon. Control mode The control mode can be changed by tapping this icon. • Local control via start/stop buttons • Remote control via digital input(s) • LAN control via the network. When in Remote or LAN control, the start/stop buttons on the controller will not work. -
Page 68: Shutdown
Instruction book It remains possible to scroll through other screens, to check the actual status of other parameters. Press stop key (7) to stop the unit and wait until the unit has stopped. Switch off the voltage, inspect the unit and remedy. The warning message will disappear as soon the warning condition disappears. - Page 69 Instruction book Status screen with shutdown indication Press on shutdown indication on the screen. Shutdown screen, element outlet temperature The above screen shows that the temperature at the outlet of the element is 116 ˚C. Actions: • Switch off the voltage and remedy the problem cause. •...
-
Page 70: Menu Screen
Instruction book • Too high element outlet temperature, detected by temperature switch (TSHH11) or additional temperature switch (TSHH21). • Overload of the motor (M1) or the fan motor (M2). • Incorrect phase sequence, detected by phase sequence relay (K25). The unit will be shutdown, alarm LED (2) will flash, automatic operation LED (4) will go out and following screen will appear: Main screen with shutdown indication Actions:... - Page 71 Instruction book Description Reference Designation Function Data The data menu contains the status of the unit, information about the Inputs, Outputs and Counters. The Auxiliary equipment can also be viewed through this menu. Service The service menu contains the Service information. The ‘Clean screen’...
-
Page 72: Data Menu
Instruction book This is the main menu structure. The structure can be different depending on the configuration of the unit. Data menu Function This screen is used to display the following submenus: • Status • Inputs • Outputs • Counters •... - Page 73 Instruction book Description Reference Designation Status menu Inputs menu Outputs menu Counters menu Auxiliary equipment menu Status menu Tap the Status icon to enter the Status menu. This menu shows the current status of the unit. If an alarm is active, it can be viewed by tapping the alarm message. To reset an alarm, tap the reset button (1).
- Page 74 Instruction book This menu shows information about all the inputs. Outputs menu Tap the Outputs icon to enter the Outputs menu. This menu shows information about all the outputs. Voltage-free outputs may only be used to control or monitor functional systems. They should NOT be used to control, switch or interrupt safety related circuits.
-
Page 75: Service Menu
Instruction book This menu shows an overview of all auxiliary equipment fitted. 4.10 Service menu Function This screen is used to display the following submenus: • Service • Service functions (Only visible as advanced user) • Clean screen These submenus can be entered by tapping the icons. Procedure To enter the Service menu screen: 1. - Page 76 Instruction book This menu shows the remaining Running Hours and the remaining Real Time Hours until the next service. The first row (A) shows the Running Hours when the first service is needed (green), the second row shows the Real Time Hours (blue) A service overview can be viewed by tapping icon (1).
-
Page 77: Week Timer Menu
Instruction book The touchscreen and the start and stop button become inactive for 15 seconds. 4.11 Week timer menu Function This screen is used to set up to 4 different week timers with each up to 8 settings per day. The week timers can be activated through this screen. -
Page 78: Machine Settings Menu
Instruction book Procedure To enter the Event history menu screen: 1. Tap the Menu button 2. Tap the Event History icon Description Reference Designation Saved Data Saved data Tap the Saved Data icon to enter the Saved Data menu. Scroll through the items swiping up and down in this list. The event date and time is shown at the right side of the screen. - Page 79 Instruction book Procedure To enter the Machine settings menu screen: 1. Tap the Menu button 2. Tap the Machine Settings icon Description Reference Designation Alarms menu Regulation menu Control Parameters menu Aux. Equipment Parameters menu Auto Restart menu Alarms menu Tap the Alarms icon to enter the Alarms menu.
- Page 80 Instruction book Setpoints or pressure bands can be modified through this menu. Modify a setting When tapping a list item, a selection screen pops up. The user can modify the setting by tapping ‘–’ or ‘+’ and can confirm by tapping ‘V’ or decline by tapping ‘X’. Change a selection When tapping a list item, a selection screen pops up.
-
Page 81: Controller Settings Menu
Instruction book Modify a setting When tapping a list item, a selection screen pops up. The user can modify the setting by tapping ‘–’ or ‘+’ and can confirm by tapping ‘V’ or decline by tapping ‘X’. Auto restart menu Tap the Auto restart icon to enter the Auto Restart menu. - Page 82 Instruction book Description Reference Designation Network Settings menu Localisation menu User Password menu Help menu Information menu Network settings menu Tap the Network Settings icon to enter the Network Settings menu. Ethernet Settings The list of Ethernet Settings is shown. When ethernet is turned off, the settings can be modified. CAN Settings The list of CAN Settings is shown.
- Page 83 Instruction book Language The language setting of the controller can be modified through this menu. Date/Time The date and time settings of the controller can be modified through this menu. Units The units displayed can be modified through this menu. Modify a setting When tapping a list item, a selection screen pops up.
-
Page 84: Access Level
Instruction book This menu can show a link to the web page of your supplier, a helpdesk phone number or other helpful information. Information menu Tap the Information icon to enter the Information menu. This menu shows information about the controller. 4.15 Access level Function Through this pop-up screen the access level settings can be viewed or changed. -
Page 85: Web Server
Instruction book Reference Designation Function User A basic set of parameters is visualized, no password required. Service A basic set of parameters can be modified, no password required. Full This access level is not accessible to end users. Decline Tap to decline the selected user level. Confirm Tap to confirm the selected user level. - Page 86 Instruction book Configuration of the network card • Go to Network and Sharing Center (1). • Click on Change adapter settings (1). • Select the Local Area Connection, which is connected to the controller. • Click with the right button and select Properties (1). 2920 7109 51...
- Page 87 Instruction book • Use the check box Internet Protocol version +4 (TCP/IPv4) (1) (see picture). To avoid conflicts, uncheck other properties if they are checked. After selecting TCP/IPv4, click on the Properties button (2) to change the settings. • Use the following settings: •...
- Page 88 Instruction book • Subnet mask = 255.255.254.0 • Connect the controller to the company's network (LAN) by using a UTP cable (min. CAT 5e). • Adapt the network settings in the controller. • Put the controller in “advanced status”, tap “Controller Settings”, ”Network settings”, and at last “Ethernet settings”: •...
- Page 89 Instruction book • Open your browser and type the IP address of the controller you want to view in your browser (in this example http://192.168.100.100). The interface opens: Screen shot (example!) Navigation and options • The banner shows the unit type and the language selector. In this example, three languages are available on the controller.
- Page 90 Instruction book Unit settings All unit settings can be displayed or hidden. Put a check mark in front of each point of interest and it will be displayed. Only the machine status is fixed and can not be removed from the main screen.
-
Page 91: Programmable Settings
Instruction book Special protections Lists all special protections of the unit. Service plan Displays all levels of the service plan and their status. This screen shot underneath only shows the running hours. It is also possible to show the current status of the service interval. 4.17 Programmable settings Parameters Minimum... - Page 92 The built-in service timers will give a Service warning message after their respective pre- programmed time interval has elapsed. Also see section . Consult Atlas Copco if a timer setting has to be changed. The intervals must not exceed the nominal intervals and must coincide logically. See section Modifying general settings.
-
Page 93: Osci (Optional)
Instruction book OSCi (optional) Introduction Compressed air produced by oil-injected compressors contains a small quantity of oil. During the cooling of the air in the aftercooler and in the refrigeration dryer (on compressors with built-in refrigeration dryer), oil-containing condensate is formed. The OSCi is a condensate treatment device, designed to separate most of this oil from the water and to sorb it in its replaceable filters, thus preventing contamination of the environment. -
Page 94: Operation
Instruction book Operation General Condensate flow scheme Condensate inlet Foam cover Oleophilic filter Service drains with valve Air injection connection OGC filter Activated carbon filter Condensate test outlet Condensate outlet The OSCi 3790 housing consists of 3 interconnected vessels. The oil-containing condensate is injected (1) in discontinuous bursts at a downward angle into the first vessel which acts as expansion chamber. - Page 95 Instruction book bag (6), filled with oleophilic granular clay (OGC). Through a connection (5) at the bottom of the second vessel, air is injected into the condensate. This airflow breaks stable emulsions by enhancing the sorption process of oil onto the OGC. The air supply also prevents the formation of certain anaerobic bacteria.
- Page 96 Instruction book Clamping ring Foam cover Location of sample bottles and connection material (during shipping only) Service drains with valve Fixation bolts Wire and tube clamp Overflow switch Filter position sensor and visual indication of the filter position Detail views View of OSCi inlet Filter position sensor Condensate inlet connections...
- Page 97 Instruction book View of OSCi outlet Condensate outlet Condensate test outlet Drain plate Condensate outlet connection of the OSCi Condensate sample valve 2920 7109 51...
-
Page 98: Putting Into Operation (Commissioning)
Instruction book Putting into operation (commissioning) 1. Verify that the OSCi drain valves (4) are closed. 2. Unscrew the clamping ring (1) of the cover of the first vessel of the OSCi and take off the cover (2). 3. Take out the CDROM and the box (3) with the test bottle and the reference bottle and keep them in a safe place nearby the compressor. -
Page 99: Pictographs
Instruction book Drain plate 5. Connect an outlet tube leading to the sewage system (19 mm inner diameter). Since the OSCi functions at atmospheric pressure, the outlet piping must always be positioned below the outlet connection on the OSCi vessel 3, unless a pump (able to run dry) is installed (not provided). -
Page 100: Controller Display And Warnings
Instruction book Automatic condensate outlet (not pressurized!) Periodically required manual test outlet Manual condensate outlet Consult manual before maintenance or repair Controller display and warnings Following important parameters of the OSCi can be consulted from the controller display: • The remaining filter lifetime, expressed as a percentage compared to new filters (100%) •... -
Page 101: Warnings
Instruction book Reference Description OSCi remaining: OSCi filters remaining lifetime To take a look at the status of the OSCi overflow sensor, swipe down in the list. Reference Description OSCi overflow Warnings Service required This warning indicates that the remaining filter lifetime has dropped below 10%. In this case, a service kit with new filters needs to be ordered. - Page 102 Instruction book Reference Description Reference Description Alarms Warning OSCi Remaining Level Once the filter has reached a lifetime below 10%, this warning will remain active until new filters are inserted correctly (sensor arm in tower 1 should rest on the filter edge!). When the new filters are installed correctly and the percentage is above 10% (normally between 90% and 100%), the warning will disappear automatically.
-
Page 103: Maintenance
Instruction book Reference Description Status OSCi Overflow When you tap the warning, the screen will show that the water level in the OSCi is too high. By fixing the problem (see section Problem solving), this warning will disappear automatically. Maintenance Check the filters regularly as explained below in order to prevent untreated condensate from entering the sewer. - Page 104 Instruction book Test/sample bottle (1) and turbidity reference bottle (2) Oleophilic filter Initially, the oleophilic filter (3 - Condensate flow scheme) will float almost completely on the condensate and only the bottom part will act as filtration medium. By sorbing more and more oil, the filter will sink and new filter material will be exposed to the condensate.
-
Page 105: Service Kits
13. Close/reposition the compressor bodywork. Service kits Atlas Copco has a complete range of service kits available. Service kits comprise all parts needed for servicing components and offer the benefits of using genuine Atlas Copco parts while keeping the maintenance budget low. -
Page 106: Problem Solving
Instruction book part number Filter kit OSCi: 2901 1734 00 5.10 Problem solving Condition Fault Remedy A lot of oil entered the Compressor Replace all filters. Clean the vessels. Check the OSCi. malfunctioning compressor. The Elektronikon® A section of the outlet Reposition the outlet tube to below the outlet connection controller shows tube is higher than... - Page 107 Instruction book Condition Fault Remedy No enough air flow Disconnect the strainer (4-View of OSCi inlet) and take out during the test. the strainer. Clean the strainer and the nozzle with compressed air and dry tissue. Check that the air tube does not touch any other components and is not hindered in any way.
-
Page 108: Energy Recovery (Optional)
Instruction book Energy recovery (optional) Energy recovery unit Description A large part of the energy required for any compression process is transformed into heat. For oil- injected screw compressors, the major part of the compression heat is dissipated through the oil system. -
Page 109: Energy Recovery Systems
Instruction book Reference Designation Water inlet pipe Water outlet pipe Temperature sensor, water inlet pipe Temperature sensor, water outlet pipe Oil drain plug Oil flexible from compressor oil separator vessel to ER unit Oil flexible from ER unit to oil filter housing Pressure relief valve Location of heat exchanger by-pass valve (BV2) Heat exchanger... -
Page 110: Operation
Instruction book Recovery water flow The recovery water enters the unit at inlet connection (1). In heat exchanger (HE) the compression heat is transferred from the compressor oil to the water. The water leaves heat exchanger (HE) via outlet connection (2). Water requirements for closed water circuits The use of a closed water circuit minimises make-up water requirements. - Page 111 Instruction book Flow diagram of compressor with energy recovery system Reference Designation Reference Designation Thermostatic bypass valve of ER Oil filter unit Oil/water heat exchanger (ER Oil separator vessel unit) Compressor element Thermostatic bypass valve in oil filter housing Oil cooler (compressor) Aftercooler (compressor) Water inlet Water outlet...
- Page 112 Instruction book Position of valve housing of BV2 with wheel V1 ER label Attention: It is only allowed to turn the wheel completely in or out. No in-between position is allowed! The oil cooler bypass valve (BV1) starts closing the bypass over the oil cooler (Co) at the lower limit of its temperature range.
-
Page 113: Maintenance
Instruction book • Compressor start-up When the compressor is started up from cold, the oil temperature will be low. Bypass valve (BV2) shuts off the oil supply through the heat exchanger (HE) and bypass valve (BV1) shuts off the oil supply through the oil cooler (Co) to prevent the compressor oil from being cooled. -
Page 114: Energy Recovery Data
To clean the oil side, soak the heat exchanger in a degreasing solution. To remove scale formation in the water compartment, a proper descaling process should be applied. Consult Atlas Copco. Energy recovery data... - Page 115 Instruction book Modifying settings If the programmed warning settings for the water temperatures are exceeded, a warning indication is shown on the controller: Temperature input Minimum Nominal Maximum setting setting setting Water inlet temperature of energy recovery ˚C Water inlet temperature of energy recovery ˚F Energy recovery water outlet temperature ˚C...
-
Page 116: Installation
Instruction book Installation Dimension drawings The drawings are on the CD, supplied with your machine Dimension drawing Model 9829 3503 01 GA 37, GA 45, GA 30 , GA 37 , GA 45 Text on drawings Translation or Explanation Compressor cooling air outlet Cooling air outlet of compressor and motor Compressor cooling air inlet Cooling air inlet of compressor and motor... -
Page 117: Installation Proposal
Instruction book Installation proposal Compressor room example Compressor room example Air cooling Water cooling The direction of the cooling flows may never be inverted Description Compressor Install the compressor unit on a solid, level floor, suitable for taking its weight. 2920 7109 51... - Page 118 Instruction book Position of the compressed air outlet valve. The pressure drop over the air delivery pipe can be calculated from: 1.85 Δp = (L x 450 x Q ) / (d x P), with d = inner diameter of the pipe in mm Δp = pressure drop in bar (recommended maximum: 0.1 bar (1.5 psi)) L = length of the pipe in m P = absolute pressure at the compressor outlet in bar(a)
- Page 119 T0 = air receiver temperature in K Bypass system to bypass the dryer during service operations (available as an option, consult Atlas Copco). Air-cooled compressors: To prevent feedback of exhaust air into the cooling inlet, sufficient space should be foreseen above the unit to evacuate the exhaust air.
-
Page 120: Electrical Connections
If frost might occur, the appropriate measures should be taken to avoid damage to the machine and its ancillary equipment. In this case, and also if operating above 1000 m (3300 ft), consult Atlas Copco. Moving/lifting The compressor can be moved by a lift truck using the slots in the frame. - Page 121 Instruction book Electrical connections for GA 30 up to GA 45 Reference Designation Customer’s installation Option All voltages (50 and 60 Hz) Instructions 1. Provide an isolating switch. 2. Check that the motor cables and wires inside the electric cabinet are clamped tight to their terminals.
-
Page 122: Cooling Water Requirements
Have the modifications checked by Atlas Copco. Stop the compressor and switch off the voltage before connecting external equipment. Only potential-free contacts are allowed. • LAN control: The compressor is controlled via a local network. Consult Atlas Copco. See section Electrical system to locate the connectors. - Page 123 Instruction book The water requirements refer to untreated water. When water is treated, some parameters will change. Water treatments should be carried out by a specialized water treatment company, taking the responsibility for the performance of the treated cooling water and the compatibility with the materials in the cooling circuit.
- Page 124 Instruction book Ca (ppm Ca CO Type of cooling system Standard Energy recovery Single pass < 500 < 2 Recirculating (with tower) < 500 not applicable Closed loop < 1000 < 50 4. The Ryznar Stability Index (RSI) The Ryznar Stability Index is a parameter for predicting whether water will tend to dissolve or precipitate calcium carbonate.
- Page 125 Instruction book Total Temperature Ca hardness dissolved (°C) (ppm CaCO Alkalinity solids (ppm (mg/l) CaCO 86 - 91 356 - 446 356 - 446 92 - 95 447 - 563 447 - 563 564 - 707 564 - 707 708 - 892 708 - 892 893 - 1000 893 - 1000 3.0...
- Page 126 Instruction book Dissolved iron (ppm) Dissolved manganese (ppm) Type of cooling Standard Energy recovery Standard Energy recovery system Single pass < 1 < 0.2 < 0.2 < 0.05 Recirculating (with < 1 not applicable < 0.2 not applicable tower) Closed loop <...
-
Page 127: Pictographs
Instruction book If additives are used in the cooling water, take into account that the cooling capacity will change. Δm = ((C ) * X) / (C *(1-X) + X*C ) * 100 % with Δm: change of mass flow of the coolant : specific heat capacity of water : specific heat capacity of the additives X: the percentage of additives... - Page 128 Instruction book Reference Designation Warning: Always read the manual, switch off the voltage, depressurise compressor and lock out/ tag out before repairing. Keep the doors closed during operation Switch off the voltage before removing protecting cover inside electric cubicle Warning, voltage Automatic condensate drain Stop the compressor before cleaning the coolers Lightly oil the gasket of the oil filter, screw it on and tighten by hand (approx.
- Page 129 Instruction book Pictographs on water-cooled compressors Reference Designation Cooling water inlet Cooling water outlet 2920 7109 51...
-
Page 130: Operating Instructions
Instruction book Operating instructions Initial start-up The operator must apply all applicable Safety precautions. For the location of the air outlet valve and the drain connections, see sections Introduction Condensate system. Preparations 1. Consult the sections Electrical cable size, Installation proposal Dimension drawings. - Page 131 For draining of pure condensate water, install an oil/water separator which is available from Atlas Copco as an option. See section OSCi 8. For compressors with a DD or a DD and PD filter: connect the automatic drain of the filters to a suitable drain collector.
- Page 132 Instruction book Initial start procedure If the compressor has not run for the past 6 months, it is strongly recommended to improve the lubrication of the compressor element before starting. To do so: 1. Disconnect the inlet hose. 2. Remove the unloader (UA). 3.
-
Page 133: Before Starting
Instruction book 2. On water-cooled compressors, close the cooling water drain valves. Open the cooling water inlet valve and the regulation valve. 3. Switch on the voltage. Start the compressor and stop it immediately. Check the rotation direction of drive motor (M1) while the motor is coasting to a stop. The correct rotation direction of the drive motor is indicated by an arrow shown on the motor fan cowl. -
Page 134: Starting
Instruction book Position of air filter and service indicator 4. On water-cooled compressors: • Check that the cooling water drain valves in the inlet and outlet pipes are closed. • Open the cooling water inlet valve. • Open the water flow regulating valve. This step can be skipped if the setting of this valve has not been changed. - Page 135 Instruction book Control panel Elektronikon™ Swipe Control panel Elektronikon™ Touch Procedure 1. Open the air outlet valve. 2. Switch on the voltage. Check that voltage on LED lights up. 2920 7109 51...
- Page 136 100° C, this will lead to more rapid oil deterioration, which will have an impact on oil service intervals. Consult Atlas Copco for best practices in this case. Also consult Atlas Copco in case condensate should form in the oil.
-
Page 137: During Operation
Instruction book loaded operation to obtain a temperature between 70 °C (158 °F) and 75 ˚C (167 ˚F) at the outlet of the compressor element. During operation Warnings The operator must apply all relevant Safety precautions. Also consult section Problem solving. - Page 138 Instruction book Control panel Elektronikon™ Touch Regularly check the oil level. To do so: 1. Press the stop button on the control panel. 2. A few minutes after stopping, the oil level should be between the oil filler neck (FC) and the top of the sight glass (Gl).
-
Page 139: Checking The Display
Instruction book 6. Remove the plug and add oil until the level reaches the filler opening. 7. Fit and tighten the plug (FC). Unlock the emergency stop button, select the STOP icon and press reset before starting. Air filter Position of the service indicator Regularly check the service indicator. - Page 140 Instruction book Control panel Elektronikon™ Swipe Check the display (6) regularly for readings and messages. The display normally shows the compressor outlet pressure, while the status of the compressor is indicated by pictographs. Remedy the trouble if alarm LED (1) is lit or flashes. The display (6) will show a service message if a service plan interval has been exceeded or if a service level for a monitored component has been exceeded.
- Page 141 Instruction book Control panel Elektronikon™ Touch Check the display (1) regularly for readings and messages. The display normally shows the compressor outlet pressure, while the status of the compressor is indicated by pictographs. Remedy the trouble if alarm LED (2) is lit or flashes. The display (1) will show a service message if a service plan interval has been exceeded or if a service level for a monitored component has been exceeded.
-
Page 142: Stopping
Instruction book Stopping Control panel Control panel Elektronikon™ Swipe Control panel Elektronikon™ Touch 2920 7109 51... -
Page 143: Taking Out Of Operation
Instruction book Procedure Step Action For Elektronikon™ Swipe, press stop button (9). Automatic operation LED (3) goes out and the compressor stops after 30 seconds of unloaded operation. For Elektronikon™ Touch, press stop button (6). Automatic operation LED (4) goes out and the compressor stops after 30 seconds of unloaded operation. -
Page 144: Maintenance
Instruction book Maintenance Preventive maintenance schedule Warning Control panel Elektronikon™ Swipe Control panel Elektronikon™ Touch 2920 7109 51... - Page 145 For overhauling or carrying out preventive maintenance, service kits are available (see section Service kits). Service contracts Atlas Copco offers several types of service contracts, relieving you of all preventive maintenance work. Consult your Atlas Copco Customer Centre. General When servicing, replace all removed O-rings and washers.
- Page 146 Instruction book Maintenance checklist Period Operation Daily Check oil level. Check readings on display. Check air filter service indicator. Check that condensate is discharged during operation. Drain condensate. On water-cooled units: check for cooling water flow. Monthly Check that condensate is discharged when pressing the test button on top of the electronic water drain.
-
Page 147: Oil Specifications
In order to achieve the best machine performance and guarantee the reliability, it is required to use genuine Atlas Copco Lubricants. Their tailor made formulation is the result of years of field experience, research and in-house development. Consult the Spare Parts list for part number information. - Page 148 Extreme Roto-Inject Fluid NDURANCE Atlas Copco's Roto-Inject Fluid NDURANCE is a premium mineral oil based 4000 hours lubricant, specially developed for use in single stage oil injected screw compressors running in mild conditions. Its specific formulation keeps the compressor in excellent condition. Roto-Inject Fluid NDURANCE can be used for compressors operating at ambient temperatures between 0 ˚C (32...
- Page 149 Atlas Copco. Roto Synthetic Fluid XTEND DUTY Atlas Copco's Roto Synthetic Fluid XTEND DUTY is a high quality synthetic 8000 hours lubricant for oil injected screw compressors which keeps the compressor in excellent condition. Because of its excellent oxidation stability, Roto Synthetic Fluid XTEND DUTY can be used for compressors operating at ambient temperatures between 0 ˚C (32 ˚F) and 46 ˚C (115 ˚F).
-
Page 150: Drive Motor
110°C (230°F) use not recommended use not recommended Note: the presence of dust and/or high humidity may require a shorter exchange interval. Consult Atlas Copco. * Whichever comes first. Drive motor General Keep the outside of the electric motor clean for efficient cooling. If necessary, remove dust with a brush and/or compressed air jet. -
Page 151: Air Filter
Instruction book Air filter Location of air filter Recommendations 1. Never remove the element while the compressor is running. 2. For minimum downtime, replace the dirty element by a new one. 3. Discard the element when damaged. Procedure 1. Stop the compressor. Switch off the voltage. 2. - Page 152 Instruction book Procedure Oil drain and filler plug on the oil separator vessel Oil drain plugs, check valve and gear casing 2920 7109 51...
-
Page 153: Coolers
Instruction book Vent plug, oil cooler Step Description Run the compressor until warm. Stop the compressor after 3 minutes of unloaded operation. Close the air outlet valve and switch off the voltage. Wait a few minutes and depressurise by unscrewing oil filler plug (FC) just one turn to permit any pressure in the system to escape. Air cooled units: loosen the vent plug (VP) of the oil cooler and wait for 5 minutes. -
Page 154: Safety Valves
• Next, clean with an air jet in the reverse direction to normal flow. Use low pressure air. If necessary, the pressure may be increased up to 6 bar(e) (87 psig). • If it is necessary to wash the coolers with a cleaning agent, consult Atlas Copco. • Remove the cover used during cleaning. -
Page 155: Service Kits
Atlas Copco parts while keeping the maintenance budget low. Also a full range of extensively tested lubricants, suitable for your specific needs is available to keep the compressor in excellent condition. -
Page 156: Disposal Of Used Material
Instruction book If the compressor is going to be stored without running from time to time, protective measures must be taken. Consult your supplier. 9.11 Disposal of used material Used filters or any other used material (e.g. desiccant, lubricants, cleaning rags, machine parts, etc.) must be disposed of in an environmentally friendly and safe manner, and in line with the local recommendations and environmental legislation. -
Page 157: Problem Solving
Instruction book Problem solving Warning Always apply all relevant Safety precautions. Before carrying out any maintenance, repair work or adjustment, press the stop button, wait until the compressor has stopped and close the air outlet valve. Open the manual drain valve(s). Press the emergency stop button and switch off the voltage. - Page 158 Safety valve leaking Replace valve Inlet valve does not fully open Have valve checked Compressor element out of order Consult Atlas Copco Excessive oil flow through air inlet Check valve leaking or oil stop valve Replace defective parts. Replace filter after stopping...
- Page 159 On water-cooled compressors, Increase flow cooling water flow too low On water-cooled compressors, Consult Atlas Copco Customer restriction in cooling water system Centre Oil cooler clogged Clean cooler Bypass valve malfunctioning Have valve tested...
- Page 160 Instruction book Condition Fault Remedy Condenser pressure too high Fan control switch out of Replace or too low order Fan blades or fan motor out of Have checked fan/fan motor, if necessary order replace. Ambient temperature too high Check and correct; if necessary, draw cooling air via a duct from a cooler place or relocate the compressor Condenser externally clogged Clean condenser...
-
Page 161: Technical Data
Instruction book Technical data 11.1 Readings on display Control panel Control panel Elektronikon™ Swipe Control panel Elektronikon™ Touch 2920 7109 51... -
Page 162: Electric Cable Size And Fuses
Instruction book Important The readings mentioned below are valid under the reference conditions (see section Reference conditions and limitations). Reference Reading Air outlet pressure Modulates between programmed unloading and loading pressures. Compressor element For air-cooled units: approx. 60 ˚C (108 ˚F) above cooling air inlet temperature outlet temperature For water-cooled units: approx. - Page 163 Instruction book Compressor type I (1) Max. fuse (1) I (2) Max. fuse (2) gL/gG gL/gG GA 30 GA 30 GA 30 GA 30 Compressor type I (1) Max. fuse (1) I (2) Max. fuse (2) gL/gG gL/gG GA 37 GA 37 GA 37 GA 37...
- Page 164 Instruction book Compressor type I (1) Max. fuse (1) I (2) Max. fuse (2) gL/gG gL/gG GA 45 GA 45 GA 45 GA 45 GA 45 GA 45 I: current in the supply lines at maximum load and nominal voltage (1): compressors without integrated dryer (2): compressors with integrated dryer Fuse calculations for IEC are done according to 60364-4-43 Low-voltage electrical installations...
- Page 165 Instruction book Installation method B2 according table B.52.1. Multi-core cable in conduit on a wooden wall Maximum allowed current in function of the ambient temperature for installation method B2 Ambient temperature Cable section 30 °C 40 °C 45 °C 50 °C 55 °C 4 mm²...
- Page 166 Instruction book Installation method F according table B.52.1. Single-core cables, touching in free air Clearance to wall not less than one cable diameter Maximum allowed current in function of the ambient temperature for installation method F conductor temperature 70°C Ambient temperature Cable section 30 °C 40 °C...
-
Page 167: Protection Settings
Instruction book • Add 10 % to the total compressor current (I Pack or I FF from the tables) and divide by 2 • Multiply the ampacity of the cables with 0.8 (see table A.52.17 (52-E1)) • Install fuses of half the size of the recommended maximum fuse size on each cable. •... -
Page 168: Dryer Switches
Instruction book Frequency Voltage (V) GA 30 P GA 37 GA 37 P GA 45 GA 45 P (Hz) F21 (A) F21 (A) F21 (A) F21 (A) F21 (A) Settings for fan motor overload protection (Q15) Frequency Voltage (V) GA 30 P GA 37 GA 37 P GA 45... -
Page 169: Compressor Data
Instruction book Minimum working pressure bar(e) Minimum working pressure psig Maximum air inlet temperature ˚C Maximum air inlet temperature ˚F Minimum ambient temperature ˚C Minimum ambient temperature ˚F On water-cooled units also: Maximum cooling water outlet temperature ˚C Maximum cooling water outlet temperature ˚F Maximum cooling water inlet pressure bar(e) - Page 170 Instruction book 7.5 bar 8.5 bar 10 bar 13 bar 100 psi 125 psi 150 psi 175 psi Pressure drop over psig dryer, Workplace Full- Feature units Set point of thermostatic ˚C valve Set point of thermostatic ˚F valve Motor shaft speed r/min 2956 2956...
- Page 171 Instruction book 7.5 bar 8.5 bar 10 bar 13 bar 100 psi 125 psi 150 psi 175 psi Refrigerant quantity, Workplace Full-Feature units Cooling water l/min consumption (at water inlet temperature below 35 ˚C and temperature rise of 15 ˚C), water- cooled units Cooling water consumption (at water...
- Page 172 Instruction book 7.5 bar 8.5 bar 10 bar 13 bar 100 psi 125 psi 150 psi 175 psi Maximum (unloading) bar(e) 10.8 12.5 pressure, Workplace units Maximum (unloading) psig pressure, Workplace units Maximum (unloading) bar(e) 12.8 10.6 12.3 pressure, Workplace Full-Feature units Maximum (unloading) psig...
- Page 173 Instruction book 7.5 bar 8.5 bar 10 bar 13 bar 100 psi 125 psi 150 psi 175 psi Dryer power at full load, 1.34 Workplace Full-Feature units Dryer power at full load, Workplace Full-Feature units Dryer power at no load, Workplace Full-Feature units Dryer power at no load,...
- Page 174 Instruction book 7.5 bar 8.5 bar 10 bar 13 bar 100 psi 125 psi 150 psi 175 psi Oil capacity, air-cooled Imp gal 3.43 3.43 3.43 3.43 3.43 3.43 3.43 3.43 units Oil capacity, water- 17.9 17.9 17.9 17.9 17.9 17.9 17.9 17.9...
- Page 175 Instruction book 7.5 bar 8.5 bar 10 bar 13 bar 100 psi 125 psi 150 psi 175 psi Temperature of air ˚C leaving outlet valve, Workplace units Temperature of air ˚F leaving outlet valve, Workplace units Pressure dew point, ˚C Workplace Full-Feature units Pressure dew point,...
- Page 176 Instruction book 7.5 bar 8.5 bar 10 bar 13 bar 100 psi 125 psi 150 psi 175 psi Cooling water consumption (at water inlet temperature below 95 ˚F and temperature rise of 27 ˚F), water- cooled units Cooling water l/min consumption (at water inlet temperature between 35 and 40 ˚C...
- Page 177 Instruction book 7.5 bar 8.5 bar 10 bar 13 bar 100 psi 125 psi 150 psi 175 psi Maximum (unloading) psig pressure, Workplace Full-Feature units Reference working bar(e) 12.5 10.3 pressure Reference working psig pressure Pressure drop over bar(e) 0.13 0.13 0.13 0.13...
- Page 178 Instruction book 7.5 bar 8.5 bar 10 bar 13 bar 100 psi 125 psi 150 psi 175 psi Dryer power at no load, Workplace Full-Feature units Refrigerant type, R410A R410A R410A R410A R410A R410A R410A R410A Workplace Full-Feature units Refrigerant quantity, Workplace Full-Feature units Refrigerant quantity,...
- Page 179 Instruction book 7.5 bar 8.5 bar 10 bar 13 bar 100 psi 125 psi 150 psi 175 psi Sound pressure level dB(A) (according to ISO 2151 (2004)) GA 45 7.5 bar 8.5 bar 10 bar 13 bar 100 psi 125 psi 150 psi 175 psi Frequency Maximum (unloading) bar(e)
- Page 180 Instruction book 7.5 bar 8.5 bar 10 bar 13 bar 100 psi 125 psi 150 psi 175 psi Pressure dew point, ˚F 37.4 37.4 37.4 37.4 37.4 37.4 37.4 37.4 Workplace Full-Feature units Temperature of air ˚C leaving outlet valve, Workplace Full-Feature units Temperature of air...
-
Page 181: Technical Data Controller
Instruction book 7.5 bar 8.5 bar 10 bar 13 bar 100 psi 125 psi 150 psi 175 psi Cooling water 2.65 2.65 2.65 2.65 2.65 2.65 2.65 2.65 consumption (at water inlet temperature between 95 and 104 ˚F and temperature rise of 18 ˚F), water-cooled units Oil capacity, air-cooled... - Page 182 Instruction book Digital outputs Number of outputs 9 (Elektronikon™ Touch controller) 6 (Elektronikon™ Swipe controller) Type Relay (voltage free contacts) Rated voltage AC 250 V AC / 10 A max. Rated voltage DC 30 V DC / 10 A max. Digital inputs Number of inputs 10 (Elektronikon™...
-
Page 183: Instructions For Use
Instruction book Instructions for use Oil separator vessel This vessel can contain pressurized air. This can be potentially dangerous if the equipment is misused. This vessel must only be used as a compressed air/oil separator tank and must be operated within the limits specified on the data plate. - Page 186 COMMITED TO SUSTAINABLE PRODUCTIVITY We stand by our responsibilities towards our customers, towards the environment and the people around us. We make performance stand the test of time. This is what we call — Sustainable Productivity. www.atlascopco.com...
Need help?
Do you have a question about the GA 30+ and is the answer not in the manual?
Questions and answers