Advertisement
Quick Links
Ver 1.1 Copyright © 2021 Everybot Inc. All rights reserved
Before using the product, please carefully read the user manual to use the product safely and
properly. Everybot Inc. assumes no responsibility for product damage caused by failure to follow
user instructions and precautions. Please keep this user manual as it contains the warranty.
Download Manual
https://everybot.co.kr/userguide.asp
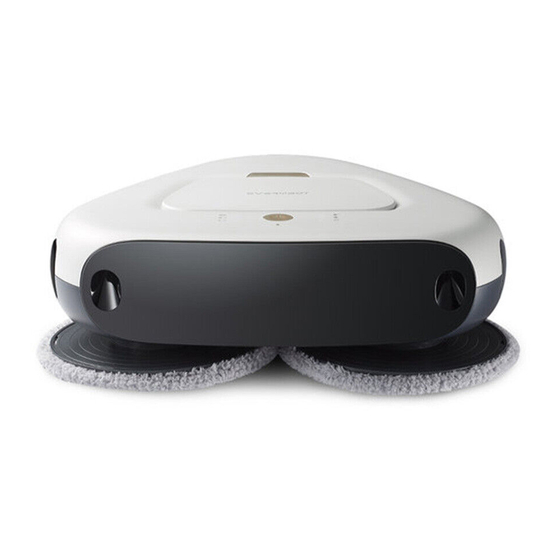
TS300
User Manual
Advertisement

Subscribe to Our Youtube Channel
Related Manuals for Everybot THREE SPIN TS300


Summary of Contents for Everybot THREE SPIN TS300
- Page 1 Before using the product, please carefully read the user manual to use the product safely and properly. Everybot Inc. assumes no responsibility for product damage caused by failure to follow user instructions and precautions. Please keep this user manual as it contains the warranty.
- Page 2 Quick Guide Battery Charging Sufficient: ��% or more Moderate: ��-��% Low: Less than ��% • Connect the power adapter to the • When the main unit is mounted on • Check the charging status through adapter jack on the bottom of the the charging station,charging will the LED indicator on the main unit.
- Page 3 Start Cleaning Click Click Turn on the power Start cleaning • Press and hold • Press the power/operate the power/operate button button once more to start to turn on the power. automatic cleaning. Cleaning the Unit • Remove the mop pad from the •...
- Page 4 Important Safety Instructions • This is to protect users' safety and prevent property damage. • Before using the product, please carefully read the user manual to use the product properly. • This appliance is not intended for use by persons (including children) with reduced physical, sensory or mental capabilities, or lack of experience and knowledge, unless Caution they have been given supervision or instruction concerning use of the appliance by a...
- Page 5 Table of Contents Do not lie down near the product while it is cleaning. ▶ Quick Guide � • Long hair can get tangled around mops and rotating plates. Important Safety Instructions � Do not touch rotating plates or mop pads while the ▶...
- Page 6 Components Main Unit Remote Control with Batteries Charging Station Power Adapter (AAA size) Mother Yarn Mop Microfiber Mop User Guide (gray) (light green) Mother Yarn Mop (gray) Microfiber Mop (light green) It is composed of mother yarn fibers that Long and thick bristles provide a large are ���...
- Page 7 Names of Parts Status indicator Brightness detection sensor Front detection sensor Cliff detection sensor Remote control receiver Water tank release button Water tank Side detection sensor Rotating plates Bottom Charging point Mop pad Side handle Rear handle Charging Station Charging point Adapter jack (located on the bottom) Status Indicator...
- Page 8 Battery Charging • Do not use any adapter other than the genuine adapter included. • Please install the charging station on a flat surface. • Use the product after fully charging it. Caution • When charging, empty all water in the water tank. Charging time: Approx.
- Page 9 Attaching Mop Pads • Do not leave wet mop pads on the floor for an extended period. It may damage the floor and the mop may develop a bad odor. Caution • When starting with dry mop pads, it can be used after the mop pads are sufficiently wet from the automatic supply of water at the beginning.
- Page 10 Installing the Water Tank Detach the water tank by pressing the water Open the water tank cap and fill it with water tank release button on the top of the main unit. up to the mouth of the water tank (max. ���mL). Turn the water tank cap clockwise to close it.
- Page 11 Start Cleaning • If there is no operation for � minutes, the power turns off. Caution Turn on power | Start cleaning Press and hold the power/operate button to turn on the power. Press the power/operate button once more to start automatic cleaning. Click Click Turn on...
- Page 12 Using the Remote Control How to Insert Batteries ➀ Remove the remote control cover. ➁ Insert the batteries as shown in the picture. ➂ Close the remote control cover by sliding it until it clicks. • The maximum distance that the remote control signal can be received is �m, and there may be restrictions on signal reception if there are obstacles nearby.
- Page 13 Automatic Cleaning Intensive Cleaning Focused Cleaning Efficiently cleans the entire Cleans thoroughly by repeating Cleans the space around the space in basic cleaning mode. short straight lines and product in detail. Cleans automatically until ���-degree rotations. the battery is low. Edge Cleaning Y Cleaning ��-min Cleaning...
- Page 14 Cleaning the Unit How to wash mop pads Soak the mops sufficiently Gently rub the mop pads with After wringing out the water in water. neutral detergent to wash. from mop pads, dry them in the sun. • Do not put the mop pads in the dryer. It may cause damage to the pads. •...
- Page 15 Cleaning the mouth of the water tank Water filter Rubber washer Take out the rubber washer from Separate the rubber washer Clean the rubber washer and water filter. the mouth of the water tank and the water filter. Caution • If the rubber washer and water filter are not installed, it will not spray water and prevent the cleaning process.
- Page 16 Things to Check Before Reporting a Breakdown • If an error occurs during the operation of the product, the operation stops, and the LED indicator blinks with an error beep for � minutes. • The power turns off automatically after repeating a total of �� error notifications. Caution Symptoms Troubleshooting...
- Page 17 Symptoms Troubleshooting Check if there is water in the water tank. • Check if the water tank is properly installed. • Water is not sprayed. Check if there is any foreign matter in the mouth of the water tank. • Check that the rubber washer and water filter are properly installed in •...
- Page 18 Product Specification Main unit 306mm 99mm 306mm 325mm • Manufacturer: Everybot Inc. • Device name: Electric floor sweeper • Certification number: RR-EV�-TS��� Product name Electric floor sweeper Model TS��� Power consumption �� W Size W��� x D��� x H�� mm Weight �.��...
- Page 19 In accordance with the consumer damage compensation regulations, we guarantee the product as follows. When service is requested, Everybot Service Center will provide services. Detailed information on compensation will be notified within � days from the requested date, and damage compensation will be resolved within �� days from the notification date.
- Page 20 Everybot...
Need help?
Do you have a question about the THREE SPIN TS300 and is the answer not in the manual?
Questions and answers
one of the rotating pads is not moving, and the machine will not clean.
One of the rotating pads on the Everybot THREE SPIN TS300 may not be moving due to loose screws on the rotating plate. To fix this issue, check if the screws on the rotating plate are loose. If the problem persists, contact customer service for further assistance.
This answer is automatically generated
The mop stopped working. Battery is full; filter is clean. It acts like it is going to start normally, then flashes green. I would like some hints for trouble shooting and know where to get repairs.