Table of Contents
Advertisement
Quick Links
Advertisement
Table of Contents

Related Manuals for Bernini Naples


Summary of Contents for Bernini Naples
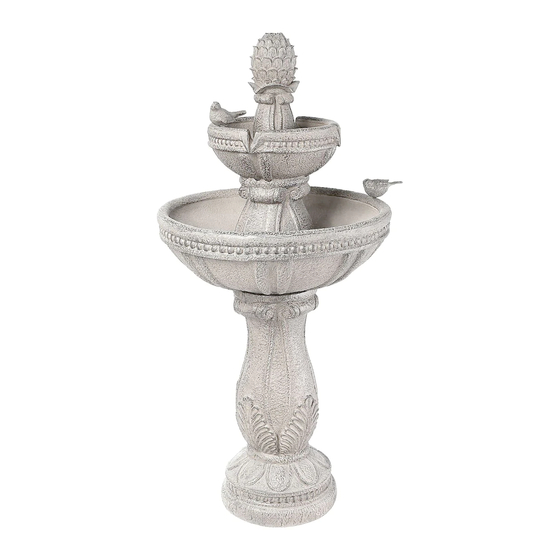
- Page 2 Bernini™ Fountain on the next page. Please note, images of parts are not to scale with one another. About Naples: Naples is an ethereal seaside city in Italy famous for its siren and mermaid lore. Bernini’s Naples Fountain adds a subtle touch of whimsy to your home.
-
Page 3: Table Of Contents
CONTENTS Step1: Base and Large Bowl Bowl Locking System Step 2: Fountain Tier Installation Step 3: Battery Installation Battery Installation Corded Operation Mode Inserting and Removing Battery Compartment Door Step 4: Setting Up Your Fountain Fill Your Fountain Operating Your Fountain Step 5: Installation Instructions for Decor Tops Dancing Water Feature Installation Dancing Water Feature and Spray Pattern... - Page 4 Parts for your Bernini ™ Fountain: Dancing Water Attachments Fountain Tier with Water Pump 2 Bird Attachments Extension Tube Connection Port Large Bowl Flowerbud Finial Extension Rechargeable Cable Battery Leveling Shim Battery Compartment Battery Door Charger Base...
-
Page 5: Step1: Base And Large Bowl
Step 1: Step 1: Base & Large Bowl You will need: Large Bowl Base Remember if you need help contact Customer Care: 1+ (619) 449-2392... -
Page 6: Bowl Locking System
STOP At this point, your fountain should look like the image on the left. Go to the next page for the next step to setup your new Bernini™ Fountain. Remember if you need help contact Customer Care: 1+ (619) 449-2392... -
Page 7: Step 2: Fountain Tier Installation
Step 2: Fountain Tier Installation You will need: Fountain Tier Assembled Base & with Pump Large Bowl Remember if you need help contact Customer Care: 1+ (619) 449-2392... - Page 8 Fountain Tier Installation Step 1: Feed the Water Pump cord down the For the next step, you will install the fountain tier pipe. The cord will be connected to the Connec- into the large bowl. Rest the fountain tier on the tion Port at a later step.
- Page 9 STOP At this point, your fountain should look like the image on the left. Go to the next page for the next step to setup your new Bernini™ Fountain. Remember if you need help contact Customer Care: 1+ (619) 449-2392...
-
Page 10: Step 3: Battery Installation
Step 3: Battery Installation You will need: Extension Cable Connection Port Fountain Battery Assembled Compartment Rechargeable Door Battery Remember if you need help contact Customer Care: 1+ (619) 449-2392... -
Page 11: Battery Installation
Battery Installation Step 2: Using the cords from Step 1: In the open battery Step 3: Place your connection port compartment, you will see three inside the base and the cord from inside the designated angled area the battery, connect the color cords hanging down that you must located at the back of your fountain connect to the connection port. -
Page 12: Corded Operation Mode
Corded Operation Mode Corded Operation Mode Connecting The Extension Cable (When not using the rechargeable battery) Connecting The Extension Cable (When not using the rechargeable battery) Please note: This fountain has 2 different modes of operation. The first utilizes the Lithium Battery. The second mode is corded operation using the included Extension cable. - Page 13 At this point, your fountain should look like the image on STOP the left. Go to the next page for the next step to setup your new Bernini™ Fountain. Remember if you need help contact Customer Care: 1+ (619) 449-2392...
-
Page 14: Step 4: Setting Up Your Fountain
Step 4: Setting up your fountain You will need: Water to fill your fountain Fountain Assembled Remember if you need help contact Customer Care: 1+ (619) 449-2392... -
Page 15: Fill Your Fountain
Operating Your Fountain The on-board control panel is located towards the top of the base, just below the large bowl. See the diagram below to see how the all-new on-board controls work for your Bernini™ Fountain. 1-4 Hour Daily Timer... - Page 16 Operating Your Fountain (Continued) BUTTON DESCRIPTION Three hour operation: press the A button three times and your fountain will automatically shut-off after three hours of operation. Four hour operation: press the A button four times and your fountain will automatically shut-off after four hours of operation. How To Use This Function: A (1-4 Hour Timer) 1.
- Page 17 This feature is not used on this model. You can now try your Bernini™ Fountain to see if everything is working correctly! Turn your fountain on and if you see water flowing from the...
-
Page 18: Step 5: Installation Instructions For Decor Tops
Step 5: Installation Instructions for Decor Tops Choose Your Accent: 2 Bird Attachments Dancing Water Flowerbud Finial Attachments Remember if you need help contact Customer Care: 1+ (619) 449-2392... -
Page 19: Dancing Water Feature Installation
Step 1: Find the Dancing Dancing Water attachment to and calming sound of your Water attachment. the outlet in the middle of the new Bernini™ Fountain. fountain bowl. Dancing Water Feature and Spray Pattern Dancing Water Feature and Spray Pattern Dancing Water... -
Page 20: Flowerbud Finial Top Installation
Flowerbud Finial Top Installation To install the Flowerbud Finial you will need to use the clear extension tube included with your Bernini™ Fountain. Before installing the extension tube, pull the two ends of the extension tube apart to about 9 inches (22.8cm). -
Page 21: Bird Attachment Installation
Flowerbud Finial Top Installation Step 5: Replace the silicone cap on to the Step 6: Press the extension tube down until extension tube. it is level with the Flowerbud Finial. Bird Attachment Installation You can now attach the 2 Bird Attachments. The 2 Bird attachments have pegs in the bottom, the pegs fit into 2 small holes on the edge of the Large Bowl and Fountain Tier. -
Page 22: Troubleshooting And Maintenance
To clean your fountain, drain of all water and disassemble. Use a mild soap and a soft cloth to clean the parts of your Bernini™ fountain. Your fountain bowl will form a natural patina finish which with time may appear lighter or whiter than the original color. This is normal. DO NOT SCRUB YOUR FOUNTAIN, AS THIS COULD CAUSE DAMAGE TO THE FINISH OF YOUR BERNINI™... -
Page 23: Cleaning The Water Pump's Parts
Cleaning the Water Pump’s Parts Water Pump Air Filters After about six weeks of usage, you may want to clean the Water Pump’s filter and impeller to keep your Bernini™ Fountain in tip-top shape. Begin by disconnecting the Step 2: Pull the water pump... -
Page 24: Priming The Water Pump
Priming the Water Pump Is your fountain making a loud noise or do you not see water flowing? If you find the water pump is running, but water is not flowing from your fountain, or you hear a loud grinding noise coming from your fountain, not to worry, you can try priming the water pump: Begin by turning your fountain off. -
Page 25: Using Leveling Shims
If you are having trouble getting water to flow evenly off of the spouts on your Bernini™ Fountain, you may need to level the surface that your fountain is placed on. With the included leveling shims, you do not need to move your fountain, just follow the instructions below to get even water flow. -
Page 26: Water Pump Connection
(1) year from the date of original purchase. If within one (1) year this product fails due to defect in material or workmanship, Bernini™ will repair, replace or supply any defective part at their discretion. The purchaser must contact Bernini™ and provide a description of the defective part, including digital pictures if requested, with this original purchase documentation as validation of warranty coverage. - Page 27 IMPORTANT BATTERY SAFETY INSTRUCTIONS DANGER: Do not store battery in an airtight container as it may cause an explosion. WARNING: When using electric devices, basic safety precautions should always be followed to reduce the risk of fire, electric shock and personal injury, including the following: WARNING: 1.
- Page 28 Telephone Number: 1+ (619) 449-2392 Santee, California 92071 World Wide Patents Pending Email: customercare@berninifountains.com On the web: www.berninifountains.com Facebook & Pinterest: Bernini Fountain Company Instagram:@berninifountains Twitter: @yrdllc © Yeiser Research & Development, LLC; 2020. All rights reserved. Made in China Designed in the USA...
Need help?
Do you have a question about the Naples and is the answer not in the manual?
Questions and answers