Advertisement
Quick Links
Advertisement

Related Manuals for Top RC Model Sport Jet Aspire ARF


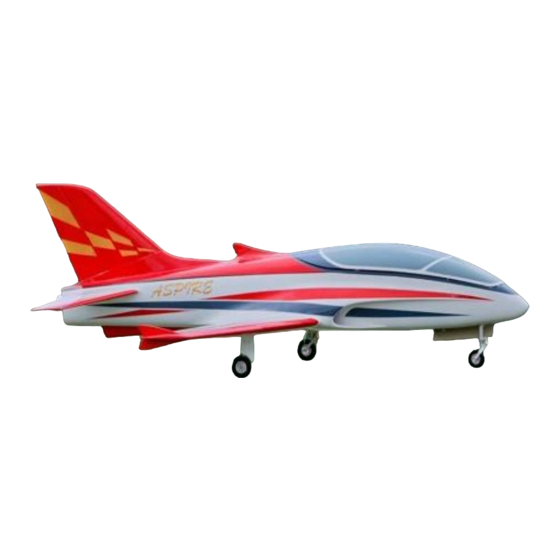
Summary of Contents for Top RC Model Sport Jet Aspire ARF
- Page 1 TopRCModel-USA.com...
- Page 2 TopRCModel-USA.com...
- Page 3 TopRCModel-USA.com...
- Page 4 Accessory list for the coming installation steps. 3. Fix the servo trays to the wings with screws. 1. Apply AB glue to the slots in the ailerons, flaps and 4. Conntect the horn to the servo with the push rod and assemble the horns into them.
- Page 5 9. Apply marking tape around the wing bafflers to keep 6. Fix the main retracts and wheel covers with screws. the wing not get dirty when glue the bafflers in the wings. 7. The picture when the gear down. Accessory list for the coming installation steps. 10.Assemble the servo to the stabilizer through the slots 8.
- Page 6 14.Apply marking tape around the horn to keep clean 11. Use steel ruler to measure the length where the stab when glue the horn in the elevator and connect it to the servo will install inside the stab. servo arm. 12.Measure the same length on the bottom of the stab, mark it and trim a slot for the stab servo arm.
- Page 7 16.The sketch map of how the servo arms connect to the 19.Measure the same length on the vertical fin, mark it horns. and trim a slot for the rudder servo arm. 20.Assemble the rudder servo to the vertical fin with 17.The processes for assembling the rudder servo.
- Page 8 Accessory list for the coming installation steps. 24.Assemble the nose gear servo to the nose retract. 22.Connect the nose gear door with screw. 25.Assemble the steering linkages. 23.Connect the nose gear door with screw. 26.Assemble the nose retract to the fuselage with screws. 第...
- Page 9 27.Put the tail pipe into the fuselage. 30.Fix the tail pipe to the fuselage with screws. 28.Assemble the turbine engine. 31.The sketch map of the connection for the fuel tanks. 29.Drill holes to appropriate position in the fuselage and assemble the turbine engine to it with screws. 32.Install the bottom hatch to the fuselage with screws.
- Page 10 33.Assemble the fuel tank. 36.Fix the fuselages together with screws. 34.Put the fuel tank into the fuselage. 37.Put the plywood plate in the fuselage. 35.Put the two parts fuselage together. Accessory list for the coming installation steps. 第 10 页...
- Page 11 38. Put the wing tube through the fuselage. Accessory list for the coming installation steps. 39.Assemble the wings to the fuselage through the wing tube. 41.Glue the stabilizer tube to the stabalizer. 40.Lock the wing to the fuselage by screws from the bottom of the fuselage.
- Page 12 43.Assemble the stabilizers to the fuselage. 45.Glue the vertical tubes to the vertical fin. 44.Lock the stabilizers to the fuselage by screws from the top of the tail fuselage. 46.The photo when the vertical fin ready. 47.Assemble the vertical fin to the fuselage, lock it with Accessory list for the coming installation steps.
- Page 13 48.The photo when the model assemble completely. 49. Adjust the travel of each control surface to the values in 50. Adjust the travel of each control surface to the values the diagrams. These values fit general flight in the diagrams. These values fit general flight capabilities.Readjust according to your needs and flight capabilities.Readjust according to your needs and flight level.
- Page 14 第 14 页...
Need help?
Do you have a question about the Sport Jet Aspire ARF and is the answer not in the manual?
Questions and answers