Dobot Magician User Manual
Hide thumbs
Also See for Magician:
- User manual (171 pages) ,
- User manual instruction and precautions (167 pages) ,
- User manual (116 pages)

Related Manuals for Dobot Magician


Summary of Contents for Dobot Magician
- Page 1 User Guide ユーザーマニュアル Dobot Magician User Guide Dobot Magician ユーザーマニュアル Issue: V1.5.1 Date: 2018-11-14 バージョン: V1.5.1 日付: 2018-11-14 Shenzhen Yuejiang Technology Co., Ltd 深セン市越疆科技有限公司...
- Page 2 Even if follow this document or any other related instructions, Damages or losses will be happen in the using process, Dobot shall not be considered as a guarantee regarding to all security information contained in this document.
- Page 3 Dobot Magician User GuideDobot Magician ユーザーマニュアル 使用者は国の定める実際の法規に従い、DobotMagicianの使用に際しいかなる重大な 危険要素もが発生しないことを確認する責任があります。 Shenzhen Yuejiang Technology Co., Ltd 深セン市越疆科技有限公司 Address: 4F, A8, Tanglang Industrial Area, Taoyuan Street, Nanshan District, Shenzhen, PRC 住所:中国深セン市南山区桃園路塘朗工業区A8 4F Website: www.dobot.cchttp://cn.dobot.cc/ 公式サイト:www.dobot.cchttp://cn.dobot.cc/ Issue V1.0 (2018-06-12) User Guide Copyright © Yuejiang Technology Co., Ltd.
- Page 4 Preface はじめに Purpose 目的 This Document describes the functions, technical specifications, installation guide and system commissioning of Dobot Magician, making it easy for users to fully understand and use it. この文書は、利用者がDobot Magicianを簡単に理解し、正しく使用できるため、その 機能、技術仕様、取付説明、およびシステムの立上げについて説明します。 Intended Audience 対象読者 This document is intended for: 本文書の対象読者は:...
- Page 5 Dobot Magician User GuideDobot Magician ユーザーマニュアル Preface Symbol Description Indicates a hazard with a high level of risk which, if DANGER not avoided, could result in death or serious injury Indicates a hazard with a medium level or low level of...
-
Page 6: Table Of Contents
1.1 General Security........................ 1 1.2 Precautions ........................3 1.3 Important Safety Notice ................4 2. Quick Start 7 2.1 Connecting Cables to the Dobot Magician ............... 8 2.2 Installing the DobotStudio ....................9 2.2.1 System Requirements ..................9 2.2.2 Obtaining the DobotStudio Package ..............9 2.2.3... - Page 7 Dobot Magician User GuideDobot Magician ユーザーマニュアル Contents 5.4 Writing and Drawing ...................... 82 5.4.1 Installing a Writing Kit ..................82 5.4.2 Connecting the DobotStudio ................84 5.4.3 Importing Image Files and Setting Writing Parameters ........87 5.4.4 Adjust the Position of the Pen Nib ..............94 5.5 Performing Laser Engraving Tasks .................
- Page 8 Dobot Magician User GuideDobot Magician ユーザーマニュアル 目次 目次 1. 安全上のご注意 1 1.1 一般的な安全上のご注意 ....................1 1.2 注意事項 .......................... 3 1.3 重要な安全上のご注意 ................4 2. クイックスタート 2.1 Dobot Magician にケーブルを接続する ..............8 2.2 DobotStudio をインストールする ................. 9 システム要件 ..................... 9 2.2.1 DobotStudio パッケージを入手する...
- Page 9 Dobot Magician User GuideDobot Magician ユーザーマニュアル 目次 5.3 オフラインモードで作業する ..................79 5.4 ライティング&ドローイング ..................82 ライティングキットを取り付ける ............... 82 5.4.1 DobotStudio に接続する .................. 84 5.4.2 画像ファイルを取り込み、ライティングパラメータを設定する.... 87 5.4.3 ペン先の位置を調整する ................94 5.4.4 5.5 レーザー彫刻タスクを実行する ................. 98 レーザーキットを取り付ける ..............100 5.5.1 DobotStudio に接続する ................101 5.5.2...
- Page 10 Dobot Magician User GuideDobot Magician ユーザーマニュアル 目次 Issue V1.0 (2018-06-12) User Guide Copyright © Yuejiang Technology Co., Ltd. バージョン V1.0 (2018-06-12) ユーザーマニュアル 版権所有 © 越疆科技有限公司.
-
Page 11: Security Precautions
Dobot Magician User GuideDobot Magician ユーザーマニュアルエラー! [ホーム] タブを使用して、ここに表示 1. Security Precautions 安全上のご注意 This topic describes the security precautions that should be noticed when using this product. Please read this document carefully before using the robotic arm for the first time. This product... - Page 12 腐食性の高い洗浄剤でロボットアームを洗浄しないでください。 陽極酸化部品は 液浸洗浄には適していません。 People cannot repair and disassemble the robotic arm without professional training. If there is a problem with the robotic arm, please contact Dobot technical support engineer in time. 専門的な訓練を受けていない人によるロボットアームの修理、分解が禁止です。 ロボットアームに問題がある場合は、Dobot技術サポートエンジニアに連絡して ください。...
-
Page 13: Precautions
Forearm and Rear Arm (as shown in Figure 1.1) before starting up. If the LED indicator turns red after starting up, it indicates that the Dobot Magician is at a limited position. Please make the Dobot Magician in the workspace. -
Page 14: Important Safety Notice
Dobot Magician User GuideDobot Magician ユーザーマニュアルエラー! [ホーム] タブを使用して、ここに表示 please press the Reset button on the back of the base to reset Dobot Magician or click Home on the DobotStudio page to perform homing. DobotStudioに表示されているDobot Magicianの座標に異常がある場合は、ベース の背面にある「リセット」ボタンを押してDobot Magicianをリセットするか、 DobotStudio画面の「ホーム」をクリックしてホーミングを実行してください。 During resetting, Dobot Magician will disconnect from the PC automatically and the LED indicator on the base turns yellow. -
Page 15: 重要な安全上のご注意
When using the 3D printing module, the heating rod will produce temperatures up to 250℃, please be careful! 3Dプリンティングモジュールを使用する場合、3Dプリンティングホットエンド が250℃の高温になりますので、ご注意ください。 DO NOT put hands into the operating zone while the Dobot is running. Not doing so runs the risk of bruising and/or pinching. 動作中は、 手をロボットアームの動作範囲に入れないでください。 ぶつかりやは さみの恐れがあります。 ... - Page 16 Dobot Magician User GuideDobot Magician ユーザーマニュアルエラー! [ホーム] タブを使用して、ここに表示 Issue V1.0 (2018-06-12) User Guide Copyright © Yuejiang Technology Co., Ltd. バージョン V1.0 (2018-06-12) ユーザーマニュアル 版権所有 © 越疆科技有限公司.
-
Page 17: Quick Start
2. Quick Start クリックスタート This topic briefly describes how to operate the Dobot Magician with the software DobotStudio, allowing you to quickly know and use the robotic arm. Figure 2.1 shows the process of getting started with the Dobot Magician. -
Page 18: Connecting Cables To The Dobot Magician
USB cable, as shown in Figure 2.3. ス テ ッ プ 1 図 2.2 に 示 す よ う に 、 付 属 の USB ケ ー ブ ル を 使 っ て Dobot Magicianをコンピュータに接続します。. Figure 2.3 Connect the Dobot Magician to your computer 図2.4 Dobot Magicianをコンピュータに接続する... -
Page 19: Installing The Dobotstudio
電源アダプタを接続する Connect a power adapter Installing the DobotStudio DobotStudio をインストールする With the DobotStudio, you can control Dobot Magician to implement functions such as Teaching & Playback, fully programmable applications, and 3D printing. This topic introduces Teaching & Playback. DobotStudioを使用すると、Dobot Magicianをコントロールして、ティーチング&プレ... -
Page 20: Installing The Dobotstudio
DobotStudio パッケージを入手する Before using Dobot Magician, download the Windows DobotStudio package from https://www.dobot.cc/downloadcenter.html. The macOS version is also downloadable in this URL. Dobot Magician を ご 使 用 に な る 前 に 、 https://www.dobot.cc/downloadcenter.html か ら Windows またはmacOSのDobotStudioパッケージをダウンロードしてください。 2.2.3 Installing the DobotStudio DobotStudio をインストールする... - Page 21 Dobot Magician User GuideDobot Magician ユーザーマニュアルエラー! [ホーム] タブを使用して、ここに表示 Figure 2.9 Select English 図 2.10 英語を選択する Step 4 Click OK to follow the on-screen instructions to continue with the installation. ステップ4 「OK」をクリックして、画面の指示に従ってインストールを 続行します。 During the installation, the DriverSetup(X64) dialog box is displayed, as shown in Figure 2.11.
-
Page 22: Verifying The Installation
Dobot Magician User GuideDobot Magician ユーザーマニュアルエラー! [ホーム] タブを使用して、ここに表示 Figure 2.13 The drive is successfully Pre-installed in advance! dialog box 図 2.14 「ドライブが正常にプリインストールされている」ダイアログボックス Step 6 Click OK. ステップ6 「OK」をクリックします。 Step 7 Click Next to continue to install the DobotStudio by following the prompts on the Setup –... - Page 23 Verifying the Dobot Magician Driver Dobot Magicianのドライバーを検証する If an available COM port is displayed on the upper left corner of the DobotStudio page after the robotic arm is powered on, as shown in Figure 2.17, the Dobot Magician driver is installed successfully. ロボットアーム起動後、図2.9に示すように、DobotStudio 画面の左上隅に利用可能な...
- Page 24 &LPT)セクションを見つけます。項目USB-SERIAL CH340(COM3)が 表示されていると、Dobot Magicianドライバが正常にインストールされたこ とを意味します。 Figure 2.19 The robotic arm driver in Device Manager window 図 2.20 デバイスマネージャーが画面のロボットアームドライバ NOTE To reinstall the Dobot Magician driver after uninstalling it, double-click SETUP.EXE install driver directory Installation Directory\DobotStudio\attachment\CH341SER_WIN\CH341SER, as shown in Figure 2.21.
-
Page 25: Powering On/Off The Dobot Magician
から緑色に変わります。そこで、Dobot Magicianが使用可能になります。 NOTICE 注意 If the LED indicator is red after powering on the Dobot Magician, it means that the robotic arm reaches its limited position. To go back to the workspace, press and hold the unlock button on the Forearm to move the robotic arm to another desired position After releasing the button the LED indicator turns green. -
Page 26: Getting Started
Getting Started 使い始める This topic describes how to use the Dobot Magician to complete the teaching & playback function by saving three points in the MOVJ mode, allowing you to get the basic knowledge of the usage of the robotic arm. - Page 27 Dobot Magician User GuideDobot Magician ユーザーマニュアルエラー! [ホーム] タブを使用して、ここに表示 手順 Step 1 Double-click the desktop shortcut to the DobotStudio. The DobotStudio page with its beginner guide is displayed, as shown in Figure 2.25. ステップ1 DobotStudioのデスクトップショートカットをダブルクリックします。 図2.13に示すように、DobotStudioの初心者ガイド画面が表示されます。 Figure 2.25 The DobotStudio page with a beginner guide 図...
- Page 28 図 2.30 質問ダイアログボックス Step 3 Click OK. Because this section is for quick access to the Dobot Magician only and no high accuracy is required. When Connect changes to Disconnect, it means that the DobotStudio is connected the Dobot Magician, as shown in Figure 2.31.
- Page 29 Question dialog box. 注 精度を高めるには、キャンセルをクリックし、7.53秒待ってから「接続」を再 度クリックします。持続時間は目安です。正確な時間については、 「質問」ダイ アログボックスのメッセージを参照してください。 Figure 2.31 The DobotStudio is connected to the Dobot Magician 図 2.32 DobotStudio が Dobot Magician に接続されている Step 4 Use DobotStudio to accomplish a teaching & playback task. ステップ4 DobotStudioでティーチング&プレイバックタスクを実行しま...
- Page 30 Dobot Magician User GuideDobot Magician ユーザーマニュアルエラー! [ホーム] タブを使用して、ここに表示 Figure 2.33 Click Teaching & Playback 図 2.34 ティーチング&プレイバックをクリックする NOTE After reading a beginner guide on the Teaching & Playback page, as shown in Figure 2.35, click to close it. 注 図2.18に示すように、 「ティーチング&プレイバック」画面の初心者ガイドを読...
- Page 31 Dobot Magician User GuideDobot Magician ユーザーマニュアルエラー! [ホーム] タブを使用して、ここに表示 Figure 2.35 Teaching & Playback page 図 2.36 ティーチング&プレイバック画面 Select PTP Point > MOVJ mode in the Save Point area, as shown in Figure 2.37. 図2.19に示すように、 保存点エリアでPTP ポイント > MOVJ モードを選択 します。...
- Page 32 Dobot Magician in the Cartesian or Joint coordinate system, as shown in Figure 2.41. 注 手 で 動 か す こ と に よ る テ ィ ー チ ン グ の 他 に 、 図 2.21 に 示 す よ う に 、 Dobot Magicianをデカルト座標系またはジョイント座標系でジョギングさせること...
- Page 33 Dobot Magician User GuideDobot Magician ユーザーマニュアルエラー! [ホーム] タブを使用して、ここに表示 Move the robotic arm to other two locations such as points B and C by referring to the method of creating point A above, as shown in Figure 2.43 The Cartesian coordinates of points B and C 図...
- Page 34 Dobot Magician User GuideDobot Magician ユーザーマニュアルエラー! [ホーム] タブを使用して、ここに表示 Figure 2.45 Enter 3 in the Loop text box 図 2.46 ループテキストボックスに 3 を入力する Click Start to perform the motions taught above, as shown in Figure 2.47. The robotic arm will stop after playing back the steps for three times.
- Page 35 Dobot Magician User GuideDobot Magician ユーザーマニュアルエラー! [ホーム] タブを使用して、ここに表示 図2.25に示すように、 をクリックして「ティーチング&プレイバ ック」画面を終了します。 Figure 2.49 Click Exit 図 2.50 終了をクリックする Issue V1.0 (2018-06-12) User Guide Copyright © Yuejiang Technology Co., Ltd. バージョン V1.0 (2018-06-12) ユーザーマニュアル 版権所有 © 越疆科技有限公司.
-
Page 36: Introduction
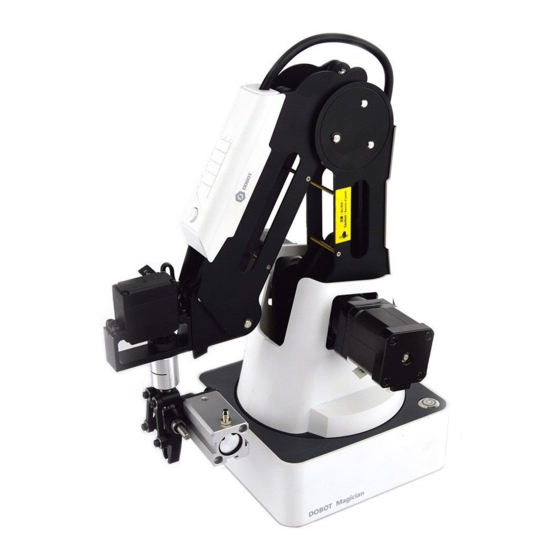
Dobot Magician is a multifunctional desktop robotic arm for practical training education, supporting teaching and playback, blockly graphic programming, script, etc. Installed with different end-effectors, Dobot Magician can realize interesting functions such as 3D printing, laser engraving, writing and drawing. It also supports secondary development by various extensible I/O interfaces, which really makes your creativity and imagination increase without any limitation. -
Page 37: Working Principle
Dobot Magician User GuideDobot Magician ユーザーマニュアルエラー! [ホーム] タブを使用して、ここに表示 電源ボタン Power button ベース Base Working Principle 動作原理 This topic describes the workspace, principle, size and technical specifications of Dobot Magician. このセクションでは、Dobot Magicianの作業スペース、原理、サイズ、および技術仕 様について説明します。 3.3.1 Workspace 作業スペース Figure 3.3 and Figure 3.5 shows the workspace. -
Page 38: Coordinate System
図 3.6 Dobot Magician の作業スペース (2) 3.3.2 Coordinate System 座標系 Dobot Magician has two types of coordinate system, the joint one and the Cartesian one, as shown in Figure 3.7 and Figure 3.9 respectively. Dobot Magicianには、図3.4と図3.5に示すように、ジョイントとデカルトの2種類の座 標系があります。 Figure 3.7 Joint coordinate system 図... - Page 39 If the end-effector with servo is installed, such as suction cup kit, gripper kit, Dobot Magician contains four joints: J1, J2, J3 and J4, which are all the rotating joints. The positive direction of these joints is counter-clockwise. 吸引カップキット、 空気式グリッパなどのサーボ付きエンドエフェクターを...
-
Page 40: Motion Function
Dobot Magicianのモーションモードには、 ジョギング、 ポイントツーポイント (PTP) 、 ARCなどがあります。 3.3.3.1 Jogging Mode ジョギングモード Jogging mode is the mode jogging Dobot Magician along the Cartesian coordinate system or Joint coordinate system when teaching. ジョギングモードは、ティーチングを行うとき、Dobot Magicianをデカルトまたはジ ョイント座標系に沿ってジョギングさせるためのモードです。 NOTE This topic describes jogging mode by the GUI operation of DobotStudio. - Page 41 R+、R-をクリックすると、Dobot Magicianは、R軸に沿って逆回転または正 回転します。 NOTICE If the end-effector with servo is installed on the Dobot Magician, the R-axis will move together with Y-axis, to make sure that the terminal posture relative to the origin stays constant. 注意 Dobot Magicianにサーボ付エンドエフェクターが取り付けられている場合、 原点...
- Page 42 Dobot Magician User GuideDobot Magician ユーザーマニュアルエラー! [ホーム] タブを使用して、ここに表示 MOVJ: ジョイント移動。図3.6に示すように、ポイントAからポイントBまでの 軌跡にかかわらず、各ジョイントは初期角度から目標角度まで移動します。 Figure 3.11 MOVL/MOVJ mode 図 3.12 MOVL/MOVJ モード MOVJ MOVJ MOVL MOVL MOVL: Rectilinear movement. The joints will perform a straight line trajectory from point A to point B, as shown in Figure 3.11.
- Page 43 Dobot Magician User GuideDobot Magician ユーザーマニュアルエラー! [ホーム] タブを使用して、ここに表示 Figure 3.13 JUMP mode 図 3.14 JUMP モード 高さ Height 3.3.3.3 The trajectory of ARC mode is an arc, which is determined by three points (the current point, any point and the end point on the arc), as shown in Figure 3.15.
-
Page 44: Technical Specifications
Dobot Magician User GuideDobot Magician ユーザーマニュアルエラー! [ホーム] タブを使用して、ここに表示 (a)開始点 A と終点 C (a)starting point: A and point C (b)開始点 A と終点 B (B)starting point: A and point B 3.3.3.4 Application Scenarios アプリケーションシナリオ The application scenario depends on the trajectory in motion mode, as shown in Table 3.1. -
Page 45: Technical Parameters
Dobot Magician User GuideDobot Magician ユーザーマニュアルエラー! [ホーム] タブを使用して、ここに表示 3.4.1 Technical Parameters 技術的パラメータ Name Dobot Magician Maximum 500g payload Maximum reach 320mm Motion range Base ﹣90°-90° Rear Arm 0°-85° Forearm ﹣10°-90° End-effector ﹣135°-135° rotation Maximum speed Rotational 320°/s (with 250g speed of... -
Page 46: Sizes
DobotStudio 動作温度範囲 -10°-60° 3.4.2 Sizes サイズ Figure 3.17 shows the size of Dobot Magician and Figure 3.19 shows the size of the end mounting hole. 図3.9はDobot Magicianのサイズを、図3.10は末端マウント穴のサイズを示します。 Issue V1.0 (2018-06-12) User Guide Copyright © Yuejiang Technology Co., Ltd. バージョン V1.0 (2018-06-12) ユーザーマニュアル... - Page 47 Dobot Magician User GuideDobot Magician ユーザーマニュアルエラー! [ホーム] タブを使用して、ここに表示 Figure 3.17 Size of Dobot Magician 図 3.18 Dobot Magician のサイズ Figure 3.19 Size of end mounting hole 図 3.10 末端マウント穴のサイズ Issue V1.0 (2018-06-12) User Guide Copyright © Yuejiang Technology Co., Ltd.
- Page 48 Dobot Magician User GuideDobot Magician ユーザーマニュアルエラー! [ホーム] タブを使用して、ここに表示 最大 4-R2.5 4-R2.5Max Issue V1.0 (2018-06-12) User Guide Copyright © Yuejiang Technology Co., Ltd. バージョン V1.0 (2018-06-12) ユーザーマニュアル 版権所有 © 越疆科技有限公司.
-
Page 49: Interface Description
インタフェースの説明 Interface Board インタフェースパネル The interfaces of Dobot Magician are located on the back of the base and the Forearm respectively. Figure 4.1 shows the interfaces on the back of the base, and Table 4.1 lists the description. Dobot Magicianのインタフェースは、それぞれベースとフォアアームの後ろにありま... - Page 50 Dobot Magician User GuideDobot Magician ユーザーマニュアルエラー! [ホーム] タブを使用して、ここに表示 Reset key: Reset MCU program During resetting, the LED indicator on the base turns yellow. About 5 seconds later, if the LED indicator turns green, it indicates that the reset is successful Functional key: ...
- Page 51 Dobot Magician User GuideDobot Magician ユーザーマニュアルエラー! [ホーム] タブを使用して、ここに表示 Interface Description Power interface of air pump; output 12V of controllable power Output 12V of controllable power Stepper1 User-defined stepper interface; extruder interface (3D printing mode) Stepper2 User-defined stepper interface Signal interface of air pump; color sensor interface; infrared sensor interface;...
-
Page 52: Led Indicator
Dobot Magician User GuideDobot Magician ユーザーマニュアルエラー! [ホーム] タブを使用して、ここに表示 アナログ ANALOG Table 4.5 Peripheral interface description 表 4.6 周辺インタフェースの説明 Description GP3, Auto levelling interface, R-axis servo interface; infrared sensor interface; user-defined general interface GP4, user-defined general interface; color sensor interface; infrared sensor interface GP5, Signal interface of laser engraving;... -
Page 53: Multiplexed I/O Interface Description
アラーム未解除 3Dプリンティングキットの接続が異常 Multiplexed I/O Interface Description 多重化 I/O インタフェースの説明 The addresses of the I/O interfaces in Dobot Magician are unified. Most of I/O interfaces have multiple functions, to control the peripheral equipment. Dobot MagicianのI/Oインタフェースのアドレスは統一されています。ほとんどのI/O インタフェースは、周辺機器をコントロールするために複数の機能を備えています。 4.3.1 Multiplexed Base I/O Interface Description 多重化ベース... - Page 54 Dobot Magician User GuideDobot Magician ユーザーマニュアルエラー! [ホーム] タブを使用して、ここに表示 STOP STOP ELO20 ELO20 ELO19 ELO19 Figure 4.5 shows the UART interface on the base, Table 4.9 lists the multiplexed I/O description. 図4.3にベースのUARTインタフェース、表4.5に多重化I/Oの説明を示します。 STOP STOP ELO20 ELO20 ELO19 ELO19 Figure 4.5 UART interface 図...
- Page 55 Dobot Magician User GuideDobot Magician ユーザーマニュアルエラー! [ホーム] タブを使用して、ここに表示 Table 4.9 Multiplex I/O Description 表 4.10 多重化 I/O の説明 I/O addressing Voltage Level Output Level Input √ √ 3.3V √ √ 3.3V √ √ 3.3V I/O ア ド レ ス 電圧...
-
Page 56: Multiplexed Forearm I/O Interface Description
Dobot Magician User GuideDobot Magician ユーザーマニュアルエラー! [ホーム] タブを使用して、ここに表示 VALVE VALVE PUMP PUMP Table 4.11 Multiplexed I/O Description 表 4.12 多重化 I/O の説明 I/O addressing Voltage Level Output Level Input 電圧 レベル出力 レベル入力 I/Oアドレス指 定 √ √ √ √ 3.3V √... - Page 57 Dobot Magician User GuideDobot Magician ユーザーマニュアルエラー! [ホーム] タブを使用して、ここに表示 Figure 4.9 Peripheral interface in the Forearm 図 4.10 フォアアームの周辺インタフェース Table 4.13 Multiplexed I/O description 表 4.14 多重化 I/O の説明 I/O addressing Voltage Level Output Level Input 電圧 レベル出力 レベル入力 I/Oアドレス指 定...
-
Page 58: Operation
Function Modules 機能モジュール You can use the DobotStudio to control the Dobot Magician to accomplish multiple functions such as Teaching & Playback, Write & Draw, Blockly graphic programming, and Script control, as shown in Figure 5.1. For details, see Table 5.1. - Page 59 3D プリンティングが可能です。 もっと追加 複数のカスタム機能を追加します。 You can also set the Dobot Magician by clicking Setting on the DobotStudio page, for example, implement general settings, base calibration, manual levelling, and auto levelling, as shown in Figure 5.3. For details, see Table 5.3.
- Page 60 Dobot Magician User GuideDobot Magician ユーザーマニュアルエラー! [ホーム] タブを使用して、ここに表示 Figure 5.3 The General Setting page 図 5.4 一般設定画面 Table 5.3 The General Setting page 表 5.5 一般設定画面 Items Description Firmware Switch firmware For example, you can switch to the 3D printer firmware to implement 3D...
-
Page 61: Common Areas Of Dobotstudio Page
Dobot Magician User GuideDobot Magician ユーザーマニュアルエラー! [ホーム] タブを使用して、ここに表示 Items Description acceleration, acceleration, pen up offset and pen down position. Set the parameters such as speed, scale, and performance for hand gesture Leap Motion control. Mouse Set the parameters such as speed, scale, and performance for mouse control. - Page 62 Dobot Magician User GuideDobot Magician ユーザーマニュアルエラー! [ホーム] タブを使用して、ここに表示 DobotStudio 画面の共通エリア The DobotStudio offers the following common areas shared by all the function modules to control the robotic arm. DobotStudio は、ロボットアームをコントロールするため、全モジュールが共有する 以下の共通エリアを提供します。 You can select the liner rail or an end-effector on the DobotStudio page, as shown in Figure 5.6.
- Page 63 Set the Dobot Magician back to its home position to get a correct reference position Home When the Dobot Magician is moving, if its movement is hindered by an obstacle or the stepper motors lost steps, perform the homing operation...
- Page 64 表 5.8 操作パネルの設定 Items Description Coordinate Jog the Dobot Magician by clicking X (X+/-), Y (Y+/-), Z (Z+/-), or R (R+/-) in the jogging Cartesian coordinate system Jog the Dobot Magician by clicking J1+/-, J2+/-, J3+/-, or J4+/- in the Joint coordinate...
-
Page 65: Performing Teaching & Playback Tasks
ッパーキットが必要なので、最初に説明します。 5.2.1 Installing a Suction Cup Kit 吸引カップキットを取り付ける A suction cup kit is the default end-effector shipped with the Dobot Magician. When using the suction cup kit, an air pump is necessary, as shown in Figure 5.13. 吸引カップキットは、Dobot Magician本体と同梱されるデフォルトのエンドエフェク ターです。吸引カップキットを使用する場合は、図5.6に示すようにエアポンプが必要で... - Page 66 Procedure 手順 Connect the air pump’s power cable SW1 to the SW1 connector on the Step 1 Dobot Magician base’ rear panel and the signal cable GP1 to the GP1 connector, as shown in Figure 5.15. ステップ1 図5.7に示すように、 エアポンプの電源ケーブルSW1をDobot Magicianのベー...
- Page 67 Dobot Magician User GuideDobot Magician ユーザーマニュアルエラー! [ホーム] タブを使用して、ここに表示 Figure 5.15 Connect the air pump to the Dobot Magician 図 5.16 エアポンプを Dobot Magician に接続する Insert a suction cup kit into the end’s port, and fasten it with a Step 2 butterfly nut, as shown in Figure 5.17.
- Page 68 Dobot Magician User GuideDobot Magician ユーザーマニュアルエラー! [ホーム] タブを使用して、ここに表示 Figure 5.19 Install an air tube 図 5.20 風管を取り付ける 風管 Air tube Connect the servo’s GP3 cable to the GP3 connector on the Step 4 Forearm, as shown in Figure 5.21. ステップ4 図5.10に示すように、サーボのGP3ケーブルをフォアアームの...
-
Page 69: Installing A Gripper Kit
Dobot Magician User GuideDobot Magician ユーザーマニュアルエラー! [ホーム] タブを使用して、ここに表示 Figure 5.21 Connect the servo’s GP3 cable to the GP3 connector 図 5.22 サーボの GP3 ケーブルを GP3 コネクタに接続する Gp3 connector Gp3コネクタ Cp3 wire Gp3ケーブル Cp3 wire Gp3ケーブル 5.2.2 Installing a Gripper Kit グリッパキットを取り付ける... - Page 70 Dobot Magician User GuideDobot Magician ユーザーマニュアルエラー! [ホーム] タブを使用して、ここに表示 Figure 5.23 A gripper kit 図 5.24 グリッパキット Procedure 手順 Step 1 Dismantle the suction cup by unfastening its terminal strand with a 1.5mm hexagon wrench, as shown in Figure 5.25. ステップ1 図5.12に示すように、 1.5mmの六角レンチで端子ストランドを緩めて吸引カッ...
- Page 71 After Step 3 Connect the gripper kit and an air pump to the Dobot Magician in the same way as the suction cup kit is installed. For details, see 5.2.1 Installing a Suction Cup Kit. Figure 5.29 shows the effect of the gripper kit installation.
-
Page 72: Teaching & Playback Page
Dobot Magician User GuideDobot Magician ユーザーマニュアルエラー! [ホーム] タブを使用して、ここに表示 図 5.30 グリッパキット取り付ける後の状態 5.2.3 Teaching & Playback Page ティーチング&プレイバック画面 The Teaching & Playback page is shown in Figure 5.31. To access it, select Connect > Teaching & Playback on the DobotStudio page. - Page 73 Dobot Magician User GuideDobot Magician ユーザーマニュアルエラー! [ホーム] タブを使用して、ここに表示 Table 5.9 Set Easy/Pro, Loop, Speed and acceleration (Acc) 表 5.35 簡単/プロ、ループ、速度と加速度を設定する(Acc) Items Description Click this slider to switch between Easy and Pro modes. The default is the Easy mode. Easy/Pro Apart from all the functions in the Easy mode, the Pro mode offers multiple features such as the offline mode and multiplexed I/O interface.
- Page 74 Dobot Magician User GuideDobot Magician ユーザーマニュアルエラー! [ホーム] タブを使用して、ここに表示 Figure 5.36 Set the save points, motion modes and pause time 図 5.37 保存点、モーションモードと一時停止時間を設定する Table 5.10 Set the save points, motion modes, and pause time 表 5.38 保存点、モーションモードと一時停止時間を設定する Items Description +Point Click to create a new save point in the Save points list Choose a PTP (point to point) Point mode or ARC Point mode.
- Page 75 Dobot Magician User GuideDobot Magician ユーザーマニュアルエラー! [ホーム] タブを使用して、ここに表示 Figure 5.39 The Save points list 図 5.40 保存点リスト Table 5.11 The Save points list 表 5.41 保存点リスト Items Description A right-click mouse In the right-click popup menu you can edit a highlighted save point such as copy, operation paste, cut, insert, and delete, as shown in Figure 5.39...
- Page 76 If Check Lost Step is selected, the robotic arm detects if the stepper motors lose steps when moving. If unselected, no detection is performed If the Dobot Magician detects lost-steps, it stops working, and its LED indicator turns red. In this case, click Home to get a correct reference position...
-
Page 77: Arc Motion Mode
ARCモーションモードでは、円弧移動プロセスを実現するため、円弧上の3つのポイ ントが必要です。ARCモーションモードでは、第2のポイントと終点だけが保存され、開 始点は他のモードによって決定されます。 Prerequisites 前提条件 The Dobot Magician has been powered on and connected to your computer. Dobot Magician電源オン、コンピュータに接続されています。 Procedure 手順 NOTICE Note the following rules when saving points to prevent the robotic arm from working outside its normal workspace. - Page 78 Dobot Magician User GuideDobot Magician ユーザーマニュアルエラー! [ホーム] タブを使用して、ここに表示 円弧軌跡は、Dobot Magicianの通常の作業スペースを超えてはいけない For example the points A, B, and C are on the arc. Point A is the start point; Point B is the second point; Point C is the end point, as shown in Figure 5.45.
- Page 79 図 5.48 操作パネルを表示する Set the jogging speed percentage to 50 on the Operation Panel. Jog the Dobot Magician in the Cartesian or Joint coordinate system to move the robotic arm to a location called position A. Click +Point to save the coordinate corresponding to the position A, as shown in Figure 5.49.
- Page 80 Save the second point B and the end point C. Select cirPoint to save the second point in the Save Point area. Jogging the Dobot Magician in the Cartesian or Joint coordinate system to move the robotic arm to the second position B as required.
-
Page 81: Teaching & Playback Example
Application Scenarios アプリケーションシナリオ You can use Teaching & Playback function module to manipulate the Dobot Magician to accomplish different tasks such as transportation or intelligent sort. This topic introduces how to move small cubes from position A to B in the JUMP motion mode. - Page 82 Dobot Magician User GuideDobot Magician ユーザーマニュアルエラー! [ホーム] タブを使用して、ここに表示 前提条件 The Dobot Magician has been powered on and connected to your computer. A suction cup kit has been installed. For details, see 5.2.1 Installing a Suction Cup Kit. ...
- Page 83 Dobot Magician User GuideDobot Magician ユーザーマニュアルエラー! [ホーム] タブを使用して、ここに表示 をクリックして閉じます。 DobotStudioの初心者ガイドを読んだ後、 Step 3 Save the start point A. Put a small cube on the work surface near the suction cup kit. Select the MOVJ motion mode in the Save Point area.
- Page 84 ジョイント座標系およびデカルト座標系のジョギング速度と加速度について は、負荷付きの場合は500mm/s以下、無負荷の場合は800mm/s以下にすることを 推奨します。 Jog the Dobot Magician in the Cartesian or Joint coordinate system to move the suction cup close enough to the small cube for picking-up. For example, the suction cup reaches this location called position A. Select SuctionCup on the Operation Panel to turn on the air pump to pick up the small cube.
- Page 85 Dobot Magician User GuideDobot Magician ユーザーマニュアルエラー! [ホーム] タブを使用して、ここに表示 in Figure 5.61. デカルト座標系またはジョイント座標系でDobot Magicianをジョギング させ、小さなキューブを持ち上げるため、吸引カップを十分に近づけ ます。例えば吸引カップは、位置Aと呼ばれる位置に到達します。 「操作パネル」で「吸引カップ」を選択して、エアーポンプをオンにし て小さなチューブを持ち上げます。 保存点エリアで「一時停止時間」を1秒に設定します。 図5.28に示すように、 「+ポイント」をクリックして、位置Aに対応する 座標を保存します。 Figure 5.61 Save the start position A 図 5.62 位置 A を保存する Step 4 Save the end point B.
- Page 86 Figure 5.63 Jump parameters 図 5.64 JUMP パラメータ Jogging the Dobot Magician in the Cartesian or Joint coordinate system to move the small cube to the end position B as required. Unselect SucktionCup to turn off the air pump to release the small cube.
- Page 87 Dobot Magician User GuideDobot Magician ユーザーマニュアルエラー! [ホーム] タブを使用して、ここに表示 Figure 5.65 Save the end position B 図 5.66 最終位置 B を保存する Step 5 Set the percentage of both speed and acceleration for playback, for example, 50. ステップ5 プレイバック速度と加速度両方のパーセンテージを設定します。 (例:50) NOTE To change the speed and acceleration of playback, select Setting > Playback >...
- Page 88 Dobot Magician User GuideDobot Magician ユーザーマニュアルエラー! [ホーム] タブを使用して、ここに表示 Figure 5.67 Set the speed and acceleration of the playback 図 5.68 プレイバックの速度と加速度を設定する Table 5.13 Set the Playback 表 5.14 プレイバックを設定する Items Description JointParam Set the speed and acceleration of the joints...
-
Page 89: Working In Offline Mode
Figure 5.69 Move the small cube in the JUMP motion mode 図 5.70 JUMP モーションモードで小さなキューブを移動させる Working in Offline Mode オフラインモードで作業する Offline mode allows the Dobot Magician to perform the points in the Save points list previously downloaded from the DobotStudio without keeping the USB connection established. オフラインモードでは、Dobot Magicianは、USB接続により、前もってDobotStudioか らダウンロードした保存点リスト内のポイントを実行できます。... - Page 90 Step 2 Click Download. The Question dialog box is displayed, asking if you want the Dobot Magician to automatically to go back to its homing point before performing the save points in the offline mode, as shown in Figure 5.71.
- Page 91 アームとコンピュータ間のUSBケーブルを外します。 Press the Key button once on the base’s rear panel. Step 5 The Dobot Magician returns to its homing point and performs the downloaded save points. To stop the robotic arm’s movement, press the Key button once. ステップ5 ベースの背面パネルにあるキーボタンを一回押します。...
-
Page 92: Writing And Drawing
Dobot Magician User GuideDobot Magician ユーザーマニュアルエラー! [ホーム] タブを使用して、ここに表示 Writing and Drawing ライティング&ドローイング Figure 5.75 shows the process of writing and drawing. 図5.35にライティング&ドローイングのプロセスを示します。 Figure 5.75 The process of writing and draw 図 5.76 ライティング&ドローイングのプロセス 開始 Start ライティングキットを取り付ける Install a writing kit DobotStudio に接続する... - Page 93 Dobot Magician User GuideDobot Magician ユーザーマニュアルエラー! [ホーム] タブを使用して、ここに表示 Step 1 Install a pen in the pen holder. ステップ1 ペンをペンホルダーに取り付けます。 Fasten the writing kit to the Dobot Magician’s end with a Step 2 butterfly nut, as shown in Figure 5.77. ステップ2 図5.36に示すように、蝶形ナットでライティングキットをDobot Magicianの末端に固定します。...
-
Page 94: Connecting The Dobotstudio
Launch the DobotStudio, and select the COM port, and then click Connect. If the current firmware of the Dobot Magician is the 3D Printing firmware instead of the Dobot firmware, the Select tool dialog box is displayed, asking if you want to switch to the Dobot firmware. - Page 95 Figure 5.83 Confirm the firmware upgrade 図 5.84 ファームウェアアップグレードを確定する Click Confirm to upgrade the Dobot firmware, as shown in Figure 5.85. When the upgrade process bar shows 100%, and a short beep sound is heard, it means that the firmware is upgraded successfully, as shown in Figure 5.87.
- Page 96 Dobot Magician User GuideDobot Magician ユーザーマニュアルエラー! [ホーム] タブを使用して、ここに表示 Figure 5.87 The firmware upgrade is successful 図 5.88 ファームウェアのアップグレード成功 WARNING During the firmware upgrade, do not stop it. Otherwise, errors occur. 警告 アップグレード中は、強制終了しないでください。エラーが発生します。 Step 2 Click Connect on the DobotStudio page to connect the DobotStudio to the Dobot Magician.
-
Page 97: Importing Image Files And Setting Writing Parameters
Dobot Magician User GuideDobot Magician ユーザーマニュアルエラー! [ホーム] タブを使用して、ここに表示 Figure 5.89 Click Write & Draw 図 5.90 ライティング&ドローイングをクリックする Step 4 Choose Pen as the end-effector on the Write & Draw page, as shown in Figure 5.91. ステップ4 図5.43に示すように、 「ライティング&ドローイング」画面のエンドエフ ェクターに「ペン」を選択します。 Figure 5.91 Choose Pen as the end-effector 図... - Page 98 Dobot Magician User GuideDobot Magician ユーザーマニュアルエラー! [ホーム] タブを使用して、ここに表示 ライティング&ドローイングタスクを実行するときは、 内蔵またはカスタムの画像フ ァイルが必要です。PLTまたはSVGイメージのみ対応できます。内蔵ファイルは、ディレ クトリInstallation Directory¥DobotStudio¥config¥prefab¥system¥sourceにあります。 Prerequisites 前提条件 A PLT or SVG image file has been created. PLTまたはSVG画像ファイル作成済み。 Procedure 手順 Step 1 Click Write & Draw on the DobotStudio page, as shown in Figure 5.93.
- Page 99 Dobot Magician User GuideDobot Magician ユーザーマニュアルエラー! [ホーム] タブを使用して、ここに表示 注意 図5.45に示すように、取り込まれた画像は、 「ライティング&ドローイング」画 面の環状区域内に配置される必要があります。そうしないと、ロボットアーム は制限位置に止まり、 ドローイングまたはライティングが実行不可になります。 この場合、画像は図5.46に示すように赤い枠線で強調表示されます。 Figure 5.95 The PLT or SVG image is located within the annular area 図 5.96 PLT または SVG 画像は環状区域内に配置される Figure 5.97 The PLT or SVG image is located outside the annular area 図...
- Page 100 Dobot Magician User GuideDobot Magician ユーザーマニュアルエラー! [ホーム] タブを使用して、ここに表示 InstallatonDirectory\DobotStudio\config\prefab\system\source, as shown in Figure 5.99. You can also import your custom PLT or SVG image file. 図5.47に示すように、 「ライティング&ドローイング」画面の「開く」をクリッ ク し 、 DobotStudio の イ ン ス ト ー ル デ ィ レ ク ト リ の...
- Page 101 Dobot Magician User GuideDobot Magician ユーザーマニュアルエラー! [ホーム] タブを使用して、ここに表示 Figure 5.101 Insert a system image file 図 5.102 内蔵の画像ファイルを取り込む Click Input Texts on the Write & Draw page to input texts, and set its style, and then click OK to display the text on the annular area, as shown in Figure 5.103.
- Page 102 Dobot Magician User GuideDobot Magician ユーザーマニュアルエラー! [ホーム] タブを使用して、ここに表示 Click Open to import an image file such as BMP, JEPG, or PNG to convert this image to its corresponding SVG file that the DobotStudio supports, as shown in Figure 5.105.
- Page 103 ステップ3 ライティングパラメータを設定します。 図5.52に示すように、 「ライティング&ドローイング」画面の「設定」 をクリックします。 Figure 5.109 Click Setting 図 5.110 設定をクリックする Click Write & Draw to set the Dobot Magician’s Velocity (mm/s), junction velocity (JunctionVel: mm/s), PlanAcc (mm/s ), acceleration (Acc: mm/s Issue V1.0 (2018-06-12) User Guide Copyright © Yuejiang Technology Co., Ltd.
-
Page 104: Adjust The Position Of The Pen Nib
Dobot Magician User GuideDobot Magician ユーザーマニュアルエラー! [ホーム] タブを使用して、ここに表示 PenUpOffset (mm), PenDown (mm), as shown in Figure 5.111. 図5.53に示すように、 「ライティング&ドローイング」をクリックして、 Dobot Magicianの速度(mm/s)、 接合速度(JunctionVel: mm/s)、 直線加速度 (mm/s )、加速度(Acc: mm/s )、PenUpOffset (mm)とPenDown (mm)を設 定します。 NOTE We recommend to set the Velocity in the range of 0mm/s to 500mm/s and to adjust the... - Page 105 The point marked by a red box, as shown in Figure 5.115 The point corresponding to the laser kit of the robotic arm 図 5.116, corresponds to the position of the writing kit of the Dobot Magician. This point changes its position only within the annular area when the robotic arm moves.
- Page 106 Dobot Magician User GuideDobot Magician ユーザーマニュアルエラー! [ホーム] タブを使用して、ここに表示 Figure 5.115 The point corresponding to the laser kit of the robotic arm 図 5.116 ロボットアームのレーザーキットに対応するポイント Step 2 Click AutoZ on the Write & Draw page to obtain and save the current value of the Z axis.
- Page 107 Dobot Magician User GuideDobot Magician ユーザーマニュアルエラー! [ホーム] タブを使用して、ここに表示 Figure 5.117 Lock the height of writing 図 5.118 ライティングの高さをロックする NOTE The value of the Z axis is the PenDown parameter. This parameter can be set by selecting Setting > Write Draw > PenDown on the Write & Draw page, as shown in Figure 5.119.
-
Page 108: Performing Laser Engraving Tasks
Dobot Magician User GuideDobot Magician ユーザーマニュアルエラー! [ホーム] タブを使用して、ここに表示 Figure 5.119 The PenDown parameter 図 5.120 PenDown パラメータ Step 3 Click SyncPos. The Dobot Magician automatically moves above the position (PenDown) of the start point of the text. ステップ3 SyncPosをクリックします。 Dobot Magicianは自動的にテキストの開始点位置(PenDown)の上方に移動... - Page 109 Dobot Magician User GuideDobot Magician ユーザーマニュアルエラー! [ホーム] タブを使用して、ここに表示 Figure 5.121 The process of laser engraving 図5.122 レーザー彫刻のプロセス 開始 Start レーザーキットを取り付ける Install a writing kit Dobotstudio に接続する Connect the dobotstudio 画像ファイルを取り込み、彫刻パラメ Import an image file and set engraving ータを設定する parameters レーザーの焦点を調整し、彫刻を始め...
-
Page 110: Installing A Laser Kit
A laser kit includes a laser. For detailed steps, see below. レーザーキットにはレーザーが含まれています。 詳細な手順については、 下記を参照 してください。 Step 1 Fasten the laser kit to the Dobot Magician's end with a butterfly nut, as shown in Figure 5.123. ステップ1 図5.59に示すように、 レーザーキットをDobot Magicianの末端に蝶形ナッ トで固定します。... -
Page 111: Connecting The Dobotstudio
Launch the DobotStudio, and select the COM port, and then click Connect. If the current firmware of the Dobot Magician is the 3D Printing firmware instead of the Dobot firmware, the Select tool dialog box is displayed, asking if you want to switch to the Dobot firmware. - Page 112 ます。 Dobot Magicianの現在のファームウェアがDobotファームウェアではなく3D プリンティングファームウェアである場合、 「工具選択」ダイアログボック スが表示され、Dobotファームウェアに切り替えるか尋ねます。この場合、 次の手順に従い、ファームウェアを切り替えます。 Select DobotStudio to upgrade the Dobot firmware, as shown in Figure 5.127. The Question dialog box is displayed. 図5.61に示すように、 DobotStudioを選択してDobotファームウェアをア ップグレードします。 「質問」ダイアログボックスが表示されます。 Figure 5.127 Select the DobotStudio to upgrade the Dobot firmware 図 5.128 DobotStudio を選択して Dobot ファームウェアをアップグレードする...
- Page 113 Dobot Magician User GuideDobot Magician ユーザーマニュアルエラー! [ホーム] タブを使用して、ここに表示 means that the firmware is upgraded successfully, as shown in Figure 5.133. In this case, the LED indicator turns from red to green. Then click Quit to exit. 図5.63に示すように、 「確定」をクリックしてDobotファームウェアをア ップグレードします。図5.64に示すように、アップグレードプロセスバ ーが100%と表示され、ビープ音が鳴った場合は、ファームウェアが正...
- Page 114 Dobot Magician User GuideDobot Magician ユーザーマニュアルエラー! [ホーム] タブを使用して、ここに表示 WARNING During the firmware upgrade, do not stop it. Otherwise, errors occur. 警告 アップグレード中は、強制終了しないでください。エラーが発生します。 Step 2 Click Connect on the DobotStudio page to connect the DobotStudio to the Dobot Magician. Step 3 Click Write &...
-
Page 115: Importing Image Files And Setting Engraving Parameters
Dobot Magician User GuideDobot Magician ユーザーマニュアルエラー! [ホーム] タブを使用して、ここに表示 Figure 5.137 Choose Laser as the end-effector 図 5.138 エンドエフェクターにレーザーを選択する 5.5.3 Importing Image Files and Setting Engraving Parameters 画像ファイルを取り込み、彫刻パラメータを設定する When performing a laser-engraving task, a built-in or a custom image file is required. Only a PLT or SVG image can be used. - Page 116 Dobot Magician User GuideDobot Magician ユーザーマニュアルエラー! [ホーム] タブを使用して、ここに表示 Figure 5.139 Click Write & Draw 図 5.140 ライティング&ドローイングをクリックする Step 2 Import an image file using one of the following methods. ステップ2 次のいずれかの方法で画像ファイルを取り込みます。 NOTICE The imported image should be placed within the annular area on the Write & Draw page, as shown in Figure 5.141.
- Page 117 Dobot Magician User GuideDobot Magician ユーザーマニュアルエラー! [ホーム] タブを使用して、ここに表示 Figure 5.141 The PLT or SVG image is located within the annular area 図 5.142 PLT または SVG 画像が環状区域内に配置される Figure 5.143 The PLT or SVG image is located outside the annular area 図...
- Page 118 Dobot Magician User GuideDobot Magician ユーザーマニュアルエラー! [ホーム] タブを使用して、ここに表示 ク し 、 DobotStudio の イ ン ス ト ー ル デ ィ レ ク ト リ の InstallatonDirectory¥DobotStudio¥config¥prefab¥system¥sourceから、内蔵のPLT またはSVG画像ファイルを取り込みます。カスタムのPLTまたはSVG画像ファイ ルも取り込み可能です。 Figure 5.145 Open a PLT or SVG file 図 5.146 PLT または SVG ファイルを開く...
- Page 119 Dobot Magician User GuideDobot Magician ユーザーマニュアルエラー! [ホーム] タブを使用して、ここに表示 Figure 5.147 Insert a system image file 図 5.148 内蔵の画像ファイルを取り込む Click Input Texts on the Write & Draw page to input texts, and set its style, and then click OK to display the text on the annular area, as shown in Figure 5.149.
- Page 120 Dobot Magician User GuideDobot Magician ユーザーマニュアルエラー! [ホーム] タブを使用して、ここに表示 Figure 5.151 Import an image file 図 5.152 画像ファイルを取り込む Figure 5.153 Convert Bitmap to SVG 図 5.154 ビットマップを SVG に変換する Step 3 Set the laser-engraving’s parameters. Click Setting on the Write & Draw page, as shown in Figure 5.155.
- Page 121 Dobot Magician User GuideDobot Magician ユーザーマニュアルエラー! [ホーム] タブを使用して、ここに表示 Figure 5.155 Click Setting 図 5.156 設定をクリックする Click Write & Draw to set the Dobot Magician’s Velocity (mm/s), junction velocity (JunctionVel: mm/s), PlanAcc (mm/s ), acceleration (Acc: mm/s PenUpOffset (mm), PenDown (mm), as shown in Figure 5.157.
-
Page 122: Adjust The Laser Focus And Start To Grave
Dobot Magician User GuideDobot Magician ユーザーマニュアルエラー! [ホーム] タブを使用して、ここに表示 Figure 5.157 Setting the parameters of the Write & Draw function 図 5.158 ライティング&ドローイング機能のパラメータを設定する 5.5.4 Adjust the Laser Focus and Start to Grave レーザーの焦点を調整し、彫刻を始める Procedure 手順 Step 1 Choose Laser as the end-effector on the Write & Draw page, as shown in Figure 5.159. - Page 123 Never aim the laser at a person and their clothes. Do not allow the children to play with the Dobot Magician. Monitor the robotic arm while it is running and power off it once the movement is complete. 危険...
- Page 124 Dobot Magician User GuideDobot Magician ユーザーマニュアルエラー! [ホーム] タブを使用して、ここに表示 ください。 レーザー焦点中央は、高温の熱が発生し、紙や木製ボードなどの材料を燃 やすことができます。 人と服にレーザーを向けないでください。 子供にロボットアームを遊ばせないでください。動作中は全プロセスを監 視する必要があります。プロセス完了後、すぐに装置の電源を切ってくだ さい。 Step 3 Press and hold the unlock button on the Forearm to move the robotic arm to raise and lower the height of the laser kit until the laser is the brightest with a smallest possible spot size.
- Page 125 The point marked by a red box, as shown in Figure 5.167, corresponds to the position of the end-effector of the Dobot Magician. This point changes its position only within the annular area when the robotic arm moves. ...
- Page 126 Dobot Magician User GuideDobot Magician ユーザーマニュアルエラー! [ホーム] タブを使用して、ここに表示 Figure 5.167 The point corresponding to the end-effector of the robotic arm 図 5.168 ロボットアームのエンドエフェクターに対応するポイント Step 4 Click AutoZ on the Write & Draw page to obtain and save the current value of Z axis.
- Page 127 ください。 Figure 5.171 Set the PenDown parameters 図 5.172 PenDown パラメータを設定する Step 5 Click SyncPos. The Dobot Magician automatically moves above the position (PenUpOffset) of the start point of the laser-engraving. ステップ5 SyncPosをクリックします。 Issue V1.0 (2018-06-12) User Guide Copyright © Yuejiang Technology Co., Ltd.
-
Page 128: Engraving A Grayscale Image
Dobot Magician User GuideDobot Magician ユーザーマニュアルエラー! [ホーム] タブを使用して、ここに表示 Dobot Magicianは自動的にレーザー彫刻の開始点位置 (PenUpOffset) の上方 に移動します。 Step 6 Click Start to start engraving on the paper. When engraving, click Pause to pause the engraving and Stop to halt the engraving. ステップ6 「開始」をクリックして紙に彫刻し始めます。 彫刻中は、 「一時停止」をクリックすると彫刻が一時停止し、 「停止」をクリ... -
Page 129: Installing A Grayscale-Engraving Kit
Dobot Magician User GuideDobot Magician ユーザーマニュアルエラー! [ホーム] タブを使用して、ここに表示 Figure 5.175 The process of engraving a grayscale image 図5.176 グレースケール画像彫刻のプロセス 開始 Start レーザーキットを取り付ける Install a writing kit Dobotstudio に接続する Connect the dobotstudio 画像ファイルを取り込み、 彫刻パラメ Import an image file and set engraving ータを設定する... -
Page 130: Connecting The Dobotstudio
Launch the DobotStudio, and select the COM port, and then click Connect. If the current firmware of the Dobot Magician is the 3D Printing firmware instead of the Dobot firmware, the Select tool dialog box is displayed, asking if you want to switch to the Dobot firmware. - Page 131 Figure 5.179 Confirm the firmware upgrade 図 5.180 ファームウェアアップグレードを確定する Click Confirm to upgrade the Dobot firmware, as shown in Figure 5.181. When the upgrade process bar shows 100%, and a short beep sound is heard, it means that the firmware is upgraded successfully, as shown in Figure 5.183.
- Page 132 Dobot Magician User GuideDobot Magician ユーザーマニュアルエラー! [ホーム] タブを使用して、ここに表示 Figure 5.183 The firmware upgrade is successful 図 5.184 ファームウェアのアップグレード成功 WARNING During the firmware upgrade, do not stop it. Otherwise, errors occur. 警告 アップグレード中は、強制終了しないでください。エラーが発生します。 Step 2 Click LaserEngraving, as shown in Figure 5.185.
-
Page 133: Importing Image Files And Setting Engraving Parameters
Dobot Magician User GuideDobot Magician ユーザーマニュアルエラー! [ホーム] タブを使用して、ここに表示 Figure 5.185 Click LaserEngraving 図 5.186 レーザー彫刻をクリックする 5.6.3 Importing Image Files and Setting Engraving Parameters 画像ファイルを取り込み、彫刻パラメータを設定する Prerequisites 前提条件 An image file has been created. 画像ファイルが作成済み。 Procedure 手順 NOTICE The imported image should be placed within the annular area on the LaserEngraving page, as shown in Figure 5.187. - Page 134 Dobot Magician User GuideDobot Magician ユーザーマニュアルエラー! [ホーム] タブを使用して、ここに表示 図5.188 画像ファイルが環状区域内に配置される Figure 5.189 The image file is located outside the annular area 図5.92 画像ファイルが環状区域外に配置される Step 1 Choose Laser as the end-effector on the LaserEngraving page, as shown in Figure 5.190. ステップ1 図5.93に示すように、 「レーザー彫刻」画面でエンドエフェクターに「レ...
- Page 135 Dobot Magician User GuideDobot Magician ユーザーマニュアルエラー! [ホーム] タブを使用して、ここに表示 Figure 5.192 Import an image file 図 5.193 画像ファイルを取り込む Step 3 Set the Grayscale range, Laser power range, and Border, as shown in Figure 5.194. For details, see Table 5.15. ステップ3 図5.95に示すように、 「グレースケール範囲」 、 「レーザー出力範囲」 、お...
- Page 136 Dobot Magician User GuideDobot Magician ユーザーマニュアルエラー! [ホーム] タブを使用して、ここに表示 Table 5.15 Laser engraving parameters 表 5.16 レーザー彫刻のパラメータ Items Description Grayscale range Set the grayscale range Range: 0 - 255 Default value: 20 - 240 Laser power range Set the laser power range...
- Page 137 Dobot Magician User GuideDobot Magician ユーザーマニュアルエラー! [ホーム] タブを使用して、ここに表示 Figure 5.196 Set the parameters of laser engraving 図 5.197 レーザー彫刻のパラメータを設定する Issue V1.0 (2018-06-12) User Guide Copyright © Yuejiang Technology Co., Ltd. バージョン V1.0 (2018-06-12) ユーザーマニュアル 版権所有 © 越疆科技有限公司.
-
Page 138: Adjust The Laser Focus And Start To Engrave
Never aim the laser at a person and their clothes. Do not allow the children to play with the Dobot Magician. Monitor the robotic arm while it is running and power off it once the movement is complete. 危険... - Page 139 Dobot Magician User GuideDobot Magician ユーザーマニュアルエラー! [ホーム] タブを使用して、ここに表示 Figure 5.198 Select the Laser 図 5.199 レーザーを選択する Step 3 Adjust the laser focus. Press and hold the unlock button on the Forearm to move the robotic arm to raise and lower the height of the laser kit until the laser is the brightest with a smallest possible spot size.
- Page 140 Dobot Magician User GuideDobot Magician ユーザーマニュアルエラー! [ホーム] タブを使用して、ここに表示 Figure 5.200 Unselect the Laser 図 5.201 レーザーの選択を解除する NOTICE If you cannot set the laser to be at its minimum focus, it’s probably because the focal length is long. To shorten the focal length, slightly turn the sliver lens screw (as shown in Figure 5.202) on the bottom of the laser kit.
- Page 141 The point marked by a red box, as shown in Figure 5.204, corresponds to the position of the laser kit of the Dobot Magician. This point changes its position only within the annular area when the robotic arm moves.
- Page 142 Dobot Magician User GuideDobot Magician ユーザーマニュアルエラー! [ホーム] タブを使用して、ここに表示 Figure 5.206 Lock the height of engraving 図 5.207 彫刻の高さをロックする NOTE The value of Z axis is the PenDown parameter. This parameter can be set by selecting Setting > LaserEngraving > PenDown, as shown in Figure 5.208. If the effect of engraving is not satisfactory, slightly raise and lower the height of the laser kit or directly change the value of PenDown.
- Page 143 Dobot Magician User GuideDobot Magician ユーザーマニュアルエラー! [ホーム] タブを使用して、ここに表示 Figure 5.208 Set the PenDown parameters 図5.209 PenDownパラメータを設定する Step 5 Click SyncPos. The Dobot Magician automatically moves above the position of the start point of the laser-engraving. ステップ4 SyncPosをクリックします。 Dobot Magicianは自動的にレーザー彫刻の開始点位置 (PenUpOffset) の上方 に移動します。...
-
Page 144: Controlling With Your Hand Gesture
Dobot Magician User GuideDobot Magician ユーザーマニュアルエラー! [ホーム] タブを使用して、ここに表示 Figure 5.210 The effect of laser-engraving 図 5.211 レーザー彫刻の結果のイメージ Controlling with your Hand Gesture 手振りコントロール You can use the LeapMotion function module of the DobotStudio to perform tasks, for example, grab or suck an object with your hand gesture. - Page 145 Dobot Magician User GuideDobot Magician ユーザーマニュアルエラー! [ホーム] タブを使用して、ここに表示 Figure 5.212 Download the Leap Motion driver software for Windows 図 5.213 Windows 向け LeapMotion ドライバをダウンロード Procedure 手順 Step 1 Connect a Leap Motion controller to your computer with a USB cable, and put it on the work surface with its face up, as shown in Figure 5.214.
-
Page 146: Leap Motion Demo
LeapMotion機能を使用して物体を移動、または並べ替えることができます。 このセ クションでは、手振りで小さなキューブを移動する方法を紹介します。 Prerequisites 前提条件 The Dobot Magician is powered on and connected to your computer. The suction cup kit has been installed. For details, see 5.2.1 Installing a Suction Cup Kit. Dobot Magician電源オン、コンピュータに接続済み。 ... - Page 147 Dobot Magician User GuideDobot Magician ユーザーマニュアルエラー! [ホーム] タブを使用して、ここに表示 ステップ1 DobotStudioを起動し、 「接続」をクリックしてDobot Magicianにコント ロールします。 ステップ2 Figure 5.218に示すように、 「LeapMotion」をクリックします。 Figure 5.218 Click LeapMotion 図 5.219 LeapMotion をクリックする Step 3 Click Setting on the DobtStudio page, as shown in Figure 5.220. ステップ3 図5.108に示すように、DobtStudio画面で「設定」をクリックし...
- Page 148 Dobot Magician User GuideDobot Magician ユーザーマニュアルエラー! [ホーム] タブを使用して、ここに表示 図 5.221 設定をクリックする Step 4 Click Leap Motion, as shown in Figure 5.222. Set the parameters, as shown in Table 5.17, and click OK. ステップ4 図5.109に示すように、 「 LeapMotion」 をクリックします。 表5.12 に示すようにパラメータを設定し、OKをクリックします。 Figure 5.222 Set the parameters of the Leap Motion function 図...
- Page 149 Choose SuctionCup as the end-effector on the DobotStudio page, and click Start to control the Dobot Magician with your hand gesture, as shown in Figure 5.224. To maintain the Dobot Magician in a stable state, move your hand into the workspace of the Leap Motion controller while keeping your palm upward.
- Page 150 Dobot Magician User GuideDobot Magician ユーザーマニュアルエラー! [ホーム] タブを使用して、ここに表示 図 5.225 開始をクリックする NOTE Move your hand in the workspace of the Leap Motion controller to control the Dobot Magician to perform a particular task, as shown in Table 5.19. 注 表5.13に示すように、LeapMotionコントローラの作業スペースに手を動かして、...
-
Page 151: Controlling With Your Mouse
DobotStudioの「マウス」機能モジュールを使用して、マウスにより、物体を持ち上 げるかつかむことなどのタスクを実行することができます。 Prerequisites 前提条件 The Dobot Magician is powered on and connected to your computer. The suction cup kit has been installed. For details, see 5.2.1 Installing a Suction Cup Kit. Dobot Magician電源オン、コンピュータに接続済み。 吸引カップキット取付け済み。詳細については5.2.1 Installing a Suction Cup Kitを... - Page 152 Dobot Magician User GuideDobot Magician ユーザーマニュアルエラー! [ホーム] タブを使用して、ここに表示 Figure 5.228. ステップ2 図5.112に示すように、DobotStudio画面のエンドエフェクターに「吸引カ ップ」を選択します。 Figure 5.228 Choose SuctionCup as the end-effector 図 5.229 エンドエフェクターに吸引カップを選択する Step 3 Click Setting, as shown in Figure 5.230. ステップ3 図5.113に示すように、 「設定」をクリックします。 Figure 5.230 Click Setting 図 5.231 設定をクリックする...
- Page 153 Dobot Magician User GuideDobot Magician ユーザーマニュアルエラー! [ホーム] タブを使用して、ここに表示 Figure 5.232 Set the parameters of mouse control 図 5.233 マウスコントロールのパラメータを設定する Issue V1.0 (2018-06-12) User Guide Copyright © Yuejiang Technology Co., Ltd. バージョン V1.0 (2018-06-12) ユーザーマニュアル 版権所有 © 越疆科技有限公司.
- Page 154 遅延のないように、低スペックコンピュータで低性能(デフォルト)を 選択してください。 Step 4 Put a small cube on the work surface in the workspace of the Dobot Magician, such as point A. Step 5 Press V to enable the mouse control of the Dobot Magician. Press and hold the left mouse button to drag the mouse within the red annular area to move the robotic arm, as shown in Figure 5.234.
- Page 155 Figure 5.234 Move the robotic arm in the red annular area 図 5.235 赤い環状区域内にマウスを移動する Step 6 Move the Dobot Magician above the cube by dragging the mouse and then place it close to the cube. ステップ6 マウスでドラッグすることにより、 Dobot Magicianをキューブの上方から近く まで移動させます。...
-
Page 156: Operating 3D Printing
Dobot Magician User GuideDobot Magician ユーザーマニュアルエラー! [ホーム] タブを使用して、ここに表示 Robotic arm’s movement Mouse action Move your mouse front, The robotic arm moves accordingly back, right, or left Scroll the mouse wheel The robotic arm moves accordingly up or down Press and hold the left... - Page 157 Dobot Magician User GuideDobot Magician ユーザーマニュアルエラー! [ホーム] タブを使用して、ここに表示 Figure 5.236 3D printing process 図 5.237 3D プリンティングのプロセス 開始 Start 3D プリンティングキットを取り付け Install 3D printing kit る ファームウェアを書き込む Burn firmware 3D プリンティングを実行する Perform 3D printing 終了 During 3D printing, the 3D printing control software is required. You can use Repetier Host or Cura software for 3D printing.
-
Page 158: Installing 3D Printing Kit
Dobot Magician User GuideDobot Magician ユーザーマニュアルエラー! [ホーム] タブを使用して、ここに表示 コントロールが実行可能です。 より多くのパラメータ設定により、Repetier-Host は非常にフレキシブルになります。 Cure: The slicing of Cura is fast and stable. It has strong inclusiveness to 3D model structure and less parameter settings. Cure: Curaによるスライス処理は非常に速く安定しています。高水準の3Dモデ ル製造を実現すると同時に、パラメータ設定は少ないです。 NOTICE This section uses Windows as an example to describe how to perform 3D printing with Repetier Host and Cura. - Page 159 Dobot Magician User GuideDobot Magician ユーザーマニュアルエラー! [ホーム] タブを使用して、ここに表示 Figure 5.238 3D printing kit 図 5.239 3D プリンティングキット ホットエンド Hot end PTFE Tube PTFEチューブ 押出機 Extruder モーターケーブル Motor cable モーターケーブル Motor cable Issue V1.0 (2018-06-12) User Guide Copyright © Yuejiang Technology Co., Ltd.
- Page 160 Dobot Magician User GuideDobot Magician ユーザーマニュアルエラー! [ホーム] タブを使用して、ここに表示 フィラメント filament フィラメントホルダー Filament holder Procedure 手順 Step 1 Press down the lever on the extruder, and push down the filament to the bottom of the hole via the pulley, as shown in Figure 5.240.
- Page 161 Please make sure that the PTFE tube has been pushed down to the bottom of the hot end. Otherwise, it will cause abnormal discharge. 注意 PTFEチューブがホットエンドの底まで押し下げられていることを確認してく ださい。異常放電を招く原因となります。 Step 4 Fix the hot end on the Dobot Magician with butterfly nut, as shown in Figure 5.244. ステップ4 図5.120に示すように、Dobot Magicianのホットエンドを蝶形ナ ットで固定します。 Issue V1.0 (2018-06-12) User Guide Copyright ©...
- Page 162 Dobot Magician User GuideDobot Magician ユーザーマニュアルエラー! [ホーム] タブを使用して、ここに表示 Figure 5.244 Fix hot end 図 5.245 ホットエンドを固定する Step 5 Insert the heating cable to the interface 4 on the Forearm, the fan cable to the interface 5 and the thermistor cable to the interface 6, as shown in Figure 5.246.
- Page 163 Dobot Magician User GuideDobot Magician ユーザーマニュアルエラー! [ホーム] タブを使用して、ここに表示 Figure 5.246 Connect hot end to the Forearm 図 5.247 ホットエンドをフォアアームに接続する 加熱ケーブル Heating cable ファンケーブル Fan cable サーミスタケーブル Thermistor cable Step 6 Connect the extruder to the Stepper1 interface on the back of the base with motor cable, as shown in Figure 5.248.
- Page 164 Dobot Magician User GuideDobot Magician ユーザーマニュアルエラー! [ホーム] タブを使用して、ここに表示 Figure 5.248 Connect with extruder 図 5.249 押出機と接続する ステッパー1 Stepper1 Step 7 Place the filament and the extruder to the filament holder, as shown in Figure 5.250. ステップ7 図5.123に示すように、 フィラメントと押出機をフィラメントホ ルダーに置きます。 Issue V1.0 (2018-06-12) User Guide Copyright ©...
-
Page 165: Operating Repetier Host
The printing platform has been prepared and please place it in the workspace of the Dobot Magician. Dobot Magician has been powered on. Dobot Magician has been connected to DobotStudio successfully (Only USB connection is supported). The 3D printing kit has been installed. ... - Page 166 Dobot Magician User GuideDobot Magician ユーザーマニュアルエラー! [ホーム] タブを使用して、ここに表示 Dobot MagicianはDobotStudioに正常に接続されている(USB接続のみ対応) 。 3Dプリンティングキット取付け済み。 5.9.2.1 Burning Firmware ファームウェアを書き込む Procedure 手順 Step 1 Click 3DPrinter on the DobotStudio page. The 3D Printing FM page is displayed, as shown in Figure 5.252.
- Page 167 Dobot Magician User GuideDobot Magician ユーザーマニュアルエラー! [ホーム] タブを使用して、ここに表示 ベースのLEDランプが赤色点灯している場合は、3Dプリンティングキット の接続異常を示します。 WARNING Please DO NOT operate or turn off Dobot Magician when burning firmware, to avoid machine damage. 警告 ファームウェアを書き込むときは、機器の損傷を避けるため、Dobot Magician を操作したり、電源を切ったりしないでください。 Figure 5.254 Repetier Host page 図 5.255 Repetier Host 画面...
- Page 168 Dobot Magician User GuideDobot Magician ユーザーマニュアルエラー! [ホーム] タブを使用して、ここに表示 Figure 5.256 Switch into 3D printing automatically 図 5.257 自動的に 3D プリンティングに切り替える 5.9.2.2 Performing 3D Printing 3Dプリンティングを実行する Procedure 手順 Step 1 Set printing parameters. Printing parameters only need to be set for the first time.
- Page 169 Dobot Magician User GuideDobot Magician ユーザーマニュアルエラー! [ホーム] タブを使用して、ここに表示 Figure 5.258 Connection setting 図 5.259 接続の設定 Click Apply. Unselect the corresponding options on the Printer tab as shown in the red box of Figure 5.260 and the other parameters are set by default. Then, click Apply.
- Page 170 Dobot Magician User GuideDobot Magician ユーザーマニュアルエラー! [ホーム] タブを使用して、ここに表示 Figure 5.260 Unselect options 図 5.261 オプション選択を解除する Set the corresponding parameters on the Extruder tab as shown in the red box of Figure 5.262, the other parameters are set by default. Then, Click Apply.
- Page 171 Dobot Magician User GuideDobot Magician ユーザーマニュアルエラー! [ホーム] タブを使用して、ここに表示 Figure 5.262 Extruder settings 図 5.263 押出機の設定 Set the corresponding parameters on the Printer Shape tab as shown in the red box of Figure 5.264, the other parameters are set by default. Then, Click Apply.
- Page 172 Click OK 「OK」をクリックします。 Step 2 Click Connect on the Repetier Host page to connect Dobot Magician. After the connection is successful, the current heating temperature will be shown on the below of the Repetier Host page, as shown in Figure 5.266.
- Page 173 Before printing, you need to test the extruder to check whether the melted filament flows from the nozzle of the extruder. The temperature of the extruder should be above 170℃. Dobot Magician will not start 3D printing until the filament is in the melting state. So you need to heat the extruder first.
- Page 174 Dobot Magician User GuideDobot Magician ユーザーマニュアルエラー! [ホーム] タブを使用して、ここに表示 let children play with it alone. The process needs to be monitored when it is running. After the process is completed, please turn off the equipment promptly. 危険 加熱ロッドは250℃の高温になりますのでご注意ください。 子供だけで遊ばせな いでください。実行中はプロセスを監視する必要があります。プロセスが完了 すると、すぐに機器の電源を切ってください。...
- Page 175 Step 4 Adjust the printing space and get the printing coordinates. ステップ4 プリントスペースを調整し、プリント用座標を取得します。 NOTE During printing, if the distance from Dobot Magician to the printing platform is too Issue V1.0 (2018-06-12) User Guide Copyright © Yuejiang Technology Co., Ltd. バージョン V1.0 (2018-06-12) ユーザーマニュアル...
- Page 176 層目の粘着性を高めるため、マスキング用紙をプラットフォーム上に置くこと を推奨します。 Press the Unlock key on the Forearm and drag Dobot Magician to make the printing head contact the surface of the masking paper (The distance between the printing head and the surface of the masking paper is the thickness of a sheet of A4 paper), then release the Unlock key.
- Page 177 Dobot Magician User GuideDobot Magician ユーザーマニュアルエラー! [ホーム] タブを使用して、ここに表示 図 5.273 M415 を入力する NOTE If you cannot find the G-Code command window, please click EASY to close Easy Mode, as shown in Figure 5.274. 注 G-Codeコマンド画面が見つからない場合は、図5.135のように、 「簡単」をクリ ックして「簡単モード」を閉じます。 Figure 5.274 Easy mode 図...
- Page 178 Dobot Magician User GuideDobot Magician ユーザーマニュアルエラー! [ホーム] タブを使用して、ここに表示 Figure 5.276 Import 3D printing Model 図 5.277 3Dプリンティングモードを取り込む After importing the model, you can center, zoom, or rotate the model on the Object Placement page, as shown in Figure 5.278. モデル取り込み後、図5.137に示すように、 「物体配置」画面でモデルの...
- Page 179 Dobot Magician User GuideDobot Magician ユーザーマニュアルエラー! [ホーム] タブを使用して、ここに表示 Step 6 Set slicing parameters and slice up. You need to set the slicing parameters before first printing. ステップ6 スライス処理のパラメータを設定し、スライスを開始します。 初回プリント前に、スライス処理のパラメータを設定する必要があります。 Select Slic3r from Slicer on the Slicer tab of the Repetier Host page, and click Configuration, as shown in Figure 5.280.
- Page 180 Dobot Magician User GuideDobot Magician ユーザーマニュアルエラー! [ホーム] タブを使用して、ここに表示 Figure 5.282 Slic3r page 図 5.283 Slic3r 画面 Set the slicing parameters on the Slic3r page. The 3D printing effect depends on the slice parameters. This topic provides a configuration sample, you can select File > Load Config on the Slic3r page to import it directly for printing.
- Page 181 Dobot Magician User GuideDobot Magician ユーザーマニュアルエラー! [ホーム] タブを使用して、ここに表示 Figure 5.284 Configuration sample 図 5.285 構成サンプル Dobot-2.0-Vase.ini is used for printing a thin-walled vase, while Dobot-2.0-ini is used for the filling, the filling rate is 20%. Dobot-2.0-Vase.iniは薄壁の花瓶のプリントに使用されます。 Dobot-2.0-ini は充填用で、充填率は20%です。 Save the Printing Settings, Filament Settings and Printer Settings tabs respectively after importing configuration sample, as shown in Figure 5.286.
- Page 182 Dobot Magician User GuideDobot Magician ユーザーマニュアルエラー! [ホーム] タブを使用して、ここに表示 Click Slici with Slic3r on the Slicer tab of the Repetier Host page, as shown in Figure 5.288. 図5.142に示すように、 Repetier Host画面の 「スライサー」 タブで 「Slic3r でスライスする」をクリックします。 Figure 5.288 Start to slice 図 5.289 スライスを開始する...
- Page 183 Dobot Magician User GuideDobot Magician ユーザーマニュアルエラー! [ホーム] タブを使用して、ここに表示 Figure 5.290 Start printing 図 5.291 プリントを開始する Here we choose vase mode to print, and the product after printing as shown in Figure 5.292. ここで花瓶モードを選択します。プリント完了後の製品は図5.144に示されます。 Issue V1.0 (2018-06-12) User Guide Copyright © Yuejiang Technology Co., Ltd.
-
Page 184: Operating Cura
Please download the recommended version V14.07. The way how to install and use is not descripted in this topic. The 3D printing model has been prepared. The printing platform has been prepared and please place it in the workspace of Dobot Magician. Dobot Magician has been powered on. ... - Page 185 Dobot Magician User GuideDobot Magician ユーザーマニュアルエラー! [ホーム] タブを使用して、ここに表示 is supported). The 3D printing kit has been installed. スライスソフトCuraインストール済み。 https://ultimaker.com/en/products/ultimaker-cura-software/listからダウンロードして ください。 推奨バージョンV14.07をダウンロードしてください。 このセクションでは、 イン ストール方法と使用方法について説明しません。 3Dプリンティングモード準備済み。 プリントプラットフォーム準備済み、Dobot Magicianの作業スペース内に設置さ れている。 Dobot Magician電源オン。 Dobot MagicianはDobotStudioに正常に接続されている(USB接続のみ対応) 。 ...
- Page 186 3D printing kit is abnormal. ステップ2 「確定」をクリックして3Dプリンティングフォームウェアの書き込みを 開始します。 3Dプリンティングファームウェア書き込み完了後、ベースのLEDランプが 赤色に変わると、3Dプリンティングキットの接続異常を示します。 WARNING Please DO NOT operate or turn off Dobot Magician when burning firmware, to avoid machine damage. 警告 ファームウェアを書き込むときは、機器の損傷を避けるため、Dobot Magician を操作したり、電源を切ったりしないでください。 5.9.3.2 Performing 3D Printing 3Dプリンティングを実行する...
- Page 187 Dobot Magician User GuideDobot Magician ユーザーマニュアルエラー! [ホーム] タブを使用して、ここに表示 Procedure 手順 Step 1 Launch Cura software. Step 2 Set slicing parameters. Select Machine > settings on the Cura page. The Machine settings page is displayed. Set the corresponding parameters on the Machine settings and click OK, as shown in Figure 5.296.
- Page 188 Dobot Magician User GuideDobot Magician ユーザーマニュアルエラー! [ホーム] タブを使用して、ここに表示 Parameter Description Maximum depth The maximum with please set to 80mm Maximum height The maximum height Please set to 150mm Machine center 0,0 Machine center, please select it GCode Flavor The style of GCode...
- Page 189 Dobot Magician User GuideDobot Magician ユーザーマニュアルエラー! [ホーム] タブを使用して、ここに表示 parameters, as shown in Figure 5.298. スライス処理パラメータを設定してから、図5.147に示すように、ファ イル> プロファイルを開くを選択して、これらのパラメータを取り込 みます。 Figure 5.298 Import slice parameters 図 5.299 スライス処理パラメータを取り込む The 3D printing effect depends on the slice parameters. This topic provides a configuration sample, you can import it directly for printing.
- Page 190 Dobot-2.0-Vase-Cura.ini is used for printing a thin-walled vase, while Dobot-2.0-Cura.ini is used for the filling, the filling rate is 20%. Dobot-2.0-Vase-Cura.ini は 薄 壁 の 花 瓶 の プ リ ン ト に 使 用 さ れ ま す 。 Dobot-2.0-Cura.iniは充填用で、充填率は20%です。...
- Page 191 Dobot Magician User GuideDobot Magician ユーザーマニュアルエラー! [ホーム] タブを使用して、ここに表示 Figure 5.302 Zoom and rotate 図 5.303 拡大縮小と回転 Click to connect with Dobot Magician. The printing window is displayed and the current printing temperature is shown on the top corner of the window, as shown in Figure 5.304.
- Page 192 Set Temperature to 200 and press down Enter to heat the extruder. The temperature of the extruder should be above 170℃. Dobot Maigicain will not start 3D printing until the filament is in the melting state. So you need to heat the extruder first.
- Page 193 ステップ4 プリントスペースを調整し、プリント用座標を取得します。 NOTE During printing, if the distance from Dobot Magician to the printing platform is too large or too small to paste the first layer, it can lead to the nozzle blockage. For increasing the stickiness of the first layer, placing a masking paper on the platform is recommende.
-
Page 194: 5.10 Calibration
Dobot Magician User GuideDobot Magician ユーザーマニュアルエラー! [ホーム] タブを使用して、ここに表示 を推奨します。 Press the Unlock key on the Forearm and drag Dobot Magician to make the printing head contact the surface of the masking paper(The distance between the printing head and the surface of the masking paper is the thickness of a sheet of A4 paper), then release the Unlock key. -
Page 195: Base Calibration
Dobot Magicianが正しくDobotStudio に接続されている。 センサーキャリブレーション基板準備済み。 Procedure 手順 Step 1 Place the Dobot Magician at the right position on the sensor calibration board, as shown in Figure 5.310. ステップ1 図5.153に示すように、Dobot Magicianをセンサーキャリブレーション基 板の所定の位置に置きます。 Issue V1.0 (2018-06-12) User Guide Copyright © Yuejiang Technology Co., Ltd. - Page 196 Click Teaching&Playback on the DobotStudio page. The Teaching&Playback page is displayed. Press the Unlock key on the Forearm and drag Dobot Magician to make the nib contact the surface of the calibration board, then release the Unlock key. The coordinates of this point will be displayed on the Teaching&Playback page.
- Page 197 ステップ3 DobotStudio画面で設定> ベースキャリブレーションをクリックしま す。 「ベースキャリブレーション」画面が表示されます。 Step 4 Click Next on the Base Calibration page. Dobot will start homing. Please ensure that there are no obstacles in the workspace during homing. ステップ4 「ベースキャリブレーション」画面で「次へ」をクリックします。 Dobot Magicianがホーミングを開始します。動作中に作業スペースに障害物 がないことを確認してください。 Step 5 Click +J1 or -J1 to make the nib at a point on the line between A3 and B3 on the calibration board, as shown in Figure 5.314 and Figure...
- Page 198 Dobot Magician User GuideDobot Magician ユーザーマニュアルエラー! [ホーム] タブを使用して、ここに表示 Figure 5.314 Move J1-axis 図 5.315 J1軸を動かす Figure 5.316 Nib position 図 5.317 ペン先の位置 Step 6 Click Calibration to start calibrating the base Encoder. You can check the J1-coordinate on the Operation Panel page, as shown in Figure 5.318.
-
Page 199: Sensor Calibration
The angle sensors of the Forearm and Rear Arm have been calibrated before being shipped out. Generally, the Z-coordinate will remain the same when moving Dobot Magician in the same horizontal plane. If changed, you need to recalibrate the angle sensors by manual levelling or auto levelling to improve the positioning accuracy. - Page 200 Dobot Magicianが正しくDobotStudioに接続されている。 センサーキャリブレーション基板準備済み。 Procedure 手順 Step 1 Place the Dobot Magician at the right position on the sensor calibration board, as shown in Figure 5.320. ステップ1 図5.158に示すように、Dobot Magicianをセンサーキャリブレーション基 板の所定の位置に置きます。 Issue V1.0 (2018-06-12) User Guide Copyright © Yuejiang Technology Co., Ltd.
- Page 201 Step 3 Click Next on the Manual Levelling page. Dobot Magician will finish the auto-compensation of the angle senor coefficients of the Forearm and Rear Arm move according to the system settings. The result is as shown in Figure 5.322.
- Page 202 Dobot Magician User GuideDobot Magician ユーザーマニュアルエラー! [ホーム] タブを使用して、ここに表示 Figure 5.322 Get the angle sensor coefficients 図 5.323 角度センサーの係数を取得する Step 4 Click Next and set Angle Precision, Distance Precision, Result Range. In this step, please keep the default values, as shown in Figure 5.324.
- Page 203 Install the writing kit. For details, please see 5.4.1 Installing a Writing Kit. Press the Unlock key on the Forearm and drag Dobot Magician to make the nib near the A3 point on the calibration board, then release the Unlock key.
- Page 204 Dobot Magician User GuideDobot Magician ユーザーマニュアルエラー! [ホーム] タブを使用して、ここに表示 Figure 5.326 Fine-tune page 図 5.327微調整画面 Figure 5.328 Nib position 図 5.329 ペン先の位置 Issue V1.0 (2018-06-12) User Guide Copyright © Yuejiang Technology Co., Ltd. バージョン V1.0 (2018-06-12) ユーザーマニュアル 版権所有 © 越疆科技有限公司.
- Page 205 Dobot Magicianを移動して、 2番目のキャリブレーションポイントの中心にペ ン先を合わせます。Figure 5.332に示すように、当該キャリブレーションポ イントをB3にします。 NOTICE Please DO NOT drag Dobot Magician in this step, to avoid manual levelling failure. If the speed is too fast when clicking coordinate buttons, you can drag Speed slider to adjust speed. 注意...
- Page 206 Dobot Magician User GuideDobot Magician ユーザーマニュアルエラー! [ホーム] タブを使用して、ここに表示 Figure 5.332 Nib position on the second calibrated point 図 5.333 2番目のキャリブレーションポイントに合わせるペン先の位置 Step 7 Click Next and set the distance between the two calibrated points, as shown in Figure 5.334. The distance between the two calibrated points on the Calibration board is 80mm, so please keep the default value in this step.
- Page 207 Dobot Magician User GuideDobot Magician ユーザーマニュアルエラー! [ホーム] タブを使用して、ここに表示 Figure 5.334 Set the distance between the two calibrated points 図 5.335 2つのキャリブレーションポイント間の距離を設定する Step 8 Click Next to start calibrating. The result is shown as Figure 5.336. ステップ8 「次へ」をクリックしてキャリブレーションを始めます。 結果はFigure 5.336のようになります。 Figure 5.336 Calibrating result Issue V1.0 (2018-06-12)
- Page 208 Dobot Magician User GuideDobot Magician ユーザーマニュアルエラー! [ホーム] タブを使用して、ここに表示 図 5.337 キャリブレーション結果 Issue V1.0 (2018-06-12) User Guide Copyright © Yuejiang Technology Co., Ltd. バージョン V1.0 (2018-06-12) ユーザーマニュアル 版権所有 © 越疆科技有限公司.
- Page 209 5.10.2.2 Auto Levelling 自動整準 Prerequisites 前提条件 Dobot Magician has been connected to a PC via USB cable. Dobot Magician has been connected to the power adapter. The auto-levelling tool has been obtained, as shown in Figure 5.338.
- Page 210 Dobot Magician User GuideDobot Magician ユーザーマニュアルエラー! [ホーム] タブを使用して、ここに表示 自動整準が失敗にならないよう、プラットフォームが水平であることを確認し てください。 Step 2 Fix the auto-levelling tool on the Dobot Magician with butterfly nut, as shown in Figure 5.340. ステップ2 図5.168に示すように、蝶形ナットで自動整準ツールをDobot Magicianに 固定します。 Figure 5.340 Fix auto-levelling tool 図 5.341 自動整準工具を固定する...
- Page 211 Figure 5.342 Insert the cable of the auto-levelling 図 5.343 自動整準のケーブルを差し込む Step 5 Power on Dobot Magician and connect it to DobotStudio. Step 6 Click Setting > Auto Levelling on the DobotStudio page. The Auto Levelling page is displayed, as shown in Figure 5.344.
- Page 212 Figure 5.344 Auto levelling page 図 5.345 自動整準画面 Step 7 Click Start on the Auto Levelling page. Dobot Magician starts auto levelling. The levelling process will takes about 2 minutes. The result is shown as Figure 5.346. ステップ6 自動整準画面で「開始」をクリックします。. Dobot Magicianは自動整準を開始します。 整準処理には約2分かかります。 結...
-
Page 213: Homing
5.10.3 Homing ホーミング Dobot Magician has been calibrated before being shipped out. If the Dobot Magician has been hit or the motor has lost step, leading data abnormal, you need to operate homing to improve the positioning accuracy. Dobot Magicianは出荷前にキャリブレーションされています。 Dobot Magicianがぶつけ... - Page 214 Figure 5.348 Operate homing 図 5.349 ホーミングを実行する Dobot Magician will rotate clockwise to the limited position and then return to the default homing point automatically and the LED indicator on the base turns blue and is blinking. After the homing is successful, there is a beep sound and the LED indicator turns green.
-
Page 215: 5.11 Connecting With Wifi Kit
図 5.351 ホーミングポイントを設定する 5.11 Connecting with WIFI Kit WIFI キットで接続する You can connect Dobot Magician to a PC via WIFI kit without USB cable, making Dobot Magician and PC in the same WLAN. Figure 5.352 shows the WIFI kit. USBケーブル無しで、Dobot MagicianとPCをWIFIキット経由で接続すると、Dobot MagicianをPCと同じWLANに配置できます。図5.174にWIFIキットを示します。... - Page 216 スに接続します。 Figure 5.354 Connect with WIFI kit 図 5.355 WIFI キットに接続する NOTICE Please turn off the Dobot Magician completely first before connecting or disconnecting external equipment. Or, it causes serious damage to your device 注意 Issue V1.0 (2018-06-12) User Guide Copyright ©...
- Page 217 Set the related parameters on the Set Dobot Wi-Fi page. In this topic, please select Dynamic Host Configuration Protocol (DHCP) and set SSID and Password to obtain the IP address of Dobot Magician, as shown in Figure 5.356. If you unselect Dynamic Host Configuration Protocol (DHCP), you need to set IP address, Netmask, Gateway.
- Page 218 Yes: Only set SSID and Password No: Only set IPAddress, Netmask and Gateway IPAddress Set the IP address of Dobot Magician. The IP address of Dobot Magician and the PC must be in the same WLAN without conflict. Netmask Set subnet mask Issue V1.0 (2018-06-12)
- Page 219 DNSを設定する Step 6 Click OK. About 5 seconds later, the green LED indicator on the WIFI module is on, indicating that the Dobot Magician has been connected with WLAN, as shown in Figure 5.358. ステップ6 OKをクリックします。 約5秒後、 図5.177に示すように、 WIFIモジュールの緑のLEDランプが点灯し、 Dobot MagicianがWLANに接続されたことを示します。...
- Page 220 のドロップダウンリストからIPアドレスを選択し、 「接続」をクリックしま す。 Figure 5.360 IP address of Dobot Magician 図 5.361 Dobot Magician の IP アドレス After the connection is successful, you can control Dobot Magician without USB Issue V1.0 (2018-06-12) User Guide Copyright © Yuejiang Technology Co., Ltd.
-
Page 221: 5.12 Connecting With Bluetooth Kit
接続に成功すると、USBケーブルなしでDobot Magicianをコントロールでき ます。 5.12 Connecting with Bluetooth Kit Bluetooth キットで接続する Dobot Magician can be connected to smart phone with Bluetooth. Figure 5.362 shows the Bluetooth kit. Please download the matched DobotStudio APP from the website https://www.dobot.cc/downloadcenter.html?sub_cat=69#sub-download. Dobot MagicianはBluetoothを搭載したスマートフォンに接続できます。図5.179に Bluetoothキットを示します。... - Page 222 ステップ1 図5.180に示すように、BluetoothキットをベースのUARTインタフ ェースに接続します。 Figure 5.364 Connect with Bluetooth kit 図 5.365 Bluetooth キットに接続する NOTICE Please turn off the Dobot Magician completely first before connecting or disconnecting external equipment. Or, it causes serious damage to your device. 注意 周辺機器の着脱前に、Dobot Magicianの電源を完全に切ってください。機器破損 の原因となります。...
-
Page 223: 5.13 Operating Blockly
ランプが点灯し、緑色のランプが点滅します。 Bluetoothをオンにし、携帯でDobotStudioアプリを起動します。 「接続」をク リックしてDobot Magicianに接続します。 このセクションでは、Bluetoothキットを接続する方法について説明します。 DobotStudio ア プ リ で Dobot Magician を 操 作 す る 方 法 に つ い て は 、 https://www.youtube.com/watch?v=kyeXwuf17IYを参照してください。 5.13 Operating Blockly blocky を使用する Blockly is a programming platform based on Google Blockly. You can program through the puzzle format, which is straightforward and easy to understand. - Page 224 Dobot Magician User GuideDobot Magician ユーザーマニュアルエラー! [ホーム] タブを使用して、ここに表示 ステップ2 図5.181に示すように、 「blocky」画面の左区画にあるブロック 単位モジュールをドラッグしてプログラムします。 Figure 5.366 Blockly graphic programming 図 5.367 blocky ビジュアルプログラミング Table 5.29 lists the description of blockly module. Table 5.29 にblockyモジュールの説明を示します。 Table 5.29 Blockly description 表 5.30 blocky の説明...
-
Page 225: 5.14 Scripting
5.14 Scripting スクリプティング You can control Dobot Magician over scripting. Dobot Magician supports various API, such as velocity/acceleration setting, motion mode setting, and I/O configuration, which uses Python language for secondary development. For details about the Dotob Magician API interface and function description, please see Dobot Magician API Description. - Page 226 Dobot Magician User GuideDobot Magician ユーザーマニュアルエラー! [ホーム] タブを使用して、ここに表示 利用者は、 スクリプティングを介してDobot Magicianをコントロールできます。 Dobot Magicianは、速度/加速度設定、モーションモード設定、二次開発用のPython言語を使用す るI / O設定など、さまざまなAPIに対応しています。Dobot MagicianAPIのインタフェース の説明 と機能の詳細については、Dobot MagicianAPI を参照してください。 https://www.dobot.cc/downloadcenter.html?sub_cat=72#sub-downloadからダウンロードし てください。 Prerequisites 前提条件 Dobot Magician has been powered on. Dobot Magician has been connected to DobotStudio successfully.
-
Page 227: 5.15 Operating Stick Controller Kit
ステップ5 「開始」をクリックすると、Dobot Magicianはスクリプトファイ ルに従い動き始めます。 実行ログは、確認のために「スクリプト」画面の下部区画に表示されます。 5.15 Operating Stick Controller Kit スティックコントローラキットを使用する Dobot Magician can be controlled by stick controller kit without DobotStudio. Figure 5.370 Issue V1.0 (2018-06-12) User Guide Copyright © Yuejiang Technology Co., Ltd. バージョン V1.0 (2018-06-12) ユーザーマニュアル... - Page 228 用) 、トランシーバー。 Figure 5.370 Stick controller kit 図 5.371 ティックコントローラキット Prerequisites 前提条件 Dobot Magician has been connected to a PC over USB cable. Dobot Magician has been connected to the power adapter. Dobot MagicianはUSBケーブルでPCに接続されている。 Dobot Magicianは電源アダプタに接続されている。...
- Page 229 ステップ3 電源ボタンを押してDobot Magicianをオンにします。 USBホストモジュールの青色LEDランプが点灯します。電源を入れると、短 いビープ音が4回鳴り、緑色のランプが点灯します。 NOTICE Please turn off the Dobot Magician completely first before connecting or disconnecting external equipment. Or, it causes serious damage to your device. NOTICE 周辺機器の着脱前に、Dobot Magicianの電源を完全に切ってください。機器破損 の原因となります。...
- Page 230 Dobot Magician User GuideDobot Magician ユーザーマニュアルエラー! [ホーム] タブを使用して、ここに表示 The red LED indicator on the middle of the stick controller is blinking, indicating that the Dobot Magician can be controlled by the stick controller. ステップ4 図5.185に示すように、 スティックコントローラの電源ボタンを 押します。 スティックコントローラの中央にある赤色のLEDランプが点滅し、 スティッ クコントローラによってDobot Magicianがコントロールできることを示しま...
- Page 231 Dobot Magician User GuideDobot Magician ユーザーマニュアルエラー! [ホーム] タブを使用して、ここに表示 Button Function Control the outtake of the air pump Control the intake of the air pump Turn off the air pump Left stick: Front/back Cartesian coordinate system mode: Dobot along X-axis in the...
-
Page 232: 5.16 Operating Sliding Rail
5.16 Operating Sliding Rail LinearRail を使用する When the workspace of Dobot Magician is not enough, you can extend it with the sliding kit to do large-scale tasks, such as long-distance picking and placing, a large range of writing and so on. - Page 233 Dobot Magician User GuideDobot Magician ユーザーマニュアルエラー! [ホーム] タブを使用して、ここに表示 Figure 5.376 Sliding rail kit 図 5.377 LinearRail キット Table 5.33 Sliding rail kit description 表 5.34 LinearRail キットの説明 Description Tool kit Screws Plate a Plate c Sliding rail (with wire set and plate b) 番号...
-
Page 234: Installing Sliding Rail
LinearRail を取り付ける Procedure 手順 Step 1 Mount Dobot Magician on the plate a with four M3*10 countersunk head cap screws (The counter bore of plate a is outwards), as shown in Figure 5.378. ステップ1 図5.187に示すように、 M3*10の皿ネジ4個 (プレートaのカウンタ ーボアは外側にある) を使用してDobot Magicianをプレートaに取り付けます。... - Page 235 Fix the plate a (with Dobot Magician) on the plate b with three M3*8 hexagon socket head cap screws. Please make the back of the base of Dobot Magician towards the rabbet on the plate b, as shown in Figure 5.380.
- Page 236 Dobot Magician User GuideDobot Magician ユーザーマニュアルエラー! [ホーム] タブを使用して、ここに表示 Figure 5.382 Connect with wire set 図 5.383 ワイヤセットに接続する Step 4 (Optional) Fix plate c. This step is only needed when using air pump for picking and placing or other tasks. Fix the plate c on the plate a with two M3*8 hexagon socket head cap screws, as shown in Figure 5.384.
- Page 237 Dobot Magician User GuideDobot Magician ユーザーマニュアルエラー! [ホーム] タブを使用して、ここに表示 Fix the air pump on the plate c, as shown in Figure 5.386. And connect the air pump to Dobot Magician. For details, please see 5.2.1 Installing a Suction Cup Kit. 図5.191に示すように、 エアーポンプをプレートcに固定します。 そして、...
- Page 238 Dobot Magician User GuideDobot Magician ユーザーマニュアルエラー! [ホーム] タブを使用して、ここに表示 Figure 5.388 Connect to Dobot Magician 図 5.389 Dobot Magician に接続する Step 6 Connect the interfaces on the other end of the wire set to the power adaptor, USB interface of PC, motor interface and homing interface of the sliding rail respectively.
-
Page 239: Sliding Rail Parameter Description
Dobot Magician User GuideDobot Magician ユーザーマニュアルエラー! [ホーム] タブを使用して、ここに表示 モータ端子 Motor interface ホーミング端子 Homing inteface USB interface USB端子 電源端子 Power interface Figure 5.392 shows the connection between the sliding rail and the wire set. Figure 5.392にLinearRailとワイヤセット間の接続を示します。 Figure 5.392 Connect sliding rail and wire set 図... -
Page 240: Demo Description
参照してください。 Procedure 手順 Step 1 Click LineraRail on the DobotStudio page. Now, you can click L+, L- to make Dobot Magician move to the left or right. ステップ1 DobotStudio画面で「LinearRail」をクリックします。 Issue V1.0 (2018-06-12) User Guide Copyright © Yuejiang Technology Co., Ltd. - Page 241 Dobot Magician User GuideDobot Magician ユーザーマニュアルエラー! [ホーム] タブを使用して、ここに表示 すると、L +、L-で、Dobot Magicianを左右に移動させることができます。 Step 2 Click Home on the DobotStudio page. The sliding block moves to its homing point and then Dobot Magician rotates back to its homing point. ステップ2 DobotStudio画面で「ホーム」をクリックします。 スライドブロックが原点に移動し、Dobot Magicianがホーミング位置に戻り...
- Page 242 Dobot Magician User GuideDobot Magician ユーザーマニュアルエラー! [ホーム] タブを使用して、ここに表示 図 5.395 ポイントを保存する L indicates the position where Dobot Magician is located on the sliding rail, and the speed and acceleration can be set on the Setting > Playback page. LはDobot Magicianがスライドレール上にいる位置を示し、 設定>プレイ...
- Page 243 Dobot Magician User GuideDobot Magician ユーザーマニュアルエラー! [ホーム] タブを使用して、ここに表示 Figure 5.398. ステップ5 図5.197に示すように、 「テキスト入力」 区画にテキストを入力し、 「OK」をクリックします。 If the text is Magician. 例としてテキストをMagicianにします。 Figure 5.398 Input text 図 5.399 テキストを入力する Step 6 (Optional) Right-click Add a playback trigger on the Write&Draw page to set trigger points, as shown in Figure 5.400.
-
Page 244: 5.17 Multiplexed I/O Demo
グを続行します。 5.17 Multiplexed I/O Demo 多重化 I/O デモ The addresses of the I/O interfaces in Dobot Magician are unified. Most of I/O interfaces have multiple functions. For details, please see 4.3 Multiplexed I/O Interface Description. Dobot MagicianのI/Oインタフェースのアドレスは統一されています。ほとんどのI/O インタフェースは、 周辺機器をコントロールするために複数の機能を備えています。 詳細... -
Page 245: Level Output
Dobot Magician User GuideDobot Magician ユーザーマニュアルエラー! [ホーム] タブを使用して、ここに表示 You can set I/O interfaces on the advanced Teaching&Playback page to control the peripheral equipment, as shown in Figure 5.404. 図5.200に示すように、 「ティーチング&プレイバック」画面の詳細設定ページでI / O インタフェースを設定して、周辺機器をコントロールすることができます。 Figure 5.404 I/O setting page 図 5.405 I/O 設定画面... - Page 246 Figure 5.406 Peripheral Interface on the base 図 5.407 ベースにある周辺インタフェース Prerequisites 前提条件 The air pump has been connected to Dobot Magician. For details, please see 5.2.1 Installing a Suction Cup Kit. Dobot Magician has been powered on. ...
- Page 247 Dobot Magician User GuideDobot Magician ユーザーマニュアルエラー! [ホーム] タブを使用して、ここに表示 ロップダウンリストから「ペン」を選択します。 Figure 5.408 Select end-effector 図 5.409 エンドエフェクターを選択する NOTICE Normally, If SuctionCup or Gripper is selected from the end-effector drop-down list after the air pump has been connected, the air pump will be controlled by the system. In this topic, we use I/O interfaces to control the air pump, so SuctionCup and Gripper cannot be selected, to avoid conflict.
- Page 248 Dobot Magician User GuideDobot Magician ユーザーマニュアルエラー! [ホーム] タブを使用して、ここに表示 Step 3 Select IO_11, IO_16 and their corresponding Value on the Output pane, and click +Point. “The saved point is displayed on the Teaching&Playback page, as shown in Figure 5.412. ステップ3 「出力」区画でIO_11、IO_16 とそれぞれの対応する「値」を選...
-
Page 249: Level Input
Dobot Magician User GuideDobot Magician ユーザーマニュアルエラー! [ホーム] タブを使用して、ここに表示 示されます。 Figure 5.414 Saved point 図 5.415 保存点 Step 6 Select this point and click StepRun. The air pump is humming with outtake. ステップ6 このポイントを選択してStepRunをクリックします。 エアポンプがブンブンしながら排気を始めます。 5.17.2 Level Input レベル入力 This topic also takes I/O 11 as an example. - Page 250 Dobot Magician User GuideDobot Magician ユーザーマニュアルエラー! [ホーム] タブを使用して、ここに表示 前提条件 Dobot Magician has been powered on. Dobot Magician has been connected to DobotStudio successfully. The saved points list has been existed on the Teaching&Playback page. Dobot Magician電源オン。...
-
Page 251: Pwm Output
Dobot Magician User GuideDobot Magician ユーザーマニュアルエラー! [ホーム] タブを使用して、ここに表示 Figure 5.418 Saved point 図 5.419 保存点 5.17.3 PWM OUTPUT PWM 出力 This topic also takes I/O 11 as an example. このセクションでも、I/O 11を例として取り上げます。 Table 5.41 Multiplexed I/O description 表 5.42 多重化 I/O の説明... - Page 252 Dobot Magician User GuideDobot Magician ユーザーマニュアルエラー! [ホーム] タブを使用して、ここに表示 手順 Step 1 Click icon on the Teaching&Playback page, as shown in Figure 5.420. ステップ1 図5.208に示すように、 「ティーチング&プレイバック」画面のア イコン をクリックします。 Figure 5.420 Switch advanced function 図 5.421 拡張機能の切替 Step 2 Select IO_11 on the Output pane, and click +Point, as shown in Figure 5.422.
- Page 253 Dobot Magician User GuideDobot Magician ユーザーマニュアルエラー! [ホーム] タブを使用して、ここに表示 Figure 5.424 EIO setting 図 5.425 EIO 設定 Step 4 Set Frequency (Unit: KHZ; Value range: 10HZ-1MHZ) and DutyRatio (0%-100%) on the EIO Setting page. ステップ4 「EIO設定」 画面で周波数 (単位:KHZ、 値の範囲:10HZ-1MHZ) とDutyRatio(0%-100%)を設定します。 Issue V1.0 (2018-06-12) User Guide Copyright ©...
Need help?
Do you have a question about the Magician and is the answer not in the manual?
Questions and answers