
Subscribe to Our Youtube Channel
Related Manuals for Dobot Magician Lite


Summary of Contents for Dobot Magician Lite
- Page 1 User Guide Dobot Magician Lite User Guide Issue: V1.9.1 Date: 2020-01-11 Shenzhen Yuejiang Technology Co., Ltd...
- Page 2 Even if follow this document or any other related instructions, Damages or losses will be happen in the using process, Dobot shall not be considered as a guarantee regarding to all security information contained in this document.
- Page 3 Dobot Magician Lite User Guide Preface Preface Purpose This Document describes the functions, technical specifications, installation guide and system commissioning of Magician Lite, making it easy for users to fully understand and use it. Intended Audience This document is intended for: Customer Engineer ...
-
Page 4: Table Of Contents
Security Precautions ....................1 1.1 General Security........................ 1 Precautions ........................2 Quick Start ....................... 3 Connecting Cables to Magician Lite ................. 3 Installing the DobotStudio ....................6 System Requirements ..................6 Obtaining the DobotStudio Package ..............6 Installing the DobotStudio ................... 6 Verifying the Installation .................. - Page 5 Dobot Magician Lite User Guide Contents Importing Image Files and Setting Writing Parameters ........56 Adjust the Position of the Pen Nib ..............61 Operating Blockly ......................64 Scripting .......................... 65 Issue V1.9.1 (2020-01-11) User Guide Copyright © Yuejiang Technology Co., Ltd.
-
Page 6: Security Precautions
People cannot repair and disassemble the robotic arm without professional training. If there is a problem with the robotic arm, please contact Dobot technical support engineer in time. Please comply with the relevant laws to deal with the product which is scrapped, and protect the environment. -
Page 7: Precautions
Magician Lite moving to the default homing point, i.e. The forearm is in the middle of the front of the base of Magician Lite. If the LED indicator turns red after starting up, it indicates that the Magician Lite is at a limited position. Please make the Magician Lite in the workspace. ... -
Page 8: Quick Start
Quick Start This topic briefly describes how to operate the Magician Lite with the software DobotStudio, allowing you to quickly know and use Magician Lite. Figure 2.1 shows the process of getting started with Magician Lite. Figure 2.1 The process of getting started with Magician Lite Connecting Cables to Magician Lite ... - Page 9 Figure 2.2 Connect Magician Lite to your computer Figure 2.3 Connect Magician Lite to the electrical outlet When used with Magic Box, connect Magic Box and Magician Lite. Issue V1.9.1 (2020-01-11) User Guide Copyright © Yuejiang Technology Co., Ltd.
- Page 10 Dobot Magician Lite User Guide 2 Quick Start Figure 2.4 Connect Magician Lite and Magic Box Figure 2.5 Connect Magician Lite to the electrical outlet Issue V1.9.1 (2020-01-11) User Guide Copyright © Yuejiang Technology Co., Ltd.
-
Page 11: Installing The Dobotstudio
2 Quick Start Figure 2.6 Connect power adaptor Installing the DobotStudio You can control Magician Lite and Magic Box by DobotStudio(V1.9.1 and above)to implement functions such as Teaching & Playback, fully programmable applications. This topic introduces Teaching & Playback. System Requirements... - Page 12 Dobot Magician Lite User Guide 2 Quick Start Figure 2.7 The Select Setup Language dialog box Figure 2.8 Select English During the installation, the Driver Installation dialog box is displayed, two drivers need to be installed, as shown in Figure 2.9.
-
Page 13: Verifying The Installation
Dobot Magician Lite User Guide 2 Quick Start When the drivers are installed successfully, the Completing the Device Driver Installation Wizard dialog box is displayed. Click Finish, as shown in Figure 2.10. Figure 2.10 The Completing the Device Driver Installation Wizard dialog box When the installation is complete, the Completing the DobotStudio Setup Wizard dialog box is displayed. -
Page 14: Powering On/Off Magician Lite
Power on: Press power button on Magician Lite or Magic Box, as shown in Figure 2.14. Once Magician Lite is powered on, all the stepper motors lock, and a short beep sound will be heard, the LED indicator turns green. Now Magician Lite is ready to use. -
Page 15: Getting Started
Figure 2.14 Power on Magician Lite NOTICE If the LED indicator is red after powering on Magician Lite, it means that Magician Lite reaches its limited position. To go back to the workspace, press and hold the unlock button on the Forearm to move Magician Lite to another desired position After releasing the button the LED indicator turns green. - Page 16 2 Quick Start The DobotStudio has been installed. For details, please refer to 2.2 Installing the DobotStudio. Magician Lite is powered on. For details, please refer to 2.3Powering On/Off Magician Lite. Procedure The DobotStudio page is displayed as shown in Figure 2.15.
- Page 17 Dobot Magician Lite User Guide 2 Quick Start Click Teaching & Playback, as shown in Figure 2.17. Figure 2.17 Click Teaching & Playback Select PTP Point > MOVJ mode in the Save Point area, as shown in Figure 2.18. Figure 2.18 Select MOVJ motion mode Press and hold the unlock button on the Forearm to move the robotic arm to a Issue V1.9.1 (2020-01-11)
- Page 18 NOTE: Apart from hand-guided teaching, you can accomplish a teaching task by jogging Magician Lite in the Cartesian or Joint coordinate system, as shown in Figure 2.20. Figure 2.20 Jog Magician Lite in the Cartesian or Joint coordinate system Move the robotic arm to the other two locations such as points B and C by referring to the method of creating point A above, as shown in Figure 2.21.
- Page 19 Dobot Magician Lite User Guide 2 Quick Start Figure 2.21 The Cartesian coordinates of points B and C Enter 3 in the Loop text box. The robotic arm will repeat the sequence of movements three times, as shown in Figure 2.22.
- Page 20 Dobot Magician Lite User Guide 2 Quick Start Figure 2.23 Click Start Click to exit the Teaching & Playback page, as shown in Figure 2.24. Figure 2.24 Click Exit Issue V1.9.1 (2020-01-11) User Guide Copyright © Yuejiang Technology Co., Ltd.
-
Page 21: Introduction
Magician Lite features an external controller called “Magic Box” that separates motion control algorithm and user tasks to allow more convenience for programming and creating. Magician Lite supports offline function, 2 controllable power interfaces with 12V, 2 multi-function communication interfaces, 6 universal IO interfaces, 2 stepper motor interfaces and several I2C interfaces are available. -
Page 22: Working Principle
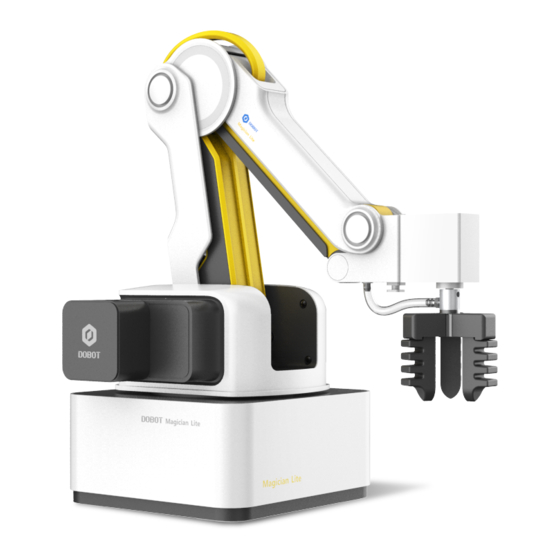
Dobot Magician Lite User Guide 3 Introduction Figure 3.2 The appearance of Magician Lite Working Principle This topic describes the workspace, principle, size and technical specifications of Magician Lite. Workspace Figure 3.3 and Figure 3.4 shows the workspace. Figure 3.3 Workspace of Magician Lite (1) Issue V1.9.1 (2020-01-11) -
Page 23: Coordinate System
3 Introduction Figure 3.4 Workspace of Magician Lite (2) Coordinate System Magician Lite has two types of coordinate systems, the joint one and the Cartesian one, as shown in Figure 3.5 and Figure 3.6 respectively. Figure 3.5 Joint coordinate system Issue V1.9.1 (2020-01-11) -
Page 24: Motion Mode
If the end-effector with servo is installed, such as suction cup kit, gripper kit, Magician Lite contains four joints: J1, J2, J3, and J4, which are all the rotating joints. The positive direction of these joints is counter-clockwise. ... - Page 25 Dobot Magician Lite User Guide 3 Introduction direction. Click Z+, Z- and Magician Lite will move along Z-axis in a negative or positive direction. Click R+, R- and Magician Lite will rotate along R-axis in a positive or negative direction.
- Page 26 Dobot Magician Lite User Guide 3 Introduction Move horizontally to a point that is above B by height. Move down to point B. Figure 3.8 JUMP mode 3.3.3.3 ARC The trajectory of ARC mode is an arc, which is determined by three points (the current point, any point and the end point on the arc), as shown in Figure 3.9.
-
Page 27: Technical Specifications
JUMP If the trajectory of playback is required as an arc, such as dispensing, you can choose ARC Technical Specifications Technical Parameters Table 3.2 Magician Lite technical parameters Name Magician Lite Maximum payload 250g Maximum reach 340mm -135°... - Page 28 Dobot Magician Lite User Guide 3 Introduction Power supply 100V~240V AC,50/60Hz Power in 12V/5A DC Working Temperature -5° C - 45° C Capacity 60W Max Communication mode USB virtual serial/serial/Bluetooth Program language MicroPython Software DobotStudio/DobotScratch Weight Size 95 mm× 80 mm× 21.5 mm...
-
Page 29: Sizes
Power interface Black port, 4 PIN, 12V-3A max Sizes Figure 3.10 shows the size of Magician Lite and Figure 3.11 shows the size of the end mounting hole. Figure 3.10 Size of Magician Lite Figure 3.11 Size of end mounting hole Issue V1.9.1 (2020-01-11) -
Page 30: Interface Description
Interface Description Magician Lite Interface Description The interfaces of Magician Lite are located on the back of the base. Figure 4.1 shows the interfaces on the back of the base, and Table 4.1 lists the description. Figure 4.1 Interfaces in the base Table 4.1 Interface description... -
Page 31: Magic Box Interface Description
Table 4.2 LED indicator description State Description Green On Magician Lite works normally Yellow On Magician Lite is in the starting status Blue On Magician Lite is in the offline mode Blue Blinking Magician Lite is running homing procedure ... -
Page 32: Multiplexed I/O Interface Description
Dobot Magician Lite User Guide 4 Interface Description Figure 4.3 Power Box interface description Table 4.3 Power Box LED description State Description Flashing In discharge Water lights Charging All on Charging complete Turn off after all flashing Low battery, automatic shutdown The inside and outside The temperature of the Power Box is too high or too low. - Page 33 Dobot Magician Lite User Guide 4 Interface Description Figure 4.4 Communication Interface 1 Figure 4.5 Communication Interface 2 Table 4.4 Magic Box multiplexed I/O description Level Whether Interface Description Level Input Output Pulling undefined ground General 3.3V_10m 3.3V/5V_10 EIO1 No pulling...
- Page 34 Dobot Magician Lite User Guide 4 Interface Description Level Whether Interface Description Level Input Output Pulling interface A output input 3.3V General 3.3V_10m 3.3V/5V_10 EIO4 No pulling interface A output mA input General 3.3V_10m 3.3V/5V_10 EIO5 No pulling interface A output...
- Page 35 Dobot Magician Lite User Guide 4 Interface Description Figure 4.6 Peripheral interface Table 4.5 Peripheral multiplexed I/O description Descripti Level Whether Interface Level Input Output Pulling 8V~12.6V Controlled EIO12 power output Ground 8V~12.6V Controlled EIO11 power output Ground 2_1A 8V~12.6V...
- Page 36 Dobot Magician Lite User Guide 4 Interface Description Descripti Level Whether Interface Level Input Output Pulling 1_1A 1_1B STP2 1_2A 1_2B Ground Power 5V/1A General 3.3V_10m 3.3V_10mA Pull up 51K √ EIO16 Port1 output input to 3.3V interface General 3.3V_10m 3.3V_10mA...
- Page 37 Dobot Magician Lite User Guide 4 Interface Description Descripti Level Whether Interface Level Input Output Pulling General 3.3V_10m 3.3V_10mA √ EIO22 No pulling A output input interface Ground 5V/1A Power output General 3.3V_10m 3.3V_10mA Pull up 51K Port5 √ EIO20...
-
Page 38: Operation
Control Magician Lite using the script commands Add More Add more custom functions to manipulate Magician Lite You can also set the Magician Lite by clicking Setting on the DobotStudio page as shown in Figure 5.2. For details, please refer to Table 5.2. Issue V1.9.1 (2020-01-11) User Guide Copyright ©... -
Page 39: Common Areas Of Dobotstudio Page
Firmware Upgrade firmware DobotStudio displays different firmware when connecting different devices. When connecting Magician Lite, firmware shows Magician Lite firmware. You can click Confirm to upgrade firmware. Set the jogging speed ratio Playback Set speed ratio, Jump parameters, handhold teaching, and LostStepParam. - Page 40 Figure 5.3 The linear rail and end-effector drop-down list Table 5.3 The linear rail and end-effector drop-down list Items Description When Magic Box+Magician Lite is connected to a linear rail, click this item to enable Linear rail the rail End-effector...
-
Page 41: Homing
Table 5.5 Setting the Operation Panel Items Description Coordinate Jog Magician Lite by clicking X (X+/-), Y (Y+/-), Z (Z+/-), or R (R+/-) in the Cartesian jogging coordinate system Joint jogging Jog Magician Lite by clicking J1+/-, J2+/-, J3+/-, or J4+/- in the Joint coordinate system When the linear rail is enabled (refer to Table 5.3), click L+/- to move the robotic arm... -
Page 42: Performing Teaching & Playback Tasks
Because a suction cup kit or a gripper kit is required, we will explain them first. Installing a Suction Cup Kit Magician Lite has built-in air pump with suction cup as the default end-effector, as shown in Issue V1.9.1 (2020-01-11) User Guide Copyright ©... - Page 43 Dobot Magician Lite User Guide 5 Operation Figure 5.8. Figure 5.8 A suction cup kit Procedure Figure 5.9 Install a suction cup kit Issue V1.9.1 (2020-01-11) User Guide Copyright © Yuejiang Technology Co., Ltd.
-
Page 44: Installing A Gripper Kit
Figure 5.11 A gripper kit Install the gripper kit to Magician Lite in the same way as the suction cup kit is installed. For details, please refer to 5.3.1 Installing a Suction Cup Kit. Figure 5.12 shows the effect of the gripper kit installation. -
Page 45: Teaching & Playback Page
Teaching & Playback Page The Teaching & Playback page is shown in Figure 5.13 when connect to Magic Box+Magician Lite. To access it, select Connect > Teaching & Playback on the DobotStudio page. Figure 5.13 The Teaching & Playback page ... - Page 46 Apart from all the functions in the Easy mode, the Pro mode offers multiple features such as the offline mode and multiplexed I/O interface Easy/Pro NOTE The Pro mode is only available when connecting Magic Box + Magician Lite. Set the loop that the robotic arm plays back the recorded steps Loop Default value: 1...
- Page 47 Dobot Magician Lite User Guide 5 Operation In both Easy and Pro modes, you can edit a highlighted save point such as copy, paste, cut, switch between motion modes, modify name and coordinates, as shown in Figure 5.16. Figure 5.16 The Save points list Table 5.8 The Save points list...
-
Page 48: Arc Motion Mode
If Check Lost Step is selected, the robotic arm detects if the stepper motors lose steps when moving. If unselected, no detection is performed If Magician Lite detects lost-steps, it stops working, and its LED indicator turns red. In this case, click Home to get a correct reference position... - Page 49 The three points cannot be in the same straight line. The arc trajectory cannot exceed the Magician Lite normal workspace. For example, the points A, B, and C are on the arc. Point A is the start point; Point B is the second point;...
- Page 50 5 Operation Set the jogging speed percentage to 50 on the Operation Panel. Jog Magician Lite in the Cartesian or Joint coordinate system to move the robotic arm to a location called position A. Click +Point to save the coordinate corresponding to the position A, as shown in Figure 5.20.
-
Page 51: Teaching & Playback Example
Teaching & Playback Example Application Scenarios You can use the Teaching & Playback function module to manipulate Magician Lite to accomplish different tasks such as transportation or intelligent sort. This topic introduces how to move small cubes from position A to B in the JUMP motion mode. - Page 52 Dobot Magician Lite User Guide 5 Operation Figure 5.23 Choose SuctionCup as the end-effector The Teaching & Playback page is displayed. Put a small cube on the work surface near the suction cup kit. Select the MOVJ motion mode in the Save Point area.
- Page 53 5 Operation Figure 5.25 Set jogging speed ratio Jog Magician Lite in the Cartesian or Joint coordinate system to move the suction cup close enough to the small cube for picking-up. For example, the suction cup reaches this location called position A.
- Page 54 Setting > Playback > JumpParam, as shown in Figure 5.27. Figure 5.27 Jump parameters Jogging Magician Lite in the Cartesian or Joint coordinate system to move the small cube to the end position B as required. Unselect SucktionCup to turn off the air pump to release the small cube.
- Page 55 Figure 5.29 Set the speed ratio of the playback Table 5.10 Set the Playback Items Description SpeedRatioParam Set speed ratio of Magician Lite and linear rail JumpParam Set the Jump height and Z limit, which are required in the JUMP motion mode Enable or disable handhold teaching. Handhold...
-
Page 56: Working In Offline Mode
Figure 5.30 Move the small cube in the JUMP motion mode Working in Offline Mode Magician Lite and Magic Box support offline mode, they download a saving list and perform it without keeping the USB connection. We will take Magic box as an example in this chapter. - Page 57 Dobot Magician Lite User Guide 5 Operation Figure 5.31 Click Download The Name dialog box is displayed, input the name of download save points, and click Download as shown in Figure 5.32. Figure 5.32 The process bar at the bottom of the DobotStudio page NOTICE Issue V1.9.1 (2020-01-11)
-
Page 58: Writing And Drawing
When connecting only Magician Lite, Save points are downloaded to Magician Lite, you have to disconnect the DobotStudio from Magician Lite or the USB cable between Magician Lite and your computer, and then press the button Key on the base of Magician Lite to perform the downloaded save points. - Page 59 Dobot Magician Lite User Guide 5 Operation Figure 5.34 Install a writing and drawing kit NOTE When using the pen for the first time, unscrew the suction tube inside the pen, and then replace it with the ink tube that came with the box. After replacement, keep the pen straight down for 2 minutes to use it.
-
Page 60: Connecting The Dobotstudio
Dobot Magician Lite User Guide 5 Operation Connecting the DobotStudio Figure 5.37 Connect Magician Lite Figure 5.38 Click Write & Draw Issue V1.9.1 (2020-01-11) User Guide Copyright © Yuejiang Technology Co., Ltd. -
Page 61: Importing Image Files And Setting Writing Parameters
Dobot Magician Lite User Guide 5 Operation Figure 5.39 Choose Pen as the end-effector Importing Image Files and Setting Writing Parameters When performing a write & draw task, a built-in or custom image file is required. Only a PLT or SVG image can be used. The built-in file is located in the directory Installation Directory \DobotStudio\config\prefab\system\source. - Page 62 Dobot Magician Lite User Guide 5 Operation NOTICE The imported image should be placed within the annular area on the Write & Draw page, as shown in Figure 5.41. If not, the robotic arm reaches its limited position and cannot draw or write.
- Page 63 Dobot Magician Lite User Guide 5 Operation Figure 5.43 Open a PLT or SVG system image file Issue V1.9.1 (2020-01-11) User Guide Copyright © Yuejiang Technology Co., Ltd.
- Page 64 Dobot Magician Lite User Guide 5 Operation Click a shape in the Input Shapes area, as shown in Figure 5.44. Figure 5.44 Insert a system image file Click Input Texts on the Write & Draw page to input texts, and set its style, and then click OK to display the text on the annular area, as shown in Figure 5.45.
- Page 65 Dobot Magician Lite User Guide 5 Operation Figure 5.46 Import an image Figure 5.47 Convert an image to SVG NOTICE After image is converted to SVG,if there are single colors and fewer lines in the image, you need to adjust threshold, otherwise, the image can not be uploaded to DobotStudio.
-
Page 66: Adjust The Position Of The Pen Nib
Figure 5.50 Setting the parameters of the Write & Draw function Adjust the Position of the Pen Nib Procedure Press and hold the unlock button on the Forearm to move Magician Lite to raise and Issue V1.9.1 (2020-01-11) User Guide... - Page 67 The point marked by a red box, as shown in Figure 5.52, corresponds to the position of the writing and drawing kit of Magician Lite. This point changes its position only within the annular area when the robotic arm moves.
- Page 68 If the effect of writing is not satisfactory, slightly raise and lower the height of the writing and drawing kit or directly change the value of PenDown. Figure 5.54 The PenDown parameter Magician Lite automatically moves above the position (PenDown) of the start point Issue V1.9.1 (2020-01-11) User Guide...
-
Page 69: Operating Blockly
When writing, click Pause to pause the writing and Stop to halt the writing. NOTE You can click Download to download the file to Magic Box or Magician Lite to perform in offline mode. For the detail, please refer to 5.4Working in Offline Mode Operating Blockly Blockly is a programming platform for Magician Lite based on Google Blockly. -
Page 70: Scripting
5.4Working in Offline Mode. Scripting You can control Magician Lite over scripting. Magic Box supports various API, such as velocity setting, motion mode setting, and I/O configuration, which can be called by users during... - Page 71 Dobot Magician Lite User Guide 5 Operation how to set the parameters. The scripting examples (including Jog, PTP) can refer to Installation directory/DobotStudio/config/ststore/. Figure 5.56 Write a script The Saving Scrip File page is displayed. The running log will be displayed on the lower pane of the Script page for checking.
- Page 72 Dobot Magician Lite User Guide DOBOT Shenzhen Yuejiang Technology Co., Ltd www.dobot.cc Issue V1.0.0 (2020-01-11) User Guide Copyright © Yuejiang Technology Co., Ltd.
Need help?
Do you have a question about the Magician Lite and is the answer not in the manual?
Questions and answers