Table of Contents
Advertisement
Quick Links
Single Size Kit B
Double Size Kit A
(Plus Athens K2)
Instructions: ATHENS
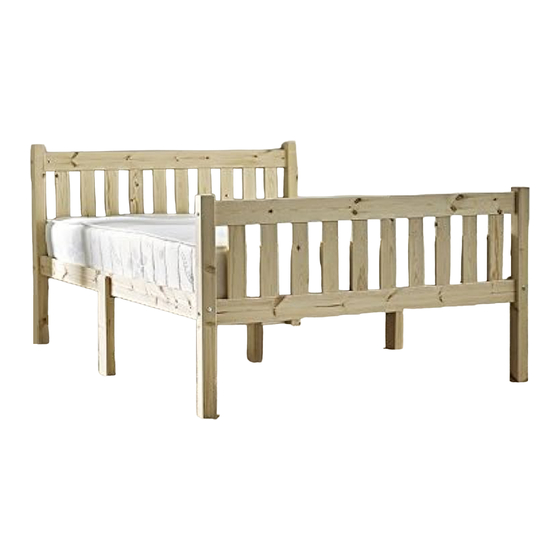
ATHENS BED
(Version Nov 2021)
FRAME
Assembly Instructions
IMPORTANT – READ CAREFULLY –
RETAIN FOR FUTURE REFERENCE
(All Sizes)
We have checked all parts to ensure they are free of damage. However timber is a natural, living product.
Occasionally timber can still be adjusting to humidity, for this reason a crack or stretch mark may appear after
the product has been packaged.
Strictly Beds and Bunks however have a FREE PARTS REQUEST
service in this unlikely event. You need to order a part please go to
Parts Portal - www.strictlyhelpdesk.co.uk.
Email Assistance: help@strictlybedsandbunks.co.uk
Using the Camera on your phone scan this barcode to
take you our after sales. You can find various options as
regards assistance on this purchase.
Mattress Selection Available
Strictly Beds has a full range of mattresses to fit this bunk bed.
To go to our selection please type in
www.strictlbedsandbunks.co.uk/mattress
Using the Camera on your phone, scan this barcode to
take you to our mattress selection
IMPORTANT: DO NOT DISPOSE of
the packaging until you are satisfied
with your purchase.. Please keep all
cardboard until fully satisfied.
Advertisement
Table of Contents

Related Manuals for Strictly Beds & Bunks ATHENS BED FRAME


Summary of Contents for Strictly Beds & Bunks ATHENS BED FRAME
- Page 1 Single Size Kit B Double Size Kit A (Plus Athens K2) Instructions: ATHENS ATHENS BED (Version Nov 2021) FRAME Assembly Instructions IMPORTANT – READ CAREFULLY – RETAIN FOR FUTURE REFERENCE (All Sizes) CUSTOMER CARE We have checked all parts to ensure they are free of damage. However timber is a natural, living product. Occasionally timber can still be adjusting to humidity, for this reason a crack or stretch mark may appear after the product has been packaged.
- Page 2 TOP TIPS - TOP TIPS Read before you start assembly Locating the Dowel Rods To keep the bed from rattling all the dowel holes have been slightly mis-drilled by a couple of mm. When you push parts together the dowels will straighten and pull together to ensure a tight fit.
- Page 3 Using the Camera on your phone scan this barcode to take you our after sales. You can find various options as regards assistance on this purchase.
- Page 4 Parts Identifier Part BS- Pack of Base Slats Part STR - Right footboard Corner Post Part 1 - Side Rail Part STL - Left footboard Corner Post Part 16- Centre Rail (Not Single size) Part 25- Siderail Support Legs Part 9- Headboard Insert (4G) Part 12- Long Shaker Inserts Part AL - Left Headboard Corner Post Part 10- Short Shaker Inserts...
- Page 5 How to identify your parts and fixings BLACK MARKING/FIXINGS Headboard Facia **SINGLE BEDS ONLY** The part will have a blue marker pen marking on the end. Hole / Bolt configuration: TWO large dowel holes - Place for large dowel One small centre hole - Place for large 90mm connector bolt D BLACK MARKING/FIXINGS Headboard Facia ** DOUBLE /KINGSIZE ONLY**...
- Page 6 First Build the Head Board First Select the two headboard posts, lay AL to the left and AR to the right. These posts will have a white chalk marking, these MUST be facing you and at the top when laying on the carpet. You will also see two headboard facias Pic 1 marked Black PART 9 ( 4G), position...
- Page 7 Now Build the Foot Board First Select the two headboard posts, lay STL to the left and STR to the right. These posts will have a white chalk marking, these MUST be facing you and at the top when laying on the carpet. You will also see two headboard facias marked Black PART 9 ( 4G), position these as shown in PIC 1.
- Page 8 Attach The Centre Rail (Double/Kingsize Beds ONLY) From the inside of the bed we need to attach metal brackets, one either end. These are fixed using the small screws (L), these are fixed to bottom headboard facia. Using a tape mark a centre line from each corner post, then measure and mark 55mm from the top of the BLUE Facia(13).
Need help?
Do you have a question about the ATHENS BED FRAME and is the answer not in the manual?
Questions and answers