Advertisement
Quick Links
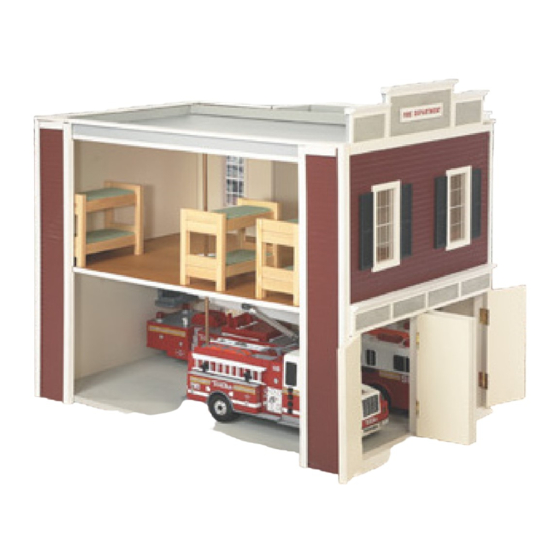
#00080 QuickBuild
Parts List (listed in order of use):
(Measurements may vary slightly)
Panels and Assembled sections:
(1) Base Floor (finished only on 1 side)
(1) Right Side Assembly
(1) Back Wall - 15 3/4"W
(1) Front Assembly - 15 3/4"W
(1) Middle Floor
(1) Roof Top Assembly
(2) Front & Rear Side Walls - 3 1/8"W
(1) Top Front Assembly
(1) Front Step
Small Parts Bag:
(12) Screws
Trim:
(2) Mitered Roof Top Edge Trim
3 3/8" (top edge of Rear Walls)
(2) Corners - (3 notches )
(fits inside edge of the Rear Walls)
(2) Front Corners
(1 bottom notch - fits over entry ramp)
(2) Corners - (fits the Back corners)
(2) Flat Trim - 2 1/4"
(upper edge of Rear Walls)
(2) Flat Trim - 15 3/4"
(upper edge of Front and Back)
(2) Mitered Roof Top Edge Trim - 17"
(1) Fire Pole
(1) Coat Rack
(attach to the inside of the Back Wall 6" above the floor)
Firehouse Instructions
TM
Real Good Toys
10 Quarry Hill * Barre, Vermont 05641
Customer Service: 802-479-2217
Tips for building the perfect dollhouse:
Congratulations on your purchase of a Real Good Toys' QuickBuild
dollhouse. Your QuickBuild
TM
ticulous care by our craftspeople using cabinet grade materials and
requires only ordinary white glue to quickly and easily build a sturdy
dollhouse you will be proud of for many years to come.
This dollhouse will last for years, even generations, if proper care and
attention is given during assembly. Take your time and be sure to read
the instructions completely before you proceed.
Check all parts and packs against the parts list before beginning con-
struction to identify the parts and to make sure you have everything. If
you need replacement parts be sure to include the exact name and mea-
surements taken directly from the parts list.
Assembly Notes:
A large, clutter-free, well lighted work area is most helpful during as-
sembly, and a flat work surface is very important.
Supplies you will need:
Phillips Screwdriver
White glue
Masking tape
All the parts should be attached with glue.
amounts of glue and always wipe off excess glue immediately. Use
masking tape, if necessary, to hold parts together while the glue dries.
Read the instructions carefully, look at each of the illustrations. With the
parts in your hands, think the assembly through before you proceed.
Always test fit (without glue) parts before final assembly.
Make sure everything is straight and flat as the glue dries... That's
the shape that will be permanent.
kit has been precision made with me-
Use generous
TM
Advertisement

Related Manuals for Real Good Toys QuickBuild Firehouse


Summary of Contents for Real Good Toys QuickBuild Firehouse
- Page 1 #00080 QuickBuild Firehouse Instructions Tips for building the perfect dollhouse: Parts List (listed in order of use): Congratulations on your purchase of a Real Good Toys’ QuickBuild (Measurements may vary slightly) dollhouse. Your QuickBuild kit has been precision made with me-...
- Page 2 1. Attach the Base Floor to the Right Side. (use a weight to hold the Floor Seam together while the glue dries.) 2. Attach the Back to the Right Side. Screw through the pre-drilled holes at the top corner of the Back and the bottom corner of the Right Side.
- Page 3 5. Attach the Roof Top. Do not over tighten the screws, or the Roof Top Strip may split. If this happens, remove the screws and attach with glue and tape only. This will not sacrifice the quality of this Slot 6.
- Page 4 9. Attach the Mitered Roof Top Edge Trim (17”) and the (2) 3 10. Attach the (2) Notched Corners to the inside edges (1 left & 1 right), at- 3/8” Mitered Roof Top Edge Trim (1 left & 1 right) to the top tach (2) Corners to the outside edges and attach the (2) 2 1/4”...