Table of Contents
Advertisement
Advertisement
Table of Contents

Related Manuals for Amico Hummingbird


Summary of Contents for Amico Hummingbird
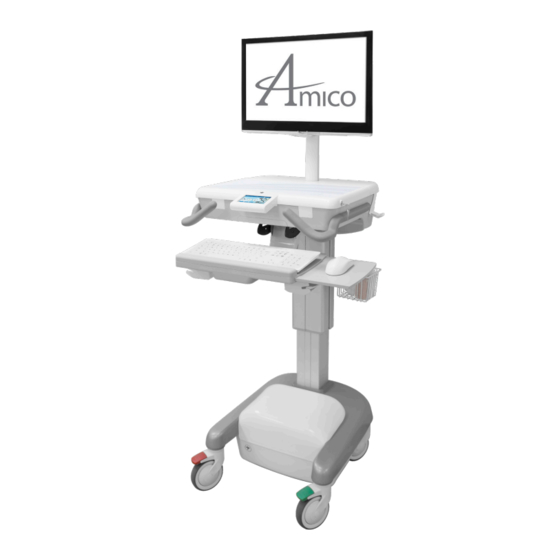
- Page 1 User Manual Hummingbird Mobile Computer Workstations...
- Page 2 This Instruction Manual is your guide to ensure that you get the best performance out of the equipment. Amico Accessories Inc. is not responsible for any damage as a result of (but not limited to) abuse and other problems that may be a direct or indirect result of failure to comply with the instructions provided in this manual.
-
Page 3: Table Of Contents
Charging and Discharge the Battery 33-34 Section 7: Cable Management FIT Cable Management (LCD Cart Only) Section 8: Troubleshooting, Preventative Maintenance, Storage, & Cleaning 36 - 39 Troubleshooting 36 - 37 Preventative Maintenance Product Storage Guidelines Cleaning Amico Warranty Policy... -
Page 4: Section 1: Product Specifications
Work Surface with Spill Guard Lockable PC Compartment Control Interface Auxiliary USB Ports LED Keyboard Light Mouse and Barcode Optional Battery Scanner Holders Accessory Mounting Rails Total Lock Caster (Red) Manual or Electric Lift LED Base Light Directional Lock Caster (Green) Amico Accessories Inc. -
Page 5: Features
(5 lbs max) and height adjustment and height adjustment and height adjustment and height adjustment Lighting Work Surface, Keyboard Keyboard Tray and Base Keyboard Tray Keyboard Tray Tray and Base www.amico.com... - Page 6 FROM THE CART IF NECESSARY. IF DETACHED, ENSURE CABLE IS FULLY PLUGGED IN BEFORE RESUMING USE. Various optional storage solutions and additional workstation column mountable accessories are available (Amico approved accessories and are within footprint of cart only, with some exceptions. Refer to www.amico.com for more information).
-
Page 7: Options Matrix
10 - 13 lbs Please always add monitor and peripherals' weight that are mounted onto the IT post * Customer-provided power outlet requires a type C14 coupler as per IEC 60320 standards to receive power from the Hummingbird. www.amico.com... -
Page 8: Powered For Laptop
Combined weight of computer, accessories, peripherals, devices, supplies, etc. to be supported by the lift. * Customer-provided power outlet requires a type C14 coupler as per IEC 60320 standards to receive power from the Hummingbird. Amico Accessories Inc. -
Page 9: Non-Powered For Lcd
10 - 13 lbs Please always add monitor and peripherals weight that are mounted onto the IT post * Customer-provided power outlet requires a type C14 coupler as per IEC 60320 standards to receive power from the Hummingbird. www.amico.com... -
Page 10: Non-Powered For Laptop
Pure Sine Schuko 2 Round Pins, Top Pin Grounding Custom (Please complete verification page) No Power Inlet * Customer-provided power outlet requires a type C14 coupler as per IEC 60320 standards to receive power from the Hummingbird. Amico Accessories Inc. -
Page 11: Section 2: Installation Preparation
WARNING: DO NOT ATTEMPT TO CARRY THE CART UP/DOWN STAIRS OR OVER/AROUND OBSTACLES. FAILURE TO FOLLOW THESE GUIDELINES COULD RESULT IN SERIOUS INJURY. WARNING: DO NOT ALLOW BATTERY COMPARTMENT (AMICO POWER SYSTEM) TO COME IN CONTACT WITH LIQUIDS. DO NOT OPERATE THE POWER SYSTEM IF WET. -
Page 12: Section 3: Software Initialization
3. Setting Time and Date: 1. Tap on “Guest“ in top left corner of interface (Figure 1). 2. Select “Admin“ from drop down list and login using password: AMICO (Figure 2). 3. Tap on “Settings“ icon. 4. Select “Admin Setup“ (Only available in the ADMIN profile). - Page 13 2. Adjust the height using the Up/Down arrows. When height is at desired stand position, select Save next to respective position icons. 3. Tap OK twice to return to Main Menu. GUEST 07/10/2014 4:50 pm 10h:50m BACK USER NAME NEXT User Name Enter Figure 3 www.amico.com...
- Page 14 2. Setting Time and Date: 1. Tap on “Guest” in top left corner of interface. 2. Select “Admin” from drop down list and login using password: AMICO (Figure 1). 3. Top on “Settings” icon. 4. Select “Admin Setup” (Only available in the ADMIN profile).
- Page 15 1. Pull lever and adjust to desired height (Figure 3). Peter Guest 07/10/2014 4:50 pm 10h:50m BACK USER NAME NEXT User Name Enter Figure 2 Figure 3 PROJECTION www.amico.com DESCRIPTION: PART NO: SCALE: DRAWN BY: DATE: DATE: CHECKED BY: www.amico.com...
-
Page 16: Section 4: Mounting Platform
Section 4: Mounting Platform The Hummingbird Mobile Workstation is intended for use on flat surfaces (carpet, tile, wood, laminate) in an indoor environment and on inclines of up to 10°. The Hummingbird Mobile Workstation includes a directional locking caster (green) to aid in movement and maneuvering corners, and a total locking caster (red) to prevent movement as well as 2 handles for steering. -
Page 17: Section 5: Device Installation
Remove the 2 bottom screws from the VESA plate, and loosen the top 2 screws. Carefully lift the monitor off the VESA plate. M4 mounting holes M4 mounting holes for VESA-75 for VESA-100 Figure 1: VESA Plate www.amico.com... -
Page 18: Mounting A Keyboard And Mouse
(outer most position). WARNING: DO NOT OVERLOAD OR LEAN ON THE KEYBOARD TRAY (MAX LOAD = 10 LBS). Dual Locking Coins Figure 1 Figure 2 Figure 3 Figure 4 Figure 5 Figure 6 (View underneath bin) Amico Accessories Inc. -
Page 19: Mounting A Computer (Lcd Carts Only)
Section 5: Device Installation Mounting a Computer (LCD Carts Only) 1. To open the Work Surface, insert the key (provided by Amico) into the lock on the Work Surface and turn counterclockwise (CCW) to unlock the Work Surface. 2. Lift the Work Surface upwards (as shown in Figure 1) to access the interior of the main bin. -
Page 20: Mounting A Laptop (Laptop Carts Only)
Section 5: Device Installation Mounting a Laptop (Laptop Carts Only) 1. To open the Work Surface, insert the key (provided by Amico) into lock on Work Surface and turn counterclockwise (CCW) to unlock the Work Surface (Figure 1). 2. Lift the Work Surface upwards to access the interior of the main bin. -
Page 21: Section 6: Adjustments
NOTE: THE LIGHT INTERFACE MUST BE PLUGGED INTO A POWERED USB OUTLET ON A COMPUTER (OR EQUIVALENT) TO FUNCTION. NOTE: THE POWER CORD IS EASILY DETACHABLE AND CAN BE DISCONNECTED FROM THE CART IF NECESSARY. IF DETACHED, ENSURE THE CABLE IS FULLY PLUGGED IN BEFORE RESUMING USE. www.amico.com... -
Page 22: Standard Interface (Powered Manual Carts Only)
The Lighting Indicator/Switch (capacitive touch) is used to turn the lights on the Hummingbird mobile workstation on/off and will be illuminated when the lights are on. To adjust the brightness of the Hummingbird lights, hold the Lighting Switch until the brightness begins to cycle. Release the switch when desired brightness is achieved. -
Page 23: Advanced Interface/Advanced Interface With Automatic Height Control
1. To create a new profile, tap on Name in top left corner (Guest or Equivalent) and tap New User. NOTE: IF LOGGED INTO THE ADMIN ACCOUNT (PASSWORD: AMICO), YOU MUST FIRST LOG OUT BY TAPPING ON ADMIN AND SELECTING “LOG OUT”. - Page 24 NOTE: “RECOVERY MODE” IS SHOWN BY A YELLOW CHARGE PROGRESS INDICATOR WITH AN “R” IN THE CENTER (Figure 4). NOTE: A TEMPERATURE WARNING WILL BE SHOWN BY A THERMOMETER ICON APPEARING NEXT TO THE CHARGE PROGRESS INDICATOR. Amico Accessories Inc.
-
Page 25: Manual Height Adjustment
0 - 9.9 (0 - 4.49 kg) 10 - 19.9 (4.54 - 9.03 kg) 20 - 29.9 (9.07 - 13.6 kg) 30 - 39.9 (13.61 - 18.14 kg) 40 - 49.9 (18.15 - 22.68 kg) Work Surface Manual Height Adjustment www.amico.com... -
Page 26: Automatic Height Adjustment Standard Interface
4. To adjust position, hold the Up Touch Button to move up or the Down Touch Button to move down. NOTE: AT IDEAL OPERATING HEIGHT, THE OPERATOR’S FOREARMS SHOULD BE PARALLEL TO THE FLOOR WHEN USING THE KEYBOARD/MOUSE (90° BEND AT ELBOWS). Standard Interface Work Surface Standard Interface Recovery Battery Level Up/Down Touch Buttons Amico Accessories Inc. -
Page 27: Automatic Height Adjustment Advanced Interface
NOTE: AT IDEAL OPERATING HEIGHT, THE OPERATOR’S FOREARMS SHOULD BE PARALLEL TO THE FLOOR WHEN USING THE KEYBOARD/MOUSE (90° BEND AT ELBOWS). GUEST 07/10/2014 4:50 pm 10h:50m Standing Icon Up/Down Icons Settings Timer Notes Sitting Icon Middle Bottom Figure 1 www.amico.com... -
Page 28: Monitor Adjustments (Lcd Carts Only)
Adjusting tilt tension: Tighten or loosen the tension screw on the mounting bracket. NOTE: YOU MAY NEED TO REMOVE THE CAP AND COVER ON THE FIT POST. +/- 15° Small Screws 180° Large Screw Amico Accessories Inc. PROJECTION www.amico.com DESCRIPTION:... -
Page 29: Work Surface
Section 6: Adjustments Work Surface 1. To open the Work Surface, insert the key (provided by Amico) into the lock on the Work Surface and turn counterclockwise (CCW) to unlock the Work Surface. 2. Lift the Work Surface upwards to access the interior of the main bin. -
Page 30: Ergonomic Keyboard Tray
The ergonomic keyboard tray can be tilted up and down, rotated 180°, elevated and is able to slide in and out as shown below: Standard Keyboard Tray The standard keyboard tray slides in and out of the cart as shown below: Amico Accessories Inc. -
Page 31: Lockable Casters And Transport Position
Section 6: Adjustments Lockable Casters and Transport Position The Hummingbird Mobile Workstation includes a Directional Locking Caster (green) to aid in movement in straight lines, and a Total Locking Caster (red) to prevent movement. 1. To lock the casters, step on the Locking Lever (on each caster) such that it clicks in the down position. -
Page 32: Spring Adjustment (Lcd Carts Only)
4. Replace the VESA Plate, re-attach the Top Plate with the screws and replace the Top Cap and the Swivel-Post Cover. Top Cap Screws Top Plate Hex Nut Gas Spring Swivel-Post Swivel-Post VESA Plate Cover Figure 1 Figure 2 Amico Accessories Inc. -
Page 33: Resetting The Cart (Reset Button)
• For long term storage, press and hold the Reset button for 9 seconds to put the cart into Deep Sleep mode. • For SLA battery carts, carts must be fully charged every 6 months to preserve the battery. The cart can then be put back into Deep Sleep mode for storage or transport until next scheduled charge. www.amico.com... -
Page 34: Resetting The Cart (No Reset Button)
2. Disconnect yellow battery connector. 3. Disconnect unit from power. 4. Wait 10 seconds and reconnect yellow battery connector. 5. Reconnect unit to power. For long term storage, follow previous instructions without reconnecting unit to power (Steps 1-4). Amico Accessories Inc. -
Page 35: Opening The Battery Compartment
Within the yellow envelope, you will find a magnetic Battery Compartment Key. 2. Use the Battery Compartment Key to unlock the Battery Compartment by placing it on the Hummingbird Logo Sticker on the left side of the front of the battery compartment (see Hummingbird Logo Sticker (Figure 3)). -
Page 36: Charging And Discharge The Battery
WARNING: THE FOLLOWING STEPS MUST BE PERFORMED BY AUTHORIZED PERSONNEL. NOTE: USE CATION WHEN USING STEELS TOOLS. DO NOT CONNECT POSITIVE “+” AND NEGATIVE ”-” BATTERY TERMINALS. THIS WILL SHORT THE BATTERY AND CAUSE DAMAGE TO THE UNIT. Amico Accessories Inc. - Page 37 Figure 1 depicts. 4. Disconnect the positive terminal of one battery (Figure 2). 5. Wait for 2-3 minutes, and put the HMW back together by reversing directives (Steps 4-1). Power Light Figure 1 Positive Terminal Positive Terminal Figure 2 www.amico.com...
-
Page 38: Section 7: Cable Management
Fax: (905) 763.8587 Fax: (905) 763.8587 DESCRIPTION: DESCRIPTION: THIS PRINT IS PROPERTY OF AMICO ACCESSORIES THIS PRINT IS PROPERTY OF AMICO ACCESSORIES AND IS LOANED IN CONFIDENCE SUBJECT TO RETURN AND IS LOANED IN CONFIDENCE SUBJECT TO RETURN PART NO: PART NO: [TOP LEVEL P.N.]... -
Page 39: Section 8: Troubleshooting, Preventative Maintenance, Storage, & Cleaning
FIT Post Spring weight rating (page 3) Too easy or too difficult to utilize the • Damaged hardware • Please contact Amico Accessories portrait landscape feature (LCD Carts • Damaged Head • The Monitor Head needs to be replaced,... - Page 40 • FIT Access Door is open • Ensure the FIT Access Door is closed and not interfering with the Work Surface If the above solutions do not solve your symptoms or you are in need of parts/hardware, please contact Amico Accessories, 1-877-264-2697. Amico Accessories Inc.
-
Page 41: Preventative Maintenance
Section 8: Troubleshooting, Preventative Maintenance, Storage, & Cleaning Preventative Maintenance WARNING: HUMMINGBIRD WORKSTATIONS REQUIRE PERIODIC INSPECTION AND MAINTENANCE TO PERFORM OPTIMALLY AND ACHIEVE MAXIMUM OPERATION LIFE. WARNING: THE INTERVALS SHOWN ARE RECOMMENDED. MAINTENANCE SCHEDULES SHOULD BE MORE FREQUENT FOR HIGHER USE AREAS. -
Page 42: Product Storage Guidelines
Damage caused by the use of unapproved substances or processes will not be warranted. It is recommended that you test any cleaning solution on a small area of the Hummingbird that is not visible to verify compatibility. Never submerge the Hummingbird and do not allow liquids to enter it. -
Page 43: Amico Warranty Policy
Amico Accessories Inc. warrants all mounting accessories and electrical systems to be free from defects in material and workmanship for a period of twelve (12) months from the date of shipment. Within this period Amico Accessories Inc. will repair or replace any part which is proven to be defective. - Page 44 Amico Accessories Inc. | 122 East Beaver Creek Road, Richmond Hill, ON L4B 1G6, Canada Toll Free Tel: 1.877.264.2697 | Tel: 905.763.7778 | Fax: 905.763.8587 Email: info@amico-accessories.com | www.amico.com AA-INSTAL-INSTR-MOBILE-COMPUTER-WORKSTATION-HUMMINGBIRD 09.16.2021...
Need help?
Do you have a question about the Hummingbird and is the answer not in the manual?
Questions and answers