Table of Contents
Advertisement
Quick Links
Advertisement
Table of Contents

Related Manuals for Amico Hummingbird Lite


Summary of Contents for Amico Hummingbird Lite
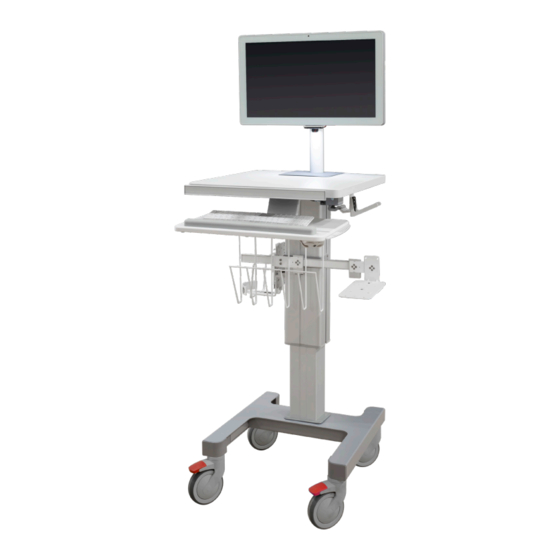
- Page 1 Installation Instructions Hummingbird Lite Workstation on Wheels...
- Page 2 This Instruction Manual is your guide to ensure that you get the best performance out of the equipment. Amico Accessories Inc. is not responsible for any damage as a result of (but not limited to) abuse and other problems that may be a direct or indirect result of failure to comply with the instructions provided in this manual.
-
Page 3: Table Of Contents
Contents Installation Preparation Installation Tools Installation Reference Hardware Kit Installation Instructions Device Installation LCD/Display Mounting: VESA 75/100 Adjustments 10-16 Mounting a Laptop (Laptop Models Only) LCD/Display Adjustments Sliding Keyboard Tray Adjustments Lockable Casters and Transport Position Spring Adjustment (LCD/Display Models Only) Worktop Height Adjustment LCD/Display Mount Load Ranges Cart Load Ranges... -
Page 4: Installation Preparation
PHILLIPS PAN HEAD 10-24UNC 1/2" LENGTH 10-24UNC 1/2" LENGTH PHILLIPS PAN HEAD DUAL LOCK 10-24UNC 1/2" LENGTH 10-24UNC 1/2" LENGTH 10-24UNC 1/2" LENGTH 10-24UNC 1/2" Length 8-32UNC 1/2" LENGTH 1/4-20UNC 1/2" LENGTH 1/4-20UNC 3/8" LENGTH 1/4-20UNC 1/4" LENGTH Amico Accessories Inc. -
Page 5: Installation
1/4-20 x 1" long screws, four #14 lock washer and four #14 flat washer through the bottom of the base into the column. Ensure the bottom of the vertical column is placed inside the collar (pre-installed in opening). Figure 3 www.amico.com 5... - Page 6 Laptop with Security Bracket Model: Install the Laptop Security Bracket (Box B) to the worktop by placing the Laptop Security Bracket on the backside of the worktop and fasten four 1/4-20 x 1/4" long screws (Figure 6) from the bottom. Figure 6 Amico Accessories Inc.
- Page 7 Remove the bottom acorn nuts and #10 washers from the Sliding Keyboard Tray (Box A) and align with keyboard tray bracket holes. Fasten back #10 washer and acorn nuts (Figure 8). Figure 8 www.amico.com 7...
- Page 8 6. To install the two reusable zip ties on the saddles, slide the zip tie through the two saddles slots as shown below and repeat for the second zip tie. Place the power bar or laptop adapter symmetrically with the two zip ties and secure. Zip Tie Saddle Figure 10 Amico Accessories Inc.
-
Page 9: Device Installation
Display off the VESA plate. Front of the VESA 75/100 6.5" 6.5” (16.51 cm) +/- 90 (16.51 14.6" M4 mounting M4 mounting 14.6” (37.1 cm) hole for VESA 100 hole for VESA 75 (37.10 Figure 1 Figure 2 www.amico.com 9... -
Page 10: Adjustments
3. Shut the adjustable glides by pushing towards inside each other to secure the laptop and remove the key from the key slot. NOTE: Keep the Laptop Security Bracket Key in a safe location, separate from the workstation. Security Bracket Key Slot Figure 1 Amico Accessories Inc. -
Page 11: Lcd/Display Adjustments
+/- 90 + 15 6.5” (16.51 - 15 19.0” (48.29 27.0” 14.6” (68.58 35.0” (37.10 (88.00 + 15° + 15 +/- 90 +/- 90° - 15° - 15 5” Figure 1 19.0” (48.29 27.0” 14.6” (68.58 35.0” (37.10 (88.00 www.amico.com 11... -
Page 12: Sliding Keyboard Tray Adjustments
WARNING: DO NOT TRANSPORT THE CART WITH KEYBOARD TRAY IN EXTENDED POSITION. Safe for Transport Figure 1 Mouse Tray Adjustments The mouse tray slides in and out on both sides of the worktop or standard keyboard tray (Figure 1). Laptop LCD/Display LCD/Display with Keyboard Tray Figure 1 Amico Accessories Inc. -
Page 13: Lockable Casters And Transport Position
Lockable Casters and Transport Position The Hummingbird Lite Mobile Workstation includes two Total Locking Casters (red) to prevent movement. 1. To lock the casters, step on the Locking Lever (on each caster) such that it clicks in the down position (Figure 1). -
Page 14: Spring Adjustment (Lcd/Display Models Only)
4. Replace the VESA Plate, re-attach the Top Plate with the screws and replace the Top Cap and the LCD/Display Post Cover. Top Cover Top Plate VESA plate LCD/Display Screws LCD/Display Gas Spring HEX nut Post Post Cover Figure 1 Figure 2 Amico Accessories Inc. -
Page 15: Worktop Height Adjustment
3. Grasp the sides of the Work Surface and pull upwards while holding the Height Adjustment Lever to raise the Work Surface. 4. Worktop Height adjustment range is 15" (38.1 cm) (Figure2). 15" (38 cm) Worktop Height Adjustment Range Figure 1 Figure 2 www.amico.com 15... -
Page 16: Lcd/Display Mount Load Ranges
17 lbs - 22.5 lbs (10.21 kg - 17.71 kg) 255N 13.5 lbs - 27 lbs (6.12 kg - 12.25 kg) NOTE: The combined total weight of all peripherals and accessories on the cart should fall within load range of selected spring type. Amico Accessories Inc. -
Page 17: Cable Management (Lcd/Display Models Only)
PRIVATE AND CONFIDENTIAL PRIVATE AND CONFIDENTIAL www.amico.com www.amico.com www.amico.com Fax: (905) 763.8587 Fax: (905) 763.8587 Fax: (905) 763.8587 DESCRIPTION: DESCRIPTION: DESCRIPTION: THIS PRINT IS PROPERTY OF AMICO ACCESSORIES THIS PRINT IS PROPERTY OF AMICO ACCESSORIES THIS PRINT IS PROPERTY OF AMICO ACCESSORIES... -
Page 18: Mounting Keyboard And Mouse
4. Carefully position the keyboard on the keyboard tray and firmly press down while supporting the keyboard tray from the bottom (Figure 3). WARNING: DO NOT OVERLOAD OR LEAN ON THE KEYBOARD TRAY (MAX LOAD = 10 LBS). Dual Lock Pads Figure 1 Figure 2 Cable Access Door Figure 4 Figure 3 Amico Accessories Inc. - Page 19 DESCRIPTION: DESCRIPTION: DESCR THIS PRINT IS PROPERTY OF AMICO ACCESSORIES THIS PRINT IS PROPERTY OF AMICO ACCESSORIES THIS PRINT IS PROPERTY OF AMICO ACCESSORIES AND IS LOANED IN CONFIDENCE SUBJECT TO RETURN AND IS LOANED IN CONFIDENCE SUBJECT TO RETURN...
-
Page 20: Product Matrix
2 Total Locking (Tente) None For Tablet 25N (35N + 2.5 lbs Counter Weight) For LCD/Display with Small form Factors CPU 25N with spare 50N gas spring For All In One 60N with spare 75N gas spring Amico Accessories Inc. -
Page 21: Troubleshooting, Maintenance And Product Classification
Troubleshooting, Maintenance, Product Classification Specifications and Adjustments Refer to Amico website for the manual and specification documents. Troubleshooting Guide Problem Possible Cause Solution LCD/Display mount facing wrong Incorrect installation Check the LCD/Display Post hole positions, direction should keep the LCD/Display mounting facing front with 180°... -
Page 22: Cleaning
Damage caused by the use of unapproved substances or processes will not be warranted. It is recommended that you test any cleaning solution on a small area of the Hummingbird Lite that is not visible to verify compatibility. -
Page 23: Warranty
Amico Accessories Inc. will warrant its materials to be free from defect for an additional period of four (4) years, (five [5] years from the date of shipment). Within this period, Amico Accessories Inc. will replace any part which is proven to be defective, at no charge. - Page 24 Amico Accessories Inc. | 122 East Beaver Creek Road, Richmond Hill, ON L4B 1G6, Canada Toll Free Tel: 1.877.264.2697 | Tel: 905.763.7778 | Fax: 905.763.8587 Email: info@amico-accessories.com | www.amico.com AA-IM-HMNGBRD-LITE 09.16.2020...
Need help?
Do you have a question about the Hummingbird Lite and is the answer not in the manual?
Questions and answers