Advertisement
Quick Links
Advertisement

Related Manuals for MecPower Tecway Dining Car


Summary of Contents for MecPower Tecway Dining Car
- Page 1 Dining Car...
- Page 2 In order to prevent the variety of problems which caused by incorrect operation,Please read the manual first before operating this machine and pay attention to the items marked in “note”. Please keep this manual carefully for checking when needed. Content ...
-
Page 3: Safety Attentions
Safety Attentions 1) Certain part of the game is with high voltage. Adjust the game by technician. Do not open the game door unless maintenance or parts replacement is required. 2) Please switch off the power before checking and maintenance. 3) Please switch off the power before opening the game door. - Page 4 Notes of Usage 1) The voltage range of the game should be 105V~115V or 215V~225V. The proper voltage should be 110V/220V. The specific voltage accords to the date plate on the back door of the game. The voltage must be correct;...
- Page 5 Notes of Clean 1) Please use clean and soft cloth to clean the game. 2) Prevent damaging the surface of the game, please do not use the following cleanser: Alterative Cleanser; Acidic Cleanser; Insecticide, sterilized water, alcohol or other chemical cleanser. ...
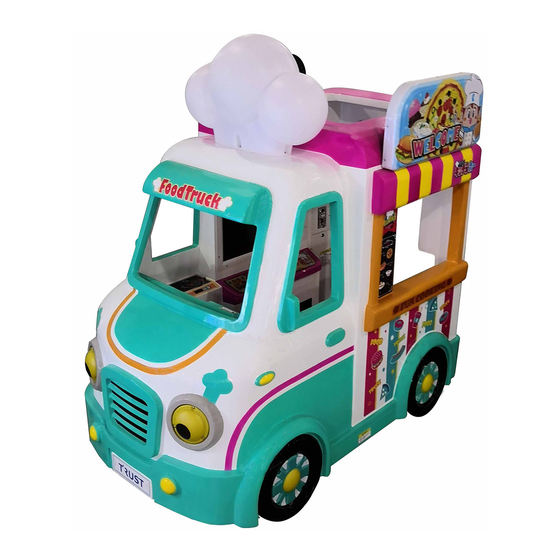
- Page 6 Game introduction Dinning Car with unique, beautiful and comic appearance, interesting and exciting game, it is specially designed and developed by our company for the young people. It will be very essential and popular in amusement center. Features: Realistic, colorful; High-speed processing CPU, stable performances;...
- Page 7 2. Playing tips and Operations Steering wheel coin selector Button (A to E) This game can be played by two players at the same time, and the roles of two people are different; one player operates at the steering wheel console, and the other player operates at the screen console.
- Page 8 Playing tips: Insert coin(s), press the lighted button when you are ready, or wait for countdown. Steering wheel:When the steering wheel rotates to the left, the light on the steering wheel turns red; when the steering wheel rotates to the right, the light on the steering wheel turns blue.
- Page 9 When the guests order more food, the arrows will have different colors to prompt the players. 2)Mini Games Make hamburgers: According to the sample, select the ingredients needed by pressing the buttons.
- Page 10 Cut Pizza: Here's how to play...
- Page 11 Cut the cake: Here's how to play...
- Page 12 3. Technical parameters VOLTAGE: AC220V(50/60HZ) MAX. CURRENT: 0.95A/1.8A (Note: please refer to the nameplate located on the back of the games to check actual usage of voltage.) MAX. POWER: 300W STANDBY POWER: 100W COIN SIZE:φ21mm ~ φ30mm (diameter) φ1.2mm ~φ2.5mm (thickness) CAPACITY OF COIN BOX: 1,500pcs of coins with coin sizeφ25mm*1.5mm LOCATION REQUIRED: -5 ~ 40℃, humidity is less than 90%.
- Page 13 Parts shipped with the game: DRAWING NAME SPEC./MODEL fuse 5A(小) 1285# 1396# power cord manual...
- Page 14 4. Movement Twist the nut of feet to the bottom, counterclockwise screw the feet to leave the ground. Unplug the wire wheel feet Direction of movement diagram: Note: when the road surface is uneven during moving or when you tilt the machine, please pay attention to the strength to prevent damage to the game machine body.
- Page 15 Please follow the direction below to install the game. 5.1 CHOOSE THE LOCATION FOR INSTALLATION 1) Put the Dining Car in the same type of game then select the concrete placement according to the machine's exterior. Choose the proper location for installation, please follow the below drawing to install.
- Page 16 5.2 FIX THE GAME feet wheel Screw the feet down to hold the game, distance between ground and wheel is ≥5mm so that the machine can not be moved. 5.3 CHECK AND SET BEFORE CONNECTING THE POWER 1) Please check whether the parts of cabinet are loose caused by moving, and the wire terminal should not drop out from the port.
- Page 17 Attention A. Please make sure the power cord is not pressed by wheel, foundation, etc. Otherwise, it will damage the wire to cause short circuit, even fire. Do not use strong power to extend and wring the wires. Do not make the wire be near to the high temperature object.
-
Page 18: Check Before Operation
5.4 CHECK AND ADJUST AFTER CONNECTING THE POWER 1) Make sure the input voltage is same as the one stated on name plate on the back door of the game. After connecting the power, please switch on the game. Insert coin to check if the coin selector cans work properly. Visually check the game and ensure the display monitor and light can work properly. -
Page 19: Daily Operation
7. DAILY OPERATION 7.1 INPUT POWER TO OPERATE Turn on the game machine. Visually check the game and ensure the display monitor is working properly. Check the light and confirm they are working properly. Check the coin selector, steering wheel, sound and button and confirm they are working properly. -
Page 20: Game Setting
8. Game Setting 8.1 Find the buttons Open the coin door to find the buttons. Steering wheel Coin Selestor Button (A to E) Test button(red) :Enter mode selection Reset button(yellow) :Error reset Free button(blue) :Free to play Button B:Up selection Button C:Confirm Button D:Down selection Test button... - Page 21 8.2 Testing and setting Testing Press the “test”button to enter mode selection I/O TEST: Test the output, input, motor, sound and screen...
- Page 22 1. Output test (LED test) 2. Input test 3. Motor test...
- Page 23 4. Sound test 5. Screen test...
- Page 24 Setting Descriptions: Coin:This setting decides how many coins for 1 credit. If set to “1”, it means insert 1 coin for playing 1 game. :This setting decides if turn on the music when standby. Attract music Volume:This is the setting of volume. The maximum is 10. Time:This setting decides the limit time for one game, if set to “2”, there are 2 minutes for 1 game.
- Page 25 9. Adjustment 9.1. Adjust the coin selector adjusting chip of entrance sample coin chute micro-adjust resistance power/signal input COUNTER(+/-) GRAY coin reject bar DC+12V WHITE COIN SIGNAL BLACK GROUND COIN signal SW GRAY COUNTER(-/+) accurate normal N.O. N.C. 100ms SLOW COIN signal wavelength 50ms MEDIUM 25ms FAST...
- Page 26 9.2 Adjust the volume sound board Maintenance door sound board potentiometer Open the cabinet backdoor to find out the sound board. Twist the volume 1) potentiometer to adjust the volume level of the machine. Turning clockwise to increase the volume; counterclockwise to decrease the volume. Note: Please twist it slowly in case the sudden volume output burn the speaker.
- Page 27 10. CHECK AND MAINTAIN !warning Please check and maintain the game by technicians. Please power off the game when check and maintain. Please do not put any tools into cabinet, otherwise it will cause problem. After checking, please tightly screw the screws and close the door. 10.1 Daily Check ITEM DESCRIPTION...
Need help?
Do you have a question about the Dining Car and is the answer not in the manual?
Questions and answers