Table of Contents
Advertisement
Quick Links
Advertisement
Table of Contents

Related Manuals for MecPower Tecway Crazy Crab


Summary of Contents for MecPower Tecway Crazy Crab
- Page 1 Crazy Crab Operation Manual...
-
Page 2: Table Of Contents
CONTENT 一、 ............3 GAME INTRODUCTION 二、 .............. 4 GAME INSTRUCTION 三、 ............5 TECHNICAL PARAMETER 五、 ............... 6 INSTALLATION ................... 7 FIXING MACHINE ....................8 INSTALL STEP 八、 ................9 GAME TEST & .................10 GAME TEST SETTING & ................13 SETTING TEST MODE &... - Page 3 12.7 . & ..........24 POWER SUPPLY DRAWING ASSY PART LIST )& 12.8 .(4 ..........24 PRIZE MOUTH ASSY SETS PART LIST )& 12.9 .(4 .............25 COIN DOOR ASSY SETS PART LIST )& 12.10 .(4 ............25 CABINET ASSY SETS PART LIST )& 12.11 .(2 ............26...
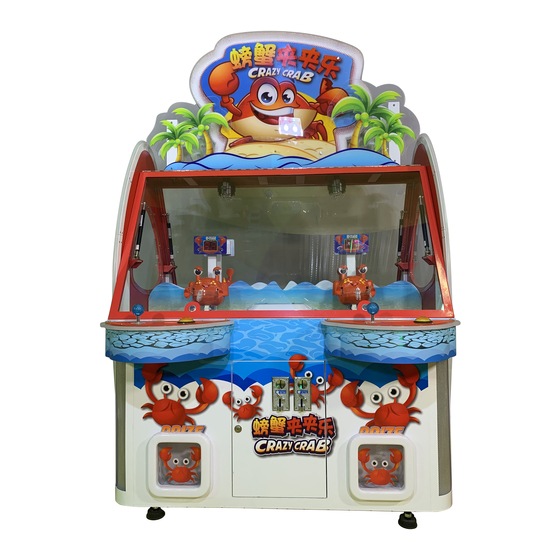
- Page 4 Crazy Crab is another masterpiece developed by our company based on the research of the game content loved by children, combined with the new popular elements of the game. It is an essential model in the entertainment place。...
-
Page 5: Game Instruction
Game playing method, stimulation, strong sense of operability, very entertaining; The operating income ratio can be adjusted according to the actual situation。 二、 Game Instruction This machine can be used for 4 people to play at the same time, and each game bit can be coin operated separately. -
Page 6: Technical Parameter
三、 Technical Parameter Voltage:AC220V(50/60HZ) Maximum/Minimum Current:2.1A/2.3A (Note: please refer to the mark on the nameplate of the machine for the actual voltage and current) Maximum Power:300W Standby Power:270W Coin box capacity:φ25mm*1.5mm coin about 5250 pieces. Operating environment: room temperature is - 5 ~ 40 ° C, environmental humidity is more than 90%, no corrosive liquid direct contact, no excessive oil mist and dust Dimension:L1333mm*W1387mm*H2129mm... - Page 7 Spare Part List: Drawing Item Spec./Model 1285 # 2pcs 1396# 2pcs Fuse 5A Small 2pcs Manual...
-
Page 8: Installation
四、 Installation Packing List Drawing/Item Drawing/Item Body Light box frame cover assy. 1set 2sets Light box 1set... - Page 9 When installing the machine for the first time, please do the following 5.1 Select the installation place According to the play method of the machine, place the machine in the same type, and then select the specific place of the machine according to the appearance of the machine The size and position of the site as shown in the figure below shall be reserved to place the machine, so that the machine can have enough space for normal operation in daily use, and ensure that the customers can have comfortable play。...
-
Page 10: Fixing Machine
5.2 Fixing machine Fixed foot Movable castors 5.3 Installation Step 1) As shown in the figure below, fix the light box assembly on the top hardware of the face cover with 6 M4 method cover nuts. Light Box Main Cabinet Installation Sketch... - Page 11 2) As shown in the figure below, fix the acrylic component of the outer frame of the light box on the top hardware of the cover with 6 M4 method cover nuts. Acrylic component of outer frame of light box Main Cabinet Installation Sketch...
- Page 12 3) As shown in the figure below, fix the acrylic component of the outer frame of another light box on the top hardware of the cover with 6 M4 method cover nuts. Acrylic component of outer frame of light box Main Cabinet Installation Sketch...
- Page 13 五、 Test & Setting 8.1 Test & setting instruction Open the coin door and find the setting board confirm button setting board SELECT TEST ENTER setting button setting board SERVE ERASE free play TEST/setting button:Enter setup and test menu SERVE/Free play button:Free play mode Rocker:Item select Confirm button:Change item content...
- Page 14 8.2 Test & Setting mode Press the "test" key on the setting panel to enter / exit the game content setting / testing interface; control the left and right directions of the rocker (the left side is "previous item" and the right side is "next item"), select the item to be changed;...
-
Page 15: Setting Test Instruction
Setting menu instruction: Showed as atached: Setting 参数调整 18游戏时间 1币数 10音量 on自动模式 yes复位 yes退出 1) 18 game times: this setting determines the game time of the machine. If it is set to "18", the game time of each game is "18" seconds. (the factory setting of automatic mode is "18", the adjustable range is 18-300, and the step size is 2;... - Page 16 Setting menu instruction: Setting menu as below I/O TEST ALL INPUT(Sensor) 左移动电眼一 左移动电眼二 左移动电眼三 左移动电眼四 右移动电眼一 右移动电二 右移动电眼三 右移动电眼四 俯身电眼上一 俯身电眼上二 俯身电眼上三 俯身电眼上四 俯身电眼下一 俯身电眼下二 俯身电眼下三 俯身电眼下四 夹礼物电眼打开一 夹礼物电眼打开二 夹礼物电眼打开三 夹礼物电眼打开四 夹礼物电眼闭合一 夹礼物电眼闭合二 夹礼物电眼闭合三 夹礼物电眼闭合四 左右中间电眼一 左右中间电眼二 左右中间电眼三 左右中间电眼四 摇杆左一 摇杆左二...
-
Page 17: Adjustment
六、 Adjustment Coin Acceptor Adjustment Coin acceptor adjustment mode: Please remove the plastic coin in the sample slot and replace it with the token to be used as the sample currency. Loosen the screw on the back of the coin slot, and adjust the fixed piece on the back of the coin slot according to the diameter of the token used, so as to prevent the coin with too large diameter from being stuck in the coin slot by mistake. -
Page 18: Volume Adjustment
9.2 Adjust the volume amplifier board volume potentiometer amplifier board Adjust volume:1) :Open the coin gate, find the volume potentiometer on the power amplifier board, and turn the volume potentiometer to adjust the volume of the machine. Turn the potentiometer clockwise to increase the output volume of the machine, and turn the potentiometer anticlockwise to decrease the output volume of the machine. -
Page 19: 十一、 Trouble Shooting
七、 Trouble Shooting Trouble Shooting: Failure Fault Trouble Shooting No sample coin Put the sample coin Coin pass through Do not insert coin Sensitive too high Adjust the coin acceptor sensitive Coin acceptor damage Replace the coin acceptor Coin wire block Connect coin acceptor wire Coin Invavid Coin acceptor damage... - Page 20 Error Code Trouble Shooting Failure Fault Trouble Shooting Sensor wire block Connect the sensor wire Sensor damage Replace the sensor mechanism not in place and cannot be sensed Check the mechanism loosen or not E1(left moving limit senor or Motor wire block Connect the motor wire motor error) motor drive board damage...
-
Page 21: Light Box Drawing & Part List
八、 Spare Part Drawing & Part List 12.1 Light box drawing & Part List 04 05 Item/No. Item/No. Light box arylic panel 01 Acrylic installation code 05 Light box plastic Acrylic installation code 03 Light strip(Blue 2400mm) Acrylic panel of light box 02 Advertising screw Acrylic installation code 01 Acrylic installation code 06... - Page 22 12.3 Front repairing door assy. Drawing & part list Item/No. Item/No. Front repairing door frame Hinge Tempered glass Top hardware Lock(1285) Glass pressure code A Door bracing Glass pressure code B...
- Page 23 12.4 Cabinet assy. Drawing & Part List 02 03 Item/No. Item/No. Small monitor(7") Acrylic around the main body Hinge(2.5 寸 ) Light strip(Blue 480mm) Gift mouth acrylic Lamp belt mounting plate Cabinet Universal casters(2.5") Micro switch(TSW05-N) Footing(M14) Acrylic decorated with sugar plate Fan net(120X120) Decoration acrylic Fan(120X120)
- Page 24 12.5 Control cabinet assy. Diagram & Part List Item/No. Integrated filter Control board Meter Control cabinet hardware 12.6 Main board assy. Diagram & Part List Item/No. Item/No. Electrical installation board Main board Motor drive board Buccal board Amplifier LED drive board...
- Page 25 12.7 Power supply assy. Diagram & Part List Item/No. Corner code Power supply(12V 20A) Electrical installation board Power supply(12V 11A 5V 3A) Power supply fix code 12.8 Prize mouth assy.(total 4 sets) diagram & Part List Item/No. Acrylic bottom plate of gift mouth Light strip(yellow 640mm) 1 Gift mouth blister...
- Page 26 12.9 Coin door assy.(4 sets) diagram & Part List Item/No. Coin acceptor Lock 1285 Coin door Coin slot 12.10 Cabinet assy.(4 sets) Diagram & Part List Item/No. Cabinet hardware Light strip(yellow 600mm) 1 Control console light transmission acrylic Speaker(4 寸 8Ω30W) Control panel Button...
- Page 27 12.11 Push plate assy.(2 sets) Diagram & Part List Item/No. Motor (24V 15W 2200r/min) Push plate hardware Joint bearing(SI6T/K) Rotating shaft of push Push plate Push plate blister Push disk suction hardware Top suction of push plate Small slide guide Candy push plate connecting rod Pusher disk 12.12 Fruit plate assy.(4 sets) Diagram &...
- Page 28 12.13 Slide rail assy.(4 sets) Diagram & Part List Item/No. Item/No. Small motor 1 Sensor(KI1300) Push rod optical axis Crab crane motor installation code Optical axis bracket Rotating shaft copper sleeve Hardware, slide ASSY Up and down stretching link hardware shaved head Linear bearing(LM16L*28*70) Axis of rotation...
- Page 29 12.14 Crab assy.(4 sets) Diagram & Part List 06 07 02 03 Item/No. Item/No. Crab clip Crab upper shell Crab's right arm Crab rotation mounting shaft Electric eye block Crab's right arm Slider of guide rail Crab arm shell 02 Crab arm shell 01 Small motor Crab arm slider...
- Page 30 12.15 Side board assy. (2 sets) Diagram & Part List Item/No. Item/No. Light transmitting edge of wood board 04 Install hardware around the board at the edge of Yake 06 Main cabinet board Light transmitting edge of wood board 03 Light transmitting edge of wood board 01 Install hardware around the board at the edge of Yake 05 Light transmitting edge of wood board 02...
- Page 31 十三、 Schematic Diagram Pu5A Y1-20 220V 12V(11A) Bla1-21 filter moving motor left limit sensor 220V R1-9 Br/W2 power input 5V(3A) power supply Bla1 12V(20A) Y31-36 next page moving motor right limit sensor 220V R/W1 Bla31-36 220V power supply Br11 meter left/right moving middle sensor Pu/W2 button light...
- Page 32 Bla22 Above Page +12V +12V +12V +12V time time W3-1 SCLK SCLK digital tube digital tube Y3-1 Br3-1 SCLK SCLK B3-1 G3-1 DATA DATA B3-1 DATA DATA Bla21 +12V +12V +12V +12V time time W6-1 SCLK SCLK digital tube digital tube Y6-1 Br6-1 SCLK...
Need help?
Do you have a question about the Crazy Crab and is the answer not in the manual?
Questions and answers