Advertisement
Quick Links
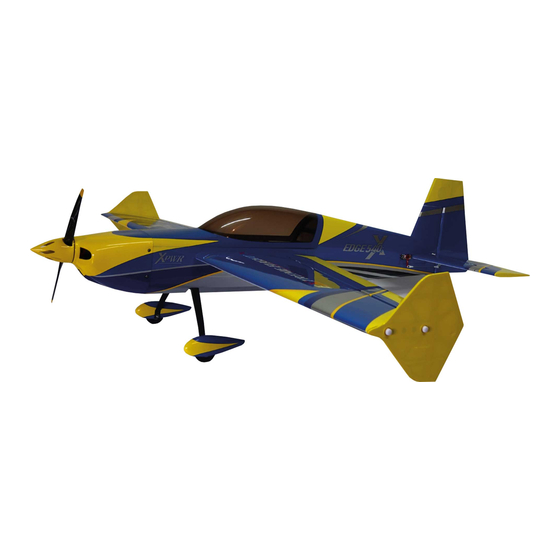
Gaspower Aircraft
30/
30/
30/50CC
.............................. ALMOST-READY-TO-FL Y
..............................
..............................
Congratulations on your purchasing of this excellent Almost-Ready-to-Fly R/C model!This ARF adopts the
latest 3D design features and emphasizes high performance,light weight and fun. The plane is designed by
professional engineers and built by skilled craftsmen .Many of the parts are already pre-installed for you!
*Note: This manual depicts the assembly procedures for these planes. Plesse read through the mamual to
determine which steps are appropriate for your aircraft.
Cautions:
This
Cautions: This
Cautions:
This R/C
50CC
50CC Series
Edge540K\Edge540\
Edge540K\Edge540\
Edge540K\Edge540\Edge540T\
Extra260\Extra330L\
Extra260\Extra330L\
Extra260\Extra330L\Extra300SHP
Mxs-R\MXS\MX2
Mxs-R\MXS\MX2
Mxs-R\MXS\MX2
Y ak54\Y ak55SP\
Y ak54\Y ak55SP\ Y ak55M\
Y ak54\Y ak55SP\
Sbach342\Sbach300\Slick540\Slick360\
Sbach342\Sbach300\Slick540\Slick360\
Sbach342\Sbach300\Slick540\Slick360\
ALMOST-READY-TO-FL Y
ALMOST-READY-TO-FL Y ..............................
R/C
model
model is is is not
R/C model
Series
Series
Edge540T\
Edge540T\
Extra300SHP
Extra300SHP
Y ak55M\
Y ak55M\
not a a a toy!
not
toy!
toy!
..............................
..............................
Advertisement

Related Manuals for arf Edge540K


Summary of Contents for arf Edge540K
- Page 1 ………………………… ………………………… Congratulations on your purchasing of this excellent Almost-Ready-to-Fly R/C model!This ARF adopts the latest 3D design features and emphasizes high performance,light weight and fun. The plane is designed by professional engineers and built by skilled craftsmen .Many of the parts are already pre-installed for you! *Note: This manual depicts the assembly procedures for these planes.
- Page 2 The RC aircraft is not a toy! If misused,it can cause serious bodily harm and damage to property.Flyit only in open area and follow all instructions including your Radio and Engine. As this product was designed for high performance,incorrect installation would affect the flying performance. Please ask for assistance form an expericnced modeler if you don’t understand the methods of assembly.
- Page 3 80”(2040mm) 80.5”2044mm) 82”(2143mm) Wing 1465sq.in(94.5sq.dm. 1465sq.in(94.5sq.dm. 1426sqin(92sq.dm.) 1426sqin(92sq.dm.) Area: Flying 15.5-171bs(7000- 15.5-171bs(7000- 15.5-171bs(7000- 15.5-171bs(7000- Weinght: 7700g) 7700g) 7700g) 7700g) Edge540 Edge540K Slick360 Slick540 Edge540 Edge540 Edge540K Edge540K Slick360 Slick360 Slick540 Slick540 Wing 87”(2202mm) 87”(2202mm) 87”(2208mm) 87”(2208mm) Span: Length: 82”(2098mm) 82”(2098mm) 83”(2100mm)
- Page 4 Slick360 Slick360 Slick360 Slick540 Slick540 Slick540 Extra330 Extra330 Extra330 Egde540 Egde540 Egde540 Wing 74”(1900mm) 74”(1900mm) 75”(1900mm) 75”(1900mm) Span: Length: 72”(1825mm) 72”(1825mm) 71”(1810mm) 71”(1809mm) Wing 868sq.in(56sq.dm.) 868sq.in(56sq.dm.) 868sq.in(56sq.dm.) 868sq.in(56sq.dm.) Area: Flying 9.2-10.6lbs(4200- 9.2-10.6lbs(4200- 9.2-10.6lbs(4200- 9.2-10.6lbs(4200- Weinght: 4800g) 4800g) 4800g) 4800g) Edge540T Edge540T Edge540T Extra260...
- Page 5 Propeller 19*10 23*8,30cc use 19*10 ~20*10,50cc use 22*10 ~ 23*10 Spinner(3”-4”) 18”or 36”servo Extension Additional Requried Equipment Additional Additional Requried Requried Equipment Equipment Radio Equipment Radio Radio Equipment Equipment 6-channel radio system 1 standard servo for throttle 5 hi-torque servos Recommended Recommended...
- Page 6 Epoxy brushes Petroleum jelly Felt –tipped pen or pencil Rubbing alcohol Measuring device (e.g.ruler,tapemeasure) Sandpaper(coarse) Mixing sticks for epoxy Covering iron Paper towels Dental floss or string Before starting Assembly Before Before starting starting Assembly...
- Page 7 Apply epoxy into the hinge holes of the leading edge. Apply epoxy to the other side of the hinges. Install the control surfaces. Move the surface up and down a couple of times to make sure all the hinges are aligned correctly and the desired throw is attained (Aileron:40degrees,others:45degrees) ...
- Page 8 Install two wheel collars. ensure that the wheel rolls freely. When the wheel and wheel pant are installed completely,you can adjust these two wheel collars to let the wheel be in the center of the wheel pant. Note: thread locking compound...
- Page 9 Cover the main landing gear with the housing by attaching it with the screws provided.This step is only for Yak55SP/Yak54/SU26M. Tail Wheel Instllation Tail Tail Wheel Wheel Instllation Instllation Center the tail wheel bracket on the mounting block. ...
- Page 10 Let the control wire through the holes of connective bolt and landing gear connector. Tighten the screw to secure the control wire. Install the wheel with two wheel collars,ensuer that the wheel rolls freely..Tail Tail surfaces Installation...
- Page 11 Screw the ball link onto the horns. Connect the pull-pull wire and control horn with ball link. Thread the cable connecter halfway into the ball link . Pass the cable into the fuselage through the slot . ...
- Page 12 Secure the servo arm to the rudder servo by using the screw that came with the servo. Install a 24”servo extension onto the elevator servo.Either tie the servo leads together,or use a connector to secure the extension to prevent it from coming loose during flight.
- Page 13 Follow the same way to install the elevator control system like rudder control horn installation. Connect the pushrod and control horn as shown. Put the control horn into the slot pre-opened, glue it to the stab, on each side. ...
- Page 14 engine you choose to install. Drill the installation holes on the firewall .If you intend to install nitro engine,you need to install the engine mount on the firewall with screws first. Drill holes on the engine mount and firmly fasten the screws on the mount.
- Page 15 We support two pieces woods . If you not use the canister , you can use one piece to close the hole after the engine . If you use the canister , you can use one piece to close the hole after canister. .Fuel .Fuel .Fuel Tank...
- Page 16 Bend two fuel tubes carefully to a 45-degree angle using your fingers.These will be the fuel tank fill and vent tubes.Use carefully not to kink the tube while bending. Locate the rubber stopper. Insert the three metal fuel tubes into the holes in the stopper so that an equal amount of tube exrends from each side of the stopper.
- Page 17 ● Assemble and check the fuel tank to ensure there are no leaks before istalling it. Make suer you conncet the three inlet/outlet tubes (see picture) correctly when connecting the fuel lines. ● Bind the fuel tank with nylon strips. .Cowling Instalation .Cowling...
- Page 18 ● Cut out the necessary holes in the cowl to accommodate your engine. Keep in mind that you may need to relieve the lower portion of the cowl in order to provide adequate airflow for the engine. ● Install a suitable propeller and spinner on the engine according to the suggestions from the engine manufacturer.
- Page 19 ● Install the control horn. Adjust the horn and servo arm. Fix the horn in place firmly. Install the ball link and push rod . Make sure it’s firm and flexible. all 30cc size airplane, please follow the above method to install it. (one piece control horn only)
- Page 20 ● Use the wing tube to attach the wing halves to the fuselage. ● Install the nylon retainingserews from the inside of the fuselage. ● ● ● Note: Note: Note: Tighten Tighten Tighten the the screws screws screws only only only by by hand.
- Page 21 ● Trial fit the canopy to the hatch to determine screw locations. ● Drill D2mm hole for the canopy screws. ● Install the canopy by using the wood screws. ● Install the hatch onto the fuselage by using the wood Screws. When satisfied with the fit ,remove the canopy and hatch,and then use optioal canopy glue to fix the canopy.
- Page 22 50~60cc 50~60cc class class 50~60cc 50~60cc class class PLANE: PLANE: Edge540K Edge540K Extra330 Extra330 Sbach342 Sbach342 Slick540 Slick540 MXS-R MXS-R S S S S bach300 bach300 bach300 PLANE: PLANE: Edge540K Edge540K Extra330 Extra330 Sbach342 Sbach342 Slick540 Slick540 MXS-R MXS-R bach300...
- Page 23 Good luck luck & & & Have Have fun! Good Good luck Have fun! fun!
Need help?
Do you have a question about the Edge540K and is the answer not in the manual?
Questions and answers