Contec IPC Series User Manual
Hide thumbs
Also See for IPC Series:
- User manual (107 pages) ,
- Operational manual (87 pages) ,
- Manual (75 pages)

Related Manuals for Contec IPC Series


Summary of Contents for Contec IPC Series
- Page 1 IPC Series IPC-DT/L400(PC)A, IPC-DT/L400(PC)TA, IPC-DT/L400(PC)TB User’s Manual CONTEC CO.,LTD.
-
Page 2: Trademarks
Copyright 2000 CONTEC Co., LTD. ALL RIGHTS RESERVED No part of this document may be copied or reproduced in any form by any means without prior written consent of CONTEC Co., LTD. CONTEC Co., LTD. makes no commitment to update or keep current the information contained in this document. -
Page 3: Table Of Contents
Table of Contents Copyright ................i Trademarks................ i Table of Contents.............. ii 1. Introduction..............1 Limited One-Year Warranty ........3 How to Obtain Service ..........3 Liability ............... 3 Handling Precautions ..........4 2. Specifications..............7 Function Specifications ............ 7 General Specifications ............. 8 Display Optical Specifications ......... -
Page 4: Introduction
1. Introduction The display is a 12.1inch, desktop TFT LCD for use with a host computer, such products as the CONTEC IPC series and SBC (single-board computer). The display is available in three different models; the IPC-DT/L400(PC)A not installed with the... - Page 5 : Stand kit for using the main unit as a desktop machine - IPC-CV12 : Protective sheet for 12.1inch screen * For more information about each host computer and option, see the "Product Guide" or contact a CONTEC branch or a sales representative. User’s Manual...
-
Page 6: Limited One-Year Warranty
Please obtain a Return Merchandise Authorization Number (RMA) from the CONTEC group office where you purchased before returning any product. * No product will be accepted by CONTEC group without the RMA number. Liability The obligation of the warrantor is solely to repair or replace the product. -
Page 7: Handling Precautions
Only plug in or disconnect the cable after turning off the host computer power or damage could result. - This monitor does not support MS-DOS. Another CONTEC product PC-LCD(PCI)T supports neither MS-DOS nor Windows 3.1. - Page 8 1. Introduction - As one of analog, touch-panel characteristics, detection positions might slide out of place due to an ambient change (in temperature and/or humidity) or as time elapses. If you experience this, recalibrate the touch panel and re-set calibration data. - If you utilize this product in such usages where high reliability and safety are required as on the trains, vessels, automotives or crime- or disaster-prevention devices, contact your retailer.
- Page 9 1. Introduction User’s Manual...
-
Page 10: Specifications
2. Specifications 2. Specifications Function Specifications Table 2.1. Function Specifications Item IPC-DT/L400(PC)A IPC-DT/L400(PC)TA IPC-DT/L400(PC)TB Installation type Desktop, wall hanging *1 Display size 12.1 inch Dot configuration 800 dots horizontal x 600 dots vertical Display device TFT color liquid crystal display Display colors 262,144 colors Brightness control... -
Page 11: General Specifications
2. Specifications General Specifications Table 2.2. General Specifications Item Specification Environment Ambient operating temperature 0 - 45°C Ambient storage temperature -10 - 60°C Ambient humidity 20% - 90% RH Floating dust Not severe Corrosive gas none Noise Line noise Signal line /1kV(IEC1000-4-4 Level3, EN61000-4-4 Level3) resistance (When using the host PC IPC-BX/M400(PC)H) Statistic electricity... -
Page 12: Display Optical Specifications
2. Specifications Display Optical Specifications Table 2.3. Display Optical Specifications Item Condition Min. Standard φ = 180° 30deg 50deg Visual angle (vertical) φ = 0° Display in 40deg 70deg CR≥10 monochrome φ = +90° 40deg 70deg Visual angle (horizontal) φ= -90° 40deg 70deg Surface... - Page 13 2. Specifications User’s Manual...
-
Page 14: Dimensions And Names Of Parts
3. Dimensions and Names of Parts 3. Dimensions and Names of Parts Case External Dimensions Display center Device center [mm] Figure 3.1. Case External Dimensions User’s Manual... -
Page 15: Part Names
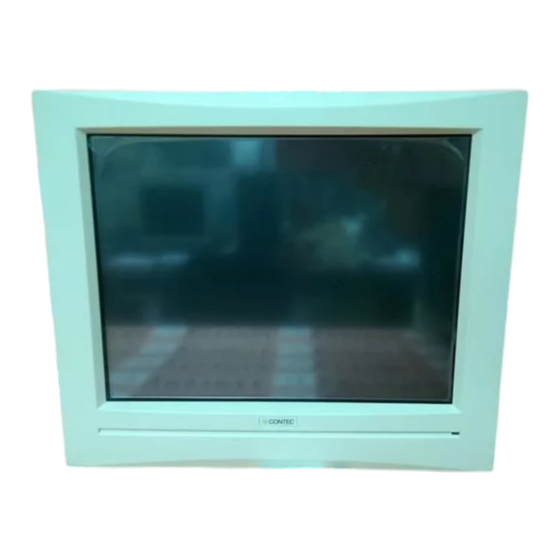
3. Dimensions and Names of Parts Part Names LCD screen * IPC-DT/L400(PC)A : Dummy glass * IPC-DT/L400(PC)TA , IPC-DT/L400(PC)TB :Touch panel Power Brightness adjustment dial How to adjust brightness * Turn the volume upward to increase brightness. Turn the volume downward to reduce brightness. Bright Dark LCD connector... -
Page 16: Installation
4. Installation 4. Installation There are two methods of installation. Both are described below. (1) Hanging with screws Install M4 size round head or binding screws at the 4 wall locations shown by the following dimensions. The panel can be hung more securely on screws with larger head diameters. Wall surface 2.2mm M4 screw... - Page 17 4. Installation (2) Fastening the back of the panel with screws. Make 4mm holes in the 6 locations on the back of panel shown by the dimensions below. Center of display screen Center of device [mm] Figure 4.3. Hole Locations Fasten the display by the 6 installation holes using M3 screws.
-
Page 18: Installation Cautions
4. Installation Installation Cautions (1) Dimension restriction when mounting in a recessed wall location 50mm Front LCD cable Side view Figure 4.5. Mounting in a Recessed Wall Location (2) Bending limit for LCD cable 20mm 60mm or more Figure 4.6. Bending Limit for LCD Cable User’s Manual... - Page 19 4. Installation User’s Manual...
-
Page 20: Connecting With Host Computer
5. Connecting with Host Computer 5. Connecting with Host Computer VGA Mode Setting Before using the display, set the VGA mode setting on the host computer to "TFT color 800 x 600." For each host computer, set as described next. If using IPC or SBC products other than those listed here, refer to their respective manuals for details of the settings. - Page 21 5. Connecting with Host Computer (3) When you are using the IPC-BX/M560E(PCW)E, IPC-BX/M560E(PCW)C, IPC-BX/M560E(PCW)EP, IPC-BX/M560(PCW)CP, PC-LCD(PCI)T, PC-686E(PC)-266 or PC-686E(PC)-333, set the rotary switches inside the display and on the circuit board to the "0 setting" (TFT color 800 x 600). (4) When you are using the PC-586HU(PC)-LV: Set the jumpers on the circuit board to TFT color 800 x 600 as shown next:...
-
Page 22: System Configuration And Connection
5. Connecting with Host Computer System Configuration and Connection Connect this display to each host computer using the LCD connector on the host computer and a dedicated cable. The following diagram shows an example connection with the IPC-BX/M400(PC)H: Cable set IPC-M4CL-2TH IPC-M4CL-2H IPC-BX/M400(PC)H... - Page 23 5. Connecting with Host Computer User’s Manual...
-
Page 24: Touch Panel
IPC-BX/M560(PCW)EP, IPC-BX/M560(PCW)CP (Windows 98/95/NT 4.0 only) For more information about touch-panel drivers, contact a CONTEC branch or a sales representative. Notes! - Brightness on this device is not adjustable with the touch-panel driver software utility. Adjust brightness using the brightness controller on one side of the device. - Page 25 3-9-31, Himesato, Nishiyodogawa-ku, Osaka 555-0025, Japan Japanese http://www.contec.co.jp/ English http://www.contec.com/ Chinese http://www.contec.com.cn/ No part of this document may be copied or reproduced in any form by any means without prior written consent of CONTEC CO., LTD. [02232005] [03072000] Management No. A-46-371 [03042005_rev2] Parts No.
Need help?
Do you have a question about the IPC Series and is the answer not in the manual?
Questions and answers