Silicon Laboratories EFR32xG21 Worksheet
Hide thumbs
Also See for EFR32xG21:
- Reference manual (866 pages) ,
- Manual (32 pages) ,
- User manual (33 pages)
Advertisement
Quick Links
Secure Debug Lab Worksheet
This lab goes through the provisioning, secure debug lock and
unlock of EFR32xG21 devices.
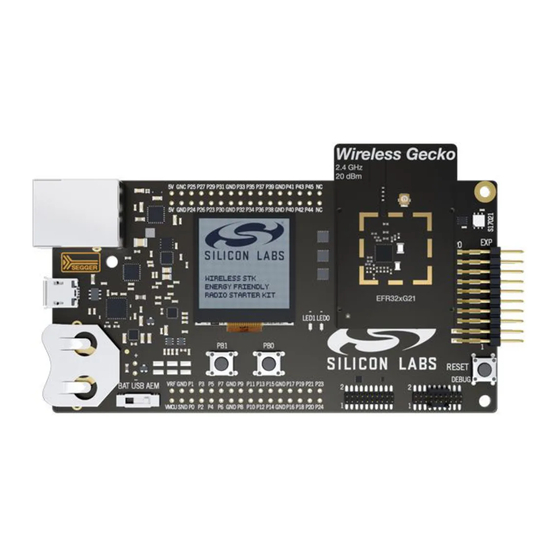
1. Plug in your EFR32xG21 Wireless Starter Kit.
2. Device provisioning.
3. Secure debug Lock and unlock.
silabs.com | Building a more connected world.
KEY POINTS
• Follow a few simple steps to provision
your EFR32xG21 device.
• Use Simplicity Studio to perform secure
debug lock and unlock.
Rev. 0.1
Advertisement

Related Manuals for Silicon Laboratories EFR32xG21


Summary of Contents for Silicon Laboratories EFR32xG21
- Page 1 Secure Debug Lab Worksheet This lab goes through the provisioning, secure debug lock and unlock of EFR32xG21 devices. KEY POINTS 1. Plug in your EFR32xG21 Wireless Starter Kit. • Follow a few simple steps to provision your EFR32xG21 device. 2. Device provisioning.
-
Page 2: Getting Started
Simplicity Studio v4 with EFR32xG21 support must already be installed. 1. Setup your kit a. Provide power to the EFR32xG21 WSTK board by connecting the USB J-Link debugger connector to the PC using the pro- vided USB cable. b. Move the Power Source Select switch to the AEM position. - Page 3 Secure Debug Lab Worksheet Provisioning 2. Provisioning The provisioning is used to program the Command Key to Secure Element OTP for Secure Debug Unlock. 1. Right-click on the selected debug adapter [J-Link Silicon Labs (serial number)] to display the context menu. 2.
- Page 4 Secure Debug Lab Worksheet Provisioning 5. Click the [Start Provisioning Wizard...] button on the right side to display the [Secure Initialization] dialog box. silabs.com | Building a more connected world. Rev. 0.1 | 4...
- Page 5 Secure Debug Lab Worksheet Provisioning 6. Click [Next >] to use the default configurable settings for secure initialization. 7. Click the [Get Local Development Key] button under [Command Key:] to get the Command Key from Local Development Cryp- to Profile. silabs.com | Building a more connected world.
- Page 6 Secure Debug Lab Worksheet Provisioning 8. Click [Next >] to display the [Secure Locks] dialog box. 9. Uncheck all the boxes to disable the security features. silabs.com | Building a more connected world. Rev. 0.1 | 6...
- Page 7 Secure Debug Lab Worksheet Provisioning 10. Click [Next >] to display the [Summary] window. silabs.com | Building a more connected world. Rev. 0.1 | 7...
- Page 8 Secure Debug Lab Worksheet Provisioning 11. Click the [Provision] button if the information on the [Summary] window is correct. silabs.com | Building a more connected world. Rev. 0.1 | 8...
- Page 9 Secure Debug Lab Worksheet Provisioning 12. Click [Yes] to proceed the provisioning process. 13. Click the [Done] button to finish the provisioning process. silabs.com | Building a more connected world. Rev. 0.1 | 9...
- Page 10 Secure Debug Lab Worksheet Provisioning 14. Click the [OK] button to exit the provisioning process. Note: Stop and wait here until directed by the lab instructor. silabs.com | Building a more connected world. Rev. 0.1 | 10...
- Page 11 Secure Debug Lab Worksheet Secure Debug Lock and Unlock 3. Secure Debug Lock and Unlock 3.1 Secure Debug Lock 1. Use steps 1 to 3 in 2. Provisioning to open the device configuration window. 2. Click the [Enable] button on [Enable Secure Debug Unlock:] to enable the secure debug unlock. The [Enable] button of [Enable Secure Debug Unlock:] will change to [Disable].
- Page 12 Secure Debug Lab Worksheet Secure Debug Lock and Unlock 9. Click [X] button to close the Simplicity Commander. Note: Stop and wait here until directed by the lab instructor. silabs.com | Building a more connected world. Rev. 0.1 | 12...
- Page 13 4. Click [Browse...] to locate the project file in USB flash drive to be imported. 5. Select the project file based on your EFR32xG21 radio board (either blink_BRD4180A.sls or blink_BRD4181A.sls) then click [Next>] to open the Build Configurations of the Project window.
- Page 14 Secure Debug Lab Worksheet Secure Debug Lock and Unlock 7. Then click [Finish] to open the selected Simplicity IDE project in default location. 8. Click the [Debug] button on highlighted project to build the project and start a debug session. 9.
- Page 15 Secure Debug Lab Worksheet Secure Debug Lock and Unlock 10. Selected device will show an error message (Secure device with no Crypto Profile.) if no Crypto Profile has been selected. Click the Manage Crypto Profiles link to open the [Crypto Profile Manager]. 11.
- Page 16 Secure Debug Lab Worksheet Secure Debug Lock and Unlock 14. Simplicity Studio unlocks the device in the background, then flashes the image to start the debug session. The device will remain unlocked until the device is hard reset. The device is now ready to debug or run, click [Step Over] button several times to step over the code.
- Page 17 Secure Debug Lab Worksheet Secure Debug Lock and Unlock 19. Click [X] button to close the Simplicity Commander. 20. The secure debug lock is reapplied by pressing the RESET button on the WSTK. 21. Use steps 5 to 9 in 3.1 Secure Debug Lock to verify the device is locked again.
- Page 18 Secure Debug Lab Worksheet Secure Debug Lock and Unlock 23. Press [Mass Erase] button to unlock the device and disable the secure debug unlock. silabs.com | Building a more connected world. Rev. 0.1 | 18...
Need help?
Do you have a question about the EFR32xG21 and is the answer not in the manual?
Questions and answers