Table of Contents
Advertisement
T674 OWNER'S MANUAL CONTENTS
1. INTRODUCTION ............................................................................
2. SAFETY PRECAUTIONS .............................................................
3. WARNING LABLE POSITION ........................................................
4. LIST OF PARTS .............................................................................
5. ASSEMBLE THE PRODUCT ......................................................... 11
STEP 0 Preparation: Inspect the Walk Belt Placement...................... 11
STEP 1 Data Cable Installation ......................................................... 12
STEP 2 Left and Right Pedestals Installation .................................... 14
STEP 3 Display Panel Installation .................................................... 15
STEP 4 Left and Right Side Covers Installation .............................. 18
STEP 5 Move the Treadmill into Place for Use ................................ 19
STEP 6 Level the Treadmill ............................................................. 20
STEP 7 Align the Walk Belt................................................................ 21
STEP 8 Adjust the Walk Belt Tension ............................................... 22
STEP 9 Power Cord Installation ...................................................... 23
6. UNDERSTAND T674 LCD DISPLAY ............................................... 24
DISPLAY Overview ........................................................................... 24
DISPLAY Parameter Window .......................................................... 25
DISPLAY Specifications .................................................................. 25
DISPLAY Button Function ............................................................... 26
7. SAFETY TIPS FOR USING T674 TREADMILL ............................... 28
SAFETY TIPS Guidelines on Safety Mechanism ............................ 28
SAFETY TIPS Safety Operating Area ............................................ 29
SAFETY TIPS Mounting and Dismounting Instructions .................. 30
8. OPERATE THE PRODUCT ............................................................. 31
OPERATION Start Screen ............................................................... 31
OPERATION GO/ENTER ................................................................ 31
OPERATION User Information Settings .......................................... 32
OPERATION Program Settings ....................................................... 33
OPERATION Switching Programs During Exercise ......................... 35
OPERATION COOL DOWN ............................................................ 36
OPERATION PAUSE/RESUME ...................................................... 36
3
4
8
9
Advertisement
Table of Contents

Related Manuals for SportsArt Fitness ECO-NATURAL Elite T674


Summary of Contents for SportsArt Fitness ECO-NATURAL Elite T674
-
Page 1: Table Of Contents
T674 OWNER’S MANUAL CONTENTS 1. INTRODUCTION ................2. SAFETY PRECAUTIONS ............. 3. WARNING LABLE POSITION ............4. LIST OF PARTS ................5. ASSEMBLE THE PRODUCT ............11 STEP 0 Preparation: Inspect the Walk Belt Placement...... 11 STEP 1 Data Cable Installation ............12 STEP 2 Left and Right Pedestals Installation ........ - Page 2 T674 OWNER’S MANUAL CONTENTS OPERATION Workout Summary ............. 36 OPERATION EUP Function ............36 OPERATION User Preference and Component Versions ....37 9. ABOUT HEART RATE DETECTION ..........39 HEART RATE Telemetry ..............39 HEART RATE Contact ..............39 10. GUIDELINES FOR EXERCISE ............40 11.
-
Page 3: Introduction
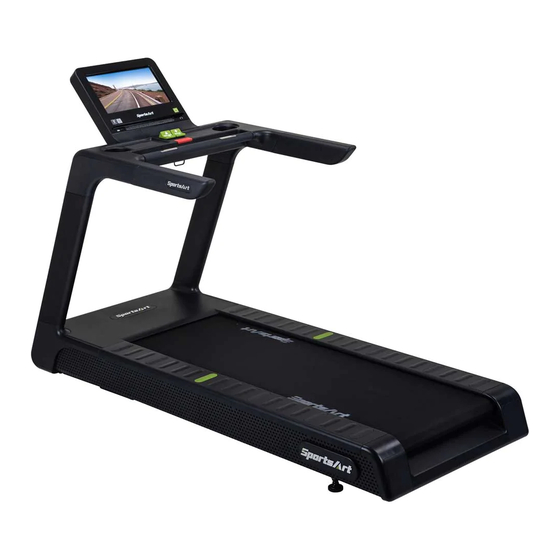
1. INTRODUCTION Congratulations on the purchase of a high quality SportsArt product, the T674 LCD treadmill. Constructed of high quality materials and designed for years of reliable performance, this product was made for full commercial use. Before this product is assembled or operated, we recommend that you familiarize yourself with this manual. -
Page 4: Safety Precautions
2. SAFETY PRECAUTIONS This product was designed and built for optimum safety. However certain precautions apply during the use of this product. Please note the following safety precautions: ● To reduce the risk of personal injury, read and understand all the instructions before using this product. - Page 5 2. SAFETY PRECAUTIONS (CONT.) ● Do not use accessories or parts that are not specifically recommended by the manufacturer (SportsArt). Such parts might cause injuries or cause the unit to fail and void the warranty. We will not be responsible for any safety issue that arises due to the misuse of accessories or parts.
- Page 6 2. SAFETY PRECAUTIONS (CONT.) ● This product must be grounded. If it should malfunction or breakdown, Improper grounding can increase the risk of electric shock. The product is equipped with a power cord having an equipment-grounding conductor and a grounding plug. The plug must be inserted into an appropriate outlet that is properly installed and grounded in accordance with all local codes and ordinances.
- Page 7 2. SAFETY PRECAUTIONS (CONT.) MARKINGS CAUTION: (Console) ● Read instruction manual before using. ● Do not let children on or near the product. ● To reduce the risk of injury, stand on side rails before starting treadmill. ● To reduce the risk of injury from moving parts or electric shock, unplug before cleaning or servicing.
-
Page 8: Warning Lable Position
3. WARNING LABLE POSITION If you are in a Non-English speaking country, you can attach the warning label to the console panel as shown, otherwise, you can also stick it on a place where is clear and obvious. (please use the French version label in French-Speaking areas in North America, and the label will not be included in the other regions.) -
Page 9: List Of Parts
4. LIST OF PARTS Assembly Parts Name Qty. No. Name Qty. Display panel Hardware kit Handlebar assembly Owner’s manual Right pedestal Power cord A3a Feeder cord Left pedestal Main frame... - Page 10 4. LIST OF PARTS (CONT.) Components on the Product Name Specification Notes Flat washer D22*d8.5*t3.0 Spring washer Inner hex screw M8*P1.25*L20 Toothed lock washer D18*d8.5*t2.0*19T Spring washer Inner hex screw M8*P1.25*L20 Inner hex screw M6*P1.0*L12 Flat washer D16*d6.3*t2 Hex socket flat head cap screw M10*P1.5*L20 Mushroom top philips screw M4*L12...
-
Page 11: Assemble The Product
5. ASSEMBLE THE PRODUCT Follow instructions below to assemble this product. Note that in this manual the words “left” and “right” are used to refer to the product and its parts. As such, these designations correspond to the “left” and “right” sides of a person in position to exercise on this product. -
Page 12: Step 1 Data Cable Installation
STEP 1 Data Cable Installation 1. Remove the screws (41) from the left and right sides of the main frame (A5). Note: DO NOT remove the screws and mounts in area A. - Page 13 STEP 1 Data Cable Installation (Cont.) 2. Follow steps (a) through (e) to thread the data cable into right pedestal (A3). (a) Pull out the data cable from the right pedestal base. Cut the zip tie, and uncurl the data cable. (b) Place the right pedestal (A3) on the floor as shown, with the bottom end facing the data cable.
-
Page 14: Step 2 Left And Right Pedestals Installation
STEP 2 Left and Right Pedestals Installation Follow steps (a) through (b) to install left and right pedestals (A3)(A4). (a) Attach left and right pedestals (A3)(A4) to the main frame (A5), and use screws (41) to secure the assembly. Note: Make sure the data cable is not pinched when installing the right pedestal (A3). -
Page 15: Step 3 Display Panel Installation
STEP 3 Display Panel Installation Follow steps (a) through (j) to install the display panel. (a) Remove the left and right covers from the handlebar assembly (A2), and the loosen the screw (45) to remove the front cover. (b) Attach the handlebar assembly (A2) to the left and right pedestals (A3) (A4), then mount screws (42) (44) in position. - Page 16 STEP 3 Display Panel Installation (Cont.) (d) Remove screws (43) from the handlebar assembly (A2). (e) Remove the rear cover of the display panel (A1). (f) Insert the display panel into the 2 mounting brackets on the handlebar as- sembly (A2). Gently press down on the display during installation to avoid the front edge of display protrudes over the storage tray.
- Page 17 STEP 3 Display Panel Installation (Cont.) (g) Hold the display with one hand, gently tilt it forward, then press it downward. Use screws (43) to secure the display panel to the mounting brackets on the assembly. (h) Pull out the data cable from the handlebar assembly (A2), and connect it with the one on the back side of the display panel.
-
Page 18: Step 4 Left And Right Side Covers Installation
STEP 4 Left and Right Side Covers Installation (a) Tighten screws (41) that secure the pedestals to the mainframe, and secure the switch protective cover (a) using screws (46), then put the left/ right side covers of the main frame (b) on. Note: Be careful not to damage or destroy the fixing kit when assembly and dismantling the side covers. -
Page 19: Step 5 Move The Treadmill Into Place For Use
STEP 5 Move the Treadmill into Place for Use Hold the rear of the walking deck in area A, and then lift the treadmill to roll it into desired position. Warning: Do not place the treadmill on a thick carpet or rug as it may interfere with the walking belt. -
Page 20: Step 6 Level The Treadmill
STEP 6 Level the Treadmill Press downward on the rear part of the treadmill as shown. Inspect whether the treadmill rests flat on the floor. If the treadmill wobbles, adjust treadmill levelers as follows: (a) Loosen the lever nut. (b) Rotate the leveler foot downward until touching the floor. (c) Rotate the leveler nut upward against the frame of the product to secure this position. -
Page 21: Step 7 Align The Walk Belt
STEP 7 Align the Walk Belt (a) First, make sure the treadmill is on a level surface and the incline is at 0% . (b) Start the speed at a lower rate of 3kph/2.5mph to check if the walk belt is aligned and if there is an equal amount of space between walk belt and side-rails on both sides. -
Page 22: Step 8 Adjust The Walk Belt Tension
STEP 8 Adjust the Walk Belt Tension Walk belt tension is important to treadmill performance. As your foot hits the walk belt, does the walk belt stop sluggishly before regaining traction? Or, if you stomp your feet, bracing against the direction of rotation, does the walk belt not pause whatsoever? When either of these conditions occurs, walk belt tension should be adjusted. -
Page 23: Step 9 Power Cord Installation
STEP 9 Power Cord Installation (a) Loosen screws (46) to remove the switch protective cover. (b) Remove screws (47) from the power connector on the product. (c) Insert the power cord plug into the connector on the product. (d) Use screws (46) to secure the power cord plug (A8) into place. (e) Insert the other end of the power cord (A8) into a proper power socket and thread the power cord out from the bottom as shown. -
Page 24: Understand T674 Lcd Display
6. UNDERSTAND T674 LCD DISPLAY DISPLAY Overview Before using the product, please familiarize yourself with the features on the display so you can fully utilize the product and all it has to offer. Description Description GOAL LCD window SPEED + - PROGRAMS INCLINE▲... -
Page 25: Display Parameter Window
DISPLAY Parameter Window Description Display the data of your heart rate value. (Displayed when BOTH HANDS hold on the sensor.) Displays the current incline. Display the messages or the illustration. Display the total time of the workout or the remaining time to exercise. -
Page 26: Display Button Function
DISPLAY Button Function Element Description Wake up the display from sleep mode. The button has two functions : (1) Skip the user input, program selection, and start train- ing instantly. (2) After the parameter settings are complete, press the key to confirm your selection. Press the key to pause or resume the workout. - Page 27 DISPLAY Button Function (Cont.) Element Description Press this key to select one of an almost endless num- ber of randomly generated workout programs. Each key press, the console will randomly generate a different pro- gram. the notification LED will light on steadily. Press this key to enter fitness test mode which provides nine built-in tests.
-
Page 28: Safety Tips For Using T674 Treadmill
7. SAFETY TIPS FOR USING T674 TREADMILL SAFETY TIPS Guidelines on Safety Mechanism The unit is equipped with a safety key so that one can immediately stop the belt and shut off the unit to prevent accidents from happening. The flashing key sign shown on the display indicates that the safety key has been removed and the unit will not start again until it has been reinserted. -
Page 29: Safety Tips Safety Operating Area
SAFETY TIPS Safety Operating Area (a) Safety clearance required as shown below. Do not allow people to be near this area when operating. (b) The stationary handlebar (highlight by mark D) is for heart rate mea- surement. Do not hold it as support while exercising. (c) Make sure to stand on the center of the running belt where are marked with green round labels at area E while exercising. -
Page 30: Safety Tips Mounting And Dismounting Instructions
SAFETY TIPS Mounting and Dismounting Instructions Get on the treadmill: To mount a treadmill properly, use the handrails to balance while you step onto the sides, straddling the belt. Step onto the belt before start exercising. Get off the treadmill: Always wait for the belt to come to a complete stop before dismounting the treadmill. -
Page 31: Operate The Product
8. OPERATE THE PRODUCT OPERATION Start Screen 1. For safety reasons, make sure the safety key is properly clipped onto your clothes before operating this product. 2. Press the wake button (at the bottom right of the panel) or step on the pedal to start the machine. -
Page 32: Operation User Information Settings
OPERATION User Information Settings The treadmill measures your calories burned, target heart rate (using the formula based on your age), workout time, and total distance after you have finished the following settings: 1. PROGRAM / GOAL How to enter WORKOUT GOAL settings? (1) Select an exercise mode from the PROGRAMS menu, and then press <GO/ENTER>... -
Page 33: Operation Program Settings
OPERATION User Information Settings (Cont.) 3. AGE and WEIGHT Parameter Window Description Set <AGE>: Age ranges from 10-90 y/o. The default age is 35 y/o. a. Press <INCLINE ▲/▼> or <SPEED +/-> key to adjust age settings. b. Press <GO/ENTER> to confirm your selection and proceed to the weight setting. - Page 34 OPERATION Program Settings (Cont.) FIT TEST: This program includes 9 fitness tests and is used to describe an individual’s physical fitness level. Each test has its own time limit and is not subject to the time limit in the WORKOUT GOAL settings: BRUCE, GERKIN, FIRE FIGHTER, WFI, ARMY, AIR FORCE, MARINES, NAVY, PEB .
-
Page 35: Operation Switching Programs During Exercise
OPERATION Program Settings (Cont.) WT LOSS、CARDIO: These programs take control of speed and incline, keeping your heart rate within the target zone. (1) The target heart rate for each program: a. WT LOSS: (220-AGE) X 65% b. CARDIO: (220-AGE) X 80% (2) Set maximum speed in HRC program: a. -
Page 36: Operation Cool Down
OPERATION COOL DOWN If your fitness goals (time/distance/calories) have been reached, the words “COOL DOWN” will pop up on the screen, the walking belt will then slow to a stop , and the treadmill will gradually return to 0% grade for your two-minute cool down walk and end your workout session. -
Page 37: Operation User Preference And Component Versions
OPERATION User Preference and Component Versions In the basic setting menu you can change the units of measure, show total dis- tance and time, and see display and drive board program version numbers. To access this information, at the startup banner screen, hold<INCLINE ▼>... - Page 38 OPERATION User Preference and Component Versions (Cont.) (6) LANGUAGE The current country selected will scroll across the screen, press <INCLINE ▲/▼>or<SPEED +/-> key to toggle between languages. Press the EN- TER key to confirm and proceed to the next setting. (7) EUP TIME The screen will show “EUP”, press <INCLINE ▲/▼>or<SPEED +/->...
-
Page 39: About Heart Rate Detection
9. ABOUT HEART RATE DETECTION Heart rate detection functions are selected at the time of purchase. Not every product has every type of heart rate detection. The following explains factors that influence the performance of two of the most common types of heart rate detection devices. -
Page 40: Guidelines For Exercise
10. GUIDELINES FOR EXERCISE HOW HARD SHOULD I EXERCISE? Studies show that to benefit from aerobic exercise, people need to maintain a certain heart rate during their workouts. Your heart rate training zone depends on your age and fitness level. The darkened area in the chart to the right represents the recommended heart rate training zone for people of various ages. -
Page 41: Maintenance
11. MAINTENANCE This section covers maintenance topics, including instructions on replacing a fuse and lubricating the walk belt, along with the presentation of a main- tenance schedule, maintenance task list, one-year maintenance log, and electronics block diagram. MAINTENANCE Safety Precautions ●... -
Page 42: Maintenance Error Messages
MAINTENANCE Error Messages Error messages can appear on the screen as a troubleshooting aid. Error messages appear in the following format: “ERROR _X_Y”. X represents the category of the error. Y represents the specific issue. Error code explanations: Error Error Explanation Remarks code X... -
Page 43: Maintenance Circuit Breaker
MAINTENANCE Circuit Breaker (a) A circuit breaker is an automatically operated electrical switch designed to protect an electrical circuit from damage caused by overcurrent/over- load or short circuit. A spring located under the push button causes the button at area D to lift up and the breaker to trip as shown. (b) After the fault is repaired by qualified technicians, press the push button to reset circuit breaker to resume normal operation as shown. -
Page 44: Maintenance Lubrication System
MAINTENANCE Lubrication System Lubrication System Flowchart: Lubricant Change Procedure : ※ Note: Pay extra attention during the lubricant changing procedure to avoid electric shock, when the machine is turned on. - Page 45 MAINTENANCE Lubrication System (Cont.) To replace the lubricant bottle, follow instructions (a) through (d) below. (a) Loosen the screws on the bezel and push the bezel up. (b) Take the old lubricant bottle out. (c) Unscrew the nozzle from the old lubricant bottle and screw it onto new bottle.
- Page 46 MAINTENANCE Lubrication System (Cont.) Error Messages: Error 1: It indicates that the system memory failing and it will not be able to perform any auto lubrication. 『Err. 01』 『EEPROM』 Error 2:It indicates motor failure or system malfunction. 『Err. 02』 『Motor』 Contact your local dealer for service enquiries if an error occurred.
-
Page 47: Maintenance Schedule
MAINTENANCE Schedule Area Day Week Month Quarter Year Notes Exterior Clean ● Inspect and secure Screws ● loose parts Treadmill Ensure the treadmill ● test operates properly Inspect alignment Walk belt (centering) and look ● for wear Walk deck Inspect for wear ●... -
Page 48: Maintenance Task List
MAINTENANCE Task List Like cars, fitness products require maintenance. Regular maintenance ex- tends product life, and failure to maintain products can void the manufac- turer’s warranty. Copy the maintenance log sheet, and record maintenance work for each fitness product. Daily tasks 1. -
Page 49: Maintenance Maintenance Log
MAINTENANCE Maintenance Log Facility:____________________ Supervisor: ____________________ Product model number:_______ Serial number:__________________ Start date:__________________ End date:______________________ Daily Tasks Week 1-7 Week 8-14 Week 15-21 Week 22-28 Completed Daily Tasks Week 29-35 Week 36-42 Week 43-49 Week 50-52 Completed Week 1-7 Week 8-14 Week 15-21 Week 22-28 Weekly Tasks... -
Page 50: Accessories
12. ACCESSORIES ACCESSORIES Standard USB PORT a. Provides up to 5V, 1A of power for charging b. Let you update all required software drivers for the product. CSAFE PORT Compatible with CSAFE (Communications Specification for Fitness Equipment) Protocol. QR code and NFC tag a. - Page 51 ACCESSORIES Option (Cont.) (1) TV rack...
-
Page 52: Appendixes
13. APPENDIXES APPENDIXES Technical Specifications Model T674 L : 2116 mm ( 83.3” ) Dimensions W : 849 mm ( 33.4” ) H : 1469 mm ( 57.8” ) Overall Weight 195 kg (430 lbs) 205 kg (450 lbs) Maximum User Weight 100 kg (220 lbs) at Maximum Speed EN957 Classification Type 6 /Class SA... -
Page 53: Appendixes Wiring Diagram
APPENDIXES Wiring Diagram LCD Display Board SA WELL+ SA WELL Connection key T674 V886 Key Board Key Board Option HTR Board SA WELL Board USB Board Control Board HRC Board USB Board EUP Board Safety Key Board Contact HTR plates Bridge Board Stop-Key Board... -
Page 54: Appendixes Exploded Diagram
APPENDIXES Exploded Diagram Note: We reserve the right to revise the following diagrams at any time without notice to notify any person of such revisions. Please visit our official website www.gosportsart.com for the latest version. - Page 55 Your Authorized Distributor...
Need help?
Do you have a question about the ECO-NATURAL Elite T674 and is the answer not in the manual?
Questions and answers