Table of Contents
Advertisement
Quick Links
TABLE OF CONTENTS
1. INTRODUCTION.....................................................................................................
2. IMPORTANT SAFETY PRECAUTIONS.................................................................
3. ASSEMBLING YOUR TREADMILL.......................................................................
List of Parts...........................................................................................................
4. TREADMILL ASSEMBLY.......................................................................................
Pedestal and Handle Assembly............................................................................
Display Installation...............................................................................................
Connect to Power.................................................................................................
5. T630 Display........................................................................................................
Display Features.................................................................................................
Display Functions................................................................................................
Button Functions.................................................................................................
Safety Key...........................................................................................................
6. HOW TO USE YOUR T630 TREADMILL.............................................................
QUICK START......................................................................................................
WORKOUT SETUP...............................................................................................
OPERATING PROCEDURE WHILE WORKING.................................................
COOL DOWN......................................................................................................
7. PROGRAMS........................................................................................................
USER PARAMETER SETTING...........................................................................
8. GUIDELINES FOR EXERCISE...........................................................................
9. ADJUST THE WALK BELT..................................................................................
10. FLOOR LEVEL ADJUSTMENT.........................................................................
11. MAIN FUSE FAILURE.......................................................................................
12. ERROR MESSAGE...........................................................................................
13. WIRING SCHEMATIC.......................................................................................
1
2
4
4
5
5
6
7
8
8
8
9
11
12
12
12
13
14
15
17
18
19
21
22
23
24
Advertisement
Table of Contents

Subscribe to Our Youtube Channel
Related Manuals for SportsArt Fitness T630


Summary of Contents for SportsArt Fitness T630
-
Page 1: Table Of Contents
Display Installation....................Connect to Power....................5. T630 Display......................Display Features....................Display Functions....................Button Functions....................Safety Key......................6. HOW TO USE YOUR T630 TREADMILL............. QUICK START...................... WORKOUT SETUP....................OPERATING PROCEDURE WHILE WORKING..........COOL DOWN...................... 7. PROGRAMS......................USER PARAMETER SETTING................8. GUIDELINES FOR EXERCISE................ -
Page 2: Introduction
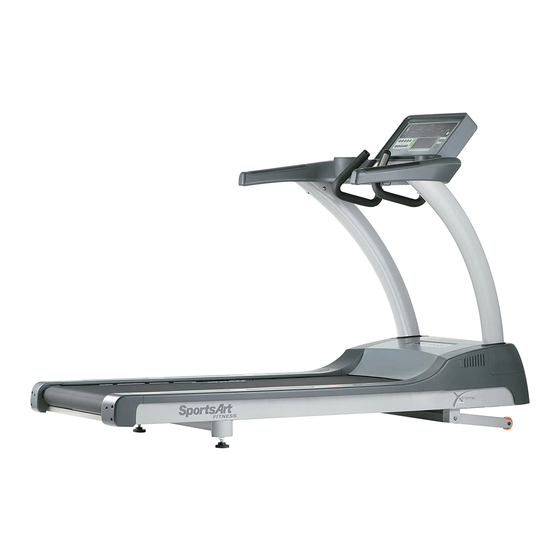
Congratulations on purchasing one of the finest pieces of exercise equipment on the market today, the SportsArt T630 Treadmill. The T630 is designed with the end-user in mind and constructed of high quality materials and designed for years of trouble- free use. -
Page 3: Important Safety Precautions
Your SportsArt treadmill was designed and built for optimum safety. However, certain precautions apply whenever you use your treadmill. Please read the entire manual before assembly and operation. Also, please note the following safety precautions: IMPORTANT SAFETY PRECAUTIONS ˙ Please read the instruction carefully and install the treadmill as instructed. ˙... - Page 4 ˙ Keep all air ventilation areas free of blockage. ˙ Never drop or insert any object into any opening. ˙ DO NOT operate where aerosol (spray) products are being used or where oxygen is being administered. ˙ The weight limit for this treadmill is 160 KGS (350 LBS). ˙...
-
Page 5: Assembling Your Treadmill
ASSEMBLING YOUR TREADMILL Thank you for purchasing our product. Even though we go to great efforts to ensure the quality of each product, occasional errors and/or omissions do occur. In any event should you find the product to be defective or missing a part, please contact your local dealer. -
Page 6: Treadmill Assembly
TREADMILL ASSEMBLY PEDESTAL AND HANDLE ASSEMBLY STEP 1. First, remove the side plates of the pedestals (both left and right). Then thread the data cable through the right pedestal. Secure the pedestals by fastening the bolts with washers as shown. At this point, do NOT tighten these bolts securely. -
Page 7: Display Installation
STEP 3. Secure the handlebars by fastening the bolts with washers (A: arc washers; B: flat washers) as shown. Then put the decorative covers in place. After that, firmly tighten the bolts to secure the pedestals and secure the pedestal side covers (both left and right) in place. -
Page 8: Connect To Power
CONNECT TO POWER Connect the power cable as indicated in Fig. 5, and secure it by tightening the screws. Fig.5... -
Page 9: T630 Display
T630 Display A. Display Features Cardio Advisor Feedback Window T630 Heart Rate LED Programs Numeric Keypad Dot Matrix Display B. Display Functions 1. SPEED: 0.1 to 12.0 MPH or 0.2 to 20.0 KPH in 0.1 increments 2. INCLINE: 0 to 15%, in 0.5% increments 3. -
Page 10: Button Functions
6. CAL/Hr: Calories burnt per hour, 0.0 to 999.9 KCAL 7. METS (Metabolic burn rate): 0.00 to 99.00 8. PACE: 1/SPEED 9. PROGRAM: MANUAL, HILL (HILL1, HILL2, HILL3), RANDOM, INTERVAL (1:1, 1:2, 2:2), TRACK (TRACK 5K, TRACK 10K), GLUTE, FAT BURN, ZONE TRAINER, WT LOSS/CARDIO and FIT TEST (BRUCE, GERKIN). - Page 11 10. WT LOSS/CARDIO Press to start the heart rate control modes - Wt Loss & Cardio. The weight loss program keeps the user's heart rate at 65% of maximum (i.e. (220-AGE)*0.65) to provide an optimal weight loss workout, while the cardio program keeps the user's heart rate at 80% of maximum (i.e.
-
Page 12: Safety Key
b. Under any status: Hold this button to reset to the startup screen. D. Safety Key 1. The safety key must be in place for the treadmill to operate. This safety device is intended to stop the treadmill should a user stumble and fall. 2. -
Page 13: How To Use Your T630 Treadmill
HOW TO USE YOUR T630 TREADMILL 1. QUICK START If you select QUICK START, "TREAD STARTING" appears on the display and the walk belt moves at 0.1MPH/0.2KPH, after which the speed can be modified. The user information default is 165lbs/75kgs. -
Page 14: Operating Procedure While Working
(6) When "FIT TEST" is selected, the 14-segment display will show "FIT TEST". Press ENTER to confirm your choice. Then, the 14-segment display will show "BRUCE-1 GERKIN-2". Press the numeric keypad (1 or 2) to select either program, or press ENTER to select BRUCE. (7) When "WT LOSS/CARDIO"... -
Page 15: Cool Down
C. Users can adjust settings while working out: Programs can be changed during a workout. Press the corresponding program button to change programs. WORKOUT GOAL (TIME/DISTANCE) counts up continuously. Remarks: (1) After QUICK START is used to activate the treadmill, MANUAL, HILL, RANDOM, INTV, or TRACK programs can be accessed. -
Page 16: Programs
PROGRAMS 1. MANUAL & TRACK One lap is equal to 400 meters (0.25 mile). 2. HILL There are three kinds of HILLs (HILL 1, HILL 2, and HILL 3). Press HILL to switch to a different hill course. 3. RANDOM The random program includes an infinite number of programs. - Page 17 b. When you set up the workout time, press ENTER to confirm your input. The 14-segment display will show "INCL-1 SPEED-2". Press 1 or 2 to select INCLINE or SPEED as a key to operate HRC mode. Then press ENTER to confirm your choice.
-
Page 18: User Parameter Setting
USER PARAMETER SETTING User parameters determine basic operating features, such as distance units, of the treadmill. To change these parameters, at the banner display, hold the CHANGE DISPLAY button for three seconds. 1. Set up MPH/KPH. The 14-segment display will show the current status ( "UNIT - ▲... -
Page 19: Guidelines For Exercise
GUIDELINES FOR EXERCISE How hard should I exercise? Studies show that to achieve the benefits of aerobic exercise, it is necessary to work within your training zone. Your training zone depends on your age and level of fitness. The above chart indicates the recommended Heart Rate training zones (darkened area of the chart). -
Page 20: Adjust The Walk Belt
ADJUSTING THE WALK BELT For optimum performance, the walk belt must track in the center of the deck. Failure to align the belt properly could cause the belt to tear or fray, which is not covered under the warranty. Caution: To avoid injury, special care must be taken when adjusting the walk belt. - Page 21 8. Let the treadmill run at least 30 seconds, while checking the position of the belt in the color gauge. When the belt is back in the green "safety zone", you can continue your regular use of the treadmill. Slowly increase the speed of the unit to 5.5 MPH (9 KPH), and let it run for at least 45 seconds.
-
Page 22: Floor Level Adjustment
FLOOR LEVEL ADJUSTMENT Level the treadmill as follows. Use the DOUBLE OPEN ENDED WRENCH to turn the levelers on the rear of the treadmill. Raise or lower the floor levelers to steady the treadmill. Once it is level, secure the position by tightening the leveler nuts up against the unit frame. -
Page 23: Main Fuse Failure
Turn the fuse holder clockwise to secure the fuse in place. (See Fig. 8-2 to Fig. 8-4.) Fig.8-2 Fig.8-1 Fig.8-4 Fig.8-3 If the unit does not work after changing the fuse, please contact your authorized SportsArt Fitness service technician for more information. -
Page 24: Error Message
ERROR MESSAGES SERVICE REQUIRED TREADMILL SHUTTING DOWN STOPPING The motor is overheated. Please turn off and turn on again to reuse the treads. 2. Display format: ERR1: The optical switch mounted on the motor is not receiving the signal reflected from the tachometer wheel. Please contact your dealer. ERR3: The user is running faster than the belt. -
Page 25: Wiring Schematic
Wiring Schematic: Your Authorized Distributor...
Need help?
Do you have a question about the T630 and is the answer not in the manual?
Questions and answers