
Subscribe to Our Youtube Channel
Related Manuals for real living HG-3179


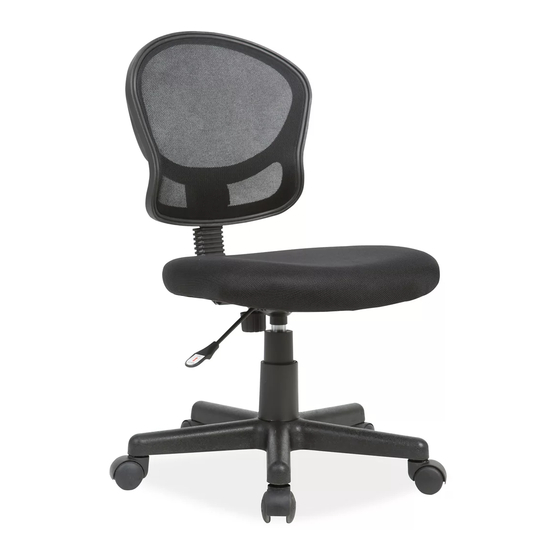
Summary of Contents for real living HG-3179
- Page 1 �real ™ MESH TASK CHAIR ASSEMBLY INSTRUCTIONS ITEM# HG-3179 BLACK I HG-3179 GREY I HG-3179 TEAL SKU# 810343896 / 810538336 / 810538337 Need help? We are here for y oul www.bi g lots.com/help/contact-us...
-
Page 2: Maintenance
GENERAL BEST PRACTICES FOR ASSEMBLY : Read all instructions before starting Clear a flat covered space to assemble We recommend two people for assembly Note that hardware required is provided for every step Pay attention to orientation Letter of the part corresponds to a sticker on the product Number of the hardware corresponds to its number in the package Helpful hints provided along the way WARNING :... -
Page 3: Parts List
PARTS LIST Base Castor Gas Lift Seat Cushion Seat Plate Telescopic Covers Cover Back Cushion J Bar... -
Page 4: Hardware List
HARDWARE LIST Screws Allen Wrench... - Page 5 STEP 1 Place the Base (B) upside down on the ground, insert the Castors (A) as shown in the diagram.
- Page 6 STEP 2 Turn the Base (B) right side up, insert the Gas Lift (C) & Telescopic Cover (D) into the center hole of Base (B) as shown in the diagram.
- Page 7 STEP 3 Attach Seat Plate (E) to Seat Cushion (F) using Screw (1) and Allen Wrench (3) as shown in the diagram. Fully tighten all screws.
- Page 8 STEP 4 Remove the knob in J Bar (H).
- Page 9 STEP 5 Use Screws (2) to fix the J Bar (H) onto Back Cushion (G). Put the Cover (I) onto the Back Cushion (G) as shown in the diagram.
- Page 10 STEP 6 Slide the end of J Bar (H) into the Seat Plate (E) and secure using the previously removed knob. Fully tighten the knob.
- Page 11 STEP 7 Carefully place Seat Plate (E) onto the Gas Lift (C) and press firmly downward. Assembly is now complete.
Need help?
Do you have a question about the HG-3179 and is the answer not in the manual?
Questions and answers