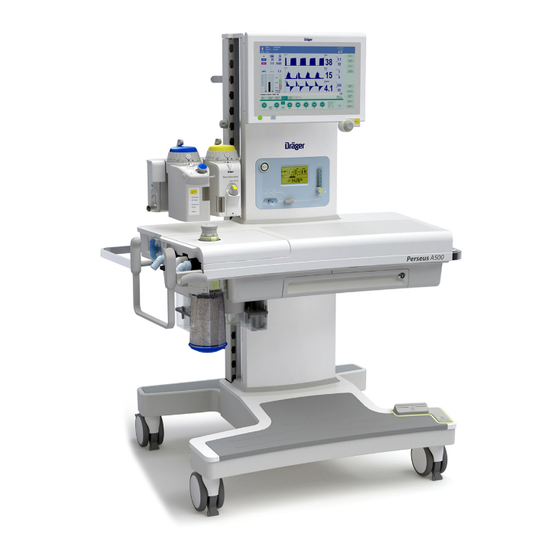
Dräger Perseus A500 Reprocessing Instructions
Anesthesia workstation
Hide thumbs
Also See for Perseus A500:
- Instructions for use manual (302 pages) ,
- Quick manual (24 pages) ,
- Disassembly/assembly (2 pages)

Related Manuals for Dräger Perseus A500


Summary of Contents for Dräger Perseus A500
- Page 1 Perseus A500 Anesthesia workstation Reprocessing instructions WARNING To properly use this medical device, read and comply with the instructions for use and this supplement. Perseus A500...
- Page 2 Supplement to the instructions for use Supplement to the instructions for use Perseus A500 WARNING To properly use this medical device, read and comply with the instructions for use and this supplement. Instructions for use Part number Edition Perseus A500 9510595 2017-02 –...
- Page 3 Information about this document Trademark Trademark owner ® Aseptix SteriMax ® Dr. Schumacher Cleanisept Reprocessing instructions Perseus A500...
-
Page 4: Table Of Contents
3.5.5 Storage and transport ..............3.6 Other agents and reprocessing procedures.......... 3.6.1 Disinfectants ................... 3.6.2 Reprocessing procedures............... 3.7 After reprocessing ................... 3.7.1 Assembling and fitting device-specific components ....... 3.7.2 Preparation before next use of device ..........Reprocessing instructions Perseus A500... -
Page 5: Safety Information
– No water jets, compressed air, brushes or the like – No ultrasonic bath – No hot-steam sterilization with Spirolog and Infinity ID flow sensors – For disinfecting the flow sensor, use only clean disinfectant solutions. Reprocessing instructions Perseus A500... -
Page 6: Information On Reprocessing
Components that come only into contact with skin that is intact Semi-critical Components that carry breathing gas or come into contact with mucous membranes or pathologically altered skin Critical Components that penetrate skin or mucous membranes or come into contact with blood Reprocessing instructions Perseus A500... -
Page 7: Classification Of Device-Specific Components
● If no separate instructions for use are available for the reusable product, perform reprocessing in accordance with the instructions in this supplement (see "Reprocessing procedures", page 32). Disposable products: ● Dispose of the disposable products. Reprocessing instructions Perseus A500... - Page 8 ● Remove the sample line (A) from the water trap and at the Y-piece, and dispose of it if necessary. Follow the instructions for use for the water trap and the sample line. Removing the breathing bag ● Remove the breathing bag hose (B) together with the breathing bag. Reprocessing instructions Perseus A500...
-
Page 9: Device-Specific Components
– Inspiratory port and expiratory port – Lower part of the breathing system and upper part of the breathing system – APL valve – Inspiratory valve (red) and expiratory valve (blue) – CLIC adapter (option) – TurboVent 2 blower module Reprocessing instructions Perseus A500... - Page 10 3. Empty out the used soda lime. Dispose of it in accordance with its own instructions for use. 4. Remove the absorber insert (C) from the absorber container. The sealing ring (D) remains on the absorber insert. Reprocessing instructions Perseus A500...
- Page 11 1. Unfasten the knurled screws (A) on the attachment piece for the breathing bag arm. 2. Remove the attachment piece (B) with the breathing bag arm from the socket (C) on the breathing system. Remove the breathing bag arm. Reprocessing instructions Perseus A500...
- Page 12 Risk of injury due to breathing system warmer When the breathing system warmer is switched on, the bottom side of the breathing system and the heating plate beneath it can become very hot. Allow the breathing system to cool off before removing. Reprocessing instructions Perseus A500...
- Page 13 Reprocessing 3. Remove the breathing system (C) straight upwards out of the breathing system mount. Reprocessing instructions Perseus A500...
- Page 14 Incident flow mesh, inspiration Remains in the lower part of the breathing system. Flow sensors Reprocessing is carried out in accordance with their own instructions for use. Expiratory valve (blue) Inspiratory valve (red) APL valve Reprocessing instructions Perseus A500...
- Page 15 – No water jets, compressed air, brushes or the like – No ultrasonic bath – No hot-steam sterilization with Spirolog and Infinity ID flow sensors – For disinfecting the flow sensor, use only clean disinfectant solutions. Reprocessing instructions Perseus A500...
- Page 16 When the flexible breathing bag arm is used, there is no bag elbow fitted to the lower part of the breathing system. Removing the upper part of the breathing system 1. To unlock, turn the 3 levers (A) counterclockwise by approx. 120°. Reprocessing instructions Perseus A500...
- Page 17 This can lead to leaks in the breathing system. Always remove the APL valve prior to reprocessing. ● Using the lower knurled nut (A), unscrew the APL valve from the upper part of the breathing system. Reprocessing instructions Perseus A500...
- Page 18 1. Place your finger at the side of the lower edge of the valve. Using gentle pressure, push the valve upwards. When the valve is released, carefully remove 2. Only grasp the valve by the valve cage. Do not touch the valve disks when doing this. Reprocessing instructions Perseus A500...
- Page 19 Reprocessing 3.4.2.5 Removing the TurboVent 2 blower module 1. Unfasten the quick release screws (A) by turning them 90° counterclockwise. 2. Remove the TurboVent 2 blower module (B) from the breathing system mount. Reprocessing instructions Perseus A500...
-
Page 20: Validated Reprocessing Procedures
28) TurboVent 2 blower (see "TurboVent 2 module blower module", page 29) Flexible breathing (see "Flexible bag arm (option) breathing bag arm (option)", page 27) 1) Cleaning with thermal disinfection is required for effective, hygienic reprocessing Reprocessing instructions Perseus A500... -
Page 21: Surface Disinfection With Cleaning
Cleaning 1. Wipe off obvious soiling with a disposable cloth soaked in surface disinfectant. Dispose of the cloth. 2. Wipe all surfaces. After that, there must no longer be any soiling visible. Reprocessing instructions Perseus A500... - Page 22 1. Soak a disposable cloth in disinfectant solution or use a ready-to-use disposable cloth. 2. Perform the surface disinfection of the breathing system mount by wiping backwards and forwards at least 3 times. Take particular care to disinfect the pneumatic connections (A). Reprocessing instructions Perseus A500...
- Page 23 – Follow the infection prevention policies and reprocessing regulations of the healthcare facility. ● If necessary, pull off the water trap (A) and empty it out or dispose of it. Observe the instructions for use for the water trap. Reprocessing instructions Perseus A500...
-
Page 24: Machine Cleaning With Thermal Disinfection
All semi-critical – – – – Drying time components depends on the load 1) For further information see: "Classification of device-specific components", page 7. Prerequisites: – The washer-disinfector has been prepared in accordance with the manufacturer's instructions. Reprocessing instructions Perseus A500... - Page 25 – Hose for flexible breathing bag arm (inner diameter 22 mm) – Hose for absorber insert (inner diameter 22 mm) – Blower mount Upper part of the breathing system ● Position the upper part of the breathing system at a slight angle (shown as example) Reprocessing instructions Perseus A500...
- Page 26 Lower part of the breathing system ● Position the lower part of the breathing system at a slight angle (shown as example) APL valve ● Positioning shown as an example Inspiratory port and expiratory port ● Positioning shown as an example Reprocessing instructions Perseus A500...
- Page 27 1. Connect one end of the breathing bag arm (A) to the hose provided (B). 2. Lay the breathing bag arm together with the hose in the load carrier. 3. Connect the other end of the hose (B) to a suitable nozzle (C). Reprocessing instructions Perseus A500...
- Page 28 1. Connect one end of the absorber insert (A) to the hose provided (B). 2. Lay the absorber insert together with the hose in the load carrier. 3. Connect the other end of the hose (B) to a suitable nozzle (C). Absorber container ● Positioning shown as an example Reprocessing instructions Perseus A500...
- Page 29 A special holder is required for the blower module. The holder must be connected to a flushing connection in the load carrier. 1. Insert the blower module (A) in the holder (B). Make sure that the locking mechanism is heard to click into place. 2. Fit the cap (C). Reprocessing instructions Perseus A500...
-
Page 30: Special Reprocessing Measures
– Place the blower module in a drying cabinet at 60 °C (140 °F) for 3 hours. – Allow the blower module to dry at room temperature for 24 hours, preferably on a mesh. The mesh will enable air to circulate. Reprocessing instructions Perseus A500... -
Page 31: Storage And Transport
Antiseptica ing agents Descogen Liquid r.f.u. Oxygenon Liquid r.f.u. Dismozon plus BODE Chemie CE Oxycide Ecolab USA Perform Schülke & Mayr SteriMax Wipes Aseptix Incidin OxyWipes Ecolab USA Robysta Kyroin (Japan) – Rely+On Virkon Du Pont Reprocessing instructions Perseus A500... -
Page 32: Reprocessing Procedures
Steam sterilization can reduce the lifespan of the TurboVent 2 blower module. Prerequisites: – The components are cleaned, disinfected, and dry. – Use a steam sterilizer that meets the requirements of the standard ISO 17665. Dräger recommends steam sterilization with fractionated vacuum. Reprocessing instructions Perseus A500... -
Page 33: After Reprocessing
– Valve plate in the inspiratory valve (red) – Valve plate in the expiratory valve (blue) If necessary, remove deposits on the valve plates with a soft cloth and reprocess once more. Reprocessing instructions Perseus A500... - Page 34 3.7.1.1 Inserting the TurboVent 2 blower module 1. Insert the TurboVent 2 blower module (A) in the breathing system mount. 2. Press down the quick release screws (B) and tighten with a clockwise rotation of 90°. Reprocessing instructions Perseus A500...
- Page 35 Perform the following steps for the inspiratory valve (B) and the expiratory valve (C): 1. Align the valves so that the recesses on the valve cages align with the corresponding lugs on the lower part of the breathing system. 2. Insert the valves. Reprocessing instructions Perseus A500...
- Page 36 1. Align the APL valve correctly. The lower dot (A) must face the user during operation. 2. Place the APL valve (B) vertically on the upper part of the breathing system (C). 3. Tighten the knurled nut (D). Reprocessing instructions Perseus A500...
- Page 37 1. Make sure the three levers (A) are rotated outward. 2. Place the upper part of the breathing system (B) on the lower part of the breathing system (C). 3. Turn the levers (A) by approx. 120° clockwise. Reprocessing instructions Perseus A500...
- Page 38 1. Insert the expiratory flow sensor (A). 2. Push in the expiratory port (B). Tighten the knurled nut. 3. Insert the inspiratory flow sensor (C). 4. Push in the inspiratory port (D). Tighten the knurled nut. Reprocessing instructions Perseus A500...
- Page 39 3. Close the holder (B) so that it engages. 4. Screw the CLIC adapter (D) on to the lower part of the breathing system. 5. Check the correct orientation of the adapter (D). The two symbols (E) must align in a vertical line. Reprocessing instructions Perseus A500...
- Page 40 1. Insert the assembled breathing system (A) vertically into the breathing system mount. 2. Turn the lever (B) clockwise by approx. 120°. The breathing system is now locked. 3. Put the breathing system cover (C) in place and click it into position. Reprocessing instructions Perseus A500...
- Page 41 1. Plug the breathing bag arm (A) onto the socket (B) on the breathing system. Tighten the two knurled screws (C). Check that the breathing bag arm is held securely. 2. Align the breathing bag arm so that collisions with other components are prevented. Reprocessing instructions Perseus A500...
- Page 42 Only use undamaged filters. 4. Attach the CO absorber (D) to the breathing system from below. Rotate it in the direction of the arrow until it reaches the stop. Follow the instructions for use for the particular soda lime. Reprocessing instructions Perseus A500...
-
Page 43: Preparation Before Next Use Of Device
Ensure the following when ventilating pediatric patients and neonates: When a fine pored filter is used close to the patient: – Do not connect the sample line between the tube and the filter, but instead directly to the filter or Y-piece. Reprocessing instructions Perseus A500... - Page 44 (C). Hang the breathing bag hanging downwards on the bag holder. Connect the breathing bag to the flexible breathing bag arm (option), (see "Fitting the flexible breathing bag arm (option)", page 41). Reprocessing instructions Perseus A500...
- Page 45 2. Screw the sample line to the patient side of the filter. Ensure a careful and patient-friendly arrangement (extensive information can be found in the corresponding chapter in the instructions for use). 3. Ensure the correct course of the sample line. 4. Do not use adapters. Reprocessing instructions Perseus A500...
- Page 46 Checking the operational readiness Prerequisites: – The device has been assembled and prepared so that it is ready for operation. Procedure: 1. Check for operational readiness with a system test; see instructions for use, chapters "Getting started" and "Test". Reprocessing instructions Perseus A500...
- Page 47 This page has been left blank intentionally. Reprocessing instructions Perseus A500...
- Page 48 Manufacturer Drägerwerk AG & Co. KGaA Moislinger Allee 53-55 23542 Lübeck Germany +49 451 8 82-0 9510563 – en © Drägerwerk AG & Co. KGaA Edition: 2 – 2021-02 Dräger reserves the right to make modifications to the medical device without prior notice.
Need help?
Do you have a question about the Perseus A500 and is the answer not in the manual?
Questions and answers