Mychef SNACK Product Manual
Hide thumbs
Also See for SNACK:
- Product manual (53 pages) ,
- Installation manual (13 pages) ,
- Technical & service manual (71 pages)

Related Manuals for Mychef SNACK


Summary of Contents for Mychef SNACK
- Page 1 SNACK Product Manual Installation, use and maintenance mychefcooking.com PRODUCT MANUAL SNACK DT.MP.SN.2103.2...
-
Page 2: Table Of Contents
INDEX 1. INTRODUCTION ................... 4 2. TECHNICAL CHARACTERISTICS ..............5 2.1. Main characteristics Mychef Snack ..............5 GENERAL SAFETY AND ACCIDENT PREVENTION REGULATIONS ....6 3.1. Personnel responsible for using the equipment ..........6 3.2. Electrical hazard ....................6 3.3. Thermal hazard...................... 6 3.4. - Page 3 7.3. Support functions ....................44 7.3.1. Reset Wi-Fi settings ................. 44 7.3.2. Show MAC address ................. 44 7.3.3. Unlink the "Mychef Control" service ............. 45 7.3.4. Desktop application for intelligent control .......... 45 7.4. Table of states ..................... 46 7.5. Recipes ......................... 46 8.
-
Page 4: Introduction
The equipment is shipped from the factory once it has been calibrated and has passed rigorous quality and safety tests that ensure its correct operation. The manufacturer will disclaim any responsibility for problems caused by improper installation, modification, use or maintenance. mychefcooking.com PRODUCT MANUAL SNACK DT.MP.SN.2103.2... -
Page 5: Technical Characteristics
Capacity 4 GN 2/3 4 GN 1/1 Table 1. Main characteristics of Mychef Snack ovens The maximum recommended food load per GN 1/1 tray is 5 Kg. The maximum recommended food load per GN 2/3 tray is 3.5 Kg. mychefcooking.com PRODUCT MANUAL SNACK DT.MP.SN.2103.2... -
Page 6: General Safety And Accident Prevention Regulations
160 cm or more high. There is a risk of injury caused by the hot contents of the trays. While the oven is in operation, avoid touching metal parts and the door glass as they may exceed 60°C. Touch only the handle and the control panel. mychefcooking.com PRODUCT MANUAL SNACK DT.MP.SN.2103.2... -
Page 7: Corrosion Hazard
DA21 cleaning products have been specially formulated for the correct cleaning and protection of Mychef ovens with automatic washing. The product contains, in addition to detergent, polish for a perfect finish. The use of this detergent is mandatory in the Mychef Snack ovens. -
Page 8: Reception, Transport And Positioning
Make sure that during transport it does not tip over and is not hit by any object. Be careful with the legs and the siphon when positioning the oven on the final location. mychefcooking.com PRODUCT MANUAL SNACK DT.MP.SN.2103.2... -
Page 9: Positioning
50mm from the rear o 500mm from the top The equipment should be placed on a Mychef support table or wall mount. If there are sources of heat or steam near the equipment (stove, grill, iron, deep fryer, pasta cooker, kettle, tilting frying pan etc.), these must be at a distance of more than 1 metre. - Page 10 Be extremely careful with the cooling areas of the oven. If it sucks in vapours or hot air it can drastically reduce the life span of the components. For the installation of Mychef stacked ovens, follow the instructions supplied with the corresponding stacking kit.
-
Page 11: Installation
In any case, respect the regulations in force for the connection of the equipment to the low voltage network. Before starting the electrical installation, check that the electrical requirements of the oven and the power supply are the same. mychefcooking.com PRODUCT MANUAL SNACK DT.MP.SN.2103.2... -
Page 12: Three-Phase Connection 400V 3L+N
Never connect a phase to neutral or ground. Check that the installation voltages correspond to those of the equipment. The following subchapters show the three possible types of connections for Mychef ovens. The voltage of each oven can be found on its identification sticker. -
Page 13: Water Connection
Copper (Cu) less than 0.05 mg/L Conductivity less than 20uS/cm Use of descaler and Mychef filter mandatory. The use of water with different characteristics than those indicated may cause serious problems in the components of the oven, such as corrosion in the cooking chamber or the glass, premature failure of the solenoid valves, etc. -
Page 14: Water Connection Kit To Carafe
5.3. Vapour condensation hood Refer to the installation manual supplied with the fume hood for installation. The vapour condensation hood is an optional extra. The hood can be installed once the oven is installed. mychefcooking.com PRODUCT MANUAL SNACK DT.MP.SN.2103.2... -
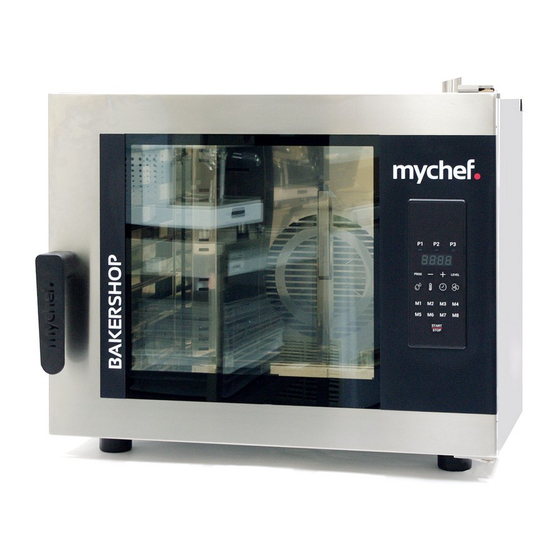
Page 15: Use
In addition, it has eight quick access programs. The figure below shows the control panel for the Mychef Snack ovens. It consists of a central screen with displays, indicators, and buttons. - Page 16 The functionality of each of them is explained below: Figure 5. Control panel detail mychefcooking.com PRODUCT MANUAL SNACK DT.MP.SN.2103.2...
- Page 17 If the oven is on but not baking, slight pressure will start the preheating. START/STOP button If the oven is preheating, slight pressure will skip the preheating. If the oven is on and baking, slight pressure will cancel the baking cycle. Table 6. Control panel description mychefcooking.com PRODUCT MANUAL SNACK DT.MP.SN.2103.2...
- Page 18 The fan speed is shown with an F in the first digit. If the convection fan is on high speed, HI is displayed. Otherwise, if the convection fan is at a low speed, LO appears. mychefcooking.com PRODUCT MANUAL SNACK DT.MP.SN.2103.2...
- Page 19 The two digits on the right show the value of the parameter. Refer to the chapter on the configuration menu for more information. Table 7. Description of messages on the central screen mychefcooking.com PRODUCT MANUAL SNACK DT.MP.SN.2103.2...
-
Page 20: Switching On The Equipment
TEMPERATURE and TIME buttons respectively. By pressing the START/STOP button, the oven will start to preheat the chamber and will stop when it has reached a level determined by the oven according to the temperature mychefcooking.com PRODUCT MANUAL SNACK DT.MP.SN.2103.2... - Page 21 At this point, the time indicator will display the keyword "End", the oven will beep for one second and the interior light will light up until the user finishes cooking by pressing the START/STOP button slightly. mychefcooking.com PRODUCT MANUAL SNACK DT.MP.SN.2103.2...
- Page 22 At the top of the control panel there are three buttons, P1, P2, and P3, each corresponding to the cooking phases. Associated with each button is an indicator, which shows the status of the phase. mychefcooking.com PRODUCT MANUAL SNACK DT.MP.SN.2103.2...
-
Page 23: Start Of The Cooking Cycle
If a parameter other than time is selected on the display, the last point of this will flash to indicate that cooking is in progress. mychefcooking.com PRODUCT MANUAL SNACK DT.MP.SN.2103.2... -
Page 24: End Of Cycle
In any cooking mode the user can select the speed of the convection fan that best suits his needs. To do so, press the fan speed button. Then select the appropriate speed with the +/- buttons. mychefcooking.com PRODUCT MANUAL SNACK DT.MP.SN.2103.2... -
Page 25: Saving A Program
6.1.7. Retrieve a program To recall a program, press the PROG key slightly and set the program number where you want to save the settings with the +/- keys. The figure below shows program 1. mychefcooking.com PRODUCT MANUAL SNACK DT.MP.SN.2103.2... -
Page 26: Quick Memories
When a power failure and subsequent restoration of the power supply occur, the oven recovers the cooking in progress (if any) and continues it with the same parameters as before the power failure. mychefcooking.com PRODUCT MANUAL SNACK DT.MP.SN.2103.2... -
Page 27: Errors And Alarms
NOT CONNECTED ERROR PROBE1 TEMP SENSOR Reserved. Not used. SHORTED ERROR PROBE2 TEMP SENSOR Reserved. Not used. NOT CONNECTED ERROR PROBE2 TEMP SENSOR Reserved. Not used. SHORTED ERROR PROBE3 TEMP SENSOR Reserved. Not used. NOT CONNECTED mychefcooking.com PRODUCT MANUAL SNACK DT.MP.SN.2103.2... - Page 28 ERROR CLEANING PROGRAM NOT Reserved. Not used. TERMINATED ERROR CLEANING TEMPERATURE Reserved. Not used. TOO HOT ALARM RECOVERY TEMP TOO Reserved. Not used. ERROR INVERTER Reserved. Not used. Table 8. Errors, alarms, and possible solutions mychefcooking.com PRODUCT MANUAL SNACK DT.MP.SN.2103.2...
-
Page 29: Remote Control Use
To link a device (mobile phone, tablet, or computer) it is first necessary to set up a Wi-Fi connection in the oven. The following section (7.1.2 Wi-Fi connectivity) explains in detail how to set up this configuration. It is recommended to use the Google Chrome browser for better performance. mychefcooking.com PRODUCT MANUAL SNACK DT.MP.SN.2103.2... -
Page 30: Wi-Fi Connectivity
Figure 22. Access point of the oven from Windows Then, this Wi-Fi network will be selected on the device with which we want to link the oven. After selecting the Wi-Fi network, enter the code or password given by Mychef and wait for a configuration web portal to open automatically. - Page 31 In the field "Mychef login email" you must enter the username that was created previously ( 7.1.1 Creating a new user). It is important to write down the MAC address that appears in the different points of the configuration, since this is unique for each device and will be necessary to link the equipment to the remote control.
-
Page 32: Linking The Oven To The Device (Mobile Phone, Tablet Or Computer)
Once the Wi-Fi network is configured, it is important to wait a few minutes until the Wi-Fi network disappears (Mychef + MAC address), if this does not happen it means that the configuration data entered to authenticate the Wi- Fi network is not correct, then the process must be started again. -
Page 33: Control Panel
7.1.4. Control panel In the Figure 26 shows the control panel for the ovens linked to the user account. The functionality of each panel element is explained below. mychefcooking.com PRODUCT MANUAL SNACK DT.MP.SN.2103.2... - Page 34 Figure 26. Control panel detail mychefcooking.com PRODUCT MANUAL SNACK DT.MP.SN.2103.2...
- Page 35 Indicates the value of the cooking time that has passed indicator (Real Point) since the start of the cooking process. Fan speed selection button, can be low speed (Slow) or Fan speed button high speed (Fast). mychefcooking.com PRODUCT MANUAL SNACK DT.MP.SN.2103.2...
-
Page 36: Google Home Setup And Voice Assistant
Voice Assistant is to sign in with a Google account on our mobile device and download the Google Home and Google Assistant application. Mychef's Intelligent Voice Control is currently only available in English, so you need to change the language of the mobile device you are using to English to enjoy the full functionality. - Page 37 1. On the app's Home screen, select Add "+" and then "Set up device”. Figure 28. Google Home application captures steps to be followed 2. Select the option "Work with Google" and then search the list of suppliers for the "Mychef Control" service. mychefcooking.com PRODUCT MANUAL SNACK DT.MP.SN.2103.2...
- Page 38 Whenever you add or remove an oven in the control web application, the Google Home startup screen will automatically update with the new devices, otherwise you need to unlink your account from the Mychef Control service and repeat the steps in this section to make the devices appear or disappear on the Google Home startup screen.
- Page 39 Figure 30. Authentication server screen and messages that appear while validating and synchronizing information Figure 31. Google Home screen where all the ovens linked to the user's account will appear, along with all the smart devices that the user has associated with his Google account mychefcooking.com PRODUCT MANUAL SNACK DT.MP.SN.2103.2...
-
Page 40: Voice Commands For Oven Control
"OK Google" or "Hey Google", will open the Google Assistant which will listen to the voice The word "Mychef" appears in these commands to refer to the oven in question, but this word can be replaced by the name you want to give the oven once it is added to the web control. -
Page 41: Adding Automated Routines
1. Go to settings in Google Assistant and select the "Routines" icon. mychefcooking.com PRODUCT MANUAL SNACK DT.MP.SN.2103.2... - Page 42 Figure 33. Google Assistant application capture 2. Then manage routines and press the add icon (+). Figure 34. Google Assistant Routines capture mychefcooking.com PRODUCT MANUAL SNACK DT.MP.SN.2103.2...
- Page 43 Google Assistant application The word "Mychef" appears in these commands to refer to the oven in question, but this word can be replaced by the name you want to give the oven once it is added to the web control.
-
Page 44: Support Functions
Once off, press and hold the temperature icon on the front panel until you hear a "Click". • The central display will show the digits of the MAC address in pairs in an orderly fashion. mychefcooking.com PRODUCT MANUAL SNACK DT.MP.SN.2103.2... -
Page 45: Unlink The "Mychef Control" Service
Wi-Fi access point. 7.3.3. Unlink the "Mychef Control" service To unlink the Google account to the "Mychef Control" service, follow the steps in section 7.2.1 until the list of service providers appears, this screen will show that we are linked to the "Mychef Control"... -
Page 46: Table Of States
The data to be entered are the name of the recipe, desired temperature and humidity, cooking time and fan speed. In order to add the shortcut to the home screen, the Chrome application must have permissions to do this. mychefcooking.com PRODUCT MANUAL SNACK DT.MP.SN.2103.2... - Page 47 Figure 40. Recipe creation form If a recipe is selected, the cooking parameter input fields are locked with the values of the recipe in question. To change the cooking values again, select Manual cooking. mychefcooking.com PRODUCT MANUAL SNACK DT.MP.SN.2103.2...
-
Page 48: Maintenance
Door water drain Weekly Interior-exterior door compartment Weekly Table 12. Cleaning frequencies for Mychef ovens Before starting any cleaning program, any trays, grids, grates, probes or other accessories inside the chamber must be removed. 8.1.1. Suction The piece that separates the cooking chamber with the fan and the heating element can be removed to clean that area. -
Page 49: Door Gasket
To clean this rubber seal, a cloth soaked in water and a little bit of dishwasher is enough. Then the whole area is rinsed out and dried well. The gasket should not be removed from its contour for cleaning, it should only be removed when it needs to be replaced. mychefcooking.com PRODUCT MANUAL SNACK DT.MP.SN.2103.2... -
Page 50: Outer Housing
To clean this compartment, the outer door must be opened and the inner door clips opened so that the door can be opened and the chamber between the outer and inner door can be accessed. Figure 42. Inner glass clamp mychefcooking.com PRODUCT MANUAL SNACK DT.MP.SN.2103.2... -
Page 51: Preventive Maintenance
These periodic checks must be carried out by an authorized service technician. The following table shows the operations to be performed on Mychef ovens at each of the revisions. The table is circular, and from 20.000h of use or 10 years would start counting again on the left of the table. - Page 52 Before any handling for maintenance or repair, the equipment must be disconnected from the power supply. If the power cable is damaged, it must be replaced by your service department or similarly qualified personnel in order to avoid risks. mychefcooking.com PRODUCT MANUAL SNACK DT.MP.SN.2103.2...
Need help?
Do you have a question about the SNACK and is the answer not in the manual?
Questions and answers