
Related Manuals for Mychef iSENSOR MVPB1640


Summary of Contents for Mychef iSENSOR MVPB1640
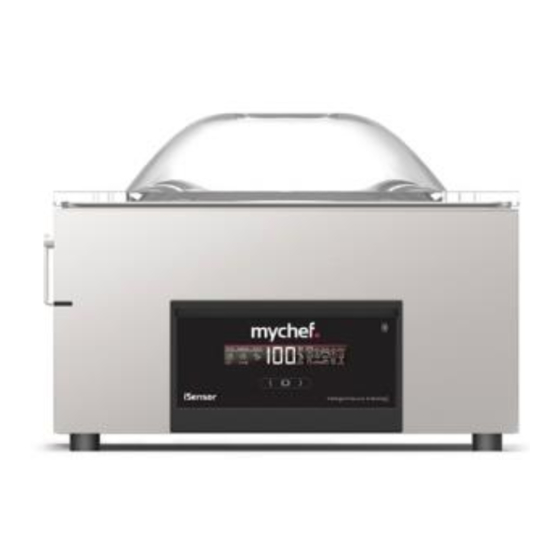
- Page 1 iSENSOR iSENSOR tabletop Product Manual Installation, use and maintenance PRODUCT MANUAL ISENSOR TABLETOP - DT.MP.IM.22.01.2 mychefcooking.com...
-
Page 2: Table Of Contents
INDEX 1. INTRODUCTION ..................... 4 2. TECHNICAL CHARACTERISTICS..............5 2.1. Functional equipment ..................... 5 2.2. Características constructivas ................... 5 3. 3. GENERAL STANDARDS FOR SAFETY AND ACCIDENT PREVENTION ..6 3.1. Personnel in charge of the use of the appliance ..........6 3.2. - Page 3 7.6. Owner liability ......................39 mychefcooking.com 210208_A PRODUCT MANUAL ISENSOR TABLETOP - DT.MP.IM.22.01.2...
-
Page 4: Introduction
1. INTRODUCTION This document has been prepared in order to provide reliable and helpful information regarding the use of the appliance. The manufacturer waives all liability, whether express or implied, for any possible errors or omissions that the manual may contain. Before operating or using this appliance, read this manual carefully and thoroughly. -
Page 5: Technical Characteristics
Smart mode for packing liquids and porous products. • Double 2x3 mm seal for tabletop iSensor vacuum packers. • Equipped with Bluetooth 4.0 or higher for connection with the “Mychef iSensor” app available on iOS and Android, for the management of packaging programs and label printing. •... -
Page 6: General Standards For Safety And Accident Prevention
3. 3. GENERAL STANDARDS FOR SAFETY AND ACCIDENT PREVENTION 3.1. Personnel in charge of the use of the appliance The use of the appliance is reserved for trained personnel. Personnel must be familiar with the safety standards and the instructions for use. -
Page 7: Installation
4. INSTALLATION Once the appliance has been received, remove the packaging carefully and check the equipment against the label (located on the rear-left side) to be sure that this is the requested appliance. Once the appliance has been checked, read this “Product Manual: Installation, use and maintenance”... -
Page 8: Use
5. USE 5.1. Control panel The iSensor vacuum packers from Mychef comprise an LCD screen and three push-buttons. Do not clean the vacuum packer screen cover with alcohol-based liquids, solvents, acids or detergents as these may damage the cover and affect the display. - Page 9 Function Description 1 Modes Labels of the 3 operating modes: Automatic, Manual and Self Cleaning. 2 “AUTO” icon Automatic mode indicator. 3 “MANUAL” icon Manual mode indicator. 4 “CLEAN” icon Self-cleaning mode indicator. 5 “OFF” icon Indicator of the vacuum packer shutdown process. Program Program display in the Manual mode.
-
Page 10: Automatic Scs Calibration
Figure 2. Buttons for navigating the screen 5.2. Automatic SCS Calibration Tabletop iSensor vacuum packers have a fully automatic calibration system, Self-Calibration System (SCS), patented by Mychef. This automatic vacuum percentage recalibration algorithm has the following advantages: • Calibration without user intervention... -
Page 11: Connecting And Turning On The Appliance
5.3. Connecting and turning on the appliance When the appliance is connected to the electricity grid, a start-up process takes place where all internal values are initialised, and safety and control checks are carried out to ensure optimum control of the vacuum packing. This process will be indicated on the screen by the simultaneous flashing of all segments for a number of seconds. -
Page 12: Gas Injection
In some foods, it may be interesting or advisable to use antioxidant gas to improve the food preservation or also mixtures of gas to avoid crushing the packaged product. This option is available with all Mychef iSensor vacuum packers. The following is a description of the precautions to be taken into account when carrying out vacuum packaging in a protective atmosphere: •... -
Page 13: Automatic Mode
Figure 5. Automatic mode The iVAC control algorithm, patented by Mychef, detects and finalises the vacuum process automatically according to the type of food and its physical conditions. It is especially suitable for packing porous foods and liquids, since it keeps them from coming to a boil and spilling out of the bag. - Page 14 This mode has 10 packing programs, from 0 to 9. They allow you to set the packing parameters for a specific purpose, such as making marinades or vacuum packing products with bones that may damage the bag. The programs also make it possible to save these parameters in the memory and load them quickly each time you want to perform packing processes with the same characteristics.
- Page 15 Gas percentage: This parameter determines the percentage value of the gas with which the chamber will be filled. This value is dependent upon the vacuum percentage selected in the previous parameter. The vacuum level minus the gas level must be at least 50%. This parameter is represented by the “GAS”...
-
Page 16: Autoclean
Gas injection is compatible with the multi-cycle mode, although keep in mind that the gas will only be injected in the last repetition, as with sealing. 5.5.3. Autoclean When the vacuum pump’s oil has taken on a whitish shade, due to water condensation, it can be removed using this mode. -
Page 17: Errors
the cooling of the bag, and the SEAL display increases progressively to 5.0 s at this stage. The last stage is the restoration of atmospheric pressure (AIR). The display will show the vacuum percentage in the chamber decreasing. The atmospheric pressure restoration type (SOFT or FAST) will also light up during this stage. - Page 18 Error Description Solution Open the lid. If the error persists, call the technical service, Lowered lid indicating the error code. The system has detected that the vacuum pump has operated too long to reach a certain vacuum level. Calibrate the system. If the Error in the vacuum calibration is carried out successfully, conduct the test again.
-
Page 19: App Use
The following application is not supported on devices with Bluetooth connectivity lower than version 4.0. 6.2. Download and activate the APP 6.2.1. For iOS (Apple) Download the Mychef iSensor application from the AppStore: Figure 9. App download for iOS mychefcooking.com 210208_A PRODUCT MANUAL ISENSOR TABLETOP - DT.MP.IM.22.01.2... - Page 20 Activate location services and Bluetooth: Figure 10. Location and Bluetooth activation for iOS mychefcooking.com 210208_A PRODUCT MANUAL ISENSOR TABLETOP - DT.MP.IM.22.01.2...
-
Page 21: For Android
6.2.2. For Android Download the Mychef iSensor application from the Play Store: https://play.google.com/store/apps/details?id=com.distform.isensor&hl=es&gl=US Figure 11. App download for Android mychefcooking.com 210208_A PRODUCT MANUAL ISENSOR TABLETOP - DT.MP.IM.22.01.2... - Page 22 Activate location services and Bluetooth: Figure 12. Location and Bluetooth activation for Android mychefcooking.com 210208_A PRODUCT MANUAL ISENSOR TABLETOP - DT.MP.IM.22.01.2...
-
Page 23: App Operation
6.2.3. App operation • Open the Mychef iSensor app: Note: When the application asks which permissions to allow, accept all permissions. Note: Ensure that both the printer and the vacuum packer are connected to a power supply and, in the case of the printer, that it is running. - Page 24 • Connecting to devices Select the device to which you want to connect, in our case we will connect first to the vacuum packaging machine and then to the printer: Note: It is only possible to establish a connection with the vacuum packaging machine, in this case only the use parameters can be displayed, and the 10 packaging programs can be edited.
- Page 25 Figure 16. Printer serial number The vacuum packer is sending its program parameters to the application Figure 17. Synchronization of the iSensor vacuum packer mychefcooking.com 210208_A PRODUCT MANUAL ISENSOR TABLETOP - DT.MP.IM.22.01.2...
- Page 26 Figure 18. Printer selection and synchronization Note: When you press "Select device" the printer should already appear in the list, otherwise make sure that the printer is connected to the power supply and switched on. If, once the vacuum packer has been switched on, "Scan again" is pressed, the connection will be interrupted, and the connection process must be repeated.
- Page 27 Both devices are correctly connected. Next, we will see the different functions we can perform. Editing the 10 vacuum packers programs Use parameters information of the vacuum packer Editing label fields Figure 19. Correctly connected devices mychefcooking.com 210208_A PRODUCT MANUAL ISENSOR TABLETOP - DT.MP.IM.22.01.2...
- Page 28 • Interaction with devices Editing programs: Figure 20. iSensor program editing o Print Label: If the packaging machine is connected, we can choose if we want program "X" to print a label or not. o Program: We can navigate through the 10 programs that the iSensor vacuum packer has. o Name: We can name the different programs what we want.
- Page 29 Sealing time, you can choose the functions patented by Mychef as iVac and iSeal so the vacuum packer itself regulates these parameters smartly. Figure 21. Select custom parameters or smart mode (iVac e iSeal) o Inert Gas %: Choose the percentage of inert gas that you want to introduce into the vacuum packer.
- Page 30 If the program is sent to the vacuum packer by pressing the following button: Figure 22. Sending the program to the vacuum packer If the "Print Label" option is activated, the application will not redirect you to configure the label. Otherwise, the program will be sent to the printer, and we will return to the main menu.
- Page 31 Label editing: As previously mentioned, if we have just sent a program to the vacuum packer that requires the printing of a label, the following screen will open directly. Figure 23. Label edition Here we can fill in the fields that will appear on the label. As we said before, the "Product"...
- Page 32 Figure 24. Access to edit or modify labels Note: Once everything is configured, label printing will be done as long as: The phone with the application is within reach of the printer and vacuum packer. The application is left running in the background (closing the application manually will not print labels and will result in loss of communication between both devices).
-
Page 33: Maintenance
7. MAINTENANCE Before the appliance is handled for cleaning, maintenance or repair, it should be disconnected from the electricity grid. If the power cable is damaged, it should be replaced by the manufacturer, its aftersales service or by personnel with similar qualifications in order to avoid danger. -
Page 34: Sealing Bar
7.3. Sealing bar Periodically check the condition of the Teflon adhesive tape and the sealing tape. They must be in perfect condition and not have any defects. 7.4. Water-tight seal on the lid Periodically check the condition of the water-tight seal on the lid. It must be in perfect condition. -
Page 35: Change The Pump Oil
Illustration 1. Rear display for checking the oil level 7.5.2. Change the pump oil Material needed for the oil change: • Material: Synthetic oil SAE 10 VSL32 Model Oil quantity (l) 0,25 0,35 0,35 0,45 0,45 mychefcooking.com 210208_A PRODUCT MANUAL ISENSOR TABLETOP - DT.MP.IM.22.01.2... - Page 36 Illustration 2. Oil replacement kit • Tools: o Number 3 Allen wrench o Adjustable wrench Warning: Before removing any components, verify that the appliance is disconnected from the electricity grid. Step 1 → Remove the two rear screws Using the number 3 Allen wrench, remove the two rear screws on the sides (do not remove the front screws because the well pivots on them).
- Page 37 Step 2 → Open the outer casing of the vacuum packer As with the hood of a car, lift the back of the vacuum packer until its limit. Illustration 4. Open the outer casing Step 3 → Open the plug to empty the pump Using an adjustable wrench, remove the plug to drain the oil from the pump.
- Page 38 Place a container below the hole for the oil to drain into, in order to keep the vacuum packer shelf clean. Illustration 5. Oil drainage When all of the oil has drained out, replace the plug. Step 4 → Open the oil filling plug Using the adjustable wrench, open the oil filling plug and use a funnel to pour the oil up to the vacuum packer maximum level.
- Page 39 Illustration 6. Remove the oil filling plug and refill with new oil The oil level must be between the MIN and MAX levels indicated by the pump’s display window. Step 5 → Close the oil plug Using the adjustable wrench, close the oil filling plug and perform these steps in reverse to make the appliance operational again.
Need help?
Do you have a question about the iSENSOR MVPB1640 and is the answer not in the manual?
Questions and answers