Table of Contents
Advertisement
Quick Links
Advertisement
Table of Contents

Related Manuals for Mychef goSensor TGS8F1E2


Summary of Contents for Mychef goSensor TGS8F1E2
-
Page 2: Table Of Contents
Table of Contents INTRODUCTION............................ 2 TECHNICAL FEATURES .......................... 2 Functional equipment ......................... 2 Design features ........................... 2 General measurements of goSensor countertop models ............3 Vacuum chamber measurements and countertop model goSensor specifications ....4 GENERAL STANDARDS FOR SAFETY AND ACCIDENT PREVENTION ............5 Personnel in charge of the use of the appliance ................. -
Page 3: Introduction
INTRODUCTION This document has been prepared in order to provide reliable and helpful information regarding the use of the appliance. The manufacturer waives all liability, whether express or implied, for any possible errors or omissions that the manual may contain. Before operating or using this appliance, read this manual carefully and thoroughly. -
Page 4: General Measurements Of Gosensor Countertop Models
2.3 General measurements of goSensor countertop models Small flat-lid goSensor Model goSensor Models with dome lids REFERENCES TGS8F1E2 TGS8D1E2 TGM101E2 TGM161E2 TGM201E2 TGL201E2 TGL202E2 Dimension A (mm) Dimension B (mm) Dimension C (mm) Dimension D (mm) Dimension E (mm) Table 1. goSensor general dimensions... -
Page 5: Vacuum Chamber Measurements And Countertop Model Gosensor Specifications
2.4 Vacuum chamber measurements and countertop model goSensor specifications REFERENCES TGS8F1E2 TGS8D1E2 TGM101E2 TGM161E2 TGM201E2 TGL201E2 TGL202E2 Interior chamber dimensions 328x385x115 328x385x162 412x453x200 560x465x210 (mm) Pump capacity (m3/h) Approximate machine cycle (seconds) Sealing bar length (mm) 455 + 455 Approx. weight (kg) 48,5 Power (kW) 0.350... -
Page 6: General Standards For Safety And Accident Prevention
GENERAL STANDARDS FOR SAFETY AND ACCIDENT PREVENTION 3.1 Personnel in charge of the use of the appliance The use of the appliance is reserved for trained personnel. Personnel must be familiar with the safety standards and the instructions for use. 3.2 Electrical hazard Work on the electrical power source and access to live parts is only permitted to skilled personnel and is under their responsibility. -
Page 7: Installation
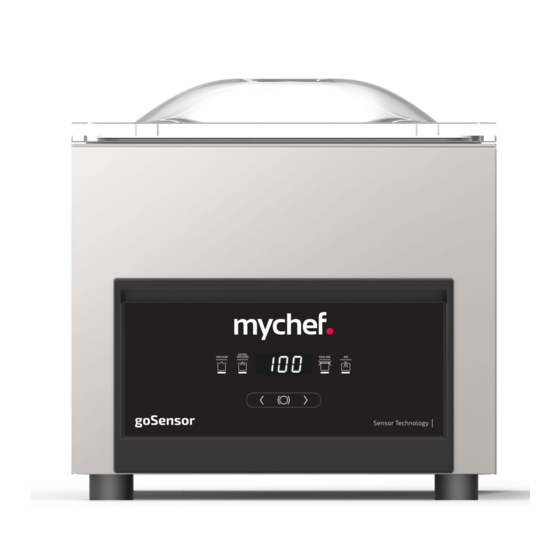
10 Maintenance). CONTROL PANEL The goSensor vacuum packers from Mychef consist of a 4-digit screen with 7 segments, three push-buttons and four LEDs that indicate the status of the appliance during the packing cycle. Do not clean the vacuum packer screen cover with alcohol-based liquids, solvents, acids or detergents as these may damage the cover and affect the display. - Page 8 Zone A (Figure 1): The LEDs tell you the status of the vacuum packer when you are carrying out a packing cycle. Zone B (Figure 1): Displays the values of the various packing parameters: vacuum %, seconds, minutes, air restoration mode and errors. Zone C (Figure 1): Corresponds to the buttons that allow you to configure the desired packing parameters and to cancel a cycle if you wish (centre button).
- Page 9 Mode: “Off” Turn off the vacuum packer Figure 4. “OFF” mode In this mode the vacuum packer will turn off automatically after a few seconds. If you wish to turn it off immediately, you will need to press the centre button. Vacuum packing settings menu To access this menu, you will need to press the centre button when the vacuum packer is in the “SET”...
-
Page 10: Calibration
CALIBRATION 6.1 Automatic SCS Calibration goSensor countertop sensor vacuum packers have a fully automatic calibration system, Self Calibration System (SCS), patented by Mychef. This automatic vacuum percentage recalibration algorithm has the following advantages: • Calibration without user intervention The appliance automatically detects optimal calibration conditions and, completely autonomously, can recalibrate itself according to the following physical changes: •... -
Page 11: Operation
OPERATION 7.1 Connecting and turning on the appliance When the appliance is connected to the electricity grid, a start-up process takes place where all internal values are initialised and safety and control checks are carried out to ensure optimum control of the vacuum packing. This process will be indicated on the screen by the simultaneous flashing of all segments for a number of seconds. -
Page 12: Operating Modes
Once the vacuum packer is connected to the electricity grid and the start-up process is finalised (whether the pump status values are checked or not), the appliance will turn itself off. The user is required to turn the appliance on in order to begin operating. The appliance can be turned on in three different ways: Pressing any of the three buttons. - Page 13 Figure 8. Modifying the packing parameters in manual mode All parameters are described below in the order of configuration: Vacuum percentage: This parameter sets a vacuum value expressed as a percentage. Once the pump reaches this value, it will disconnect and it will proceed to the next step. The goSensor vacuum packer also has a liquid packing program that will appear after 100% vacuum, and it will be indicated on the display by “H2O”.
-
Page 14: Autoclean
This parameter is identified by the “AIR” icon and each type of restoration is selected using the icons located below: “FAST”, “SOFT” and “STOP”. 7.2.2 Autoclean: When the vacuum pump’s oil has taken on a whitish shade, due to water condensation, it can be removed using this mode. - Page 15 the cooling of the bag, and the SEAL display increases progressively to 5.0 s at this stage. The last stage is the restoration of atmospheric pressure (AIR). The display will show the vacuum percentage in the chamber decreasing. The atmospheric pressure restoration type (SOFT, FAST or STOP) will also be illuminated during this stage.
-
Page 16: Errors
ERRORS The device uses algorithms that detect abnormal situations which could lead to malfunctioning. The user is notified of these situations with an error screen such as the one shown below: Figure 9. Error screen The table below shows the errors and possible solutions: Error Description Solution... -
Page 17: Maintenance
MAINTENANCE Before the appliance is handled for cleaning, maintenance or repair, it should be disconnected from the electricity grid. If the power line is damaged, it should be replaced by the manufacturer, its after- sales service or by personnel with similar qualifications in order to avoid danger. 9.1 Cleaning Clean the vacuum packer regularly and carefully. -
Page 18: Maintenance Schedule
MAINTENANCE SCHEDULE First 100 operating hours Change the oil Weekly or when the “CLN” message appears Carry out an auto-clean program on the vacuum packer Check the oil level Check the condition of the sealing bar Check the condition of the water-tight seal Weekly or every 500 hours of operation Change the oil Every 1000 hours of operation... -
Page 19: Change The Pump Oil
10.2 Change the pump oil Material needed for the oil change: • Material: Synthetic oil SAE 10 VSL32 (countertop models) Figure 2. Oil replacement kit • Tools: Number 3 Allen wrench. Adjustable wrench Warning: Before removing any components, verify that the appliance is disconnected from the electricity grid and the water supply. - Page 20 Rear side section Figure 3. Rear screws Step 2 → Open the outer casing of the vacuum packer As with the hood of a car, lift the back of the vacuum packer until its limit. Figure 4. Open the outer casing Step 3 →...
- Page 21 Figure 5. Remove the oil drainage plug Place a container below the hole for the oil to drain into, in order to keep the vacuum packer shelf clean. Figure 6. Oil drainage When all of the oil has drained out, replace the plug. Step 4 →...
- Page 22 Figure 7. Remove the oil filling plug and refill with new oil The oil level must be between the MIN and MAX levels indicated by the pump’s display window. Step 5 → Close the oil plug Using the adjustable wrench, close the oil filling plug and perform these steps in reverse to make the appliance operational again.
-
Page 23: Other Maintenance Operations
10.3 Other maintenance operations Other maintenance operations, such as changing the oil filter, must be conducted by specialised technicians, your distributor, or the technical service. 10.4 Owner liability THE OWNER IS RESPONSIBLE FOR REGULAR MAINTENANCE. TO KEEP THE WARRANTY VALID, THE OWNER MUST PROVE THAT MAINTENANCE HAS BEEN CARRIED OUT. -
Page 24: Specifications
SPECIFICATIONS The vacuum packer has a features plate with the following specifications and references: Manufacturer: Distform, S.L. C/Tramontana, s/n 25123 Torrefarrera (Lleida) Item: Serial number: Electrical features Year manufactured. DISTFORM, SL. (SPAIN) CIF: B-25262726 Year: 2010 Model: TGM201E2 Serial number: 111111/001 Voltage: 230Vac Frequency: 50/60 Hz Power: 750 W... -
Page 25: General Electrical Diagram Countertop Gosensor Small, Medium And Large
11.1 General electrical diagram Countertop goSensor SMALL, MEDIUM AND LARGE... -
Page 26: Pneumatic Diagram
11.2 Pneumatic diagram VACUUM PACKAGE CYLINDERS ATMOSPHERE IN GAS IN Gas models only...
Need help?
Do you have a question about the goSensor TGS8F1E2 and is the answer not in the manual?
Questions and answers