
Related Manuals for HealthCare International PTX Gym


Summary of Contents for HealthCare International PTX Gym
- Page 1 HealthCare International, Inc. PO Box 1509, Langley, WA 98260 www.HciFitness.com – sales@hcifitness.com P: (206) 739-5400 or (800) 398-9121...
-
Page 3: Table Of Contents
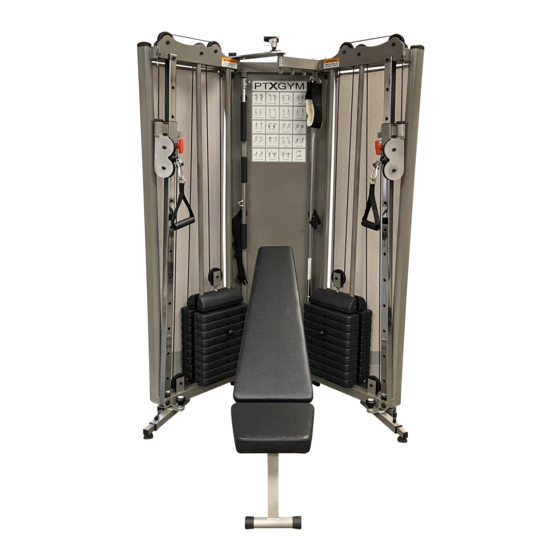
Table of Contents Safety Precautions ........................ 2 Pre-Assembly Note ....................... 3 Assembly Instructions ......................4 Storing the PTX Gym ......................11 Exercise Poster ........................13 Exploded Diagram ......................14 Parts List ..........................15... -
Page 4: Safety Precautions
Also, please note the following safety precautions: Expand and Lock the Front and Rear Stabilizers on the PTX Gym before use. Check that the Stabilizers and Safety Latch are secure before each use of the PTX Gym 1. -
Page 5: Pre-Assembly Note
PTX Folding Home Gym please review the operator’s manual and product tips to maximize your workout experience. HealthCare International is a leading supplier and distributor of innovative products for Health, Wellness, Fitness & Active Aging. Visit our website – www.HCIFitness.com for information on all of our products. -
Page 6: Assembly Instructions
Assembly Instructions Be sure that the area is clear before assembling the PTX Gym. Only move the PTX Gym in the folded position with the top safety latch locked. STEP 1: Locate pin #1, pull down on the handle lever to release the safety latch on the... - Page 7 STEP 2: Slowly pull open each side of the PTX Gym until fully extended. (Reference item 2)
- Page 8 Assembly Instructions STEP 3: After opening the PTX Gym, secure the top locking lever and make sure it is locked in place. Make sure that the locking lever is secure before each use. (Reference item 3 and detail B) STEP 4: Pull out the left rear stabilizer (4) from beneath the weight stack.
- Page 9 Assembly Instructions STEP 6: Pull out the right rear stabilizer (10) from beneath the weight stack. Aligned the holes and lock the pin in place. (11). (Reference item 10 and 11, and detail E) STEP 7: Loosen the right front knob and pull out the front slide stabilizer. Align the hole with the knob and tighten the knob in place.
- Page 10 Assembly Instructions STEP 8: You can now add the removable weights to the weight stack. (Reference item 16 and 17) Please note that the weights can be removed and used as dumbbells for free weight training. Each Weight is 10 lbs.
- Page 11 (Reference item 18) Caution: Be sure that the area is clear and to hold the bench before unlocking the bench from the PTX Gym STEP 10: To lower the bench, hold the bench and then unlock the belt and put down the...
- Page 12 To adjust the bench, lift the seat back and secure the seat back support tube in the desired position. (Reference item 22) Congratulations your PTX Gym is now ready to use! Be sure to check that all locking connections are made and secure before...
-
Page 13: Storing The Ptx Gym
Storing the PTX Gym Be sure that the area is clear before folding the PTX Gym into the stored position. STEP 1: Fold the bench into the stored position. Lower the seat back into the flat position then lift the bench and lock the bench in place. (Reference detail F) - Page 14 STEP 3: Release the top safety lock and fold the PTX Gym together. Relock the top safety lock in detail A immediately after closing the PTX Gym. Be sure that the top safety lock is in the locked position before moving...
-
Page 15: Exercise Poster
Exercise Poster... -
Page 16: Exploded Diagram
Exploded Diagram... -
Page 17: Parts List
Parts List Q’TY No Q’TY Description Description Middle Frame 31 63 Pulley Right Frame (with Mesh) 33 Knob Left Frame (with Mesh) 34 Plastic Wash 38X13 Bench Support Frame 35 3-8 teeth Nylon Nut Height Adjustable Tube(Left) Hexagonal bolt Height Adjustable Tube(Right) Hexagonal bolt Wheel Moving Tube Hexagonal bolt... - Page 18 Parts List Q’TY No Q’TY Description Description 68 Hanger set-B 91 Spring Wash 69 Washer 6X16X1.5t 1-2 teeth Nuts 70 Safety Hook 94 Insert Part 50-38 71 Nylon Nut M6 95 Cable Set for GYM 72 Pull Pin 96 Tapping screw M4X15L 73 Nut Phillips screw M4-15L...
Need help?
Do you have a question about the PTX Gym and is the answer not in the manual?
Questions and answers