
Related Manuals for HealthCare International PhysioMax TBT-1000


Summary of Contents for HealthCare International PhysioMax TBT-1000
- Page 1 Total Body Trainer OWNER’S MANUAL HealthCare International, Inc. PO Box 1509, Langley, WA 98260 www.HCIFitness.com p.360.321.7090...
-
Page 2: Safety Precautions
SAFETY PRECAUTIONS This exercise equipment was designed and built for optimum safety. However, certain precautions apply whenever you operate a piece of exercise equipment. Be sure to read the entire manual before assembly and operation of this machine. Also, please note the following safety precautions: 1. - Page 3 PhysioMax TBT-1000 Total Body Trainer Thank you for your purchase! At HealthCare International, our goal is to provide high-quality and affordable products for Health, Wellness, Fitness & Active Aging. The PhysioMax allows users to safely use their arms and legs completely independent from each other, using a unique patent pending design.
-
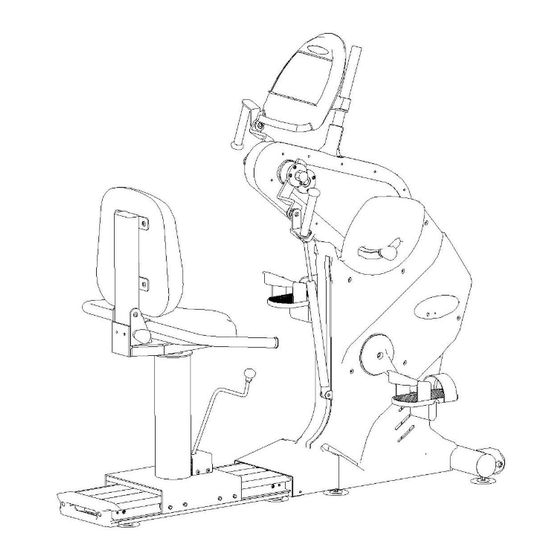
Page 4: Exploded Drawing
EXPLODED DRAWING... -
Page 5: Parts List
PARTS LIST No. Description Qty No. Description Qty No. Description 1 Main Frame 1 29 Main Gear 2 57 Crank Hub 2 Left Plate 1 30 Sub Gear 2 58 Crank Seat Covered 3 Right Plate 1 31 Pulley Sleeve 1 59 Plastic Washer 4 Cylinder Bracket 1 32 Copper Washer(2) - Page 6 PARTS LIST No. Description Q'y No. Description Q'y No. Description 85 Power Adapter 1 107 Spring Washer M6 52 129 Square Plug 40*80*1.5T Speed Sensor & 4 130 Adj. Fix Cushion 3/8”*25L Magnet 1 108 Hex Head Bolt M8*22L 87 Stabilizer Board 1 109 Nylon Nut M8 2 131 Square Key 6*6*20L 88 Power Inlet...
- Page 7 TOOL SET: 10m/m L Type Tool 13*14 Tool Please Note: Before you start to assemble this unit, please check to be sure you have the correct quantity of parts that are listed above.
- Page 8 ASSEMBLY Step 1 Assembling the Seat Back Insert the seat back support frame (14) that is connected to the seat back (72) into the seat base frame (12). Using the bolt (113) and the nut (109) secure in place. Step 2 Connecting the Seat to the Frame Pull back and hold the Movement Lever (10) then slide the entire assembly forward into the...
- Page 9 ASSEMBLY Step 4 Inserting the Arm Cranks Place each arm crank handle rod (47) through the slot into the crank hub (57). To secure the crank handle, fasten with the black adjustment knob (90). Step 5 Attaching the foot pedals Fasten each foot pedal (134) to the pedal cranks (133) using the open-end wrench, tool “13*14”.
- Page 10 OPERATING INSTRUCTIONS 1. Swivel Sweat: Pull up on the yellow, horizontal seat handle, and swivel to rotate the seat right or left, up to 90 degrees. Release the handle to lock into position. 2. Wheelchair Access: Pull back on the seat adjustment lever to adjust the seat position.
- Page 11 OPERATING INSTRUCTIONS Crank Arm Length: Pull out the black knob to adjust the crank arm length, there are 3 positions. Be sure to hold onto the handle so the arm does not drop. Pivoting Crank Arm Head: Pull out the orange knob to adjust the arm crank height and positioning, there are multiple angle settings.
- Page 12 OPERATING INSTRUCTIONS 5. Rotating Display: The display rotates 360 degrees for adjusted viewing angles. Seatback Adjustments: Pull out the back seat knob to adjust the angle of seat back.
- Page 13 PhysioMax: DISPLAY INSTRUCTION MANUAL 1. Display: The Console is an LCD screen displaying RPM, SPEED, TIME, DISTANCE, CALORIES, WATTS, PULSE (HEART RATE). 2. Modes: 2.1 POWER UP Mode: When powered on, there is a long beep, and all LCD functions light up for 2 seconds, then the display enters initial workout mode and is ready to begin.
- Page 14 DISPLAY INSTRUCTION MANUAL 3. Computer Function – Setting up your User Profiles *Please note: Quick Start requires no setup 3.1 Select User 1 or User 2: The screen will display “U1”and a scrolling message that reads “SELECT USER”. By pressing the UP or DOWN key you can toggle between User 1 (“U1”) and User 2 ( “U2”).
-
Page 15: Workout Programs
DISPLAY INSTRUCTION MANUAL 4. Program Selection: “SELECT WORKOUT PROGRAM” will scroll across the screen before the program names are displayed. The screen will display the resistance profile of each program. Press the UP or DOWN keys to scroll through all the program names. ... - Page 16 DISPLAY INSTRUCTION MANUAL 4.3 Resistance Level: (MANUAL, ROLLING HILL, PEAK, PLATEAU, MOUNTAIN CLIMB, HILL INT., STRENGTH INT. only) The maximum RESISTANCE LEVEL for the profile is displayed in the Level window (flashing) and the resistance profile is displayed on the screen. The scrolling message will read “ENTER MAXIMUM RESISTANCE LEVEL”...
-
Page 17: Constant Speed
DISPLAY INSTRUCTION MANUAL 4.6 Constant Speed In this mode, press the ENTER key to select the RPM level as L1=20/L2=30/L3=40/L4=50/L5=60/L6=70/L7=80/L8=90 RPM, Then press the ENTER key to adjust TIME 0:00~99:00 setting. Press ENTER key to start countdown. 4.6 Constant Watt In this mode, press the ENTER key to select the RPM level as L1=10/L2=20/L3=30/L4=40/L5=50/L6=60/L7=70/L8=80/L9=90/L10=100/L11=110L12=12 0/L13=130/L14=140/L15=150/L60=160 WATTS. -
Page 18: Key Functions
DISPLAY INSTRUCTION MANUAL 6. Key Functions: 6.1 Enter KEY To confirm set value and enter into the next set value 6.2 Recovery KEY When HR is not equal to zero, press recovery key to test HR Recovery rate. It will display profile 8. - Page 19 DISPLAY INSTRUCTION MANUAL 6.6 DOWN KEY Used to scroll through the different programs and profiles. Used to change time value and work level. Work level can be changed during a workout. 6.7 QUICK START KEY At anytime, press this key to start your workout in manual mode with time value 0:00. Workout Programs: Rolling Hill Peak...
- Page 20 For Optional Heart Rate Chest Strap: The PhysioMax is equipped with a Polar® Telemetry Receiver, the heart rate monitoring system in which electrodes, pressed against the skin, transfer heart rate signals to the Bike console. These electrodes are attached to a chest strap that the user wears during the workout.
-
Page 21: Warranty Information
Wires, if the resistance is still when pedaling it may be a damaged Lower Control PCB Warranty Information: Serial #:_________________ Purchase Date:_______________ 3 Year Parts Warranty, One Year Labor, Lifetime Frame HealthCare International, Inc. - Customer & Technical Service 1.360.321.7090 – 1.800.398.9121 info@HCIFitness.com - www.HCIFitness.com...
Need help?
Do you have a question about the PhysioMax TBT-1000 and is the answer not in the manual?
Questions and answers