Table of Contents
Advertisement
Quick Links
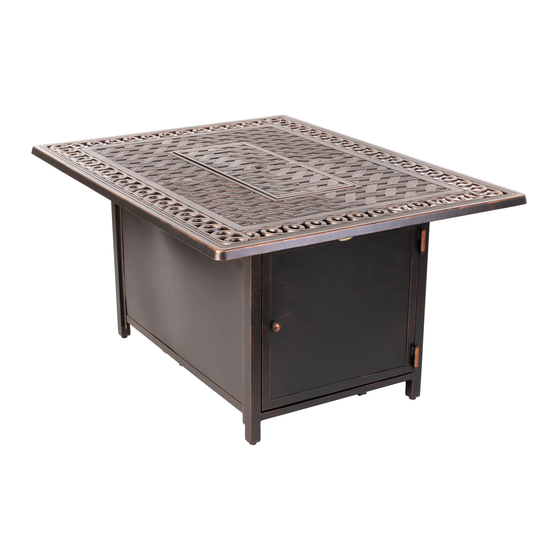
Meerin Aluminum LPG Fire Pit
*ELECTRONIC IGNITER!
Requires AAA Battery (not included)
Installation Precaution
This fire pit requires a minimum 18 inches of cross-ventilation in all directions.
Failure to provide proper ventilation can void the warranty.
ATTACH YOUR
RECEIPT HERE
Keep a copy of your proof of
purchase or order confirmation
which will be needed if you
need to contact us about
warranty coverage.
Purchase Date:
Questions, problems, missing parts?
Before returning to your retailer, our exceptional customer service is available.
Call us toll-free at (866) 985-7877, email us at cservice@welltraveled.net, or go online and
live chat at www.wtliving.com. Our hours are: 9 a.m. – 6 p.m., EST, Monday – Friday.
Conforms to ANSI STD Z21.97-2014,
Certified to CSA STD 2.41-2014 Outdoor decorative gas appliances
Item#:62976
Burner #: ULC-PC75-H-E
WARNING
FOR YOUR SAFETY
1. Improper installation, adjustment,
alteration, service or maintenance can
cause injury or property damage.
2. Read the installation, operation, and
maintenance instructions thoroughly
before installing or servicing this
equipment.
3. Failure to follow these instructions
could result in fire or explosion, which
could cause property damage, personal
injury, or death.
WARNING
For Outdoor Use Only
WARNING
This product can expose you to chemicals including
Carbon Monoxide, Lead, Chromium (hexavalent
compounds), Di(2-ethylhexyl) phthalate (DEHP) and
Diisononyl phthalate (DINP), which are known to the
State of California to cause cancer and birth defects
or other reproductive harm. For more information, go
to www.P65Warnings.ca.gov.
05292019 | ZDMF+WF
Advertisement
Table of Contents

Related Manuals for Fire Sense Meerin Aluminum ULC-PC75-H-E


Summary of Contents for Fire Sense Meerin Aluminum ULC-PC75-H-E
- Page 1 Item#:62976 Meerin Aluminum LPG Fire Pit Burner #: ULC-PC75-H-E *ELECTRONIC IGNITER! Requires AAA Battery (not included) WARNING FOR YOUR SAFETY 1. Improper installation, adjustment, alteration, service or maintenance can cause injury or property damage. 2. Read the installation, operation, and maintenance instructions thoroughly before installing or servicing this equipment.
-
Page 2: Table Of Contents
www.wtliving.com TABLE OF CONTENTS Table of Contents Page 2 Page 2 Before You Begin Package Contents Page 3 Safety Information Page 4 Assembly Pages 5-8 Operating Instructions Pages 9-12 Conversion to Natural Gas Pages 13-15 Care and Maintenance Page 16 Troubleshooting Page 17 Warranty Information... -
Page 3: Package Contents
PACKAGE CONTENTS PART DESCRIPTION QUANTITY Removable Burner Cover Burner Table Top Front Door Panel Side Panels Back Panel Gas Tank Support Bar Gas Tank Support Ring Protective Cover Fire Glass Also required but not included: AAA Battery (install by unscrewing igniter button) HARDWARE CONTENTS Washer 6mm Bolt 6x18mm... -
Page 4: Safety Information
SAFETY INFORMATION SAFETY INFORMATION DANGER DANGER This appliance has been tested to and complies FOR YOUR SAFETY — If you smell gas: EXPLOSION—FIRE HAZARD with the ANSI Z21.97-2014, Outdoor Decorative • Keep solid combustibles, such as building 1. Shut off gas to the appliance. Gas Appliances CGA CR 97-003 Outdoor Gas materials, paper, or cardboard a safe distance 2. -
Page 5: Assembly Pages
ASSEMBLY PREPARATION Before beginning assembly, be sure to empty contents of carton and make sure all parts are present. If any parts are missing, please contact Customer Service at (866)-985-7877, Monday-Friday, 9 a.m. - 6 p.m. EST or email cservice@welltraveled.net. Place all parts on a soft, level surface for assembly. - Page 6 ASSEMBLY Gas Tank Support Ring H over Gas Tank Support Bar G and align hole on front of Gas Tank Support Ring with holes at the bottom of Front Door Panel D. Insert Bolt O through Washer P and then through hole. Tighten with Hex Key/Wrench S.
- Page 7 ASSEMBLY Place the Burner B into the hole in the Table Top C. Make sure the Control Knob on the Burner faces the Front Door Panel D. Unscrew the igniter button and insert a AAA Battery with positive end facing out. Screw the button back onto the control panel.
- Page 8 ASSEMBLY Connect hose and regulator to cylinder. The propane gas and cylinder are sold separately. Use a standard 20lb propane cylinder have this book. Storage of an appliance indoors is permissible only if the cylinder is disconnected and removed from the appliance. A cylinder must be stored outdoors in a well-ventilated area out of the reach of children.
-
Page 9: Operating Instructions Pages
OPERATING INSTRUCTIONS A dented, rusted or damaged propane cylinder may be hazardous and should be checked by your cylinder supplier. Never use a propane cylinder with a damaged valve connection. Department of Transportation (DOT) or the standard for cylinders, spheres and tubs for transportation of dangerous goods and commission, CAN/CSA-B339. - Page 10 OPERATING INSTRUCTIONS LEAK CHECK WARNING! Hose / Regulator Regulator / Cylinder Connection Connection 2. Apply several drops of solution where hose attaches to regulator. 3. Apply several drops of solution where regulator connects to cylinder. 5. Turn cylinder valve ON. If bubbles appear at any connection there is a leak.
- Page 11 OPERATING INSTRUCTIONS CAUTION Do not attempt to operate until you have read and understand all General Safety Information in this manual, all assembly is complete, and leak test has been performed. WARNING DANGER! WARNING Very hot while in operation! FOR OUTDOOR USE ONLY Never lean over the fire pit while in use.
- Page 12 OPERATING INSTRUCTIONS DANGER! NOTE: This model has an Electronic Igniter and FOR OUTDOOR USE ONLY requires one AAA battery. Unscrew IGNITER Electronic igniter requires BUTTON to install. CARBON MONOXIDE HAZARD AAA battery Never use this fire pit inside a house or BEFORE LIGHTING : other unventilated or enclosed areas.
-
Page 13: Conversion To Natural Gas Pages
CONVERSION TO NATURAL GAS WARNING Make sure all control knobs and cylinder valves are in OFF position before converting. tanks and their use are covered elsewhere in this manual). If a Natural Gas connection is available, the user may wish to change the gas delivery system to the more permanent Natural Gas Supply. - Page 14 CONVERSION TO NATURAL GAS WARNING! To avoid the possibility of burns conversion should only be done when the fire pit is completely cool. Ensure burner is turned off. Turn gas off at source and disconnect the appliance before beginning conversion. WARNING! Fire Glass may have sharp edges.
- Page 15 CONVERSION TO NATURAL GAS Natural Gas Hook-Up The gas appliance is designed to operate at an inlet pressure of 7 inches water column. The piping up to the appliance is the end of the inlet valve. Tighten using two wrenches.(Do not use thread sealer/pipe dope.) Leak test all joints prior to using the installed in an upward direction and a readily accessible manual shut-off valve must be installed upstream of, and as close to, the quick disconnect as is feasible.
-
Page 16: Care And Maintenance
CARE & MAINTENANCE STORAGE: Between uses: perform the following maintenance activities on a regular basis: • Turn control knob OFF. • Disconnect LP source. cleaning agents. from direct contact with 2. While cleaning your unit, be sure to keep the area around the burner and inclement weather (such control compartment dry at all times. -
Page 17: Troubleshooting
TROUBLESHOOTING PROBLEM POSSIBLE CAUSE CORRECTIVE ACTION Wait until the propane cylinder warms up and becomes Propane cylinder is frosted over unfrosted Burner will not light Clear blockage Control knob is not in ON position Turn control knob to ON Gas pressure is low Turn cylinder valve OFF and replace cylinder Outdoor temperature is less than Use a full cylinder... -
Page 18: Warranty Information
THE PURCHASER. EXTEND YOUR WARRANTY When you purchase a Fire Sense, Patio Sense, or Avalon Home product, you have the peace of mind in knowing that it comes with a one-year warranty. Extend your warranty for an additional year when you write a review of your purchase on www.wtliving.com within 365 days of purchase.
Need help?
Do you have a question about the Meerin Aluminum ULC-PC75-H-E and is the answer not in the manual?
Questions and answers