
Subscribe to Our Youtube Channel
Related Manuals for Parker SciCon II


Summary of Contents for Parker SciCon II
- Page 1 ™ SciCon II Conductivity/Temperature Monitor & Single-Use Sensor Installation, Operating & Maintenance Instructions ENGINEERING YOUR SUCCESS.
- Page 2 Parker Hannifin Corporation. Parker has a continuous policy of product development and although the Company reserves the right to change specification, it attempts to keep customers informed of any alterations. This publication is for general information only and customers are requested to contact your local Bioscience Filtration Sales and/or Technical Support contact for detailed information and advice on a product’s suitability for specific applications.
-
Page 3: Table Of Contents
SciCon II Sensor Specifications ........................10 Documentation Software for PC ........................11 Part A SciCon II Monitor Hardware Overview ......................13 Front Panel: Data Entry & Display ........................14 Back Panel: Interface Options ......................... 15 SciCon II Single-Use Conductivity/Temperature Sensors ................18 Part B SciCon II Monitor Software Overview ...................... -
Page 4: Precautions
ALWAYS DISCONNECT this equipment from the power source before cleaning or performing maintenance. CALL Parker Customer Service for parts, information and service. WARNING DISCONNECT ALL POWER TO THIS UNIT BEFORE INSTALLING, SERVICING, CLEANING OR REMOVING THE FUSE. FAILURE TO DO SO COULD RESULT IN BODILY HARM AND/OR PROPERTY DAMAGE. - Page 5 équipement. DÉBRANCHEZ TOUJOURS cet équipement de la source de courant avant de nettoyer ou d’exécuter l’entretien. APPELEZ PARKER pour pièces détachées, renseignements et entretien. ATTENTION DÉBRANCHEZ TOUT COURANT DE CETTE UNITÉ AVANT DE FAIRE L’INSTALLATION, D’EFFECTUER L’ENTRETIEN, LE NETTOYAGE OU AVANT DE RETIRER LE FUSIBLE.
-
Page 6: Introduction
List of operating procedures and conditions in use when problem arose Calibration The SciCon II Monitor is a calibrated device and is calibrated with test equipment that is traceable to SI (International System of Units) through NIST (National Institute of Standards and Technology). -
Page 7: Warranty
To remove dust, dirt and stains, the outer surfaces of the SciCon II Monitor may be wiped using a soft, non- fluffing cloth moistened with water. If required, you may also use a mild detergent or 2-propanol. -
Page 8: Quick Setup Guide
1. Connect the power supply using the applicable adapter clip (US is shown) 2. Connect the sensor cables to monitor ports 3. Connect sensors to cables 4. Connect power supply to outlet This completes the SciCon II Quick Set-up. 8 ... -
Page 9: Scicon Ii Monitor Specifications
SciCon II Monitor Specifications W: 6.0¨ (15.2 cm); Height 2.75¨ (7.0 cm); D: 5.5¨ (14.0 cm) Dimensions 1.5 lb. (0.69 Kg) Weight Molded Plastic / Stainless Steel Enclosure 100-240 V, 60/50 Hz AC Adaptor, 12 VDC, 500 ma Output, Center Power positive. -
Page 10: Scicon Ii Sensor Specifications
SciCon II Sensor Specifications ® 5 VDC provided by SciCon II Monitor. Power Choice of five sizes: Luer, 3/8” Barb, 1/2” Barb, 3/4” Tri-Clamp (TC) Sanitary and 1” Tri-Clamp Fluid Connections (‘Ladish’) Sanitary. Polysulfone transfer tube, Silicone gasket, and a Sensing element composed of four gold plated pins. -
Page 11: Documentation Software For Pc
In the SciDoc folder on your PC, click on SciDoc to launch the program Click on the blue SciCon II button for the next screen to appear Choose the detected or assigned Com Port and set the sec/Sample time to match the Print Time setting on the Monitor (Default = 5 seconds) ... - Page 12 button saves .jpg images of the charts at that time. button exports the data and charts as both an .xls file and a .txt file. Files are saved at C:\Serial Data Loggers by Monitor type. All files can be readily turned into PDFs. NOTE: The charts are do not adjust their range automatically.
-
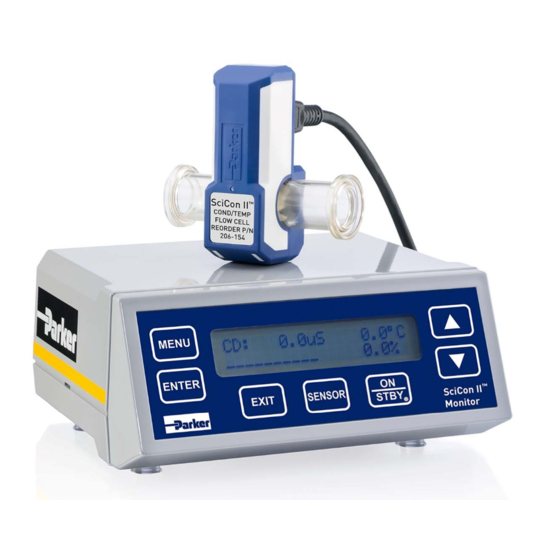
Page 13: Scicon Ii Monitor Hardware Overview
Part A: SciCon II Hardware Overview The SciCon II consists of two major components, the SciCon II Conductivity Monitor, with its power supply, and the Single-use SciCon II Sensor, with its cable. The Monitor is a small desktop package with a backlit display and seven buttons for easy interface and menu selections. -
Page 14: Front Panel: Data Entry & Display
(LCD). The display is backlit to allow easy viewing over a wide range of lighting conditions. The keypad consists of seven keys whose function does not change. These keys are used for basic control and programming of the SciCon II. The basic key definitions are: MENU Allows entry into the parameter settings menu. -
Page 15: Back Panel: Interface Options
Printer/PC: RS232 output, Female DB9, A printer cable (P/N 080-096) is required to make the connection between the printer and the SciCon II, or a Parker RS-232 to USB adapter cable (P/N 080-USB) to connect the SciCon II to a PC for data archival. - Page 16 3 (Vpwr) to pin 16 (4-20 +), and connect the output (signal) cable to pin 4 (4-20 -) and pin 17 (Gnd). Analog outputs 3 and 4 are not utilized in the SciCon II. TTL Outputs:...
- Page 17 The use of an end‐user supplied analog loop power source is presented below. The SciCon II only uses Analog 1 and 2. Please note: the black lines on the drawing above are internal connections. 17 ...
-
Page 18: Scicon Ii Single-Use Conductivity/Temperature Sensors
SciCon II Single-Use Conductivity/Temperature Sensors Connector Type Max Flow Rate Max Pressure Nominal Cell Volume Luer 2 liters/min 60 psi 80 µl 3/8" Barb 8 liters/min 60 psi 0.5 ml 1/2" Barb 17 liters/min 60 psi 0.8 ml 3/4" TC 31 liters/min 60 psi 1.2 ml 1” Ladish TC > 50 liters/min 60 psi 2.3 ml Specifications for all SciCon II Flow Thru Conductivity/Temperature Sensors Wetted Materials: Polysulfone transfer tube, Silicone gasket, and a Sensing element composed of four gold plated pins. The four pins are of synthetic origin and animal derived material free to the best of our knowledge. All other fluid path components are animal derived component free. ... -
Page 19: Scicon Ii Monitor Software Overview
Part B: SciCon II Software Overview The SciCon II Conductivity Monitor, upon connection to the Sensor, reads the stored Sensor ID and calibration data, displaying it as it is read. The Monitor then displays the measured conductivity and temperature. The data is displayed digitally as well as an analog display of % full scale. The Menu allows the setting of concentration units (ppm of NaCl, KCl, and 442 are also available), the high and low analog range settings as well as the temperature reference and coefficient. The user may also adjust the baud rate and print time and configure user‐defined Hi/Low conductivity and temperature alarms. The system is equipped with a user assigned Supervisor Password. When it is zero, it is disabled. Any other number up to 9999 can be used and is required to access any menus. The display is updated continuously, and data is output via the RS‐232 point at 5 second intervals by default. This frequency may be adjusted by the user from 1 to 60 seconds. ... -
Page 20: Main Menu
Main Menu 1200, 4800, 9600, 19200, Main Screen: Menu 28800, 38400, 57600 0.00 µS 21.3°C SERIAL: BR: 9600 ------------------- 0.0% WL: 8 SB: 2 PT: N Menu Menu µS, mS, ppm KCL, ppm NaCL, ppm 442 1-60 Seconds CONC UNITS: µS PRINT TIME: 5 SEC Max: 200000 µS, 200.00 mS, 133566 ppm KCL,... - Page 21 COLD ROOM MODE: Improves performance in rooms at approximately 4 °C. (Anything considerably colder than ambient) Default – OFF. TEMP COEFF: Temperature Coefficient, used when turned on above, 0.0 – 5.00 % / °C. Default is 1.90 % / °C. Serial: Displays the RS‐232 serial output parameters. Only baud rate can be changed. Available rates are 1200, 2400, 4800, 9600, 19200, 28800, 38400 and 57600. Default = 9600 PRINT TIME: Sets the data output interval, 1 to 60 sec. Default = 5 sec. HI – ALARM: Used to set High Conductivity Alarm, value should be within High and Low Range set above. Default = 0 µS LO – ALARM: Used to set Low Conductivity Alarm, value should be within High and Low Range set above. Default = 0 µS HI – ALARM: Set High Temperature Alarm, Max 50 °C. Default = 0.0 °C. LO – ALARM: Set Low Temperature Alarm, Max 50 °C. Default = 0.0 °C. PASSWORD: A numerical Password may be entered, with 0 being the default value, and equivalent to No Password. Once entered, the Password is required to enter any menu on the SciCon II Monitor. Call Parker Technical Support if the password must be reset. FACTORY RESET: Used to restore the SciCon II Conductivity Monitor to the factory default values. Change No to Yes using the arrow keys and press “Enter” to reset, change No to Yes on the “Are You Sure?” screen and press “Enter” again to finish the process. SET TIME/DATE… Press Enter to modify the Time Date Stamp used by the SciCon II internal clock. Press Menu to bypass and return to the top of the menu or Exit to leave the menu. TIME: Use the up / down arrows to change the time in the system. The format is 24 hour time, HH:MM. Press Enter to save. MONTH: Use the up / down arrows to change the Month. Press Enter to save. DAY OF MONTH: Use the up / down arrows to change the Day of the Month. Press Enter to save. YEAR: Use the up / down arrows to change the Year. Press Enter to save.
-
Page 22: Reduced Pump Pulsation: Improved Sensor Precision
SciCon II Printout Format RS-232 Output as sent to Serial Printer (Parker PN 080-095A) or Windows HyperTerminal: 05/14/19 0.41 12/19/19; Conductivity v0.41; uS; TEMP REF = 25.00; TEMP COEF = 1.91; ALARMS: HC= 0.0; LC= 0.0; HT= 0.0ßC; LT= 0.0ßC; Sensor ID=C3‐2G‐210012‐1219; CF= 0.338; TO=0.32; CCF= 1.000; CTO=0.00 RT, CD, T, 10:09:17, 0.3, 18.3, 10:09:27, 0.1, 18.3, 10:09:32, 592, 18.3, 10:09:37, 664, 16.2, 10:09:42, 697, 13.6, 10:09:47, 701, 12.3, 10:09:52, 652, 12.2, 10:09:57, 694, 13.2, 10:10:02, 704, 12.6, Abbreviation Description Alarms: Description RT Real Time Hi Conductivity T Temperature, °C ... -
Page 23: Sensor Performance Data
Appendix A: Sensor Performance Data 23 ... - Page 24 Notes 24 ...
- Page 25 Parker Hannifin Corporation Parker Hannifin Manufacturing Ltd © 2019 Parker Hannifin Corporation. All rights reserved. Bioscience Filtration Bioscience Filtration 2340 Eastman Avenue Durham Road IOMI‐AE1‐002‐1A Oxnard, California, USA 93030 Birtley, Co. Durham toll free: 877 784 2234 DH3 2SF, England phone: +1 805 604 3400 phone +44 (0)191 4105121 fax: +1 805 604 3401 fax +44 (0)191 4105312 email: bioscience.na@parker.com email: bioscience.emea@parker.com www.parker.com/bioscience www.parker.com/bioscience ...
Need help?
Do you have a question about the SciCon II and is the answer not in the manual?
Questions and answers