
Subscribe to Our Youtube Channel
Related Manuals for Parker PRO DISPLAY 12


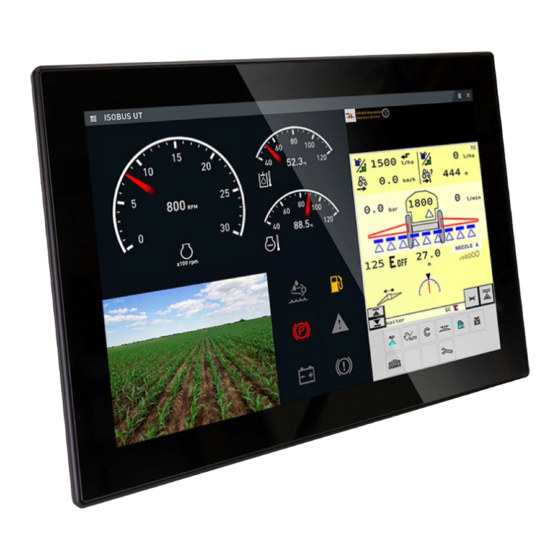
Summary of Contents for Parker PRO DISPLAY 12
- Page 1 Instruction Book PARKER PRO DISPLAY 12 P u b l . N o . M S G 1 7 - 4 0 2 2 - I B / U K E d i t i o n 1 2 / 2 0 1 9...
- Page 2 The products described herein, including without limitation, product features, specifications, designs, availability and pricing, are subject to change by Parker Hannifin Corporation and its subsidiaries at any time without notice.
-
Page 3: Table Of Contents
4.7. HMI (Human-Machine Interface) ..................23 4.7.1. Touchscreen ......................23 4.7.2. Display ......................... 24 4.8. Internal features & diagnostics ..................25 4.8.1. Acceleration sensor ..................... 25 4.8.2. Supply supervision & voltage measurement ............25 Parker Pro Display 12 Instruction Book 3/54... - Page 4 4.9. Mass storage ........................26 5. Software ........................28 5.1. General ..........................28 5.2. Parker UX Toolkit ......................28 5.2.1. Parker UX Platform (UXP) ................... 28 5.2.2. Parker Application Designer ................28 5.3. UXP Configuration ......................28 5.4. Installing and removing applications ................. 29 5.5.
-
Page 5: Publication History
Publication History The following table provides an overview of the changes made to this document over the course of its publication history. Table 1: Publication history Release Date Description of Change 11/2019 First Edition Parker Pro Display 12 Instruction Book 5/54... -
Page 6: Introduction
Contact the manufacturer if there is anything you are unsure of, or if you have any questions regarding the product and its handling or maintenance. The term "manufacturer" refers to Parker Hannifin Corporation. 1.1. Safety symbols The following symbols are used in this document to indicate potentially hazardous... -
Page 7: Precautions
The emergency stop must be easily accessible to the operator. If possible, the machine must be built so that the supply voltage to the control system's electrical units is disconnected when the operator leaves the operator’s station. Parker Pro Display 12 Instruction Book 7/54... -
Page 8: Safety During Installation
The machine cannot start moving. • Functions are positioned safely. • The machine is turned off. • The hydraulic system is relieved from any pressure. • Supply voltage to the control electronics is disconnected. Parker Pro Display 12 Instruction Book 8/54... -
Page 9: Diagram Conventions
There are many connection diagrams to be found throughout this manual. The following table provides meanings for the different symbols used in those diagrams: Symbol Meaning General input General output Frequency input Analogue input Frequency sensor Resistive sensor General sensor Application switch Emergency stop Relay Parker Pro Display 12 Instruction Book 9/54... - Page 10 Header Link to Contents Symbol Meaning Load Resistor Pull-down resistor Pull-up resistor Diode Battery Fuse Ground Chassis ground Parker Pro Display 12 Instruction Book 10/54...
-
Page 11: Product Description
4. Product Description 4.1. General Pro Display 12 is a member of Parker’s Pro Display product family. Pro Display is a family of displays capable of running Parker UX Platform (UXP) applications created with Parker Application Designer software development environment. - Page 12 Header Link to Contents The following table summarises the characteristics offered by this product: Table 4: Pro Display 12 product characteristics Characteristic Value NXP iMX6, Cortex A9 Quad FLASH 2GB (4GB eMMC used in SLC mode) EEPROM 32KB in main carrier for production data saving...
- Page 13 Weight 1,96 kg This manual describes the hardware components of the Pro Display 12, but it does not explain how to configure nor develop the actual application software. For more information about software, please refer to the appropriate software manual or contact your Parker Account Representative.
-
Page 14: System Overview
Figure 2: Pro Display 12 block diagram. 4.2. System overview Parker Pro Display can be a central Human Machine Interface (HMI) unit in the system or a stand-alone display. Pro Display is not limited to one particular control system integration. Pro Display has four CAN buses, one Ethernet port, two USB ports, one RS232 port, two video inputs and digital ignition and wake-up inputs. - Page 15 MIC IN SPEAKERS CAMERA D LINE IO LINE OUT AUDIO DEVICE IO EXPANSION DEVICE DEVICE CONTROLLER CONTROLLER CONTROLLER CONTROLLER Figure 3: Pro Display 12 system overview. This figure shows just one possible application. Parker Pro Display 12 Instruction Book 15/54...
-
Page 16: Infotainment
Output amplitude can be adjusted through the use of software. There are two audio outputs to be selected: • Audio line output (to external amplifier) • Digital audio to module (record). Recording is disabled by default in Pro Display. Parker Pro Display 12 Instruction Book 16/54... -
Page 17: Microphone Input
Maximum input voltage 215 mVrms Bandwidth 35 Hz – 16 kHz/-3 dB Bias voltage: 2,5V (typical) PRO DISPLAY MIC_BIAS C2:12 BIAS MICROPHONE MIC_P C2:11 MIC IN MIC_N C2:10 Figure 6: Pro Display microphone input Parker Pro Display 12 Instruction Book 17/54... -
Page 18: Fm Radio Tuner
Pro Display. 4.4. Video inputs Pro Display 12 has 4 pcs of analogue composite video inputs, CVBS IN 1, CVBS IN 2, CVBS_IN3 and CVBS_IN4. All video inputs have NTSC/PAL/SECAM autodetection. Power supply for external cameras is intended to be arranged from elsewhere in system where Pro Display 12 is installed - not from Pro Display 12 as there is no dedicated power supply for the purpose. - Page 19 IN 4 Video GND C5:5 :Shield Ext. Camera supply Figure 7: Video Camera connection principle for 4 cameras in Pro Display 12. Ground connections shall be considered with external supply to avoid ground loops. Parker Pro Display 12 Instruction Book 19/54...
-
Page 20: Inputs/Outputs
IGNITION IN C1:6 IGNITION C1:1 Figure 8: Ignition input connection principle Maintenance mode is intended for the following: • Installing new software packages • Updating existing software packages • Removing existing software packages Parker Pro Display 12 Instruction Book 20/54... -
Page 21: Wake-Up Input
Table 12: High-side output specifications Feature Spec Output current 1500mA ON- state VBatt – 0,9V (1,5A load) VBatt – 0,25V (no load) OFF- state 0V (100mA load) 0,25V (no load) Parker Pro Display 12 Instruction Book 21/54... -
Page 22: Communication
Pro Display has four CAN buses (ISO 11898). These buses can be used with various protocols, according to OEM’s needs. Parker currently supports J1939 protocol in Pro Display. OEM can implement other necessary protocols. CAN buses 1, 3 and 4 have software-controlled termination. -
Page 23: Rs232
Figure 12: USB device/stick connection. USB 0 & USB 1 interfaces utilises M12 connector in Pro Display. M12 to USB cable adapter is available from Parker and the interface can be brought into the dashboard or other suitable place in the vehicle cabin. -
Page 24: Display
Multi-finger support 4.7.2. Display Pro Display 12 uses a high-performance, sunlight readable 12,1” IPS colour TFT LCD with white LED backlight. The 12,1” display is widescreen and has a resolution of 1280 x 800 pixels. Cover glass is clear and with high intensity IPS display, helps user to distinguish the screen view in extremely bright light conditions and large viewing angles. -
Page 25: Internal Features & Diagnostics
The interruption can be either an alarm or a specific time. 4.8.4. EEPROM Pro Display comes with 32kB EEPROM memory. This memory is primarily intended for device production information and is available only in read-only form for the application. Parker Pro Display 12 Instruction Book 25/54... -
Page 26: Diagnostic Leds
Header Link to Contents 4.8.5. Diagnostic LEDs Pro Display 12 has 2pcs of LEDS for diagnostics purposes. These LED’s are intended to serve the application development. LED’s are covered under SD-Card plug and visible to developer after SD-Card plug is removed. - Page 27 NOTICE: The average performance for read and write from / to Micro SD card is usually lower than the maximum speed. Actual performance and speed is dependent on the inner status of SD memory card as well as the use case in application. Parker Pro Display 12 Instruction Book 27/54...
-
Page 28: Software
Overview of relevant documentation. 5.3. UXP Configuration To install any applications on a production unit of Pro Display 12, customer needs to request a specific System ID for their system from Parker. Each machine control system needs to have own System ID. This System ID consists of a Signed System ID and version number. -
Page 29: Installing And Removing Applications
System ID owner for the same System ID which is installed in Pro Display device. The customer needs to request their own System ID from Parker by following a process defined in the System Certification Guide (HY33-4812-SCG/UK). -
Page 30: Pro Display Operation Modes
RUN * 9…36V SILENT START- 9…36V 9…36V SLEEP 9…36V SHUTDOWN *) NOTICE: Unit is able to start, but its not recommended to use such low operating voltage. Recommended minimum operating voltage range is 9…36V. Parker Pro Display 12 Instruction Book 30/54... -
Page 31: Sleep Mode
UXP software offers the functionality of implementing diagnostics in an application. Applications can write and read information to/from a system log. UXP data management alarms are logged into the system log in Pro Display. The system log can be read with Maintenance App. Parker Pro Display 12 Instruction Book 31/54... -
Page 32: Mechanics
The Pro Display unit mechanics consist of a die cast aluminium back cover, PC-ABS front frame and physically strengthened cover glass with anti-glare coating. Figure 16: Pro Display 12, front and rear view. 6.2. Dimensional drawing Figure 17: Pro Display 12 dimensions... -
Page 33: Mounting
7.2. Dashboard or panel assembly 7.2.1. Panel assembly Pro Display 12 can be assembled to vehicle dashboard, - to separate panel in vehicle cabin or for example to cabinet door in installations where exists separate electrification cabinet. Currently Pro Display 12 has no dedicated panel mounting kits available due to the fact that the panel thickness can vary depending on assembly surface and customer needs. -
Page 34: Ball / Swivel Mount
Header Link to Contents NOTICE: Longer screws may damage the device when tightened! Figure 18: Pro Display 12 panel mount method. This assembly method is intended for assemblies where the installer can operate behind the assembly surface – for example cabinet doors. - Page 35 Screw ISO 14583 TX / DIN 7985 type. Figure 20: Pro Display 12 swivel mount method using RAM ball. First RAM ball is installed into rear side of the Pro Display and the second RAM ball into assembly surface of the vehicle.
- Page 36 J. Ensure that Pro Display is locked into its final mounting position by trying to move it gently. When there is no noticeable movement detected, the installation is adequate. Otherwise continue tightening of wing nut to obtain the stable position for the display. Parker Pro Display 12 Instruction Book 36/54...
-
Page 37: Installation
8. Installation 8.1. Electrical connections All electrical connections are located on the rear side of the Pro Display unit. The following chapters present available connections. Figure 21: Pro Display 12 back cover with connectors Bluetooth 2 x USB Line IN/OUT, WLAN, 802.11... -
Page 38: Main Connectors C1 And C2
MIC_P Microphone input signal + C2:12 MIC_BIAS Microphone bias NOTICE: Default mode for the selectable I/O is “Audio Line In” NOTICE: CAN 2 is intended for connecting ISOBUS implements to Pro Display 12. Parker Pro Display 12 Instruction Book 38/54... -
Page 39: Usb Connections C3 And C4
(AWG 18) Deutsch 2005 DTM06- 12SB Prototype installation cables and connector kit are available from Parker – see Appendix C for ordering codes. NOTICE No pin may be "double crimped". This means that only one wire may be attached to any given pin. -
Page 40: Video Connection C5
Table 23: Connector C5 (Video) pin assignment Name Function C5:1 CVBS_IN1 Video Input 1 C5:2 CVBS_IN4 Video Input 4 C5:3 CVBS_IN3 Video Input 3 C5:4 CVBS_IN2 Video Input 2 C5:5 Video ground SHIELD Cable shield connection (on connector chassis) Parker Pro Display 12 Instruction Book 40/54... -
Page 41: Ethernet Connection C6
Header Link to Contents NOTICE: Pro Display 12 Video Input Connection differs from Pro Display 10. Figure 24: Video input & Ethernet connections Table 24: C5 Mating connector type to interface the Pro Display into system Connector Conn. Part number Conn. -
Page 42: Micro Sd Card Interface
Suitable “M12 male D-coded 4pin”- connectors are also available from several other manufacturers. Ethernet cable is available from Parker – see Appendix C for ordering codes. 8.1.5. Micro SD card interface Micro SD is possible to use as mass storage of media with Pro Display. This connection is sealed with a cover plug on the rear side of the unit to maintain the ingress protection (IP) rating of the module. - Page 43 User must always close the Micro SD card connection with cover plug to maintain the unit IP rating and functionality. Parker do not take any responsibility if cover plug is not properly placed back into unit after accessing to Micro SD connection.
-
Page 44: Radio Antenna Connection
NOTICE: Used cable type in customer application needs to be checked before selecting SMA plug connector as the connector plugs are available for many different cable types. “Table 28: Mating connector types” provides examples from one possible manufacturer. Parker Pro Display 12 Instruction Book 44/54... -
Page 45: Power Supply Considerations
RTC). Back-up supply gets charged from the module power supply. NOTICE: If the customer application is relying on RTC functionality, then RTC back- up supply maximum operating times shall be taken into account during application development. Parker Pro Display 12 Instruction Book 45/54... -
Page 46: Polarity Reversal
D. When the installation is completed, the setup application is removed and the system restarts. Pro Display, development units (88PROD12AS10 with development unit SW licence): • Application packages can be installed using the Maintenance App. Parker Pro Display 12 Instruction Book 46/54... -
Page 47: Appendix A - Technical Summary
Header Link to Contents 10. Appendix A – Technical summary This chapter and the tables below present a technical summary of the Parker Pro Display 12 product: Table 29: Electrical Ratings & EMC Feature Rating / Value Operating temperature -30 to +70 °C Storage temperature -40 to +85 °C... - Page 48 One-touch and Multi-finger support • Hardened cover glass with anti-glare coating NOTICE 1): In Single Level Cell mode (SLC). NOTICE 2): Micro SD/ Micro SDHC card is not included into Pro Display 12 delivery. Parker Pro Display 12 Instruction Book 48/54...
-
Page 49: Appendix B - Environmental Summary
Cycles: 30 • Exposure: 3 h IEC 60068-2-2 test B High temperature, • Temperature: +70 °C operational • Time: 96 h IEC 60068-2-1 Low temperature, • Temperature: -30 °C operational • Time: 96 h Parker Pro Display 12 Instruction Book 49/54... - Page 50 Acceleration: 5 g Impact Parker • Test weight: 50 grams • H: 0,4 m Free fall ISO 16750-3, 4.3 / IEC 60068- • H: 1 m 2-32 • No hidden failures after the test Parker Pro Display 12 Instruction Book 50/54...
- Page 51 • Engine oil 100 % • Calcium chloride Solar radiation EN 60068-2-5 • Temperature: +40 °C • Exposure time: 10 d • UV radiation wavelength: 280 nm...400 nm Readability EP 455 Parker Pro Display 12 Instruction Book 51/54...
- Page 52 Immunity to micro power cuts Parker • Unom: 13,5V and 27V • Transit.app: 10 μs • Cut durations: 100, 200 and 400 µs • Test duration: 5 pulses for each level • Pulse period > 1 s Parker Pro Display 12 Instruction Book 52/54...
- Page 53 Pulse 3a: III (12 & 24V) • Pulse 3b: III (12 & 24V) • Pulse 4: III / IV (12 & 24V) • Pulse 5a: III, UA: 27V; Us: 123V; Transient, signal lines, fast ISO 7637-3 • Parker Pro Display 12 Instruction Book 53/54...
-
Page 54: Appendix C - Ordering Codes
Table 37: Pro Display product part numbers Item Description 88PROD12AS10 Pro Display 12 - iMX6 Quad core, 1GB RAM & 2GB (SLC) Flash memory, high brightness display, infotainment features, 4 analog video inputs 88PROD12AS10 + SW Pro Display 12 Development Unit. For development unit...
Need help?
Do you have a question about the PRO DISPLAY 12 and is the answer not in the manual?
Questions and answers