Table of Contents
Advertisement
Quick Links
Advertisement
Table of Contents

Subscribe to Our Youtube Channel
Related Manuals for EZ DUPE NV-05M


Summary of Contents for EZ DUPE NV-05M
- Page 1 PCIe Duplicator (NVMe M.2) User’s Manual Copyright © 2020. All rights reserved...
- Page 2 (deleting) of data. It has nothing to do with EZ Dupe if there is any mistake in correcting (deleting) the data by user. In addition, EZ Dupe is not responsible for the risks and data losses incurred as a result of duplication.
-
Page 3: Table Of Contents
Menu 1. Product Introduction ................................3 2. Product Features ..................................3 3. Product Series Introduction ..............................4 4. Operation Interface Overview ............................... 5 4.1 LCD Screen and Operation Buttons ..........................5 4.2 LED status indication ..............................6 4.3 Adapter Board Connection Instructions ........................6 5. -
Page 4: Product Introduction
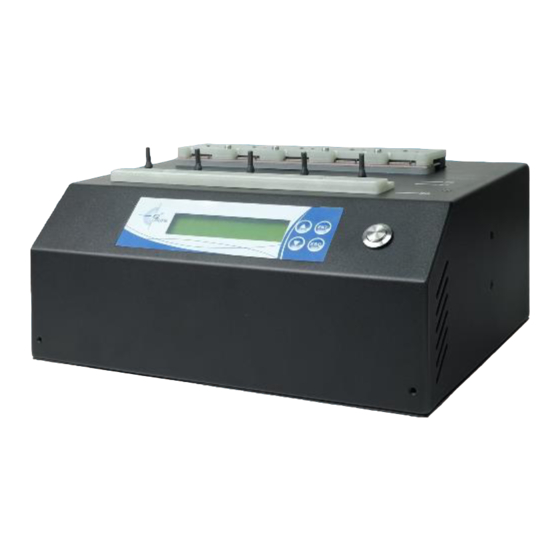
1. Product Introduction This series of PCIe duplicators have a copy speed of up to 36GB/min. It adopts the latest NVMe and SATA3.0 (6Gbps) protocol design, and has excellent performance. By changing the fixture, it can support 1.8” and 2.5” SATA hard disk, or M.2 (SATA, NVMe) interface SSD duplication. User can expand the number of interfaces through serial connection between multiple duplicators, and can also adjust the number of interfaces themselves according to capacity requirements, which greatly improves the production line work efficiency. -
Page 5: Product Series Introduction
Fast Erase: Only the index table is erased, and the erasure time is short; DoD Erasure: Erase in accordance with the US Department of Defense DOD 5220.22-M data erasure standard. Expandable interfaces without limitation Supports multiple duplicators connected in series to achieve interface expansion, and the number of interfaces can be dynamically adjusted according to capacity requirements. -
Page 6: Operation Interface Overview
1 – 9 PCIe Duplicator 1 – 19 PCIe Duplicator 4 Operation Interface Overview 4.1 LCD Screen and Operation Buttons LCD Screen ▲ Up ▼ Down ▲ Up button: to scroll upwards in the menu ▼ Down button: to scroll downwards in the menu ENT button: OK, execute the function ESC button: cancel, go back to the previous level in the menu... -
Page 7: Led Status Indication
Number of Function in use Copy speed target Data to be copied Percent copied Time used The port number with lowest speed Start Button (OK button): to execute the function 4.2 LED status indication Each port has a red and green LED to indicate the corresponding working status. LED Lights Working Status Red light: always on... -
Page 8: Attention
SATA adapter board is dedicated to 1-9 PCIe duplicator. SATA adapter board M.2 adapter board 5. Attention Please provide a stable AC power supply to the duplicator (in order to avoid loss due to accidental power failure, it is recommended to use UPS continuous power supply system), and use it in a dry and clean environment as much as possible, and avoid placing it in high temperature and humid environment. -
Page 9: Fast Copy
menu and all the LED lights are off. You can use the ▲ and ▼ keys to switch to the function you want to use, press the Start button (OK button) to start the function, and press ESC key to return to the previous menu. B. - Page 10 1 FAST COPY 2 FULL COPY 3 PERCENT COPY 4 FAST + %COPY 1 FAST COMPARE 5 COMPARE 2 FULL COMPARE 3 PERCENT COMPARE 1 FAST ERASE 6 ERASE 2 FULL ERA(00) 3 DoD ERASE Main 1 DISK INFO 7 TOOLS Menu 2 MAKE UPDATE DISK 1 CMP AFTER COPY(N)
-
Page 11: Introduction To Main Functions
7.2 Introduction to Main Functions 7.2.1 FAST COPY The duplicator will analyze the master disk data and only copy the valid data area, not the unused area. For example, a 500 GB system disk, the actual data is only 100 GB of used space. In this mode, only 100 GB of valid data is copied. -
Page 12: Full Copy
Analyze a total of 50 GB of valid data for Partition 1 and Partition 2, and the amount of copied data is 50 7.2.2 FULL COPY In this mode, the duplicator does not perform data analysis on the data of the master disk, and completely copies all data areas of the entire master disk, including used and unused space. - Page 13 In this mode, the duplicator will not analyze the master disk data. Before using this copy mode, you must fully grasp the location and distribution of the master disk data, or only want to copy a specific area on the hard disk.
-
Page 14: Fast + % Copy
After the Percent Copy is completed, the LCD screen displays the current copy result and copy time. 7.2.4 FAST + % COPY This mode is a combination of Fast Copy and Percent Copy. After selecting this copy mode, the duplicator first executes the Fast Copy mode. -
Page 15: Compare
C. After the copying is completed, the LCD screen displays the current copy result and copy time: 7.2.5 COMPARE You can use this function when you need to check the data of the master disk and the target disk. Three data comparison methods are available for user to choose: 1. -
Page 16: Erase
A. On the main menu, use the ▲ and ▼ keys to select "Compare" function and press the ENT key. Then use the ▲ and ▼ keys to select the corresponding comparison from "Fast Compare", "Full Compare", and "Percent Compare" as required. B. -
Page 17: Tools
. Press the Start button (OK button) to start the erase. 7.2.6.1 FAST ERASE Erase some data in the file system (file system area). 7.2.6.2 FULL ERA (00) Erase all the data on the hard disk. You can choose to fill it with 00, 5A, A5, AA, FF, RDM (random value) (the default value is 00). -
Page 18: Setting
※ Operation Procedure: A. Use the ▲ and ▼ keys on the main menu to select the “Tools” menu. B. Select "Disk Info" under the "Tools" sub-menu, and press ENT key. C. Use the ▲ and ▼ keys to select different hard disk, and press ENT key to view the hard disk related information; For example, the following figure shows the information of the first hard disk: 7.2.7.2 MAKE UPDATE DISK Create an upgrade disk for upgrading the duplicator software. - Page 19 7.2.8.3 COPY UNKNOWN (N) This setting is used in some special areas when it is impossible to perform comprehensive data analysis. If you select "Yes", the partitions of valid data cannot be analyzed in the quick copy, and the contents will be copied.
- Page 20 ※Operation Procedure: A. Press ENT key to enter into the password setting sub-menu. B. Press the ▲ and ▼ keys to set the corresponding passwords respectively. C. Press ESC key to exit and save password settings. 7.2.8.7 CAPACITY CHECK (N) Whether to check the capacity of the target disk when copying, you can select "Yes"...
- Page 21 ※Operation Procedure A. Press ENT key to enter into the Power On Time setting. B. Use the ▲ and ▼ keys to adjust the time. 7.2.8.9.2 POWER OFF TIME This is to set the time to wait for the hard disk to stop after copy / compare is completed. It can be set to 1 to 20 seconds (the default value is 3S) ※Operation Procedure A.
- Page 22 ※Operation Procedure: A. Press the ENT key to enter into the factory reset menu; B. If you need to restore the factory settings, press ENT to continue; C. If you do not need to restore the factory settings, press ESC to cancel; 7.2.8.9.5 FIRMWARE UPDATE It is used to update and upgrade duplicator control software.
- Page 23 Figure above indicates the disks with below 50% of the average speed will be eliminated. ※ Operation Procedure A. Press ENT key to enter into the Set Kick Percent sub-menu; B. Use ▲ and ▼ keys to set the percentage value; 7.2.8.9.8 SYSTEM INFO In this menu, you can view the current system information of the duplicator.
- Page 24 Use ▲ and ▼ keys to view the corresponding system information; 7.2.8.9.9 EXPORT LOG This is to export all the work log information of the duplicator. 7.2.8.9.10 BLOCK SIZE ( 64K) There are 5 options for setting the data transmission amount of a single system command, which are 128K, 64K, 32K, 16K and 8K (the default value is 64K).
-
Page 25: System Software Upgrade
A. Press ENT key to enter into the “Analyse XBOX” sub-menu. B. Use ▲ and ▼ keys to select “Yes” or “No”. 7.2.8.9.13 NVME WAIT LNK ( 2S) This is for dual file system duplication. You can select "Yes" or "No" to turn this feature on or off. The default is "No". - Page 26 A. Connect the formatted SSD made in step (1) to a computer, and you can see a 7.98 GB disk on the computer as an example below. B. Copy the latest software to be updated to the SSD for firmware upgrade. (3)Firmware update: A.
-
Page 27: Frequently Asked Questions
A: Check the capacity of the target disk. If the capacity of the label on the target disk is the same as that of the label on the master disk, make sure that the number of sectors of the target disk and the master disk are the same. 10. Specification NV-05M Duplicator Specification: Model NV-05M... - Page 28 Advanced Functions (available to certain models) Computer Link Real-time computer monitoring and work record keeping Mapping PC mapping production, download and copy Compatibility File Format Supported FAT16/32/64,exFAT,NTFS,EXT1/2/3/4 Hardware Specification Power Supply 100~240V,400W,50/60HZ Temperature -20°C ~ 85°C Humidity 5% ~ 95% Net Weight (kg) Gross Weight(kg)...
-
Page 29: Appendix
11. Appendix Adapter board replacement: ⑴ M.2 SSD adapter board: Step 1. Remove the adapter plate fixture screws and remove the fixture. Step 2. Unplug the original adapter board. Step 3. Insert the new adapter board. Step 4. Reinstall the adapter plate fixture and tighten the screws. ⑵... - Page 30 Step 1. Unplug the SATA cable (as shown below) and remove the fixing screws of the adapter board (as shown below) Step 2. Unplug the original adapter board and replace it with a new one. Step 3. Connect the SATA cable and tighten the fixing screw.
Need help?
Do you have a question about the NV-05M and is the answer not in the manual?
Questions and answers