Table of Contents
Advertisement
Quick Links
Advertisement
Table of Contents

Related Manuals for Datavideo DVK-300HD


Summary of Contents for Datavideo DVK-300HD
- Page 1 All manuals and user guides at all-guides.com...
-
Page 2: Table Of Contents
Post Correction ____________________________________________________________ 21 User Presets ______________________________________________________________ 22 Hardware Status___________________________________________________________ 23 7.10 Main Window Functions __________________________________________________ 23 7.11 Change Device __________________________________________________________ 24 7.12 Configuration ___________________________________________________________ 24 7.13 Exit ___________________________________________________________________ 27 Connecting DVK-300HD to SE-2800 Switcher _______________________________ 28 Firmware Update _____________________________________________________ 30... - Page 3 Datavideo Technologies is not responsible for any omissions or errors, or for any subsequent loss or damage caused by using the information contained within this manual. Further advice on the content of this manual or on the product can be obtained by contacting your local Datavideo Office or...
-
Page 4: Fcc Compliance Statement
AC adapter. If you are not sure of the type of power available, consult your Datavideo dealer or your local power company. 8. Do not allow anything to rest on the power cord. Do not locate this unit where the power cord will be walked on, rolled over, or otherwise stressed. -
Page 5: Warranty
• Drives are only covered for the first 10,000 hours, or 1 year (whichever comes first). Any second year warranty claims must be made to your local Datavideo office or one of its authorized Distributors before the extended warranty expires. -
Page 6: Product Overview
The device supports two keying modes, Chroma Key and Luma Key. Chroma Key Mode - This function enables the DVK-300HD to be used for chroma keying. Camera input is fed with object on a green or blue backdrop. Background is generated by PC or any other media sources. -
Page 7: Features
All manuals and user guides at all-guides.com 2. Features • Chrominance keyer • Matte control • Key noise reduction • Tolerance correction • Spill correction • Edge correction • Setup Wizard to guide the new user step by step • Post correction – correction of picture parameters, i.e. brightness, contrast, saturation, ambient colour and intensity, applied to foreground after keying process •... -
Page 8: Functions
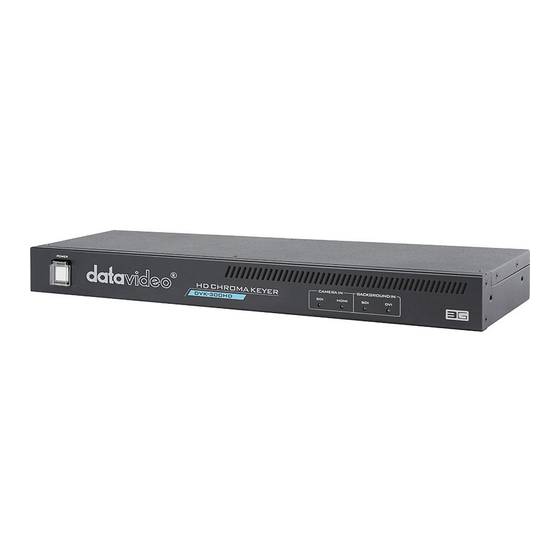
10/100Mbps Ethernet Network interface for remote access from the PC. This port connects the DVK-300HD to Laptop or PC so that the user will be able to configure the device using the utility software. FOREGROUND CAMERA IN Receives HDMI & SDI input signal from your HDMI or SDI... - Page 9 All manuals and user guides at all-guides.com BACKGROUND IN Receives SDI & DVI-I input signal from your SDI or DVI-I equipped camera or device. OUTPUT HDMI & SDI output ports (MATTE OUT is for previewing black & white level chroma key effect). SDI output SDI output port is for program output.
-
Page 10: System Diagram
All manuals and user guides at all-guides.com 4. System Diagram... -
Page 11: Dvk-300Hd Utility Software Installation
All manuals and user guides at all-guides.com 5. DVK-300HD Utility Software Installation Connect your Laptop or PC to the DVK-300HD via Ethernet port and use the utility software to operate device functions. Step1: Click the utility installer icon to install the DVK-300HD software. -
Page 12: The Initial Settings
PC running the application should be set to the IP address of the same subnet 192.168.1.X (e.g. 192.168.1.5) as DVK-300HD. 2. If you are working with multiple DVK-300HD devices, it is possible to connect each device with a network cable to the router. In this setup, the PC running the application should be configured to the same subnet as the router to which the DVK-300HD devices are connected. -
Page 13: Change The Device Name
It is recommended that each time you connect the device and after assigning an IP address to the device, the following steps are carried out to change the name of the device. • Open the DVK-300HD Chroma Key application • Select a device from the list of available devices. -
Page 14: Dvk-300Hd Utility User Interface
All manuals and user guides at all-guides.com 7. DVK-300HD Utility User Interface 7.1 Keying Colour Selection and Key Mask Setting The first step is to select the mode of operation in the Mode section – the Chroma key button. The Mode section Next, the colour to be keyed out should be selected. - Page 15 All manuals and user guides at all-guides.com Show alpha matte function The Show alpha matte view The intended result is to make the mask background colour as close to perfect black as possible. In order to do that the Black level slider should be moved until black is distributed as evenly as possible on the mask background.
-
Page 16: Correction Of Object Edges And Sharpness
All manuals and user guides at all-guides.com If the slider is moved to the extremes, the other objects will lose their properties and become non-transparent; this is why the function should be applied sparingly so that small differences are still discernible in the distribution of the black background. The successive step is to obtain a uniform distribution of white on objects which will remain fully non-transparent. - Page 17 All manuals and user guides at all-guides.com In this case, in order to adjust the grayness, two further functions from the Tolerance correction section are needed. The first one is called Color and its use leads to the restoration to a uniform black structure of the background. The Color slider The other one, Luminance, improves the structure of the uniform colour of the white mask.
-
Page 18: Removal Of Keying Colour Remains (Despill)
All manuals and user guides at all-guides.com 7.4 Removal of Keying Colour Remains (Despill) Once the correct mask is set, the functions in the Spill correction section will eliminate the reflection of the colour of the keyed background in the object. Impact of the background colour on the object –... - Page 19 All manuals and user guides at all-guides.com A view after the green component has been eliminated Another function enables a more accurate adjustment of the above problem. The use of the Despill fine function eliminates the keyed background colour from the object, but this time on the basis of the chrominance components.
-
Page 20: Additional Correction To Improve Quality
All manuals and user guides at all-guides.com 7.5 Additional Correction to Improve Quality The Edge brightness function is used to correct semi-transparent areas (e.g. hair ends that need to be darkened or brightened) in order to make an object look natural. The Edge brightness slider A view before an Edge brightness adjustment A view after an Edge brightness adjustment... - Page 21 All manuals and user guides at all-guides.com A view from the camera area By cutting the remaining elements by means of the sliders Left, Right, Top, Bottom, it is possible to place the object within the area of the keyed background. A view after a Garbage mask correction with the keying algorithm switched off After enabling the chroma keying function, the following effect is obtained.
-
Page 22: Post Correction
All manuals and user guides at all-guides.com A view after the Garbage mask correction with the keying algorithm switched on Comments: It should be kept in mind that in this case the object may only move within the area of the cut off mask – otherwise the object will disappear. Furthermore, if the Garbage mask sliders are used, it is possible to check whether the previous settings were correct and whether they had any influence on the final look of the virtual background. -
Page 23: User Presets
All manuals and user guides at all-guides.com Contrast – this enables the contrast between colours to be increased. Saturation – this enables colour saturation to be boosted. Ambient Color – this enables an ambient component to be introduced into the picture. Intensity –... -
Page 24: Hardware Status
All manuals and user guides at all-guides.com 7.9 Hardware Status This section displays software information, network information, and video formats. Hardware Status section Connected to This option is used to show the name of the device with which Key control cooperates. Work format This is the output format of the camera. -
Page 25: Change Device
All manuals and user guides at all-guides.com Save setting This function enables the current slider settings to be saved to file. 7.11 Change Device This function enables activation of the device selection window on the basis of the device’s name, MAC address or allocated IP network address. Change Device button The Device Selector window 7.12 Configuration... - Page 26 All manuals and user guides at all-guides.com Device name window Firmware – it shows the firmware version and click the change button to start the firmware upgrade wizard. Change firmware window Network configuration – this option enables network settings to be configured. Network configuration window Inputs configuration –...
- Page 27 All manuals and user guides at all-guides.com Input configuration window Outputs configuration – this option allows the user to select the logical output on which the MATTE is visible. Output Configuration window As illustrated in the diagram below, PVW output only: HDMI or SDI PGM output only: SDI PVW and PGM: HDMI or SDI/SDI...
-
Page 28: Exit
All manuals and user guides at all-guides.com Please note that in order to switch the output on which the MATTE view is shown, SHOW ALPHA MATTE mode must be selected in the main window of the application. Mirror – Mirror function inverts the image rotation along the vertical axis (PVW out connectors, HDMI/SDI). -
Page 29: Connecting Dvk-300Hd To Se-2800 Switcher
SE-2800 switcher. Talent, in the indoor studio, stands in front of a green background, which can be keyed out using the DVK-300HD Chroma Key. The procedure of switching live backgrounds behind the talent is outlined as follows: 1. - Page 30 All manuals and user guides at all-guides.com 6. Connect Fill Source (SDI Connector 2) and Key Source (SDI Connector 3) to the SE-2800 Switcher input ports, which must be neighboring inputs. On the output screen, Fill Source is in the front and behind the fill source is the Key Source. 7.
-
Page 31: Firmware Update
All manuals and user guides at all-guides.com 9. Firmware Update Firmware Update via RS-232 port 1. Connect the PC’s RS-232 port to the RS232 port of the DVK300HD; use the standard extension cable and make sure the connectors are pin-to-pin. 2. - Page 32 All manuals and user guides at all-guides.com 8. Reboot the device when the status at the lower left-hand corner of the main window displays “Finished”. Note: The RS-232 communication interface can also be used for remote access of the DVK- 300HD from the PC.
-
Page 33: Rs-232 Control Protocol
All manuals and user guides at all-guides.com 10. RS-232 Control Protocol 10.1 Hardware Specifications Serial Port Specifications Item Description Data Rate 38,400 Baud Character Length 1 start bit + 8 data bits + 1 parity bit + 1 stop bit Parity Odd parity Connector... -
Page 34: Status And Data Replies
All manuals and user guides at all-guides.com Status and Data Replies Sync Byte Byte Count Response Message Checksum Item Description Sync Byte 0xAA The total number of subsequent bytes in the block (from command Bytes Count byte to Checksum byte). Command Error 0x40 Response Message... -
Page 35: Matte Control
All manuals and user guides at all-guides.com 0x02 Set matte White 0x03 Set matte Cutoff 0x04 Set matte Softness bit1 ~ bit0 Matte bit9 ~ bit8 Parameter 2 bit7 ~ bit2 Parameter 3 bit7 ~ bit0 Matte bit7 ~ bit0 Return Response Item... -
Page 36: Matte Luminance Tolerance
All manuals and user guides at all-guides.com Matte Luminance Tolerance Set matte luma tolerance Command Code 0x14 Parameter 1 matte_luma bit7 ~ bit0 Return Response Item Sync Byte Byte Count Checksum In Response To Message Command Error 0xAA 0x02 0x40 0x40 Invalid Command Valid Write... -
Page 37: Garbage Mask
All manuals and user guides at all-guides.com Garbage Mask Garbage mask Command Code 0x17 0x01 Left garbage (must be <= Right garbage mask) 0x02 Right garbage (must be >= Left garbage mask) Parameter 1 0x03 Top garbage (must be <= Bottom garbage mask) 0x04 Bottom garbage (must be >= Top garbage mask) bit1 ~ bit0... -
Page 38: Save/Load Preset
All manuals and user guides at all-guides.com Post correction ambient color value Blue bit7 ~ bit0 Ambient_blue bit7 ~ bit0 Post correction ambient intensity bit7 ~ bit0 Ambient_intensity bit7 ~ bit0 Return Response Item Sync Byte Byte Count Checksum In Response To Message Command Error 0xAA... -
Page 39: Outputs Configuration
All manuals and user guides at all-guides.com 0x02 HDMI Background input 0x01 0x02 HDMI/DVI 0x03 Return Response Item Sync Byte Byte Count Checksum In Response To Message Command Error 0xAA 0x02 0x40 0x40 Invalid Command Valid Write Command Accepted 0xAA 0x02 0x80 0x80... - Page 40 All manuals and user guides at all-guides.com 0x22 Preset 2 name 0x23 Preset 3 name 0x24 Preset 4 name Return Command Error Response Item Sync Byte Byte Count Checksum In Response To Message Command Error 0xAA 0x02 0x40 0x40 Invalid Command Return Password Return Sync Byte...
-
Page 41: Get
All manuals and user guides at all-guides.com 0x11 Name Byte 2 0x12 Default name Byte 3 – Byte n Name/Default name (string without tailing \0) Checksum (Byte 1 + … + Byte n) & 0xFF Return Version Return Sync Byte 0xAA Byte Count 0x13... - Page 42 All manuals and user guides at all-guides.com Return Command Accepted Return Sync Byte 0xAA Byte Count n + 1 Byte 1 Command code Byte 2 Parameter 1 Parameter is optional Byte 3 Value byte 1 … … Parameter value bytes (usually 1 … 3) Byte n Value byte m Checksum...
- Page 43 All manuals and user guides at all-guides.com Return Get Background Color Tone Detection – Default Color Return Sync Byte 0xAA Byte Count 0x04 Byte 1 0x90 Command code Byte 2 0x03 Background color tone detection Byte 3 0x00 Default color Checksum 0x93 Return Get Background Color Tone Detection –...
-
Page 44: Specifications
All manuals and user guides at all-guides.com 11. Specifications 1 x BNC connector, 75 Ohm up to 3 GB/s SDI input Video Camera 1 x HDMI v1.4 connector Input Interface 1 x BNC connector, 75 Ohm up to 3 GB/s SDI input Video Background 1 x DVI-I connector for HDMI/DVI/VGA input... -
Page 45: Service & Support
All manuals and user guides at all-guides.com Service & Support...
Need help?
Do you have a question about the DVK-300HD and is the answer not in the manual?
Questions and answers