
Related Manuals for Billion BiPAC 8200AXL-1200


Summary of Contents for Billion BiPAC 8200AXL-1200
- Page 1 BiPAC 8200AXL-1200 Triple-WAN Wireless-AC 1200Mbps VDSL2/ADSL2+ Firewall Router User Manual Version Released: 2.53.d16 Last revised date: Nov. 07, 2018...
-
Page 2: Table Of Contents
Table of Contents Introduction................................1 Introduction to your Router ........................1 Features................................3 Physical Interface ............................6 Package Contents............................7 Device Description ..............................8 Basic Installation..............................12 Factory Default Settings ..........................17 Web Interface (Username and Password) ....................17 Device LAN IPv4 settings ........................17 DHCP server for IPv4 ..........................17 Configuration..............................17 Configuration via Web Interface ......................17 Status ..................................19... - Page 3 ATM Settings ..............................45 DSL Settings..............................46 3G/4G LTE Settings ............................47 Services ................................49 DNS................................49 Dynamic DNS............................49 Firewall.................................51 ALG ...............................51 IP/Port Filtering............................51 MAC Filtering ............................52 Port Forwarding ...........................53 URL Blocking............................56 Domain Blocking ..........................57 DMZ..............................57 DoS ...............................58 UPnP................................59 RIP ................................60 Samba................................61 Advance................................62 Bridging ................................62 Routing .................................63 SNMP................................64 Bridge Grouping ............................65...
- Page 4 Management ..............................80 Backup/Restore............................80 Password ..............................81 Firmware Upgrade ............................81 ACL ................................82 Time Zone ..............................84 SMS Alert Settings............................84 Statistics................................85 Interface ...............................85 DSL................................86 Reboot.................................87 Logout .................................87 Troubleshooting ..............................88 Appendix: Product Support & Contact ........................89...
-
Page 5: Introduction
3G/4G LTE mobility With BiPAC 8200AXL-1200 you can connect a 3G/4G LTE USB modem to its built-in USB port, allowing you to watch movies, download music or access e-mail no matter where you may be. You can even share your Internet connection with others, when away on business, at a show, or wherever there is mobile signal but no fixed line access. - Page 6 Pathway to the Future IPv6 (Internet Protocol Version 6), launched as the current IPv4 is getting filled up, gradually becomes the indispensible addressing system for the savvy cloud computing users. Equipped with IPv6, the router eagerly provides users a better working environment to work with, a shortcut to upgrade and a more efficient solution to save budget.
-
Page 7: Features
Features - Compliant with VDSL2/ADSL2+ standards - Triple-WAN ports for 3G/4G LTE, VDSL2/ADSL2+ fallback, Gigabit Ethernet WAN (EWAN) for broadband connectivity - Simultaneous dual-band Wireless 867Mbps (5GHz) and 300Mbps (2.4GHz) - Gigabit EWAN and LAN ports - IPv6 ready (IPv4/IPv6 dual stacks) - Fibre (FTTC/FTTP/FTTH) ready with high WAN throughput via EWAN port - USB port for NAS, Printer Server and 3G/4G LTE USB modem - QoS for traffic prioritization and bandwidth management... - Page 8 Network Protocols and Features - IPv4 or IPv4/IPv6 dual stack - NAT, static (v4/v6) routing and RIP-1/2 - Pv6 stateless/stateful address auto-configuration - IPv6 router advertisement - IPv6 over PPP - DHCPv6 - Universal Plug and Play (UPnP) compliant - Dynamic Domain Name System (DDNS) - Virtual Server (port forwarding) and DMZ - SNTP, DNS relay, IGMP proxy and IGMP snooping for video service - MLD proxy and MLD snooping for video service...
- Page 9 - PPP over ATM (RFC 2364) - Classical IP over ATM (RFC 1577) - MAC encapsulated routing (RFC 1483 MER) - OAM F4/F5 IPTV Applications - IGMP snooping and IGMP proxy - MLD snooping and MLD proxy - Bridge Grouping - Supports VLAN MUX - Quality of Service (QoS) Wireless LAN...
-
Page 10: Physical Interface
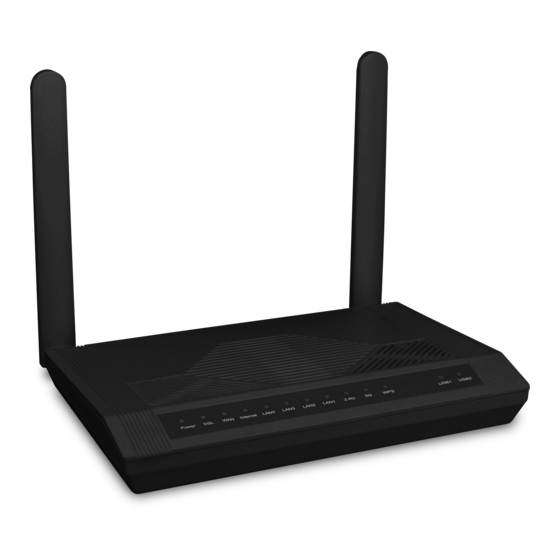
Physical Interface - WLAN antennas: 2 external antennas - DSL: VDSL/ADSL port - Ethernet: 4-port 10/100/1000Mbps auto-crossover (MDI / MDI-X) Switch - EWAN: 1 Gigabit Ethernet port as a WAN interface for broadband connectivity USB 2.0 and USB 3.0 for 3G/4G LTE USB modem USB 3.0 for storage service and 3G/4G LTE USB modem - WLAN on/off button - WPS push button... -
Page 11: Package Contents
Package Contents - BiPAC 8200AXL-1200 Triple-WAN Wireless-AC 1200Mbps VDSL2/ADSL2+ Firewall Router Router - User Manual - RJ-45 UTP Ethernet cable - Power adapter Important note for using this router Do not use the router in high humidity or high temperatures Do not use the same power source for the router as other equipment. -
Page 12: Device Description
Device Description The Front LEDs Status Meaning Green System ready Power Green xDSL Showtime Phase Green Blinking xDSL Discovery/Training/Exchange Phase No xDSL line connected Green Ethernet Link Up Green Blinking Ethernet Link Up and traffic Ethernet Link Down Device has a public IP via either static/ DHCP/ or Green IPCP Internet... - Page 13 WPS Stop USB device connected USB1/2 USB device not connected...
- Page 14 The RESET button is to designed to achieve two effects: 1. Press and hold it for 2-5 seconds to get FW/firmware upgrade from RESET Billion server when internet is working. 2. Press and hold it for 5 seconds or above to restore to factory default settings.
- Page 15 Connect to the xDSL/ telephone network with RJ-11 cable(telephone) Connect the USB device (Printer, USB storage, 3G/4G LTE USB modem) USB(2.0/3.0) to the port. Note: USB 2.0 for 3G/4G LTE USB modem only USB 3.0 port for Printer, USB storage, 3G/4G LTE USB modem.
-
Page 16: Basic Installation
Basic Installation The router can be configured through your web browser. A web browser is included as a standard application in the following operating systems: Linux, Mac OS, Windows 8 / 7 / 98 / NT / 2000 / XP / Me / Vista, etc. The product provides an easy and user-friendly interface for configuration. - Page 17 Network Configuration Configuring a PC in Windows 7/8/10 Go to Start. Click on Control Panel. Then click on Network and Internet. Settings of Windows 10 When the Network and Sharing Center window pops up, select and click on Change adapter settings on the left window panel.
- Page 18 IPv4: Select Internet Protocol Version 4 (TCP/IPv4) then click Properties. In the TCP/IPv4 properties window, select the Obtain an IP address automatically and Obtain DNS Server address automatically radio buttons. Then click OK to exit the setting. Click OK again in the Local Area Connection Properties window to apply the new configuration.
- Page 19 IPv6: Select Internet Protocol Version 6 (TCP/IPv6) then click Properties In the TCP/IPv6 properties window, select the Obtain an IPv6 address automatically and Obtain DNS...
- Page 20 Server address automatically radio buttons. Then click OK to exit the setting. Click OK again in the Local Area Connection Properties window to apply the new configuration.
-
Page 21: Factory Default Settings
Factory Default Settings Before configuring your router, you need to settings. Web Interface (Username and Password) Administrator Username: admin Password: admin Attention If you have forgotten the username and/or password of the router, you can restore the device to its default setting by pressing the Reset Button more than 6 seconds. - Page 22 Congratulations! You are now successfully logged in to the Firewall Router! Once you have logged on to your BiPAC 8200AXL-1200 Router via your web browser, you can begin to set it up according to your requirements. On the configuration homepage, the left navigation pane links you...
-
Page 23: Status
Status Device The page below shows the basic system and WAN connection information. -
Page 24: 3G/4G/Lte Info
3G/4G/LTE Info This page shows 3G/4G/LTE network and dongle information. Status: The current status of the 3G/4G LTE connection. Signal Strength: The signal strength bar and dBm value indicates the current 3G/4G-LTE signal strength. The front panel 3G/4G LTE Signal Strength LED indicates the signal strength as well. Network Name: The name of the 3G/4G LTE network the router is connecting to. -
Page 25: Ap Neighbor
AP Neighbor This page shows all WLAN AP’s information around your BiPAC 8200AXL-1200. IPv6 This page shows the current system status of IPv6. -
Page 26: Lan Port
LAN Port This page shows if the LAN port is connected and the working status, rate, and duplex mode. This section displays the router’s ARP (Address Resolution Protocol) Table, which shows the mapping of Internet (IP) addresses to Ethernet (MAC) addresses. This is useful as a quick way of determining the MAC address of the network interface of your PCs to use with the router’s Security –... -
Page 27: Dhcp
DHCP The DHCP Table lists the DHCP lease information for all IP addresses assigned by the DHCP server in the device. Host Name: The Host Name of DHCP client IP Address: The IP address which is assigned to the host with this MAC address MAC Address: The MAC Address of internal DHCP client host Expires in: Show the remaining time after registration Mark: Show clearly the SSID (WLAN) the device is in... -
Page 28: System Log
System Log Display system logs accumulated up to the present time. You can trace historical information with this function. Log Configuring System Log: Enable or disable this function. System Log Reserve: Choose if to reverse the order of log item display, with the latest at the top. Log level: Select your log level. - Page 29 Remote: Select this mode to send the log information to a remote log server. Then you must assign the remote log server and port, 514 is often used. Both: Logs stored adopting above two ways. Click Apply changes to submit. Save Log to File: Download the log to your local PC.
-
Page 30: Lan
A Local Area Network (LAN) is a shared communication system network where many computers are connected. This type of network is area defined and is usually limited to a confined region within a building. IP address: the IP address of the router. Default is 192.168.1.254. Subnet Mask: the default Subnet mask on the router. - Page 31 Ethernet to Wireless Blocking: When it is enabled, all connected PC on Ethernet port cannot access to any WiFi Client. DHCP Mode: Set to NONE to disable the DHCP Server function. DHCP Server is activated as default. IP Pool Range: Setup IP pool range that will be used for DHCP Server. User can click “Show Client” button to show information for all DHCP Clients.
-
Page 32: Wlan
WLAN BiPAC 8200AXL-1200 is a simultaneous dual-band (2.4G and 5G) wireless router supporting 11b/g/n/a/ac wireless standards. It allows multiple wireless users on 2.4G and 5G radio bands to surf the Internet, checking e-mail, watching video, listening to music over the Internet concurrently. - Page 33 Channel Number: The radio channel number. The permissible channels depend on the Regulatory Domain. The factory default setting is auto channel selection. Radio Power: Specify the transmitting power of your wireless signal. S: Small / M: Medium / H: High Associated Clients: Here you can view information about the wireless clients.
-
Page 34: Advanced Settings
Advanced Settings Here user can set some advanced parameters about wireless. Fragment Threshold: A threshold (in bytes) whether the packets will be fragmented and at what size. Packets succeeding the fragmentation threshold of 802.11n WLAN will be split into smaller units suitable for circuit size. -
Page 35: Security
Security Wireless security prevents unauthorized access or damage to computers using wireless network. SSID choice: Apply the security settings to selected SSID. Encryption: User can select one of the following authentications to secure your wireless network: None, WPA, WPA2 or WPA2 Mixed. None 802.1x Authentication: If to enable 802.1x authentication. - Page 36 802.1x Authentication: If to enable 802.1x authentication. Key Length: 64 Bits or 128 bits. RADIUS Server IP Address: RADIUS( Remote Authentication Dial In User Service), Enter the IP address of RADIUS authentication server. RADIUS Server Port: Enter the port number of RADIUS authentication server here. RADIUS Password: Enter the password of RADIUS authentication server.
- Page 37 Authentication Mode: RADIUS and Pre-shared key. If RADIUS, please RADIUS( Remote Authentication Dial In User Service), Enter the IP address, port, password of RADIUS authentication server. WPA Cipher Suite: Specify what cipher suite can be used. WPA2 Cipher Suit: Specify what cipher suite can be used. Group Key Update: The period of renewal time for changing the security key automatically between wireless client and Access Point (AP).
-
Page 38: Access Control
Access Control The page helps user to make better security for the wireless network, wireless MAC Filter. Mode: Select the mode for the action that will apply to the Current Access Control List. MAC Address: Enter the WiFi client’s MAC address. Enter the Add button to add MAC address to the list. Reset: User can click this button to clear MAC address that just entered. -
Page 39: Site Survey
Site Survey The page can help user to find what WiFi channel is used by other AP and find the best channel for you by yourself. Just click Refresh button to do WLAN side survey. WPS (Wi-Fi Protected Setup) feature is a standard protocol created by Wi-Fi Alliance. WPS is used to exchange the AP setting with Station and configure AP settings. -
Page 40: Status
Status This page shows the current configuration of WiFi module. -
Page 41: Wan
A WAN (Wide Area Network) is a computer network that covers a broad geographical area (eg. Internet) that is used to connect LAN and other types of network systems. WAN Mode The page is used to configure which WAN connection mode will be used or not. Default Routing This page is used to configure the priority of each WAN connection. -
Page 42: Ethernet Wan
Ethernet WAN The page is used to configure the parameters and protocol for the Ethernet WAN port. The device offers four popular methods for connecting WAN - Ethernet WAN (broadband) seen below, VDSL, see PTM (VDSL) WAN and ADSL, see ATM (ADSL) WAN and 3G/4G LTE, see 3G/4G LTE... - Page 43 Enable QoS: Enable/Disable the QoS for WAN connection. MTU: Most ISP offers MTU value to users. Enable IGMP-Proxy: Enable/Disable the IGMP Proxy. If disabled, the IPTV will not work with NAT enabled mode. IP Protocol: Setup profile’s IP protocol to be IPv4 only, IPv6 only or IPv4/IPv6 dual stack. When Channel Mode is set to IPoE, you will have the options below.
-
Page 44: Ptm(Vdsl) Wan
PTM(VDSL) WAN The page is used to configure the parameters and protocol for the VDSL2 WAN port. WAN Interface: Select the profile for configuration or new link to create a new profile. Enable VLAN: User can check this box to enable the VLAN on specify profile. VLAN ID: Assign a VLAN ID tag between 0 and 4094 802.1p_Mark: Select an 802.1p priority level between 0 and 7. - Page 45 Enable IGMP-Proxy: Enable/Disable the IGMP Proxy. If disabled, the IPTV will not work with NAT enabled mode. IP Protocol: Setup profile’s IP protocol to be IPv4 only, IPv6 only or IPv4/IPv6 dual stack. When Channel Mode is set to IPoE, you will have the options below. Type: Setup the WAN interface is use static IP or activate as DHCP client and get WAN IP from ISP.
-
Page 46: Atm(Adsl) Wan
ATM(ADSL) WAN The page is used to configure the parameters and protocol for the ADSL WAN port. There are three pre-set ADSL connections, users can edit or add your own ADSL rules. But note, edit when your channel mode (protocol) is in line with one of the pre-set rules, or please add new ones. - Page 47 Now, let’s add a PPPoE ADSL connection. VPI/VCI: if not sure, please Enable Auto-PVC Search. PPP Settings: Username/Password: Please input the PPP dial-up account. Type: To determine the duration of a dial-up connection. Continuous: Select this option when you want your connection up all the time. Connect on Demand: Select it when you don't want the connection up all the time and specify an idle time-out in the Max Idle Timeout field.
- Page 48 Enable Auto-PVC Search This feature is used to configure pvc auto detection. Here you can add/delete items in auto pvc search table. Apply: When ADSL is up and you are not sure about your VPI/VCI. Press Apply to auto-search PVCs, which are to be shown in the current auto-PVC table.
-
Page 49: Atm Settings
ATM Settings This page is used to configure the ATM parameters. Here you may change the setting for QoS, PCR,CDVT, SCR and MBS. The ATM QoS types include CBR (Constant Bit Rate), VBR (Variable Bit Rate) and UBR (Unspecified Bit Rate). These QoS types are all controlled by the parameters specified below, including PCR, SCR and MBS. -
Page 50: Dsl Settings
DSL Settings This screen allows you to set DSL parameters. DSL knowledge is required to configure these settings. Contact your ISP to make sure that these parameters are correct. Please keep these settings as default from ISP, it may make DSL connection broken if set to wrong parameters. -
Page 51: 3G/4G Lte Settings
3G/4G LTE Settings 3G/4G LTE dongle related settings can be found in this page. 3G/4G LTE WAN: Enable/Disable the 3G/4G LTE dongle detection function. Mode: There are 6 options of phone service standards: GSM 2G only, UTMS 3G only, GSM 2G preferred, UMTS 3G preferred, Automatic, and Use 3G/LTE 3g dongle settings. - Page 52 Connect on Demand: If you want to make UMTS/GPRS call only when there is a packet requesting access to the Internet (i.e. when a program on your computer attempts to access the Internet). In this mode, you must set Idle Timeout value at same time. Click on Connect on Demand, the Idle Timeout field will display.
-
Page 53: Services
Services Dynamic DNS The Dynamic DNS function allows you to alias a dynamic IP address to a static hostname, allowing users whose ISP does not assign them a static IP address to use a domain name. This is especially useful for hosting servers via your ADSL/VDSL connection, so that anyone wishing to connect to you may use your domain name, rather than having to use your dynamic IP address, which changes from time to time. - Page 54 DynDns Settings Username: Your registered name. Password: Your registered password. TZO Settings: Email: Your registered email. Key: Your registered key. Click Add to confirm your DDNS rules.
-
Page 55: Firewall
Firewall The ALG Controls enable or disable protocols over application layer. VPN pass-through (L2TP/PPTP) is a feature of routers which allows VPN client on a private network to establish outbound VPNs unhindered. FTP ALG enabled allows FTP clients behind an NAT to establish a connection on the port of FTP Server. Enable the H.323/SIP ALG when H.323/SIP SIP phone needs ALG to pass through the NAT. -
Page 56: Mac Filtering
Outgoing Default/Incoming Default Action: Specify the default action for the unmatched traffic in Current Filter Table. Direction: Specify the direction of traffic. Protocol: Specify the protocol of traffic. Rule Action: Specify what action will be applied to this rule. Source IP Address/Subnet Mask/Port: Enter the information of traffic that will be hooked by filter. Destination IP Address/Subnet Mask/Port: Enter the information of traffic that will be hooked by filter. -
Page 57: Port Forwarding
Port Forwarding In TCP/IP and UDP networks a port is a 16-bit number used to identify which application program (usually a server) incoming connections should be delivered to. Some ports have numbers that are pre-assigned to them by the IANA (the Internet Assigned Numbers Authority), and these are referred to as “well-known ports”. Servers follow the well-known port assignments so clients can locate them. - Page 58 Port Forwarding: Choose if to enable Port Forwarding feature. And Apply Changes to save the setting. Application: You can select the common application type, for example, AUTH, FTP or TFTP. Enable: To activate the rule or not. Comment: user-defined description for the rule. Local IP/Port: Set the local IP and port (range) for the application(local server).
- Page 59 Enter the static IP assigned to the local PC that is hosting the FTP server. Ex: 192.168.0.102 The router will forward port 21 request to the specific LAN PC (ex:192.168.0.102) in the network.
-
Page 60: Url Blocking
URL Blocking If website’s URL or keyword matches the pre-defined URL/keyword here, the connection to this URL/keyword will be blocked. FQDN Blocking: To block the URL request with a matched FQDN. If a URL request is matched with listed items, the request will be dropped. -
Page 61: Domain Blocking
Domain Blocking If any domain matches the pre-defined domain here, the connection to this domain will be blocked. Domains Blocking: Enter the domain to be blocked. The DMZ Host is a local computer exposed to the Internet. When setting a particular internal IP address as the DMZ Host, all incoming packets will be checked by Firewall and NAT algorithms before being passed to the DMZ host. -
Page 62: Dos
This page helps user to setup protection for DOS attack. -
Page 63: Upnp
UPnP UPnP offers peer-to-peer network connectivity for PCs and other network devices, along with control and data transfer between devices. UPnP offers many advantages for users running NAT routers through UPnP NAT Traversal, and on supported systems makes tasks such as port forwarding much easier by letting the application control the required settings, removing the need for the user to control advanced configuration of their device. -
Page 64: Rip
Enable this Routing Information protocol for the router to communicate with other rip-enable devices. RIP: Select Enable, the router communicates with other RIP-enabled devices. Interface: Choose the router interface that uses RIP. Receive Mode: Choose the interface RIP version that receives RIP messages. You can choose RIP1, RIP2, or Both. -
Page 65: Samba
Samba This page allows user to enable/disable the Samba server when USB storage is connected. Samba: Enable/Disable the Samba server. Server String: Descriptive string for the Samba server How to access Samba On a connected PC, go directly to Start > Run, enter \\192,168,1,254,. -
Page 66: Advance
Advance Bridging This page is used to configure the bridge parameters. You can change the settings or view some information on the bridge and its attached ports. Ageing Time: If the host is idle for 7200 seconds (default value), its entry is deleted from the bridge table. -
Page 67: Routing
Routing Enter the static routing information for an entry to the routing table. Click Add button when you are finished. Enable: Checked to enable static route function. Destination/Subnet Mask: Enter the destination IP address and the subnet mask. Next Hop: Specify the gateway IP address for routing to next network. Metric: Metric is a policy for router to commit router, to determine the optimal route. -
Page 68: Snmp
SNMP Simple Network Management Protocol (SNMP) is a protocol used for exchanging management information between network devices. SNMP is a member of the TCP/IP protocol suite. The router serves as a SNMP agent that allows a manager station to manage and monitor the router through the network. Enable SNMP: Enable to activate SNMP function. -
Page 69: Bridge Grouping
Bridge Grouping Bridge/Interface grouping is a function to group interfaces, known as VLAN. A Virtual LAN, is a group of hosts with the common set of requirements that communicate as if they were attached to the same broadcast domain, regardless of the physical location. Each group will perform as an independent network. Grouped Interfaces: Group interfaces into one group. - Page 70 How to group interfaces into one group or to map LAN ports on WAN ports / GRE ports 1. Create bridged WAN interfaces or GRE tunnels. 2. Classify interfaces into one group. Click Apply Changes to save.
-
Page 71: Ip Qos
IP QoS QoS Policy IP QoS: Enable/Disable the IP QoS function. Policy: Specify the policy for queue. Policy: The Queue Scheduling Algorithm, here supporting WRR (Weighted Round Robin) and PRIO (Priority). WRR: Weighted Round Robin, used to alternate each WRR queue to ensure that every queue can enjoy its due service time (resource) in accordance with its weight. -
Page 72: Qos Classification
QoS Classification Click the Add button to add QoS rule. Rule Name: Enter the rule name. Rule Order: Rule Index. Precedence: Specify which Queue the packets matching the QoS conditions are to be classified into. Please notice that only when the packet fulfill every detailed conditions set below, then this packet will be remarked as the priority queue of each rule. - Page 73 Ethery Type Ethernet Type: EtherType is a two-octet field in an Ethernet frame. It is used to indicate which protocol is encapsulated in the payload of the frame. Specify the Ethernet Type of packets to be monitored. IP/Protocol Source IP/Port: The source IP/Port of packets to be monitored. Destination IP/Port: The destination IP/Port of packets to be monitored.
-
Page 74: Printer Server
The Print Server feature allows you to share a printer on your network by connecting a USB cable from your printer to the USB port on the BiPAC 8200AXL-1200. This allows you to print from any location on your network. - Page 75 2. Select “Select a shared printer by name”, copy the printer URL that shows on device WEB GUI (Advanced -> Printer) and past it here. 3. Click Next button and follow the instruction by Windows 10.
-
Page 76: Ipv6
IPv6 IPv6 IPv6: Enable or Disable the IPv6 function. RADVD MaxRtrAdvInterval: The maximum time allowed between sending unsolicited multicast router advertisements from the interface, in seconds. It Must be no less than 4 seconds and no greater than 1800 seconds. MinRtrAdvInterval: The minimum time allowed between sending unsolicited multicast router advertisements from the interface, in seconds. -
Page 77: Dhcpv6
DHCPv6 DHCPv6 Mode: Set to DHCPServer(Auto) to assign the IPv6 address to all LAN clients or set to NONE to disable it. MLD Proxy The MLD Proxy feature provides a mechanism for a device to generate MLD membership reports for all entries or a user-defined subset of these entries on the device’s upstream interface. -
Page 78: Mld Snooping
MLD Snooping Similar to IGMP snooping, listens in on the MLD conversation between hosts and routers by processing MLD packets sent in a multicast network, and it analyzes all MLD packets between hosts and the connected multicast routers in the network. Without MLD snooping, multicast traffic is treated in the same manner as broadcast traffic - that is, it is forwarded to all ports. -
Page 79: Ip/Port Filtering
IP/Port Filtering Outgoing Default/Incoming Default Action: Specify the default action for the unmatched traffic in Current Filter Table. Direction: Specify the direction of traffic. Protocol: Specify the protocol of traffic. Rule Action: Specify what action will be applied to this rule. Source Interface ID/Destination Interface ID: Enter the information of traffic that will be hooked by filter. -
Page 80: Diagnostics
Diagnostics Ping This page will help you to diagnostic the status of your Network. You can use “Ping” methods in this page. After you input the IP address, click Go button. Host: Enter your host IP/domain name to ping to test the connectivity between the host and your router. -
Page 81: Atm Loopback
ATM Loopback The router is equipped to perform connectivity verification by the use of the ATM OAM loopback capability for both VP and VC connections. This page is used to perform the VCC loopback function to check the connectivity of the VCC. -
Page 82: Dsl Tone
DSL Tone The frequency band of ADSL is split up into 256 separate tones, each spaced 4.3125 kHz apart. With each tone carrying separate data, the technique operates as if 256 separate modems were running in parallel. The tone range is from 0 to 31 for upstream and from 32 to 255 for downstream. -
Page 83: Adsl Connection
ADSL Connection The router is capable of testing your WAN connection. Run Diagnostic Test to proceed. -
Page 84: Management
Management This page allows user to reboot your device. All services will be terminated during rebooting. Backup/Restore This page allows user to backup or restore the router settings to/from file. Click Backup, a window appears, click save, and then browse the location where you want to save the backup file Click Choose File. -
Page 85: Password
Password The administrator password can be changed by this page. Suggest to change default password for better security protection. Old Password: The old password for the user. New Password: Enter new password. Confirm Password: Enter new password again for confirmation. Firmware Upgrade The firmware keeps enhancement and improvement. -
Page 86: Acl
This page allows user to allow/block access to the router’s service with specified IP address or network on both LAN and WAN direction. ACL Capability: The router’s all service will be opened and can be accessed by any direction if set to disable. Default is enable. - Page 87 Example on how to configure ACL, Here we are going to establish two frequently used rules to illustrate. 1. Set up a rule to allow only clients from LAN to have access to all embedded applications (HTTP, HTTPS, Ping, etc). Under this situation, clients from WAN cannot access the router even from Ping. Click Add to add rule. 2.
-
Page 88: Time Zone
Setup the Time Zone and NTP server here to correct and sync the time on the router. SMS Alert Settings SMS, Short Message Service, is to inform clients the information clients subscribe. BiPAC 8200AXL-1200 offers SMS alert sending clients alert messages when a default route change is detected. -
Page 89: Statistics
Statistics Interface This page shows the statistics (Receive/Transmit packets, Receive/Transmit errors, Receive/Transmit drops) of each interface. Click Reset Statistics button to reset counter. -
Page 90: Dsl
This page shows more DSL Synchronization details. -
Page 91: Reboot
Reboot Click the Commit and Reboot button to reboot the device immediately with the current settings. Logout This page will force the user logout immediately by clicking Logout button. Simultaneous access to the router is not allowed. One user at a time... -
Page 92: Troubleshooting
If the problem persists, most likely it is due to the malfunction of your hardware. Please contact your service provider or Billion for technical support. You have forgotten your login username or Try the default username "admin" and password password "admin". -
Page 93: Appendix: Product Support & Contact
Appendix: Product Support & Contact If you come across any problems please contact the dealer from where you purchased your product. Contact Billion Worldwide: http://www.billion.com MAC OS is a registered Trademark of Apple Computer, Inc. Windows XP, Windows Vista, Windows 7, Windows 8 and Windows 10 are registered Trademarks of Microsoft... - Page 94 Federal Communication Commission Interference Statement This equipment has been tested and found to comply with the limits for a Class B digital device, pursuant to Part 15 of the FCC Rules. These limits are designed to provide reasonable protection against harmful interference in a residential installation.
Need help?
Do you have a question about the BiPAC 8200AXL-1200 and is the answer not in the manual?
Questions and answers