
Subscribe to Our Youtube Channel
Related Manuals for WamBam TRADITIONAL VG13005


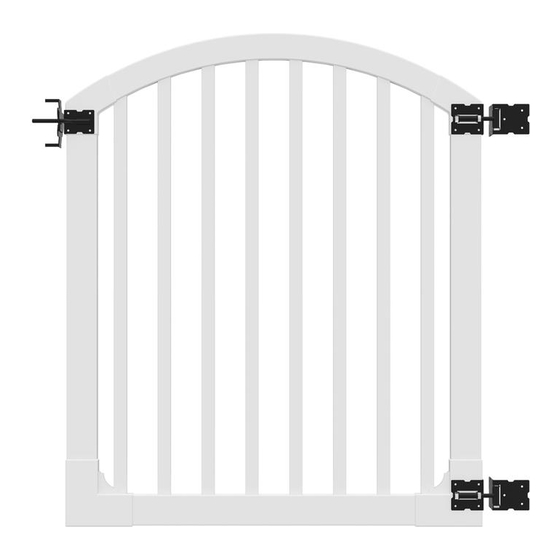
Summary of Contents for WamBam TRADITIONAL VG13005
- Page 1 VG13005 ASSEMBLY INSTRUCTIONS YARD & POOL ASSEMBLY INSTRUCTIONS VINYL GATE VG13005 (4’H X 4’W) 60 MIN Approximate assembly time Want to see a video on how to assemble this product? Scan the QR code WWW.WAMBAMFENCE.COM WWW.WAMBAMFENCE.COM VER. 051721...
- Page 2 VG13005 ASSEMBLY INSTRUCTIONS GENERAL IMPORTANT INFORMATION Check the inside of the larger pieces in your box for other materials packed inside. When assembling components, place on a non-abrasive surface (i.e. shipping box) to avoid scratching. We recommend an area approximately 5’x 8’ for unobstructed assembling.
- Page 3 VG13005 ASSEMBLY INSTRUCTIONS AVOID THESE PITFALLS! HAVE YOU CONTACTED You must call your local utilities before you start installing YOUR LOCAL UTILITIES? your fence to avoid puncturing any unseen underground utilities, especially electrical or gas lines. Fortunately, this is made easy for you. k Simply call 811 in the US or visit www.call811.com.
- Page 4 VG13005 ASSEMBLY INSTRUCTIONS TOOLS AND MATERIALS YOU’LL NEED Safety Glasses 1ft. Torpedo Level 4ft. Level (optional String Line Level) 2in. x 2in. x 6in. Inch Wood “Spacer” Block (2 for each panel) Cordless Drill (preferably with a high-torque setting) Shovel or Auger Any Power Or Hand Saw With A Fine- Toothed Blade String Line Stakes...
- Page 5 VG13005 ASSEMBLY INSTRUCTIONS INFORMATION GENERAL 1. Read over fence instructions first. Your gate and fence will work better together if you first take the time to read and understand your fence. 2. Pre-assemble the gate frame. Please do not screw the gate frame together until you have temporarily assembled the gate frame.
- Page 6 VG13005 ASSEMBLY INSTRUCTIONS 3.56in. 1.5in. 58.84in. 52in. 56.84in. 41.5in. 22in. 7.75in. 2in. Ground 3.5in. Concrete Footing 20in. 50in. 48in. 36in. 54.5in. Posts Sold Separately 1.5in. 1.5in. 3.5in. 10in. 1.5in. 3.5in. 3.5in. 1.5in. 3.5in. .090in. wall thickness Pool Code Notes: For swimming and other child safety gates, most safety standards specify: Your fence height needs to be between 4’...
- Page 7 VG13005 ASSEMBLY INSTRUCTIONS LAY OUT MATERIALS STEP 1: Arch Bracket (2) Corner Bracket (2) Top Rail (1) Latch Catch (1) 1½” x 9” x 42¼” 11/4” White Self-Drilling Stainless Steel Screw (16) Pickets Picket 1 (2) ⅞” x 1½” x 54¼” Picket 2 (2) 11/4”...
- Page 8 VG13005 ASSEMBLY INSTRUCTIONS ASSEMBLE GATE FRAME BOTTOM AND SIDES STEP 2: STEP 2.1 Insert the Bottom Rail all the way until it bottoms out inside the inside of the (B). Corner Bracket Note: The bottom rail is ribbed internally. STEP 2.2 STEP 2.3 Insert the Vertical Stiles (F).
- Page 9 VG13005 ASSEMBLY INSTRUCTIONS ASSEMBLE THE GATE FRAME TOP STEP 3: STEP 3.1 Insert the Top Rail inside the Arch Brackets as illus- trated. Insert all the way to this point. INSERT PICKETS STEP 4: STEP 4.1 STEP 4.2 Insert Pickets 1, 2, 3, and 4 Slide the gate arch over the pick- through the holes in the bottom rail in ets and vertical stiles.
- Page 10 VG13005 ASSEMBLY INSTRUCTIONS SECURE GATE FRAME AND BRACKETS STEP 5: STEP 5.1 Make sure your gate is square. The corner-to-corner measurements must be the same and the width of the gate should be 48”. Secure the brackets using (12) 11/4” White Self Drilling Stainless Steel Screws as illustrated.
- Page 11 VG13005 ASSEMBLY INSTRUCTIONS FASTEN GATE HINGES AND GATE LATCH STEP 6: STEP 6.1 Fasten the Latch Finger onto the arch bracket using (6) 11/4” Black Self-Drilling Stainless Steel Screws (L). Fasten the Gate Hinges onto the opposite arch bracket and bottom bracket using (12) 11/4”...
- Page 12 VG13005 ASSEMBLY INSTRUCTIONS ASSEMBLE AND FASTEN GATE BRACE STEP 7: STEP 7.1 Assemble the Gate Brace by sliding the larger square tube over the smaller square tube. Align the holes and install by using the included hardware. STEP 7.2 Double check that the gate is square, and screw the gate brace into place by using (4) self-drilling stainless steel screws packaged with the gate brace.
- Page 13 VG13005 ASSEMBLY INSTRUCTIONS ALIGN GATE AND SECURE HINGES TO POSTS STEP 8: STEP 8.1 Use the wooden blocks as temporary spacers to rest the gate on during alignment and installa- tion. STEP 8.2 Fasten the gate hinges to the posts using (6) 2” Black Self-Drilling Stainless Steel Screws (M).
- Page 14 VG13005 ASSEMBLY INSTRUCTIONS LEVEL GATE AND ADJUST HINGES STEP 9: STEP 9.1 STEP 9.2 Fasten the gate hinges to the inside of the Using a level, make sure that the gate post using (8) 2” black self-drilling stainless fits and functions with its latching post. steel screws as illustrated.
- Page 15 VG13005 ASSEMBLY INSTRUCTIONS INSTALL GATE LATCH STEP 10: STEP 10.1 Align and fasten the Latch Catch to fit and function with the gate finger by using (6) 11/4” black self-drilling stainless steel screws. Congratulations! You did it! Go grab a beverage of your choice, admire your handiwork, and show us what you got by entering our annual photo contest! WWW.WAMBAMFENCE.COM...
- Page 16 VG13005 ASSEMBLY INSTRUCTIONS 6935 Reames Rd. Ste. K. Charlotte, NC 28216 hmmm@wambamfence.com 704-892-5222 877-778-5733 WWW.WAMBAMFENCE.COM WWW.WAMBAMFENCE.COM...
Need help?
Do you have a question about the TRADITIONAL VG13005 and is the answer not in the manual?
Questions and answers