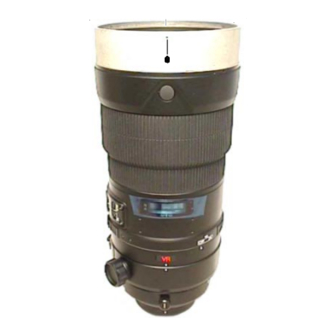
Nikon AF-S VR Nikkor ED 300mm f/2.8G IF Repair Manual
Hide thumbs
Also See for AF-S VR Nikkor ED 300mm f/2.8G IF:
- Instruction manual (39 pages) ,
- Instruction manual (53 pages)

Related Manuals for Nikon AF-S VR Nikkor ED 300mm f/2.8G IF


Summary of Contents for Nikon AF-S VR Nikkor ED 300mm f/2.8G IF
- Page 1 JAA33751-R.3646.A 作成承認印 配布許可印 サービス 計画課 M AF-S VR Nikkor ED 300mm f/2.8G IF JAA33751 REPAIR MANUAL Copyrigh c 2005 by Nikon Corporation. All Rights Reserved. Recycled paper 無断転載を禁ず !! 再生紙を使用しています Printed in Japan January 2005...
-
Page 2: Specifications
11 elements in 8 groups (3 ED glass and 2 Nano Crystal Coat-deposited lens elements), as well as 1 protective glass Picture angle: 8 ° 10’ [5° 20’ with Nikon digital cameras (Nikon DX format); 6° 40’ with IX240 system cameras] Distance information:... - Page 3 JAA33751-R.3646.A ※ Before Disassembly / (Re)assembly / Adjustment On this lens, the VR (vibration-reduction) unit is mounted to correct the picture blur. In order to maintain the functional accuracy of the picture blur correction, if detaching the VR (vibration-reduction) unit and gyro base plate, be sure to adjust the VR by using the VR lens adjustment equipment (J15380).
- Page 4 JAA33751-R.3646.A 1st lens group, 1.5th lens group, 2nd lens group 1st lens G rubber ① Remove the rubber ring (#46) and 3 setscrews 1st lens group (#277). ② Detach the 1st lens group. ③ Detach the 1.5th lens group with a wrench (J11288).
- Page 5 JAA33751-R.3646.A 1st lens group #G3-4 #190×3 - D3 ・AF-S VR300/2.8G -...
- Page 6 JAA33751-R.3646.A Name plate #297 × 4 Filter, Filter rubber Filter rubber Filter - D4 ・AF-S VR300/2.8G -...
- Page 7 JAA33751-R.3646.A Tripod screw mount ring - D5 ・AF-S VR300/2.8G -...
- Page 8 JAA33751-R.3646.A External fixed tube unit #112×3 #318 #267 B121 Lens body - D6 ・AF-S VR300/2.8G -...
- Page 9 JAA33751-R.3646.A VR on/off change ring ・ Take out the lock-ring connecting key (#188) from the hole of the VR unit. #188 - D7 ・AF-S VR300/2.8G -...
- Page 10 JAA33751-R.3646.A Fixed tube unit - D8 ・AF-S VR300/2.8G -...
- Page 11 JAA33751-R.3646.A Disassemble Fixed tube unit #125×3 #133 B102 #124 Fixed tube (#29) #B103 #181 #114×2 #103 #114×2 Solder X 2 #159 #158×2 #158×2 #129 #178 #261×2 #261×2 #161 #127×5 TA-0020 17×120 Soldering bridge×2 #B23 - D9 ・AF-S VR300/2.8G -...
- Page 12 JAA33751-R.3646.A ・ Remove the FPCs from each connector of the main PCB unit. Polyester tape ・ Take out 8 screws (#110) and 4 screws (#106). Then remove the VR unit while being careful of each FPC. #106×4 #110×8 - D10・AF-S VR300/2.8G -...
- Page 13 JAA33751-R.3646.A Aperture blade ・ Take out 3 screws (#180) to remove the aperture blade #66×3 unit. #180×3 B8×9 #221×3 #122 #180×3 #120×2 Tension spring (#96) - D11・AF-S VR300/2.8G -...
- Page 14 JAA33751-R.3646.A 3rd lens group ★:NEWTOOL Wrench ★ J11314 ① Fit the VR fixing tool ( ★ J11313) in the VR fixed tube unit. 3rd lens group B7 ② With a wrench ( ★ J11314), detach the 3rd lens group (B7). ③...
- Page 15 JAA33751-R.3646.A Main PCB unit ・ Remove the FPCs from the connectors of the VR unit. Connector ー Connector ー ・ Take out 3 screws (#111) and the washer (#199). Then remove the main PCB unit (B1001) and shield (#280) from the VR unit. VR unit B1001 #280...
- Page 16 JAA33751-R.3646.A Power brush unit 1&2 ・ Remove each wire. #369 Black Yellow Red Black Yellow #369 ・ Remove the power brush unit 1(B96) and 2 (B97). #97×2 #97×2 - D14・AF-S VR300/2.8G -...
- Page 17 JAA33751-R.3646.A ・ Turn over the rubber ring (#176) to take out the setscrew (#277). - D15・AF-S VR300/2.8G -...
- Page 18 JAA33751-R.3646.A SWM fixed tube unit #241×12 SWM fixed tube unit B87 - D16・AF-S VR300/2.8G -...
- Page 19 JAA33751-R.3646.A ・ Remove the 3 guide rollers (#108) from the SWM unit. SWM unit #108×3 #104×3 - D17・AF-S VR300/2.8G -...
- Page 20 JAA33751-R.3646.A SWM unit - D18・AF-S VR300/2.8G -...
- Page 21 JAA33751-R.3646.A (MF rotation detecting) brush unit #312 Orange White #294×2 (MF rotation detecting) brush unit - D19・AF-S VR300/2.8G -...
- Page 22 JAA33751-R.3646.A ・ Remove the wave washer (#192) and FPC retainer (#203) from the fixed tube unit. #192 ① Remove the lead wire (FL-FPC) from the relay FPC unit. - D20・AF-S VR300/2.8G -...
- Page 23 JAA33751-R.3646.A ② Detach the AF lock ring from the front fi xed tube by taking out 4 setscrews (#67). AF lock ring #67×4 ③ Remove the polyester fi lm. TA-0002 (15×50) - D21・AF-S VR300/2.8G -...
- Page 24 JAA33751-R.3646.A (5×30) - D22・AF-S VR300/2.8G -...
- Page 25 JAA33751-R.3646.A Gyro-relay FPC unit ・ Remove the gyro-relay FPC unit (B70) from the connector of the fixed tube unit, then remove the FPC. Remove Remove Connector - D23・AF-S VR300/2.8G -...
- Page 26 JAA33751-R.3646.A #210×2 Front fixed tube unit Front fixed tube Fixed tube unit - D24・AF-S VR300/2.8G -...
- Page 27 JAA33751-R.3646.A Front fixed-tube unit ・ Assemble the front fixed-tube into the fixed-tube unit. Check the position #210×2 - A1 ・AF-S VR300/2.8G -...
- Page 28 JAA33751-R.3646.A Gyro relay FPC unit ・ Insert the gyro relay FPC unit (B70) into the connector of the fixed-tube unit, and press to attach the FPC with fingers. Press to attach with fingers. Press to attach with fingers. Connector Attachment of GMR unit Apply slightly on the screw threads.
- Page 29 JAA33751-R.3646.A GMR unit Output waveform inspection of GMR encoder ★ : New tool 【 Attachment diagram 】 Communication tool (J15416) ★ Rated voltage power-supply Oscilloscope (2 ch type) Set value 5.0 V 100 mA × × Connect all GND of the probe to the terminals of GND of the switch tool.
- Page 30 JAA33751-R.3646.A Amplitude Fig. 1 ⑥ In case the amplitude is small, when the deformation is detected in the GMR head, correct the deform of the GMR head. On the other hand, when such Magnetic surface correction is impossible or no deformation is GMR head detected, replace the GMR unit.
- Page 31 JAA33751-R.3646.A < Ref. > ● As shown in Fig. 1, if the only amplitude of either CH1 or CH2 is small, one of the 2 screws (#218) may be loosened, so check for it. If this is not the case, the GMR head may malfunction, so be sure to replace the GMR holder unit and make a readjustment.
- Page 32 JAA33751-R.3646.A (5×30) AF-lock ring Apply to the threads of the point of the screw. - A6 ・AF-S VR300/2.8G -...
- Page 33 JAA33751-R.3646.A ③ Fold down the excess parts of the AF-lock FPC unit at 3 locations, then attach the polyester fi lm. TA-0002 (15×50) Fold down the 3 excess parts. ④ Put the AF-lock ring (#52) on the front fi xed-tube (#35) and fi x them with 4 setscrews (#67). #67×4 Mark (dot) Grease:F-890...
- Page 34 JAA33751-R.3646.A ⑤ Solder the lead wire (FL-FPC) on the relay-FPC unit. ・ Assemble the FPC retainer (#203) and wave washer (#192) into the fixed-tube unit. #192 - A8 ・AF-S VR300/2.8G -...
- Page 35 JAA33751-R.3646.A Assemble into SWM unit temporarily - A9 ・AF-S VR300/2.8G -...
- Page 36 JAA33751-R.3646.A Position adjustment of Distance encoder brush 1) Attach SWM fixed-tube unit temporarily ・ Attach 3 screws (#241) temporarily to the 3 locations, including the screw hole for GND of the SWM fixed- tube unit (B87). #241×3 (tentative) SWM fixed-tube unitB87 2) Adjust position of Distance brush ①...
- Page 37 JAA33751-R.3646.A Backlash adjustment of MR ring (small) unit Note: When the MF ring (small) unit (B88) is replaced, adjust the backlash amount by using washers (#177A-G × n). #241×3 (tentative) SWM fixed-tube unit (B87) (tentative) - A11・AF-S VR300/2.8G -...
- Page 38 JAA33751-R.3646.A (MF rotation detection) brush unit ① Attach the (MF rotation detection) brush unit. #294×2 Adhesive: Screwlock (MF rotation detection) brush unit ② Solder wires. White Orange ③ Attach the polyester tape (#312) on the lead wire of the (MF rotation detection) brush unit. #312 - A12・AF-S VR300/2.8G -...
- Page 39 JAA33751-R.3646.A MF ring (small) unit, Wave washer unit, SWM unit ・ Assemble the MF ring (small) unit (B88), wave washer unit (B34) and SWM unit. SWM unit - A13・AF-S VR300/2.8G -...
- Page 40 JAA33751-R.3646.A #241×3 (tentative) SWM fixed-tube unit (B87) (tentative) - A14・AF-S VR300/2.8G -...
- Page 41 JAA33751-R.3646.A MF ring (large) unit - A15・AF-S VR300/2.8G -...
- Page 42 JAA33751-R.3646.A SWM fi xed-tube unit Note: Do NOT apply Lockend B to the screws for GND. Screw for GND Adhesive: Screwlock #241×12 Adhesive: Lockend B SWM fi xed-tube unit (B87) Hole for GND Grease:GE-8 Apply to the sliding surface with the MF ring (small). Check MF ring operation ①...
- Page 43 JAA33751-R.3646.A ② Turn the rubber ring (#176) over, and check the smoothness of the MF ring operation by fixing the setscrew (#277). Adhesive: Screwlock - A17・AF-S VR300/2.8G -...
- Page 44 JAA33751-R.3646.A Power brush unit 1 & 2 ・ Assemble the power brush unit 1 (B96) and 2 (B97) into the SWM fi xed-tube unit (B87) with 2 screws (#97). #97×2 #97×2 Adhesive: Screwlock Adhesive: Screwlock ・ Solder the power brush unit 1 (B96), 2 (B96), and 6 lead wires on the SWM power FPC unit (B26). #369 Black Yellow...
- Page 45 JAA33751-R.3646.A VR unit ① Fix the main PCB unit (B1001) and shield (#280) on the VR unit with the washer (#199) and 3 screws (#111×3). VR unit B1001 #280 Adhesive: Screwlock #111×2 #199 #111 Adhesive: Screwlock ② Insert the FPC into the connector of the VR unit to connect them. Connector Connector - A19・AF-S VR300/2.8G -...
- Page 46 JAA33751-R.3646.A 3rd lens group ★:NEWTOOL ① Fit the VR fixing tool ( ★ J11313) Wrench in the VR fixed-tube unit. ★ J11314 ② Apply the Screwlock to the threads of the 3rd lens group (B7), spreading approx. 5-10 mm in 3rd lens group (B7) length.
- Page 47 JAA33751-R.3646.A Rear fixed-tube unit Adhesive: Lockend B #125×3 #133 B102 Grease:G92KA #124 Adhesive: Lockend B Fixed-tube#29 #B103 #181 Adhesive: Lockend B Adhesive: Lockend B #103 #114×2 #114×2 Adhesive: Lockend B #159 Solder Adhesive: Screwlock Black matte paint #158×2 #158×2 Adhesive: Screwlock #129 #178 #261×2...
- Page 48 JAA33751-R.3646.A Position adjustment of Aperture lever 3.1-lever block (#39) +0.1 #158×2 - A22・AF-S VR300/2.8G -...
- Page 49 JAA33751-R.3646.A Aperture blade ① Assemble the aperture blade unit. #66×3 B8×9 #221×3 #122 #180×3 #120×2 Apply to 2 screws (#120) and the screw (#99). Tension spring (#96) - A23・AF-S VR300/2.8G -...
- Page 50 JAA33751-R.3646.A ② Assemble the aperture blade into the lens body. #180×3 Aperture blade Grease:I-40 Adjustment of Aperture diameter Inside diameter of Aperture action plate Aperture blade 1±0.2mm Adhesive: Screwlock #221×3 (Addition) ・ Move the aperture lever so that it is set to full aperture. ・...
- Page 51 JAA33751-R.3646.A Removal of VR unit from Rear fixed-tube unit ・ After the adjustment, make a mark-off line. Then remove the temporarily attached 3 screws (#105) and detach the VR unit from the rear fixed-tube unit. Mark-off line Note: Do not put the unit with the aperture blade side down on a desk, etc, because it could cause a deformation of the aperture blade unit.
- Page 52 JAA33751-R.3646.A - A26・AF-S VR300/2.8G -...
- Page 53 JAA33751-R.3646.A ② Tighten 8 screws (#110) for VR unit, and 4 screws (#106) for the change-SW unit. Adhesive: Lockend B #106×4 #110×8 ③ Pass each FPC through the holes of the VR unit, and connect them to each connector of the main PCB unit. Polyester tape - A27・AF-S VR300/2.8G -...
- Page 54 JAA33751-R.3646.A Rear fixed-tube unit - A28・AF-S VR300/2.8G -...
- Page 55 JAA33751-R.3646.A VR on/off change ring ・ Assemble the lock ring connecting key (#188) into the hole of the VR unit. #188 - A29・AF-S VR300/2.8G -...
- Page 56 JAA33751-R.3646.A Position adjustment of VR-on/off brush ・ Check the VR-on/off and confirm that the brush is surely put on the right-side pattern of the PCB. #111 - A30・AF-S VR300/2.8G -...
- Page 57 JAA33751-R.3646.A External fixed-tube unit ・ Mount the external fixed-tube unit (B121) on the lens body, and fix them with 3 screws (#112) and 3 screws (#180). #112×3 #318 #267 B121 Lens body ・ Press the knob (#173) to check the rotation of the VR on/off change ring. - A31・AF-S VR300/2.8G -...
- Page 58 JAA33751-R.3646.A Tripod screw mount ring Apply to the entire circumferential surface of the outer diameter. Grease:OS-30MF Apply to the #206×2 screw Grease:EBB8041 B112 #175 Apply to the contact Adhesive: Lockend B surface with #183. #139×2 Grease:EBB8041 #183A-D #170 #135 Adhesive: Lockend B Adhesive: Lockend B...
- Page 59 JAA33751-R.3646.A Filter rubber, Filter #297×4 - A33・AF-S VR300/2.8G -...
- Page 60 JAA33751-R.3646.A 1st lens group Note: When the vinyl electric wire (#48) is replaced, #G3-4 tighten the retaining ring (#43) once, then in a few minutes, retighten it. Grease: EBB8041 #190×3 - A34・AF-S VR300/2.8G -...
- Page 61 JAA33751-R.3646.A 2nd lens group, 1.5th lens group, 1st lens group 1st lens group rubber Adhesive: EDZ4113 ① Set the focus ring by turning it all the way 1st lens group to the closest-distance. ② Put the washers (#284A-H) and fit the 2nd lens group into the lens body.
- Page 62 JAA33751-R.3646.A Set the focus ring by turning it to the infinity (∞). ① Insert a suitably-sized cut heavy paper or plastic, etc in the 3.1-aperture lever so that the aperture becomes ② "full". Set the lens on the lens adapter for focus tester, and measure M.B.f value by the back focus collimator ③...
- Page 63 JAA33751-R.3646.A Preparation for inspection & adjustment of main PCB ● In case of replacing the main PCB, SWM unit or MR encoder unit, be sure to make the necessary adjustments as follows: 1. Adjustments ・Adjust the MR duty ・Adjust the driving frequency and motor control (including Focus preset adjustment) 2.
-
Page 64: System Configuration
JAA33751-R.3646.A 【System configuration】 Power supply (6V) Oscilloscope When the RS232C terminal of the personal computer is a 9-pin type, connect it by using the 25-pin/9-pin AF-I communication box (J15306-1) conversion connector. RJ does not supply this connector. Use products on the market. AF-I communication adapter To RS232C (J15307) -
Page 65: Adjustment Of Mr Duty
JAA33751-R.3646.A Adjustment of MR duty ●In case of replacing the main PCB, SWM unit and MR encoder unit, be sure to make adjustments. ●In case of replacing the main PCB, be sure to perform [3.READING AND REWRITING OF EEPROM DATA.] then [3.WRITING THE FIXED VALUES.] How to adjust ①... -
Page 66: Adjustment Of Driving Frequency And Motor Control
JAA33751-R.3646.A Adjustment of Driving frequency and Motor control ● In case of replacing the main PCB, SWM unit and MR encoder unit, be sure to make adjustments. ① The method of connection of the rated voltage power supply and measuring tools is the same as "ADJUSTMENT OF MR DUTY". - Page 67 JAA33751-R.3646.A Inspection of Lens operations Check the lens operations by using a personal computer after assembling. ○ Check by personal computer ● Check by the following considerations: 1. MR encoder operations ・ Drive the scanning of lens and check the total number of pulses. ・In case the MR head of the MR encoder and the magnetic tape are misaligned, the number of pulses becomes out of standard.
-
Page 68: Menu Items
JAA33751-R.3646.A ●AF-S 300 VR inspection program (1) Menu screen ・Menu items The items 1 and 2 are used for adjustments. The item 3 is used for reading and writing EEPROM DATA. The items 4~7 are used for inspections. ・Selection items After selecting items screens appear, such as the lens selection, the focal length selection, the voltage setting, the inspection mode start. - Page 69 JAA33751-R.3646.A (2) Inspection of MR encoder operations <<< Running >>> Caution : If the MF ring is rotated while the lens scanning is driven, the pulse shows an abnormal value. Do NOT touch the MF ring during operations. Make inspections at the 5 positions as below.
- Page 70 JAA33751-R.3646.A The difference in pulse before and after the inspection must be within the standard. < Standard > Total pulses : 14502 ± 150 PLUSE(S) - A44・AF-S VR300/2.8G -...
- Page 71 JAA33751-R.3646.A (3) Inspection of lens-servo stop accuracy If the lens stops while inspecting the lens-servo stop accuracy, select "2. ADJUST DELAY-TIME" of the below Fig.2, and input a figure between 0-1000 for the delay time (msec: millisecond) which prevents stopping the lens.
- Page 72 JAA33751-R.3646.A ① ④ ⑤ ② ③ Caution : If the MF ring is rotated while the lens scanning is driven, the pulse shows an abnormal value. Do NOT touch the MF ring during operations. During the lens driving, the above screen is displayed. Make inspections at the 5 positions as below. (Lens position in inspecting) Lens inclination Position of index window...
- Page 73 JAA33751-R.3646.A (4) Inspection of lens-servo time Connect the probes of oscilloscope to E and H terminals of the AF-I communication box (J15306). Select the servo driving amount respectively. Each lens-servo drive time must be within the standard. Caution : If the MF ring is rotated during inspections, the waveform shows an abnormal value. Do NOT touch the MF ring during inspections.
- Page 74 JAA33751-R.3646.A (5) Inspection of switches and lens conditions ② ① ③ ④ ① Type of lens. ② The version of CPU in the lens. ③ The signals of the focusing encoder and zooming encoder. The value changes by turning the MF ring with M or M/A of the lens driving mode selector. ④...
- Page 75 JAA33751-R.3646.A Necessary adjustment when replacing parts Inspection & adjustment for MR Adjustments encoder operations; Adjustment for MR duty lens-servo stop accuracy; VR adjustment (Necessary to write fixed value); Parts to be driving frequency; motor control lens-servo time; switches; replaced lens condition ○...
- Page 76 JAA33751-R.3646.A VR adjustment When making the VR adjustment, refer to the "Instruction Manual" that is attached to the VR lens adjustment equipment (J15380). WARNING This equipment uses the laser beam. ● Do not look at the laser beam directly or through the laser beam window.
- Page 77 JAA33751-R.3646.A Procedure for mounting the lens 1. Mount the lens on the equipment and move the lens retainer stand in the direction of the arrow. Lens retainer stand 2. Move the lens retainer stand to the position as shown below and fix it by tightening the clamp. Clamp - A51・AF-S VR300/2.8G -...
- Page 78 JAA33751-R.3646.A ④ Turn the VR lens adjustment equipment (J15380) ON and start the adjustment software. ⑤ Point the cursor to "AF-S VR 300/2.8G" on the Lens selection screen and click it. ※ If the below message appears, reset the zoom ring by referring to "Procedure for mounting the lens" on the previous page.
- Page 79 JAA33751-R.3646.A Vibration Reduction mode switch inspection ① Point the cursor to the check box before "VR Mode Switch Inspection" and click it. ② Point the cursor to the "Execute" button and click it. ③ "VR Mode Switch Inspection" screen appears. - A53・AF-S VR300/2.8G -...
- Page 80 JAA33751-R.3646.A ④ The position of VR mode switch is indicated. Selecting the VR mode switch indicates the current position in the real time. VR mode switch ⑤ When completing the VR mode switch inspection, point the cursor to "Exit" button and click it to exit the inspection screen.
- Page 81 JAA33751-R.3646.A VR lens position adjustment ① Point the cursor to the check box before "VR Lens Position Adjustment" and click it. ② Point the cursor to "Execute" button and click it. ③ The left message appears. Turn the VR mode switch of the lens to ON, then point the cursor to "OK"...
- Page 82 JAA33751-R.3646.A ・Gamma and Shift Adjustment (Automatic control) Adjust the inclination and control center position based on the position sensor output of the VR unit. During the adjustment, the message appears to confirm the lens position of angle (0 or 90 degrees). Therefore, set the lens to the position and click "OK"...
- Page 83 JAA33751-R.3646.A ・ Mechanical Lock Inspection When the mechanical lock inspection is made, write the inspection result data as the adjustment value. The below 1 and 2 screens are displayed alternately, so turn the VR switch to ON/OFF 5 times for the lens position 0 and 90 degrees respectively, according to the indicated instructions.
- Page 84 JAA33751-R.3646.A VR Gyro Adjustment ① Point the cursor to the check box before "VR Gyro Adjustment", and click it. ② Point the cursor to "Execute" button, and click it. ③ The left message appears. Set "Frequency" of "Telephoto" to 5.0 Hz in the settings of the VR lens adjustment equipment (J15380).
- Page 85 JAA33751-R.3646.A " " VIBRATION switch " " SERVO switch ⑤ Press "ON" button for "SERVO" switch and press "START" for "VIBRATION" switch of the VR lens adjustment equipment (J15380). ⑥ When the equipment starts to vibrate, measure the vibration width ( ) of the laser beam.
- Page 86 JAA33751-R.3646.A - A60・AF-S VR300/2.8G -...
- Page 87 JAA33751-R.3646.A 《Ref.》 ・The laser spot beam travels 5-m ahead, irradiating with spot of approx. 5 mm in diameter. ① The vibration width is adjusted at the center of Approx. 5 mm the laser spot. First, measure the whole vibration width.
- Page 88 JAA33751-R.3646.A ・ Press "STOP" button of VIBRATION switch of the VR adjustment equipment to stop vibrations. ・ Rotate the lens through 90° in the direction indicated by the arrow, then press “START” button of VIBRATION switch to start vibrations. ・ At the 90° position, adjust the angle misalignment and make gyro-gain adjustment.
- Page 89 JAA33751-R.3646.A Criteria for VR performance Before making the VR adjustment of defective products by using the equipment, refer to the following. Check 1 Mount the lens on the appropriate body ・Set the VR mode to "ON". Repeat half-pressing ON/OFF ・Repeat pressing ON/OFF of the shutter release button a few times at of the shutter release button intervals of a few seconds during half-release timer.
- Page 90 JAA33751-R.3646.A Check 2 Mount the lens on the equipment (J15380) ・How much does the vibration width reduce, when the VR Check the vibration width mode changes from OFF to ON by the VR-gyro adjustment. of laser What is the reduction rate of the vibration width? 1/5 or less More than 1/5...
- Page 91 JAA33751-R.3646.A 実体配線図 白 橙 白 緑 橙 灰 黄 黒 SWM ユニット WIRING DIAGRAM SWM unit VR on/off 緑 Green 白 White ロック Lock 絶対距離エンコーダ 赤 Red Absolute focal 赤 Red X 軸 LED distance X axis LED 青 Blue Orange encoder 黄...
- Page 92 JAA33751-R.3646.A 外観図 Sketch drawings - L1 ・AF-S VR ED 300/2.8G IF -...
- Page 93 JAA33751-R.3646.A 組立図 Structure of the Lens - L2 ・AF-S VR ED 300/2.8G IF -...
- Page 94 JAA33751-R.3646.A - L3 ・AF-S VR ED 300/2.8G IF -...
- Page 95 JAA33751-R.3646.A - L4 ・AF-S VR ED 300/2.8G IF -...
- Page 96 JAA33751-R.3646.A - L5 ・AF-S VR ED 300/2.8G IF -...
- Page 97 JAA33751-R.3646.A - L6 ・AF-S VR ED 300/2.8G IF -...
- Page 98 JAA33751-R.3646.A - L7 ・AF-S VR ED 300/2.8G IF -...
- Page 99 JAA33751-R.3646.A 工具編 TOOLS ★:NEW TOOL RJ 番号 名称 備考 RJ No. NAME OF TOOL OTHERS 縦型焦点面検査器 LT-500S J19002 BACK FOCUS COLLIMATER LT-500S J9001-5N 安定化電源5A DC REGULATED POWER SUPPLY 5A F用レンズ受け台 J18028 LENS ADAPTER FOR FOCUS TESTER J18378 AF-S 300 VR 点検・調整ソフト ★...
- Page 100 JAA33751-R.3646.A ★:NEW TOOL RJ 番号 名称 備考 RJ No. NAME OF TOOL OTHERS AF-S 300/2.8 D Ⅱ 2 群回螺器 AF-S300/2.8 D Ⅱ J11288 WRENCH FOR 2G AF-S 300/2.8 D2 2群と共通 AF-S 300/2.8 D Ⅱ 3 群回螺器 AF-S300/2.8 D Ⅱ J11290 WRENCH FOR 3G AF-S 300/2.8 D2 3群と共通...
Need help?
Do you have a question about the AF-S VR Nikkor ED 300mm f/2.8G IF and is the answer not in the manual?
Questions and answers