Table of Contents
Advertisement
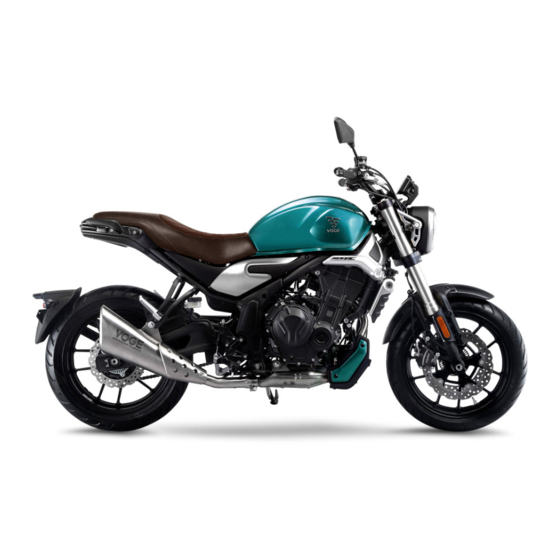
Welcome to VOGE
Thank you for choosing VOGE.
Read these operating instructions and familiarize yourself with your new vehicle so as to can
ride safely and confidently in different traffic situations. It contains important notes about operating
the vehicle and equipment, as well as important suggestions. It also contains preventive
maintenance and care instructions. if you have any questions about your vehicle, any authorized
dealer will be glad to help you.
We hope you enjoy ever y moment of your vehicle.
About this instruction
This instruction contains important information about the use of the vehicle, precautions, warnings
and so on. It is ver y important to ensure that this instruction is always kept in the car at all time. The
illustrations in this instruction may be slightly different from those in the vehicle, but the described
principle is the same. When you sell this car, please remember to hand over this instruction as it is an
important part of the vehicle. With continuous in-depth research and design improvement of
products, VOGE has always maintained the standards of high safety and quality. The manual may not
keep in line with the latest improvements of the vehicle, so the authorized dealers of VOGE will be
ready to give you correct guidance.
Executive standard of this product: Q/LX 1023-2020
This instruction to: GB/T 9969-2088 and GB/T 19678-2005
The final interpretation right of this instruction is Chongqing Longxin Locomotive Co., Ltd
Advertisement
Table of Contents

Related Manuals for VOGE 500AC E5


Summary of Contents for VOGE 500AC E5
- Page 1 VOGE has always maintained the standards of high safety and quality. The manual may not keep in line with the latest improvements of the vehicle, so the authorized dealers of VOGE will be ready to give you correct guidance.
- Page 2 Important notes The following warning symbols are highly crucial to the users. So please follow these safe driving and maintenance procedures when you see these warning symbols. Danger Indicates potential hazard that could result in injur y or death. Warning Indicates potential hazard that could result in vehicle damage.
-
Page 3: Table Of Contents
Contents Rear brake pedal ......27 Head ........1 Adjustment before driving . - Page 4 ABS System....... . 40 Maintenance of Drive Chain ....59 Fuel.
-
Page 5: Head
Head 1.Clutch handle 2.Left brake switch Gauge 4.Fuel tank lock 5.Ignition switch 6.Front brake main oil 7.Right brake switch and the oiler Front brake handle... -
Page 6: Left Side
Left side 9.Thermostat 10.Coolant injection port 11.Shift arm 12.Lateral support 13.Engine oil drain bolt 14. Vehicle label 15.Front disc brake pump... -
Page 7: Right Side
Right side 16.Rearbrake oil cup 17.Water temperature sensor 18.Oil pressure sensor 19.Vehicleidentification number(VIN) 20. Engine type and manufacturing number 21.Radiatorfilling 22. Engine oil filter 23.Engine speed sensor 23 18... -
Page 8: Underneath The Seat
Underneath the seat 24.Fuse box 35.ECU 25.Flasher 36.Tools 26.Batter y anode 27.Accumulator 28.Electrical box 29.Toppling switch 30.ABS controller 31.Batter y cathode 32.Starting relay 33.Supplementar y relay 34.Diagnose interface 4 way fuse and control relay diagram(There are 6 branches for motorcycle power supply, which get power for positive pole of battery and with 1 fuse each, who are independent without interference.)... -
Page 9: Loading And Attachment Information
Incorrect loading, improper refit or maintenance may cause safety hazard; Ensure your vehicle is not overloaded and follow these instructions. Always use the original parts from VOGE and the accessories that we approved;Non-original parts, improper installation of accessories or loading, etc will affect the performance vehicle, even result in a violation of the law. -
Page 10: Notes For Driving
8、Conversion to a three-wheeled vehicle is prohibited. And this vehicle can not be used for towing trailers or other vehicles. VOGE is not liable for any damage or injur y caused by the refit. Maximum load: no more than 150kg (including driver, luggage and accessories). -
Page 11: Ignition Switch
Ignition switch The ignition switch is located in front of the upper panel of the fuel tank . The ignition switch and the directional lock are integrated. The vehicle is equipped with two keys, one of which please keep for spare. Ignition lock/direction lock , cushion lock and fuel tank lock share one key. -
Page 12: Gauges And Indicator Lights
Gauges and indicator lights 2 3 5 6 1.Left turn light 2.Maintenance light 3.Batter y low voltage alarm lamp 4.Fuel gauge and low fuel warning light 5.Ice alarm 6.Environment temperature 7.Speed 8.Gear 9. Clock 10.Bluetooth 11. WIFI indicator 12.Right turn light 13.Lateral support alarm light 14.Engine fault alarm light 18.The speed units... - Page 13 Turn the key to" "position, and the gauge is started for self-check : The display lights up for self-check and shows the current vehicle status. Engine fault alarm lamp" "ABS fault alarm lamp" "and Oil pressure alarm lamp" "light up. Warning Do not wash the gauge directly with high pressure water.
- Page 14 If the indicator light" "is always on or flashing, stop using the vehicle immediately and turn to VOGE's authorized dealer for help as soon as possible.
- Page 15 TFT display screen Power on status: When power on, the meter displays the information mode of the last setting. Backlight: The meter automatically switches bright/dark mode according to light intensity. Bluetooth: When the mobile phone is connected to the meter through Bluetooth, the meter can realize the call reminder (Number+Name).
- Page 16 Caution The fuel in its tank during driving may wave, when the residual fuel is not much, the waves may lead to the indicator bar flash. This is normal, don't worr y. In case the fuel alarm light gets yellow during driving, which indicates the capacity of residual fuel is about 3L. Danger Taking off your hand to operate the instrument while driving will reduce the ability to control the vehicle.
- Page 17 Engine oil pressure light" " When the engine oil pressure is below the normal range, indicator light" "lights up. When the ignition key is turned to the" "position, the indicator " "lights up; The indicator light " "goes out immediately after the engine starts. Notice Engine oil pressure light"...
-
Page 18: Notes For Refueling
This warning light warns you to refill fuel Caution: The insufficient fuel in its tank may lead to engine ignition failure or abnormal power output, under this case, keep going on the ignition or driving may damage the motorcycle. The fuel ran out in its tank is not allowed, fill up the fuel before its alarm light getting yellow. Notes for refueling Turn the ignition key clockwise to open and lift the tank cap. -
Page 19: Insufficient Engine Oil Pressure
Insufficient engine oil pressure This warning light is on to warn that the lubrication system pressure is too low. Stop the vehicle immediately and turn off the engine. Functional requirements of lubricants. The only way to check the lubricants level is by checking the position of the engine oil window level height. -
Page 20: Insufficient Coolant
Insufficient coolant If the coolant is insufficient or the surface of the radiator is seriously blocked by sediment, the following methods are recommended: –Lower the heat of engine by reducing the vehicle load. –Idle the engine and loosening the throttle in heavy traffic to avoid further temperature rise. –If the above methods does not work , turn off the engine and go to professional repair sites for help. -
Page 21: Meter Interface Instruction
Meter interface instruction 1.Button instruction Second interface of the instrument Up button Down button Confirm button (1)Short press the Up button to enter the Internet First interface of the insturment mode. (2)Short press the Down button to switch between aggregate and subtotal. (3)Long press the confirm button to enter the Setting. - Page 22 (5)Level 1 menu: Vehicle Settings, My Vehicle, Exit. (6)Level 2 menu: Language selection, Metric and Inch System Switch, Interface Switch, Trip Reset, Clock Setting, Bluetooth, WiFi, Tire Pressure Matching, Phone Book Synchronization. (7)Level 2 menu of My Vehicle: My Vehicle Information, Various Version Numbers. (8)Enter My Vehicle and long press the Up button to clear the maintenance symbol.
- Page 23 Press Up and Down to select my vehicle, and then press Confirm to enter the selection mode. Short press Enter my vehicle the Confirm button on "next page" and "previous page" to switch. Short press Confirm button on"Exit " to return to the level 1 menu.
- Page 24 Press Up and Down to select Language selection, and then press Confirm to enter.Use Up and Down button to switch between Chinese Language selection and English, and short press Confirm button to select.Then long press Confirm button to confirm and return to the level2 menu.
- Page 25 Press Up and Down to select Trip reset, and then press Confirm to enter. Use Up and Down button to switch between Confirm and Exit, trip reset and short press Confirm button to select. Then long press Confirm button to confirm and return to the leve1 2 menu.
- Page 26 Press Up and Down to select Bluetooth, and then press Confirm to enter. Use Up and Down button to switch between Open and Close, and Bluetooth short press Confirm button to select. Then long press Confirm button to confirm and return to the level 2 menu.
- Page 27 Press Up and Down to select phone book synchronization, and then press Confirm to enter. short press phone book Confirm button to download. When synchronization download is completed then long press Confirm button to confirm and return to the level 2 menu. Long press Confirm button in the level 2 menu to return to the level 1 Exit the Settings...
-
Page 28: Usb Power Port
USB Power port " " USB power port is installed on the headlight. Output specifications:5V 2A.The waterproof rubber cap " " covers on the USB power port, removing it anytime as you use USB power port. Warning Prepare the charging cable when using the USB power port, and cover the waterproof rubber cap to prevent it from water and dust. - Page 29 Dimmer and pass switches Push the high beam and pass switches for ward to" ",both the high light and the high beam indicator lamp" "will light up. Pull the high beam and pass switches back to" ", the low light will turn on and the high beam indicator lamp"...
- Page 30 Emergency light Button" " Press " ",then all the turning lights and the indicator lamps on the instrument panel will shine simultaneously. Please turn on emergency light for emergency parking and vehicle accidents to warn others. Choke switch Press the Choke switch to this icon" ",he circuit of engine will be cut out ,and engine cannot start.
-
Page 31: Transmission Pedal
Transmission pedal Rear brake pedal This vehicle has six-drive treading it will drive the rear wheel transmissions with the shifting and light the rear brake light. theor y as follows: Step down step up Transmission pedal rear brake pedal The side stand This vehicle only installs the side stand system covering a security choke switch, which is a part of starting engine circuit. - Page 32 Warning 1.If the ground is uneven or not hard, the vehicle cannot park steadily. Please park it on the solid and flat road. 2. If vehicle has to be parked on a slope, keep the front facing uphill and the engine in gear 1, which will avoid reversing due to side stand rotation as possible.
-
Page 33: Adjustment Before Driving
Adjustment before driving Steering handle adjustment Adjust the steering handle according to your height and driving gesture. If you want to adjust , asking dealers authorized by VOGE operate. Releasing bolt1 Slightly turn the handlebar to proper position Lock bolt 1... -
Page 34: Adjustment Of The Front Brake Handle
Adjustment of the front brake handle ·Adjusting button can adjust the distance between the handlebar and the throttle handle. ·The distance can be adjusted in 5 gears, methods as follows: –Push the handle to the front as you adjust –Turn the adjusting button to the position that you want –After finished the adjustment, releasing the handlebar Danger It is dangerous to adjust the front brake handle when you... -
Page 35: Adjustment Of The Rear Brake Pedal
·After the reassembly is completed, the brake pedal shall be repeatedly pressed down and the pressure point shall be clearly felt. · If you cannot feel the pressure point clearly, please consult the authorized dealers of VOGE for handling. · If the adjustment is not correct, the force between the friction plate and the brake disc will... -
Page 36: Adjustment Of Throttle Control Handle
Adjustment of throttle control handle ·The throttle control handle is used to control the engine speed. ·Turning in the direction of oneself is acceleration, and vice versa is deceleration. ·Adjustment of throttle cable clearance. –Remove the rubber sleeve 1. –Loosen lock nut 2. –... -
Page 37: Adjustment Of Rear Shock Absorber
Danger Danger ·Arbitrarily adjust the loading of rear shock absorber will reduce you controllability to the vehicle. Please call the dealer to ensure the real ·Go to dealers authorized by VOGE for help if necessar y. height of the light. -
Page 38: Run-In Period For Motocycle
Run-in period for motocycle Before driving the motorcycle, you need to read carefully the instruction for the ser vice life and fuel consumption greatly affected by the run-in period. (You will keep the vehicle’s performance and attain fun with your right driving way in the first 1000 km miles). Run-in period of the engine ·No matter the motorcycle is start or not, you need to keep enough time for the engine oil all over the whole motorcycle before starting to drive. -
Page 39: The Run-In Period Of The Tire
The run-in period of the tire ·High speed driving and bend driving with the new smooth tire will cause danger. So it is necessar y for vehicle to execute the run-in period and obtain the viscous force. ·Bending driving with low speed is a way to get tire run-in period in the first 200km including the completion of the run-in of the crown. -
Page 40: The Driving Of The Motocycle
The driving of the motocycle Check before driving Without check before driving will increase the risk of the accident and damage. check items as follows: ·Turning system engine failure indicator light, water ·Tire the flexibility of the steering temperature alarm light, and the oil –The correctness of the tire handle. -
Page 41: The Start Of The Engine
The start of the engine Danger Lay down the side stand. Stimulant exhaust from motorcycles contains carbon monoxide, a colorless, odorless but highly toxic gas. To avoid the risk of poisoning, Check the choke switch of the engine on this icon" "or not. -
Page 42: Driving On The Road
Driving on the road ·Get in on the left and straddle the seat mat. ·Retract side stand. ·Adjust the motorcycle to the vertical ground orientation and straighten the steering handle. Keep the wheels for ward. ·Grip the clutch. · Slowly turn the throttle control handle in the direction of acceleration and gently release the clutch handle simultaneously to wait the clutch engages and start the motorcycle. -
Page 43: Speed Variators
Speed variators ·The speed variators allow the engine to run smoothly within the step up Step down normal speed range. ·The speed ratio carefully designed to adapt to the characteristics of the engine, the driver should choose the most suitable gear according to the driving conditions, forbidding to drive at low speed. -
Page 44: Abs System
ABS system 1.Release the throttle and grip the steering handle in a normal braking deceleration case. Holding the clutch and lowering the gear must be required as the vehicle slows down. 2.Crossing the cur ve, the vehicle should brake and slow down. Keep an uniform speed while crossing. Braking is prohibited and slightly brake should be allowed for emergency. - Page 45 Warning ·Keep the vehicle away from children after long driving in case that they could be burned by the heating engine. ·Do not park the vehicle on soft ground t in case of toppling over and being damaged. If the motorcycle parks on a gentle slope, shift the gear into the low gear and make the front of the motorcycle facing the uphill side to avoid overturning caused by the rotation of the side stand.
-
Page 46: Fuel
Fuel The fuel consumption parameter of motorcycle is different from the actual fuel consumption, which is lower than the the actual fuel consumption. · Reduce fuel consumption as much as possible under the following operations: –Drive softly and smoothly, reduce the frequency of sudden braking in driving because of the restarting and acceleration consuming more fuel. -
Page 47: Fuel Evaporation
Fuel evaporation When the fuel evaporation system fails, please contact dealers authorized by VOGE ser vice store for maintenance. Do not change the fuel evaporation system, other wise it may cause non-compliance with the requirements of the fuel evaporation emission regulations. After disassembly and maintenance, check that the connection of each pipeline should be good, and the pipe joint should be free of air leakage and blockage. -
Page 48: Three-Way Catalyst
The content of troubleshooting can help you find the cause of general problems. Of course, these are just some basic judgments. If you still can't solve the problem, please send the motorcycle to the dealer authorized by VOGE. Fail to start the engine In a neutral condition, the choke switch turns on. -
Page 49: Difficulty Starting The Engine
·Incorrect maintenance and adjustment will damage your motorcycle and can not find the cause of the fault. Such damage can not enjoy VOGE's three guarantees policy. If you are not sure how to operate correctly, please contact an authorized dealer. -
Page 50: Inspection And Maintenance
Inspection and maintenance On board tools The tools are placed in the tool box under the cushion. Open the cushion lock and remove it to see the tool box. It should be lubricated after using in the harsh condition or the rainy day or the vehicle washing. In order to drive safely, it is necessar y to maintain good lubrication of working parts for prolonging ser vice life. - Page 51 Batter y charging When the ignition lock is off and the batter y terminal voltage is lower than 12.6V, charge the batter y. ·Use a DC regulated power supply for charging, or use a suitable charger to charge the batter y, and strictly follow the Danger instructions of the charger.
- Page 52 Disassembly and assembly of batter y Warning ·Before disassembling and installing the batter y, turn off the ignition key. Do not turn the batter y upside down as ·When removing the batter y, remove the negative terminal this will cause the electrolyte inside to first, and then the positive terminal.
-
Page 53: Air Filter Maintenance
Air filter maintenance ·The air filter is located under the fuel tank . If the air filter is blocked by dust, the air intake resistance will increase, resulting in a decrease in output power and an increase in fuel consumption. ·If driving in dusty conditions, you should increase the frequency of cleaning and replace the air filter element. -
Page 54: Engine Oil Maintenance
Engine oil maintenance Engine oil can ensure the effective lubrication of the parts in the engine, cool the engine down and seal the engine. The maintenance of the engine oil is ver y important. Inspection of engine oil level height ·Check the level of and inject the engine oil on the right side engine cover, as shown in Figure 1. - Page 55 · How to drain the engine oil: -If the engine oil level is too high, remove the engine oil drain bolt (as shown in Figure 1 below, on the lower left side of the engine) with a socket wrench. -Reset and lock the engine oil bolts after draining a moderate amount of engine oil.
-
Page 56: Change Engine Oil
Change Engine Oil · hange engine oil when maintenance period is due. · Change engine oil after the engine is heated, so as to completely discharge waste engine oil. · How to change engine oil: -Put the vehicle stand upright with the auxiliar y parking frame. -Unscrew engine oil filler cap counterclockwise. -
Page 57: Change Engine Oil Filter Element
Warning Check the O-ring on the engine oil filter cover and replace it with a new one if necessar y. Ensure install genuine element provided by VOGE as unsuitable parts will damage the engine. -
Page 58: Fill Engine Oil
· Make sure engine oil drain bolts and gaskets have been replaced and assembled. -Firstly, fill about 2,500 ml of new "engine oil for VOGE EFI motorcycle" into the oil engine, ensure the engine oil level is between "MAX and MIN", and then tighten the engine oil filler cover. Run the engine at different speeds for 5 minutes. -
Page 59: Maintenance And Inspection Of Coolant
Do not replenish the coolant without authorization if the expansion tank has been completely dried out. The air that might have entered the cooling system needs to be removed at this time. Please go to dealers authorized by VOGE for maintenance. -
Page 60: Replacement Of Coolant
Replacement of Coolant · Discharge Coolant: -Keep the motorcycle upright with dedicated parking racks. -Place a tray under the engine. -Remove drain bolts. All coolant will be discharged from the port as the whole heat dissipation system is interlinked. -Install the drain bolts back. ·... - Page 61 · he coolant approved by VOGE is ethylene glycol coolant with freezing point of-45 ℃. Please go to dealers authorized by VOGE to buy or replace coolant. Notice ·The coolant should be replaced ever y two years to ensure the performance of the coolant.
-
Page 62: Maintenance Of Brake Fluid
Gas and moisture may enter when opening the brake fluid cup without authorization, which will greatly reduce or fail the braking performance. Please go to agencies authorized by VOGE to replenish or replace it. Model of brake fluid Notice ·... -
Page 63: Maintenance Of Drive Chain
Chain pin is wrapped by a special O-shaped sealing ring filling grease. Special tools are required to replace such non-open locking chain. If necessar y, please go to the dealers authorized by VOGE for help. Notice heck or adjust the drive chain before driving ever y day. -
Page 64: Adjustment Of Drive Chain
Adjustment of Drive Chain · The drive chain can neither be too loose nor too tight. · Chain will break away from the sprocket easily due to the excessive loose of chain, which causes accidents. · Chain will highly consume ser vice life and obtain transmission resistance due to the excessive tight of chain. -
Page 65: Maintenance Of Tire
Maintenance of Tire ires play a significant role in connecting motorcycles and the ground. Disordered condition and inappropriate size of tire will greatly degrade the performance of motorcycles. Tire pressure Danger · bnormal tire pressure will reduce the ser vice life of Abnormal tire pressure will affect the handling tires. - Page 66 Repair of tire · To repair the tiny hole of tubeless tire, it is necessar y to remove the tire and patch the inside of the tire. External maintenance should be avoided as the centrifugal force will loosen the repaired place when driving at high speed.
-
Page 67: Fuse
Fuse Electrical box Fuse box · Before replacing the fuse, the fault cause must be detected and eliminated. Vehicle Power Fuse F1 EFI Power · This model installs an electrical box (with internal integrated Supply Fuse Spare Fuse relay) and a fuse box. ·... - Page 68 · The fuse box must be properly covered after checked or replaced, other wise serious electrical faults will easily occur in rainy days or after vehicle washing and water inflow. Notice The electrical system is faulty if the fuses blow frequently in a short period of time. Please go to an authorized dealer immediately for handling.
-
Page 69: Brake Pad
Please go to dealers authorized by VOGE to handle such work. ·The whole pair should be replaced no matter the front or rear pad. The brake imbalance will cause accidents if only one is replaced. -
Page 70: Replace The Fuel Filter
Replace the fuel filter ·The secondar y fuel filter is for filtering the impurity in fuel to prevent them get into fuel injector. ·The machining for fuel injector is ver y accurate, which easily get blocked up, then it may lead to injection and engine starting failure. -
Page 71: Replacement Of Signal Light
Replacement of Signal Light ·You will be in danger without signal lights which can enable others find you and your vehicles more easily. The broken signal lamp should be replaced in time. ·Headlights, position lights, turn signals, rear position lights/brake lights and license plate lights are all LED packaged lamps. -
Page 72: Storage And Cleaning Of Vehicles
Storage and Cleaning of Vehicles Storage · Special maintenance is needed if vehicles has not been used for a period of time, which requires special materials, equipment and technology. It is recommended to go to authorized dealers to complete these tasks. ·... - Page 73 · Clean the motorcycle frequently according to the usage, and tr y to keep the vehicle clean and dr y. · Clean the dirt attached to the vehicle surface immediately, such as bird droppings, asphalt, salt, etc. · Tr y to use the motorcycle cover as long-term exposure to the strong sun will lead to aging and discoloration of appearance parts.
-
Page 74: Alterations And Accessories
· You can obtain the certified parts, accessories and other products from authorized distributors, and professionals will introduce you installation and use methods. · The safety, practical performance and matching of these parts and products have been tested. VOGE assumes responsibility for these products. -
Page 75: The Motorcycle Parameters
The motorcycle parameters Motorcycle parameters Engine system 2100mm × 820mm × 1170mm Length × width × height Engine type In-line dual cylinder/water cooled/eight valves/DOHC Wheelbase 1450mm Cylinder diameter × stroke 67mmx66.8mm 795mm Displacement Height of seat 471ml 162mm Ground clearance Compression ratio 10.7:1 Weight... - Page 76 · The key is proper maintenance of accessories. Apply the certified accessories provided by VOGE if you cannot confirm the source and quality of accessories. Improper maintenance will lead to accidents in later use.
-
Page 77: Maintenance Plan
Maintenance Plan Specified inspections in each regular maintenance are as follows. The inter val period depends either on the maximum ser vice time or the travel distant limit. Each inspection shall be carried out according to the items in the following table. Pe riod ic m a in te n a n c e ta b le Ite m s Inte r v a l... -
Page 78: Electrical Schematic Diagram
electrical schematic diagram Right switch assy. Kill switch Front brake switch Starting button Bl a ck/ W hi t e Black Green Red/White Green1 Black Black Black Green2 Ignition switch Yellow/Red Black/White Green/Yellow Green Black/Orange White/Grey Black Whi t e/Brown Signature Whi t e / B l u e Green2...
Need help?
Do you have a question about the 500AC E5 and is the answer not in the manual?
Questions and answers
TPMS 설정방법 공기압이 안떠요 어떻게 해야하나요
To set the TPMS (Tire Pressure Monitoring System) for the VOGE 500AC E5 if tire pressure is not displaying, follow these steps:
1. Enter the secondary menu using the Up and Down buttons and short press the Confirm button.
2. Use the Up and Down buttons to select "Tire pressure matching."
3. Short press the OK button to enter.
4. Use the Up and Down buttons to switch between front and rear wheels.
5. Move the cursor to "Tire pressure matching" and short press the OK button to confirm.
6. Keep discharging air from the tire until a success reminder is indicated.
7. Long press the OK button to return to the secondary menu.
This answer is automatically generated