
Subscribe to Our Youtube Channel
Related Manuals for Kogan SMARTERHOME KAWFPAC16YA


Summary of Contents for Kogan SMARTERHOME KAWFPAC16YA
- Page 1 KOGAN SMARTERHOME™ 4.7KW PORTABLE AIR CONDITIONER 16,000 BTU, REVERSE CYCLE & 16,000 BTU, COOLING ONLY KAWFPAC16PYA & KAWFPAC16YA...
-
Page 3: Safety And Warnings
Handle with care and inspect regularly to ensure product is in good working order. If this product, power supply cord or plug shows any signs of damage: stop use, unplug the product and contact Kogan.com support. Before Initiation To avoid damage, place the unit in an upright position for at least 24 hours before initiation. - Page 4 • Ensure ducts connected to the appliance does not contain a potential ignition source. • When the portable air conditioner or dehumidifier is turned on, the fan can work continuously under normal conditions to provide the minimum air volume of 100m /h even when the compressor is closed due to the temperature controller.
- Page 5 Notes on Refrigerant R32 • The air conditioning system must be kept and transported upright. Otherwise, irreparable compressor damage may occur. Leave the unit for at least 24 hours before putting it into operation. • Switch off the device and disconnect it from the power supply before cleaning. •...
- Page 6 • In areas where splash water can occur; • Near bathtubs, in washrooms, near showers or swimming pools. • Never insert your fingers or other objects into the ventilation openings. Ensure children are explicitly warned to not do this. • Ensure that the appliance is positioned upright (vertically) during both transport and storage so that the compressor is correctly positioned.
- Page 7 Instructions for handling damage • In case of damage to the device, cease use immediately, turn off the power, unplug the power cord, and contact help.kogan.com for support. • Do not use again until it has been approved by a representative of the manufacturer.
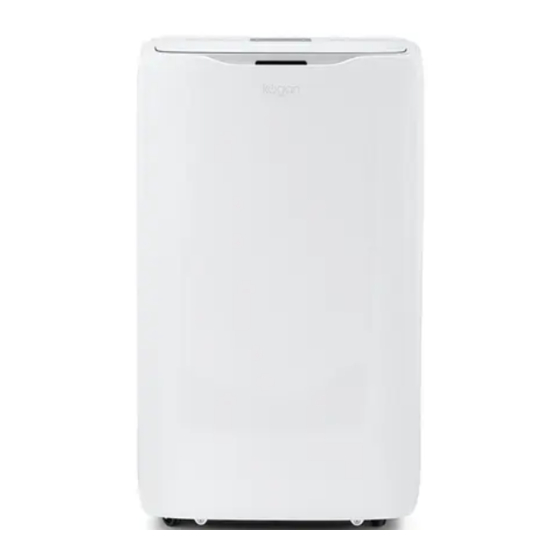
- Page 8 OVERVIEW Handle Air Inlet (Down) Control Panel Air Outlet Louver Castors Remote Control...
- Page 9 Reverse cycle model Cooling only model (KAWFPAC16PYA) (KAWFPAC16PYA) Air Outlet (Up) Hot Air Outlet Drainage Nozzle Air inlet grille (cooling only model) / Double duct frame (reverse cycle)
- Page 10 Exhaust Duct Assembly 12 Window Sealing Plate Assembly...
- Page 11 Press this button in the timer start mode to set the timer end time. 9. WI-FI button When air conditioner is in standby mode, hold the Wi-Fi button down for 3 seconds to enter Wi-Fi pairing mode for Kogan SmarterHome™ connection. The Wi-Fi light will flash when ready to connect.
- Page 12 Press this button in the timer start mode to set the timer end time. WI-FI button When air conditioner is in standby mode, hold the Wi-Fi button down for 3 seconds to enter Wi-Fi pairing mode for Kogan SmarterHome™ connection. The Wi-Fi light will flash when ready to connect.
- Page 13 Remote Control Functions 1. POWER button 5. TIMER button Press this button in standby mode to Press this button to switch the air set the start time. conditioning on and off. Press this button in the timer start mode to set the timer end time. 2.
- Page 14 Remote Control batteries: Insert the batteries correctly before using the remote control. • Remove the screw and slide the battery cover on the back of the remote control. • Insert x2 new AAA (DC 1.5 V) batteries, ensuring the polarity (+/-) is correct. Check the markings on both the batteries and the remote before installing.
-
Page 15: Read Before Use
READ BEFORE USE Instruction, Repairing Appliances Containing R32 Checks to the area Prior to beginning work on systems containing flammable refrigerants, safety checks are necessary to ensure that the risk of ignition is minimised. For repair to the refrigerating system, the following precaution shall be completed prior to conducting work on the system. - Page 16 The following checks shall be applied to installations using flammable refrigerants: • The actual refrigerant charge is in accordance with the room size within which the refrigerant containing parts are installed. • The ventilation machinery and outlets are operating adequately and are not obstructed.
- Page 17 Repair to intrinsically safe components Do not apply any permanent inductive or capacitance loads to the circuit without ensuring that this will not exceed the permissible voltage and currently permitted for the equipment in use. Intrinsically safe components are the only types that can be worked on while living in the presence of a flammable atmosphere.
- Page 18 15. Charging procedures In addition to conventional charging procedures, the following requirements shall be followed. • Ensure that contamination of different refrigerants does not occur when using charging equipment. Hoses or lines shall be as short as possible to minimise the amount of refrigerant contained in them.
- Page 19 17. Labelling Equipment shall be labelled stating that it has been de-commissioned and emptied of refrigerant. The label shall be dated and signed. For appliances containing flammable refrigerants, ensure that there are labels on the equipment stating the equipment contains flammable refrigerant. 18.
-
Page 20: Installation
INSTALLATION Installation position • Place the appliance on a level surface near a window. • For adequate air circulation and optimum performance, the appliance should be placed at least 50 cm away from walls and objects. Notes on installation • It is important to keep the exhaust hose straight. - Page 21 Installation accessories for window ventilation Exhaust Duct assembly Exhaust Joint Exhaust air hose Exhaust air hose adapter Window sealing plate assembly (sliding bar). This will differ based on Cooling Only (Single Duct) or Reverse Cycle (Double Duct) models.
- Page 22 Installation of the window ventilation Screw fixed: Measure the size of the window. Adjust the length of the window sealing plate to the size of the window sealing plate with screws (see below). Handle – stepless adjustable length: Measure the size of the window. Adjust the length of the window sealing plate to the size of the window sealing plate with button (see below).
- Page 23 Attach the exhaust pipe assembly (exhaust fitting end) to the hot air outlet (8) at the rear of the appliance by turning it counter-clockwise. Slide the exhaust air assembly (the exhaust air hose adapter) into the opening of the window sealing panel and screw it tight. Small Gap Then Slide Locking First Insert...
- Page 24 The window ventilation is now completely mounted and the appliance is ready for use.
-
Page 25: Operation
OPERATION COOL - Cooling mode • After switching on the appliance, the cooling mode is set as standard. • When the cooling mode is selected, the COOL indicator lights up. • Press the Up and Down buttons to set a temperature between 16°C and 30°C. •... - Page 26 Timer • In standby mode, press the TIMER button to program the timer start time. Press the Up and Down buttons to set a delay time (0-24 hours). The TIMER indicator lights up. Once the entered time has elapsed, the appliance will start automatically.
- Page 27 Install App Download the “Kogan SmarterHome” app from the Play Store (Android) or App Store (iOS). Register If you do not have a Kogan SmarterHome™ account, register or sign in with a verification code sent by SMS. To register: Tap to enter registration page.
- Page 28 Set device in pairing mode When the air conditioner is first turned on, it may automatically enter pairing mode (the Wi-Fi light will be flashing rapidly). If not automatically in pairing mode when powered on, you can manually set the air conditioner in pairing mode by unplugging it or turning off power at the wall, then plugging in or turning on power again.
- Page 29 Upon successfully confirming pairing mode, enter your Wi-Fi details. It is important that your SmarterHome™ device and the app are connected to the same Wi-Fi network during setup. The device will commence the pairing process and connect to the app. Ensure your Wi-Fi router, mobile phone, and the SmarterHome™...
- Page 30 From the home page of the Google Home app, select the “+” icon to access the ‘Add and manage’ page. Select ‘Set up device’, then under the Works with Google banner, select ‘Have something already set up?’ Select the search bar and type ‘Smarter Home’ to locate the Kogan SmarterHome™ service.
- Page 31 Tap ‘Authorise’ to grant Google permission to access the SmarterHome™ app and your devices. From here, you will be prompted to sign into your SmarterHome™ account using either your email or mobile phone number, depending on which method you used to register your account.
- Page 32 Tap on any of the devices to view a list of available commands. Note: Please note that Google Home can only control the base/core functions of any compatible SmarterHome™ devices. To make full use of this product’s smart functionality, please use the Kogan SmarterHome™ app.
- Page 33 AMAZON ALEXA CONTROL Note: You will need to have set up an Alexa account prior to linking your Kogan SmarterHome™ device. Adding “SmarterHome” to the Alexa app From the home page of the Alexa app, select the “ ” icon in the top-right and select Skills &...
- Page 34 Tap ‘Enable to Use’ to add the Kogan SmarterHome™ skill to Alexa. From here, you will be prompted to sign into your SmarterHome™ account using either your email or mobile phone number, depending on which method you used to register your account.
- Page 35 SmarterHome™ account. When your devices have successfully connected to the Alexa app, you will be able to control your Kogan SmarterHome™ devices via Alexa’s voice commands. Note: Please note that Alexa can only control the base/core functions of any compatible SmarterHome™...
-
Page 36: Cleaning And Care
CLEANING & CARE WARNING: Risk of electric shock! Turn the appliance off and unplug the power cord before cleaning, servicing or repairing the appliance. This product is equipped with an automatic water vaporisation system. The condenser is cooled by the circulation of the condensed water to improve the cooling capacity and save energy. - Page 37 Cleaning the filters It is recommended to clean the filters every two weeks. If the indoor air quality is poor, the filters should be cleaned more often. If the filters are clogged with dust, the performance of the appliance will be impaired. Follow the cleaning procedure below: •...
- Page 38 Notes on cleaning the filters • Do not use water that is too hot for cleaning the filter (optimum is approx. 40°C) and no aggressive cleaning agents (such as alcohol, petrol, benzene, etc.). • To avoid deformation of the filter, keep cleaned filters away from heat sources and place them in a dry place for air drying.
-
Page 39: Specifications
SPECIFICATIONS Weight 39.5 kg Product Dimension (L x W x H) 470 x 404 x 800 mm 16,000 (BTU/hr) Cooling Capacity 4700W 16,000 (BTU/hr) Heating Capacity (Reverse Cycle model) 4700W Current 3.15A Power Input 1600W Indoor Air Volume 500m Max Coverage Area Discharge 5.5MPa Max Pressure... -
Page 40: Troubleshooting
TROUBLESHOOTING Error Messages Coil temperature sensor error Error of the indoor temperature sensor Frost protection function: If the coil temperature is too low, the appliance is switched off. If the temperature rises above 8 °C, the protection is released and the previous operating state is restored. - Page 41 NOTES...
- Page 42 NOTES...
- Page 44 Need more information? We hope that this user guide has given you the assistance needed for a simple set-up. For the most up-to-date guide for your product, as well as any additional assistance you may require, head online to help.kogan.com...
Need help?
Do you have a question about the SMARTERHOME KAWFPAC16YA and is the answer not in the manual?
Questions and answers